Empty403 Build Thread

empty403

New member
Just started my v2.0 build, in May 2016 and went into overdrive in November 2016.

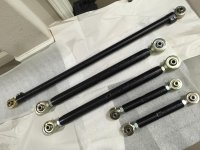
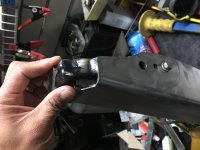
Installed the Camburgs BJ and the ToyTec/Rokmen aluminum rear bars, in May 2016. All 5 bars were hard black anodized.
 

Attachments

  • IMG_3636.jpg
    IMG_3636.jpg
    125.7 KB · Views: 716
  • IMG_3430.jpg
    IMG_3430.jpg
    129.4 KB · Views: 668
  • IMG_3977.jpg
    IMG_3977.jpg
    133.8 KB · Views: 663
Last edited:
Register to hide this ad
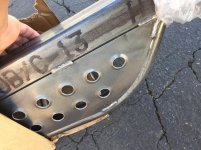
Got the sliders Line-X'd for slip resistance. These were bolt-on sliders so I tapped all the threads to remove the factory paint and all the rust or dirt in there. Also, anti-seize were used on all bolts.
 

Attachments

  • IMG_4402.jpg
    IMG_4402.jpg
    134.8 KB · Views: 659
  • IMG_4420.jpg
    IMG_4420.jpg
    119.4 KB · Views: 706
  • IMG_4466.jpg
    IMG_4466.jpg
    126 KB · Views: 693
Here's a pic on the lower rear bar before Hard Anodizing.
 

Attachments

  • IMG_3802.jpg
    IMG_3802.jpg
    125.9 KB · Views: 686
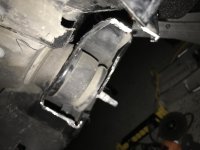
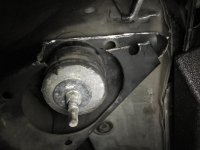
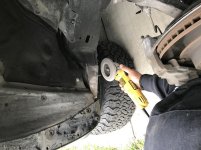
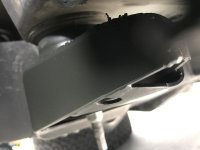
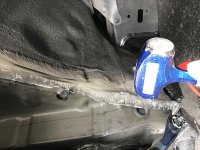
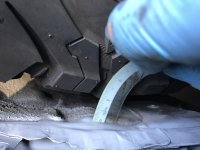
Body mount chop using an angle grinder with a Lennox diamond wheel. Also, swapped out the rock hard front bump stops with Wheeler's bumpstops using Red Loctite.
 

Attachments

  • IMG_4479.jpg
    IMG_4479.jpg
    107.3 KB · Views: 689
  • IMG_4480.jpg
    IMG_4480.jpg
    129.4 KB · Views: 697
  • IMG_4482.jpg
    IMG_4482.jpg
    135.5 KB · Views: 660
Last edited:
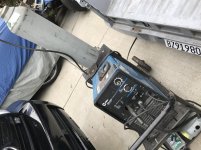
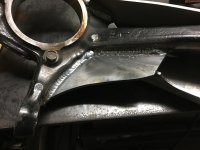
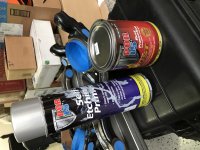
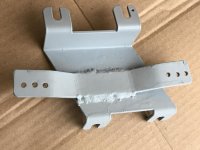
A good friend welded on the body chop mount plates. Painted over the initial primer flat paint with POR15 etching primer and POR15 gloss black.
 

Attachments

  • IMG_4494.jpg
    IMG_4494.jpg
    135.3 KB · Views: 639
  • IMG_4493.jpg
    IMG_4493.jpg
    136.1 KB · Views: 641
  • IMG_4491.jpg
    IMG_4491.jpg
    124.6 KB · Views: 676
Out goes the 3rds

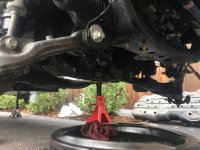
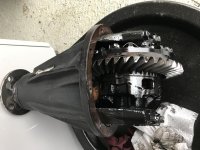
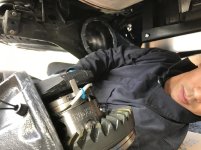
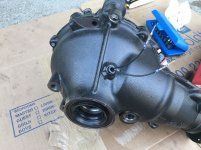
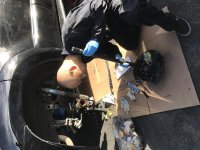
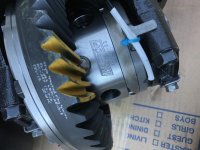
Removed the 3rds for 4.56 Nitro Gears and Harrop E-Lockers. Sent the 3rds out to Zuk - GearInstalls.com.
Zuk ordered the gears for me and he got me a discount from JustDifferentials.com.
Bought both lockers from YotaLockers.co and had them shipped to Zuk. You can contact Ward for locker details, since there are 2 versions of lockers for the front diff of the 4th Gen 4Runner/120 series.
 

Attachments

  • IMG_4558.jpg
    IMG_4558.jpg
    137.1 KB · Views: 630
  • IMG_4560.jpg
    IMG_4560.jpg
    137.4 KB · Views: 639
  • IMG_4562.jpg
    IMG_4562.jpg
    124.7 KB · Views: 654
  • IMG_4557.jpg
    IMG_4557.jpg
    135 KB · Views: 647
Spindle Gussets

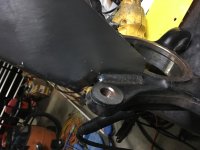
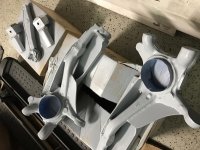
Since the diffs were out I had time to remove the spindles and weld on the spindle gussets. Masked, primered and painted with gloss black.
 

Attachments

  • IMG_4601.jpg
    IMG_4601.jpg
    124.9 KB · Views: 636
  • IMG_4600.jpg
    IMG_4600.jpg
    127.1 KB · Views: 633
  • IMG_4597.jpg
    IMG_4597.jpg
    117.1 KB · Views: 652
  • IMG_4595.jpg
    IMG_4595.jpg
    113.5 KB · Views: 640
  • IMG_4813.jpg
    IMG_4813.jpg
    132 KB · Views: 594
  • IMG_4811.jpg
    IMG_4811.jpg
    133 KB · Views: 615
Braided Brake lines

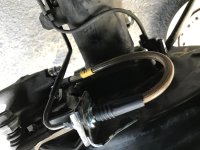
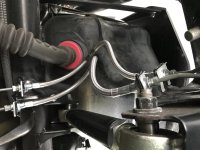
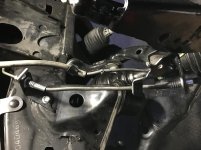
Installed extended Braided brake lines in the front and rear and the Long Travel brake lines behind the Gas Tank.
 

Attachments

  • IMG_4892.jpg
    IMG_4892.jpg
    125.2 KB · Views: 628
  • IMG_4899.jpg
    IMG_4899.jpg
    127.5 KB · Views: 579
  • IMG_5148.jpg
    IMG_5148.jpg
    124.8 KB · Views: 629
Pinch Weld Mod

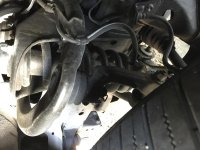
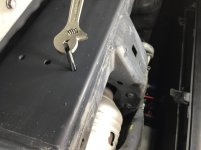
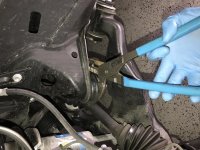
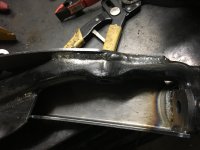
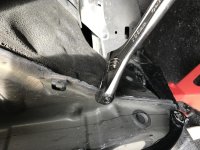
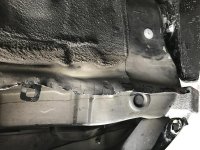
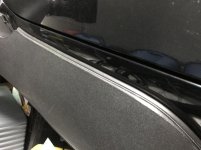
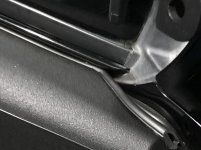
Hammered down the pinch welds in the front end. It's easier if you pre-bend the pinch weld with a Crescent wrench before hammering down. The lower half section is a lot tougher to bend. Then primered the area since the paint chipped off.
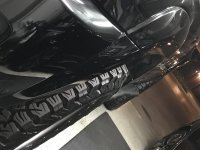
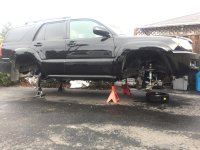
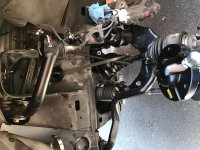
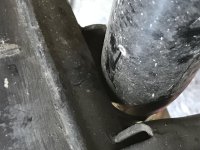
With 32" tires on and with the coilovers removed the LCA was lifted to check for clearance when the front is bottomed out. I have just under 1" at the tightest section. Barely enough for the 34.1" tire I will be getting - 305/70R17s.
 

Attachments

  • IMG_4969.jpg
    IMG_4969.jpg
    137 KB · Views: 620
  • IMG_4972.jpg
    IMG_4972.jpg
    140.1 KB · Views: 614
  • IMG_4973.jpg
    IMG_4973.jpg
    139 KB · Views: 606
  • IMG_5130.jpg
    IMG_5130.jpg
    126.5 KB · Views: 657
Dual Battery Tray and SwitchPro 8100

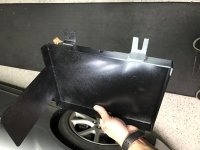
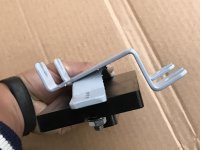
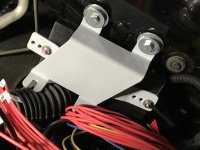
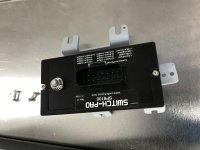
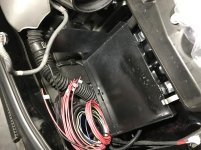
Installed the 2nd battery tray from DirtyParts by the firewall. The tray was minor Ly modified by adding an L bracket so I could bolt it onto a flat spot instead of using DPs suggested corner mounting location.
Also, the lower mount was modified to fit a bracket to hold the SwitchPro module. I labeled the wires to make it easier for wiring later on.
 

Attachments

  • IMG_4966.jpg
    IMG_4966.jpg
    132.4 KB · Views: 636
  • IMG_5018.jpg
    IMG_5018.jpg
    126.8 KB · Views: 624
  • IMG_5016.jpg
    IMG_5016.jpg
    112.4 KB · Views: 615
  • IMG_5034.jpg
    IMG_5034.jpg
    126.2 KB · Views: 584
  • IMG_5025.jpg
    IMG_5025.jpg
    128.8 KB · Views: 648
  • IMG_5037.jpg
    IMG_5037.jpg
    135.7 KB · Views: 584
Safari Snorkel SS171HP

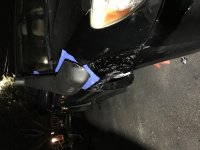
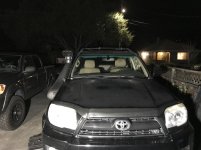
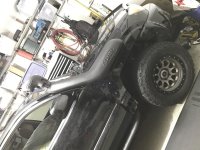
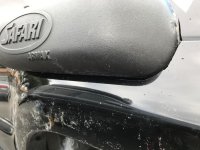
Drilled holes and used an angle grinder to cut off the excess sheet metal, for the snorkel. I used a heat gun to mould the front section of the snorkel as well as parts of the section next to the hole that goes into the fender. I'd heat it up and press the snorkel hard into the body, this was done a few times. I also used automotive stick-on rubber gasketing to fill the gaps around the snorkel. The plastic fender was slowly trimmed to be able to fit around the lower section of the snorkel.
 

Attachments

  • IMG_5044.jpg
    IMG_5044.jpg
    134.5 KB · Views: 582
  • IMG_5060.jpg
    IMG_5060.jpg
    133.9 KB · Views: 614
  • IMG_5179.jpg
    IMG_5179.jpg
    129.8 KB · Views: 623
  • IMG_5197.jpg
    IMG_5197.jpg
    135.8 KB · Views: 585
  • IMG_5063.jpg
    IMG_5063.jpg
    136.6 KB · Views: 576
Last edited:
Sweet build...Notice any difference with the SS lines?

Also serious props to you for wearing appropriate Power while drilling that hole.
 
Sweet build...Notice any difference with the SS lines?

Also serious props to you for wearing appropriate Power while drilling that hole.

I just got it back up and running a couple days ago. The brakes actually feel weak because I forgot that I needed to break-in the new rings and pinions so I put the original discs in. I got new discs and pads so I didn't mark where the original discs came from and now they have to reseat again since those discs have grooves. The brakes are getting stronger each day, though. I needed the SS lines because of the new lift I put on. I believe the noticable impact will be the rotors and pads after bead in process.
 
Installed Diffs with Harrop Lockers with Cryo Treated 4.56 Nitro gears

Got the 3rds back from Zuk and installed them. Here's a link to Zuk's page on the work performed: Toyota clamshell harrop elocker 456 thick gears

A thin layer of Honda Bond was applied to both sides of the 3rd member gasket.
I had 1 bad rear axel seal, probably due to the 1-way Diff valve which creates a strong vacuum after the differential cools down. So it'll be a good time to remove the OEM one-way valve and install a Harrop Breather kit.
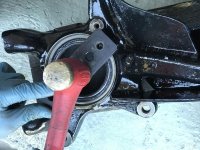
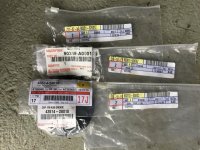
The front hub seals were also changed due to the rubber breaking apart. The front swaybar relocting bracket did double duty to also install that seal. I included a picture of the part numbers of the seals, O-rings and front hub covers which were all changed.
 

Attachments

  • IMG_4834.jpg
    IMG_4834.jpg
    128.1 KB · Views: 575
  • IMG_4851.jpg
    IMG_4851.jpg
    136.7 KB · Views: 567
  • IMG_4843.jpg
    IMG_4843.jpg
    133.9 KB · Views: 577
  • IMG_4855.jpg
    IMG_4855.jpg
    140.1 KB · Views: 582
  • IMG_4830.jpg
    IMG_4830.jpg
    128.9 KB · Views: 569
  • IMG_5209.jpg
    IMG_5209.jpg
    137.5 KB · Views: 568
Sir, your 4runner has changed vastly in a matter of weeks! Your tease-shot photos of your fabwork and add-ons has given me the bug again! Nice work and keep it up! Use some 1/4" rubber hose cut in half as the surround of the snorkel hole in your fender! Tighter fit and cleaner finish...that's all I have to say. Keep it up!
 
Sir, your 4runner has changed vastly in a matter of weeks! Your tease-shot photos of your fabwork and add-ons has given me the bug again! Nice work and keep it up! Use some 1/4" rubber hose cut in half as the surround of the snorkel hole in your fender! Tighter fit and cleaner finish...that's all I have to say. Keep it up!

Thanks! The snorkel is for a Tacoma so it didn't fit right. There's probably about a 3/16" gap around the snorkel. So I used some stick-on D-shaped automotive rubber gasket to fill the gap and it surprisingly looks decent, now. I left the bottom of the snorkel gasket free to let any water drain downwards. I have to leave the front flares off until I get the front bumper installed and 305/70R17 MTRs put on and check what I'll need to cut off the lower fender.
 

Attachments

  • IMG_5219.jpg
    IMG_5219.jpg
    137.9 KB · Views: 959
  • IMG_5221.jpg
    IMG_5221.jpg
    131.3 KB · Views: 973
LCA Alignment Cam Bolt Preventative Maintenance

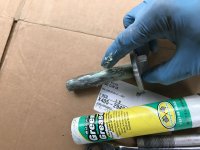
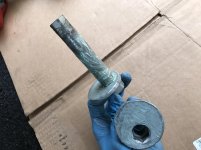
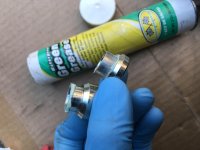
A good friend/mechanic that's been helping me with my build recommended I lube all 4 of the LCA alignment cam bolts. He has seen them rust/seize and break during alignments. I coated them with "Green Grease" - synthetic marine grease. These alignment bolts were marked and removed 1 at a time. Due to the LCA glued in bushings and to lessen the binding, the bolts will need to be again loosened then re-tightened while the vehicle is at its settled ride height.
 

Attachments

  • IMG_4984.jpg
    IMG_4984.jpg
    129.4 KB · Views: 1,014
  • IMG_4986.jpg
    IMG_4986.jpg
    127.1 KB · Views: 940
Icon C/O CDCV installation

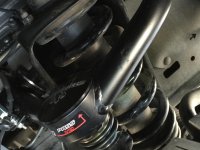
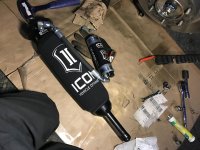
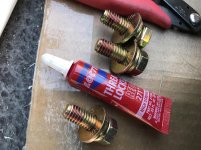
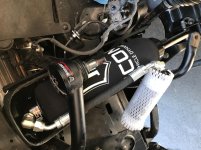
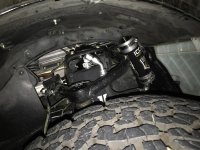
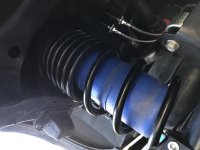
Replaced the Bilstein 5100 setup with Icon 2.5s extended travel/long travel with CDCV for the front and rear. It was pretty tough to install the front reservoir in the passenger side due to the washer fluid reservoir. The Icon C/Os top mounting bolts only came with lock washers so I ended up purchasing large washers for each bolt. I also added a couple drops of red Loctite as extra precaution.
 

Attachments

  • IMG_5144.jpg
    IMG_5144.jpg
    132.8 KB · Views: 946
  • IMG_5112.jpg
    IMG_5112.jpg
    110.7 KB · Views: 949
  • IMG_5115.jpg
    IMG_5115.jpg
    140 KB · Views: 901
  • IMG_5114.jpg
    IMG_5114.jpg
    136.4 KB · Views: 980
  • IMG_5117.jpg
    IMG_5117.jpg
    135.8 KB · Views: 941
  • IMG_5198.jpg
    IMG_5198.jpg
    132.8 KB · Views: 904
Last edited:
Icon CDCV Long Travel Rear Suspension installation

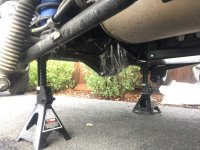
Disconnected the Pan Hard and both lower control arms (one at a time for each spring) to install each LT springs. The springs are side specific. The part number is near the top of each spring. The part number that ends with "-D" is meant for the driverside. Even though he driverside spring is slightly taller, I still noticed about 1/2" of driverside lean. Because of this, I ended up adding 2 Toytec 10mm shims (20mm total) on top of he driverside spring.
Another set back was the Toytec/Rokmon Lower Control arms are not compatible with the Long travel setup - at about 25" extension the LCA will hit the axel housing. The long travel shocks fully extend to 28.5". So I had to order the Metal Tech LCAs. Now, I'll need to take a loss and sell the new ToyTec LCAs, which were just hard coat anodized.

 

Attachments

  • IMG_5067.jpg
    IMG_5067.jpg
    122.9 KB · Views: 944
  • IMG_5064.jpg
    IMG_5064.jpg
    130.1 KB · Views: 916
Build looks great. You have a lot of the same parts that I have been acquiring. I actually looked at the Rokmen arms and wondered how they would work with the MT long travel. The MT arms (which I bought) are definitely offset more than any of the other aftermarket arms. Shame but you should still be able to get good coin for those pretty Rokmen arms.
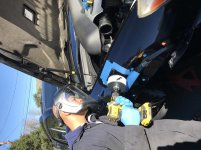
Also good call on the Icon top bolts. I would rather use red loctite and washers than lock washers as well. Will be following your lead there. What size are those bolts again?
 

Members online

Forum statistics

Threads
278,304
Messages
3,554,041
Members
248,016
Latest member
Advally Service

Trending content

Back
Top