 11-06-2013, 05:39 PM
|
#1
|
 |
Senior Member
|
|
Join Date: Aug 2012
Location: My Computer
Posts: 3,113
|
|
|
Senior Member
Join Date: Aug 2012
Location: My Computer
Posts: 3,113
|
How To: Lift Installation (on KDSS equipped vehicles)
First off, I want to start by saying that a lot of the ideas below in my write up came right from this very forum; I merely just took all of those existing tips and further experimented to devise a simple and clear method for you guys to follow at home.
Unfortunately, I've read through way too many threads over the past few months to remember all of those whom provided valuable information, but tips from
@ 1engineer
,
@ Antman
,
@ harper7
,
@ SOcalTRAIL
and
@ sp8ball
were some of the most prominent ones that come to mind, so I must give credit where credit is due. Big thanks to all of you guys, and also to those whom I might have accidentally left out, sorry!
Now moving on to the lift process, I am not going to bother rewriting the book since Antman/Sp8Ball have already provided a well documented write up on how to do this process with non-KDSS vehicles; so I will just link you to it: http://www.toyota-4runner.org/5th-ge...tml#post754964
After you've had a chance to familiarize yourself with the above installation write up, let's get started. Obviously, the steps involving the standard sway bar do not apply to us KDSS folks; and of course you can install whatever suspension setup you want, just use a little imagination when putting in the new parts.
FRONT SUSPENSION
Step 1:
Before you raise your vehicle onto jack stands and take off the front wheels, remove the front skid. Now, with the vehicle still on the ground, locate the passenger side KDSS bracket (the bracket that is bolted to the LCA) and remove the two bolts; next, remove the two bolts from the driver side KDSS bracket.
Note, you should try your best to briskly remove each bolt because the KDSS sway bar has some tension on it and will want to push against the bracket while you are removing the bolts; so you probably want to avoid having the brackets pressing on the threads of the bolts for too long. It helps to have an impact wrench to quickly zip them off, though it is not required; personally, I just removed them by hand with a ratchet.
After the bolts are out, you will see that the KDSS piston slowly extends downwards and eventually stops. Now put the brackets and bolts aside for installation later. BTW, there's a left and a right, so don't mix it up; but if you do mix it up even after I told you not to, it's no big deal because they are marked "L" and "R", lol.
Step 2:
Go back to the Antman/Sp8Ball write up and follow steps 1 through 10.
Step 3:
After the vehicle is up on jack stands, you might want to consider supporting the KDSS piston if you plan to take forever and a day to finish the front end installation (like I did, lol). I am honestly not sure if it is bad or not to leave the KDSS piston in the fully extended position for an extended period of time, so what I did was place a jack under it before I closed up shop for the night, like so:

You will see that when you start jacking it up the piston will kind of resist, but rest assure it will compress just fine, so don't worry. I compressed the piston only about half way (roughly to the position where it would be with the sway bar connected and the tires on the ground). Note, I had it hanging completely downwards for a few hours at a time and all seems well afterwards; so if you work quickly, you probably don't even need to bother. I was just paranoid about leaving it like that over the course of 2-3 days and possibly busting a seal or something.
Another member here has informed me that the front KDSS piston boot actually popped off while he left it hanging down, so maybe it would be a great idea to support it with a jack once you remove the brackets.
Step 4:
This is kind of an optional (you will see why you might need to do this later), so while I recommend doing this step to make your life easier, it might not be entirely necessary. Locate your LCA adjustment cam bolts and mark all of them, like so:

You need to mark the plate's position because you want to get the alignment back to as close as possible afterwards. Now with the bolts marked, loosen each bolt a few turns (just enough for the LCA to rotate freely). This helps you with the next few steps, such as you not needing to pry the LCA downwards to get the shock out because the LCA will just drop freely.
Step 5:
Go back to the Antman/Sp8Ball write up and follow steps 11 through 17.
Step 6:
Okay, now for the optional stuff I was talking about earlier...if you are in a region that uses a lot road salt and/or otherwise prone to rust issues you might want to consider this. Remember those cam bolts I told you to mark earlier? Now go ahead and loosen them completely, support the LCA and take out all of the bolts and remove the LCA. However, easier said then done:

So now that you know the factory mid-skid plate prevents one of the bolts from coming out, go ahead and crawl under and remove that first before you do this step.
OR you can just leave the skid alone and rotate the cam bolt until it clears the skid and remove it that way, like another member here pointed below. Why didn't I think of that, lol.
Once you remove everything, you will see how much rust accumulates in there:

This was only after ONE winter for me, and not even 10k miles! I've read all to often on here about these very bolts being seized on for good and requiring lots of work to chop them off and replace the bushings, so this might be a valuable preventative maintenance step for some of you guys.
Step 7:
Clean up all the rust with a wire brush like so:

Then coat only the shaft of the bolt with your favorite anti-seize like so:

Remember to try to clean out the inner sleeves of the bushings as well and then reinstall the LCA and cam bolts loosely (loose enough so that the LCA can still swing up and down freely).
Step 8:
Go back to the Antman/Sp8Ball write up and follow steps 11 through 24, but DO NOT complete step 24 just yet! Just get the jack into position and ready for raising the LCA and stop.
Step 9:
Now depending on the shock/spring combo you are installing you might run into clearance issues between the KDSS pipes bolted to the frame and the coil spring when raising the shock back up into position, like so:

If you notice that the coil starts hitting the KDSS pipes, what you need to do rotate the adjustment cam bolts on the LCA so that the LCA extends outwards to you. This will give you just enough clearance to raise the shock back into position without interference, like so:
 Step 10:
Go back to the Antman/Sp8Ball write up and follow steps 25 through 30. Note, I discovered a discrepancy in torque value between the FSM and the write up, so I went with the FSM. Not sure if Antman purposely wanted it a bit tighter or not. In particular, I am talking about the two bolts that hold the ball joint to the spindle, the FSM calls for 118 ft*lbf.
Step 11:
Now with that all done and the vehicle back down on the ground, here comes the fun part...reattaching the KDSS bar! This is how it should sit before you being this step:

This would be a good time to remove the rubber bushings and clean up the sway bar ends and the inside surface of the rubber bushings, like so:
 Step 12:
Place a jack under the KDSS piston and slowly raise it up to align the passenger side bracket to the LCA. Once you get the bottom bolt hole to line up, loosely install the lower bolt first, like so:

Now play around with the jack height to get the upper tab to line up as close as possible, then shove a punch or screwdriver into the hole and pry the bracket into position and loosely install the upper bolt, like so:

Once bolt bolts are in, and you are sure you didn't cross thread them, tighten the bolts down only enough to leave about a 1/8" gap between the LCA and the bracket.
Step 13:
Now onto the driver side bracket, you basically repeat the same process by playing around with the jack height and position to align the bracket. This side you might need to have a helper to help you push the jack towards the vehicle in order to get the bracket close enough to start threading the bolts. At this point, the KDSS piston has a natural tendency to tilt outwards to the front of the vehicle making the gap between the bracket and the LCA huge. Start with the first bolt, like so:

Once that bolt is in and loosely threaded on, move onto the second one, like so:

After you get both bolts in, tighten them down only enough to leave a small gap like the passenger side. Now lower the jack completely and with the wheels still on the ground, then torque down the 4 KDSS bracket bolts to 55 ft*lbf.
Step 14:
Go under and align the adjustment cam bolts back to where you marked them, and torque those bolts to spec (129 ft*lbf). Afterwards, put back all of the skid plates you removed and stand back and admire your work because you're done!
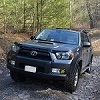
Now for the obligatory shot of the front suspension looking all pretty and new:

I think this should be a pretty accurate description of what I did for the front suspension, but if I do remember any more steps, I will be sure to update the thread. Also if anyone notices and discrepancies please let me know so I can correct them!
Happy modding!! 
Last edited by eddiebx; 11-08-2013 at 02:10 PM.
|

|
 Reply With Quote Reply With Quote
|
|
11-06-2013, 05:40 PM
|
#2
|
|
Senior Member
|
|
Join Date: Aug 2012
Location: My Computer
Posts: 3,113
|
|
|
Senior Member
Join Date: Aug 2012
Location: My Computer
Posts: 3,113
|
REAR SUSPENSION
Step 1:
Raise rear of the vehicle onto jack stands and remove the rear wheels.
Step 2:
Support the center of the sway bar with a jack and remove the bracket from the KDSS piston, like so:

Once that is out of the way, go to the passenger side and do the same, like so:

Now lower the jack and swing the sway bar down and out of the way, so that it does not unexpectedly swing down later and smack you in the face.
Step 3:
In order to attain enough slack to lower the axle and swap out the springs, locate the ABS wire bracket and remove the bolt, like so:

Now, unclip the wire for a little bit more slack, like so:

After doing this, you will have more than enough slack in the ABS wires to lower the passenger side of the axle all the way down and swap the spring with no problem.
Step 4:
In order to provide enough slack in the brake hoses for swapping out the driver side spring, locate the brake hose bracket on the driver side of the axle and remove the bolt, like so:

Now, follow the brake hoses up to the frame and unbolt that bracket, like so:

After doing this, you will have barely enough slack to swap out the driver side spring, so be mindful of the stretch on this brake hose at all times.
Step 5:
Let's take a minute to familiarize ourselves with the rear spring removal Special Service Tool (SST #12345-67890):

Obviously, any jack small enough will do, but I found that this cheap scissor jack was the easiest kind to work with for this task.
Step 6:
It really does not matter which side of the axle you start with when changing out the springs, but the slack on the driver side is significantly less than the passenger side; so I would suggest you start on the driver side first, instead of fighting with a lifted passenger side while trying to install the driver side later.
This method should allow you to get in most taller aftermarket lift springs, but you might have trouble with something like long travel springs. So keep that in mind if you're trying to install long travel springs and be prepared.
Also keep in mind that you need to do only one side at a time, and make sure to only remove one side of the shock at a time because I am not sure what happens when you remove both (the axle might drop way too far down without support from a jack). If you only remove one shock at a time, it's got enough springiness in the bushings to hold that side of the axle up enough and not over stretch the brake hose or ABS wire (after you've unbolted/unclipped the stuff mentioned earlier).
Alternatively, I've been informed by another member here below that you can remove both shocks at the same time and it might be easier to get the springs in and out. So those of you reading might want to try it that way because more remove clearance is always better, especially if you've got a much taller spring going back in. Of course be mindful of your brake hoses, but it sounds like this just might be easier than doing it one at a time!
Starting with the driver side, support the axle with a jack and remove the top nut from the upper bushing of the shock; then remove the the lower mount bolt. Now, slowly lower the jack making sure the brake hose is not getting caught on anything and then remove the shock.
Once the shock is off, raise the passenger side of the axle slightly with a jack; then grab your SST and lower the driver side of the axle SLOWLY, while keeping an eye on the brake hose stretch.
Due to the low amount of slack in the brake hose, it might take a bit of going back and forth between the passenger side and the driver side to get it right, but basically what you need to do is raise the passenger side of the axle with the jack and lower the driver side of the axle with the SST until there is enough room to get the OE spring out and the new taller spring in, all while keeping a close eye on the brake hose to make sure you don't over stretch it.
Once you have the new spring back in place, rotate it to make sure it is seated properly in the axle's spring seat and also properly centered in the upper cup; then remove the SST from the driver side and remove the jack from the passenger side.
Now, you can go ahead and install the new shock back in by loosely bolting on the lower shock mount with the bolt.
Once that is loosely bolted in, place a jack under the driver side of the axle, and slowly raise it while guiding the upper shock bushing through the opening and into position; then install the upper shock nut and tighten to ~18 ft*lbf. Obviously there's no way on earth to fit a torque wrench in there so use a short box wrench to avoid over torquing and tighten by hand. If your shock uses lock nuts, please replace with a new one for safety's sake.
DO NOT fully tighten the lower shock mount bolt until later. Now, remove the jack, and you're done with the driver side.
Step 7:
The passenger side of the axle is much easier because there is tons of slack in the ABS wire once you unbolt/unclip it as described earlier.
After you've removed the shock using the method described for the driver side, grab your SST and lower the passenger side of the axle while keeping an eye on the brake hose stretch and the ABS wire stretch. You should have no issues with attaining enough slack, but just keep any eye out to make sure nothing is getting caught.
Once you get the new spring in, install the new shock using the same method as for the driver side.
Again, DO NOT fully tighten the lower shock mount bolt until later.
Step 8:
Now go back and reattached the brake hose bracket, ABS wire bracket and ABS wire clip back to it's proper position. Double check you didn't forget to attach anything else you might've removed to install the springs/shocks.
Step 9:
Time for the fun part, putting the KDSS sway bar back up! The rear is MUCH easier, I promise.
Right now would be a good time to remove the bushings and clean off the inner surface of the bushing and the sway bar surface it pivots around. Note, keep in mind how the bushings are installed and put them back in the same exact way because they need to be installed with the rubber tab facing down (perpendicular to the bracket plane), like so:

After putting the bushings back in place, raise the sway bar up with a jack by supporting it in the center of the sway bar. Starting on the driver side, adjust the jack height until you can loosely thread on the bracket and two bolts into the KDSS piston, like so:

Once the driver side is attached, tighten the bolts only enough so that there is still a small gap between the bracket.
Now, go to the passenger side and adjust the height of the jack to line up the bushing with the bracket and attach the bracket with the two bolts, like so:

Once the brackets on both sides are on, double check to make sure the bushing has not rotated out of position and tighten the bolts to 33 ft*lbf.
Okay now lower the jack because you're done with the KDSS sway bar! See that wasn't so bad.
Step 10:
Put the wheels back on, torquing the lug nuts to 83 ft*lbf and lower the vehicle off the jack stands.
Bounce the suspension to settle it, and with the vehicle on the ground, go under and torque the two lower shock mount bolts to 72 ft*lbf.
Now for the obligatory shot of the rear suspension in all its glory:

I think this should be a pretty accurate representation of all the steps I did, but if I left out any steps please let me know and I will be glad to update this post.
Last edited by eddiebx; 11-08-2013 at 02:14 PM.
|
|
|
Reply With Quote
|
|
11-06-2013, 05:40 PM
|
#3
|
|
Senior Member
|
|
Join Date: Aug 2012
Location: My Computer
Posts: 3,113
|
|
|
Senior Member
Join Date: Aug 2012
Location: My Computer
Posts: 3,113
|
Let me add a few things I've noticed, after researching all over the internet vs testing things out in real life. I might be wrong, but it seems like most people recommend that you install a small trim spacer (~5mm thick) on the driver side springs if you are lifting your KDSS equipped vehicles to compensate for driver side lean. I of course went against the grain 
When I pulled off my OE front springs, I compared the color paint markings on them to see if there was possibly a difference; it turns out they are both painted with the same exact color markings (from what I understand the markings are usually used to indicate one being stiffer than the other). Also comparing them side by side, they are pretty much identical in height and the number of coil windings as well. So, I concluded that they are most likely the exact same spring rate and height.
After installing my new front OME 883 springs and getting the truck back down on the ground, there was ~3/4-1" difference in height between the left and right. However, right after I hooked up the front KDSS sway bar, the side to side difference was immediately reduced to less than ~1/2" (driver side being the taller side). This is when I concluded that it was a good thing I didn't bother to install the trim packer as suggested, lol.
The above was all observed with the rear end at stock height and less than a 1/4 tank of gas.
Now onto the rear suspension, I noticed the same observations with the rear coil spring markings and what not. I will take yet another educated guess and say that they are probably the same exact spring left and right as well.
Once I got the rear end back on the ground with the new SAW coils, I measured and found that the driver side is actually ~3/4" taller as compared to the passenger side (with the 1/4 tank of gas). However to settle my curiosity, I went ahead and filled up the tank all the way and remeasured; and found that the side to side difference was almost completely even now. This is when I concluded that the driver side trim packer in the rear is not required either.
Also, I noticed that the full tank of gas didn't really affect the front side to side height difference too much at all (less than ~1/4" if that).
I know that your mileage may vary and each truck is different, but I think I can safely say that it's probably better to not install trim packers on the driver side right off the bat, even though it is recommended for our KDSS equipped models.
If you think about it, right now as is my driver side is already the taller side, so if you went ahead and added trim packers, you'd be making it even taller, throwing things way off!
I am not really sure how ARB/OME concluded that the trim packers are required w/ KDSS, and I am not going to comment about that because I am sure they had their reasons. But me personally, I would never recommend installing them as a precaution on KDSS equipped models.
One thought came to mind is, perhaps when they say "driver's side", they actually mean the passenger side in the US market? (I think the aussies drive on the other side of the road?) But even then, it does not really seem to make sense because the factory springs seem to be identical left and right.
Anyway, take this all with grain of salt because these opinions are just based on my observations of ONE lift installation and nothing scientific at all.
Last edited by eddiebx; 11-13-2013 at 10:03 PM.
|
|
|
Reply With Quote
|
|
11-06-2013, 06:44 PM
|
#4
|
 |
Member
|
|
Join Date: Sep 2013
Location: Seattle, WA, USA, Earth
Posts: 394
Real Name: jim
|
|
|
Member
Join Date: Sep 2013
Location: Seattle, WA, USA, Earth
Posts: 394
Real Name: jim
|
Thanks for taking the time to write this up, take pictures and post it.
@ jbstrd
and I will be taking on mine next week. He's got all the experience with this... Between him, your write-ups and the others, I'm confident him and I can get this done. Looking forward to it.
__________________
2010 Trail- Shoreline Blue-KDSS- 285/Duratracs- 4 Bilstein 5100, Fronts @2.25:Rears W/ OME 895E- SpiderTrax Wheel Spacers- Magnaflow 11225- Heated Cloth Seats- LED Interior & Reverse Lights- V3 Triton DRL/Indicators- Shrockworks Rock Sliders- Stubby Antenna- Safari ARMAX Snorkel (3d model for now)
If they come for your guns, give them your bullets! 
|
|
|
Reply With Quote
|
|
11-06-2013, 06:57 PM
|
#5
|
 |
Senior Member
|
|
Join Date: Jul 2010
Location: Washougal, WA
Posts: 1,253
|
|
|
Senior Member
Join Date: Jul 2010
Location: Washougal, WA
Posts: 1,253
|
The thing I noticed I did differently is attach the drivers side first. This may have made it more difficult. When Jim82 and I install his 5100's I will be sure to do the drivers side last.
I can tell everybody, in my experience, the rear KDSS bar was WAY easier re-attaching.
__________________
2013 TE w/ KDSS, Icon ET CO's, LR UCA's, OME 898's, OME Rear Shocks, MT Lower Links, 315/70/17 BFG KM3's, 17x8 FN FX Pros, Spidertrax, MT Sliders, Heated Seats, Console Vault, Satoshi Grill, Cl, Shrockworks Front Bumper/Full Skids, Warn XD9000, CBI Rear, Safari Snorkel, ARB Front Locker, ARB Twin Compressor, 4.56 Gears, Xventure XV-2 Trailer
|
|
|
Reply With Quote
|
|
11-06-2013, 07:21 PM
|
#6
|
 |
Member
|
|
Join Date: Sep 2010
Location: West Bountiful, UT
Posts: 306
|
|
|
Member
Join Date: Sep 2010
Location: West Bountiful, UT
Posts: 306
|
Awesome post. I know from experience that the front KDSS sway bar is a serious pain in the butt. I ended up tearing up the threads on the sway bar bracket bolts from trying to bolt it back on under tension. I ended up ordering a new set of bolts and the new ones are made of a much harder steel than the originals.
__________________
2009 Land Cruiser 200 Series
SOLD-> 2010 Silver (formerly Mag Grey) 4Runner Trail Edition
|
|
|
Reply With Quote
|
|
11-06-2013, 07:41 PM
|
#7
|
|
Member
|
|
Join Date: Sep 2010
Location: West Bountiful, UT
Posts: 306
|
|
|
Member
Join Date: Sep 2010
Location: West Bountiful, UT
Posts: 306
|
Quote:
|
Originally Posted by eddiebx
]After the vehicle is up on jack stands, you might want to consider supporting the KDSS piston if you plan to take forever and a day to finish the front end installation (like I did, lol). I am honestly not sure if it is bad or not to leave the KDSS piston in the fully extended position for an extended period of time, so what I did was place a jack under it before I closed up shop for the night, like so:
|
I had the plastic boot pop off the hydraulic cylinder when I let mine fully extend. I was able to get it back on but it's something to beware of.
Quote:
|
Originally Posted by eddiebx
Now onto the driver side bracket, you basically repeat the same process by playing around with the jack height and position to align the bracket. This side you might need to have a helper to help you push the jack towards the vehicle in order to get the bracket close enough to start threading the bolts. At this point, the KDSS piston has a natural tendency to tilt outwards to the front of the vehicle making the gap between the bracket and the LCA huge.
|
To make things easier I'll wrap a ratcheting tie down strap around the sway bar and lower control arm. I can then ratchet the sway bar back towards the LCA making it easier to get everything lined up.
__________________
2009 Land Cruiser 200 Series
SOLD-> 2010 Silver (formerly Mag Grey) 4Runner Trail Edition
|
|
|
Reply With Quote
|
|
11-06-2013, 11:41 PM
|
#8
|
 |
Senior Member
|
|
Join Date: Feb 2012
Location: San Antonio
Age: 41
Posts: 1,318
Real Name: Jonathan
|
|
|
Senior Member
Join Date: Feb 2012
Location: San Antonio
Age: 41
Posts: 1,318
Real Name: Jonathan
|
Quote:
Originally Posted by jbstrd

The thing I noticed I did differently is attach the drivers side first. This may have made it more difficult. When Jim82 and I install his 5100's I will be sure to do the drivers side last.
I can tell everybody, in my experience, the rear KDSS bar was WAY easier re-attaching.
|
Please elaborate. When I was doing my rear lift last year I had a hell of a time re-attaching the rear. In fact I got spooked and had a shop do the rear. Now that I am ready to swap out my spacer for Icon coils in the rear, I want to do it myself.
__________________
2010 TE KDSS|275/70R17 Goodyear MT/Rs|Front Bilstein 5100s @ 2.5", rear Bilstein 5100s & 2" Icon lift springs|RR sliders|RCI skid plates|BudBuilt diff skid|Sonoran Steel HD rear lower links|RCI rear lower link bracket skid plates
|
|
|
Reply With Quote
|
|
11-07-2013, 01:29 AM
|
#9
|
|
Senior Member
|
|
Join Date: Jul 2010
Location: Washougal, WA
Posts: 1,253
|
|
|
Senior Member
Join Date: Jul 2010
Location: Washougal, WA
Posts: 1,253
|
Quote:
Originally Posted by STX4Runner
Please elaborate. When I was doing my rear lift last year I had a hell of a time re-attaching the rear. In fact I got spooked and had a shop do the rear. Now that I am ready to swap out my spacer for Icon coils in the rear, I want to do it myself.
|
It has been a year since I installed my lift and I do not recall which side of the rear bar I installed first. But, I remember I had to use ratchet straps and a lot of muscle to get the front bar re-attached. The rear went back on with the use of a jack and minor muscling around.
__________________
2013 TE w/ KDSS, Icon ET CO's, LR UCA's, OME 898's, OME Rear Shocks, MT Lower Links, 315/70/17 BFG KM3's, 17x8 FN FX Pros, Spidertrax, MT Sliders, Heated Seats, Console Vault, Satoshi Grill, Cl, Shrockworks Front Bumper/Full Skids, Warn XD9000, CBI Rear, Safari Snorkel, ARB Front Locker, ARB Twin Compressor, 4.56 Gears, Xventure XV-2 Trailer
|
|
|
Reply With Quote
|
|
11-07-2013, 05:52 AM
|
#10
|
|
Senior Member
|
|
Join Date: Aug 2012
Location: My Computer
Posts: 3,113
|
|
|
Senior Member
Join Date: Aug 2012
Location: My Computer
Posts: 3,113
|
After spending over an hour just now I was almost done with the rear installation write up and I closed the web page by accident! 
I promise to have it up by tomorrow, sorry guys!
|
|
|
Reply With Quote
|
|
11-07-2013, 09:21 AM
|
#11
|
|
Senior Member
|
|
Join Date: Feb 2012
Location: San Antonio
Age: 41
Posts: 1,318
Real Name: Jonathan
|
|
|
Senior Member
Join Date: Feb 2012
Location: San Antonio
Age: 41
Posts: 1,318
Real Name: Jonathan
|
Quote:
Originally Posted by eddiebx
After spending over an hour just now I was almost done with the rear installation write up and I closed the web page by accident!
I promise to have it up by tomorrow, sorry guys! |
Thanks
@ eddiebx
. I will be printing out this entire thread when you do.
__________________
2010 TE KDSS|275/70R17 Goodyear MT/Rs|Front Bilstein 5100s @ 2.5", rear Bilstein 5100s & 2" Icon lift springs|RR sliders|RCI skid plates|BudBuilt diff skid|Sonoran Steel HD rear lower links|RCI rear lower link bracket skid plates
|
|
|
Reply With Quote
|
|
11-07-2013, 09:23 AM
|
#12
|
|
Senior Member
|
|
Join Date: Feb 2012
Location: San Antonio
Age: 41
Posts: 1,318
Real Name: Jonathan
|
|
|
Senior Member
Join Date: Feb 2012
Location: San Antonio
Age: 41
Posts: 1,318
Real Name: Jonathan
|
Quote:
Originally Posted by jbstrd
It has been a year since I installed my lift and I do not recall which side of the rear bar I installed first. But, I remember I had to use ratchet straps and a lot of muscle to get the front bar re-attached. The rear went back on with the use of a jack and minor muscling around.
|
I remember the front being easier to reattach. I also remember using ratchet straps on the back once I detached oe side and at that point I gave up on the back. I was suprised I was able to do the front myself but not the back, as I anticipated the front would be harder.
__________________
2010 TE KDSS|275/70R17 Goodyear MT/Rs|Front Bilstein 5100s @ 2.5", rear Bilstein 5100s & 2" Icon lift springs|RR sliders|RCI skid plates|BudBuilt diff skid|Sonoran Steel HD rear lower links|RCI rear lower link bracket skid plates
|
|
|
Reply With Quote
|
|
11-07-2013, 09:53 AM
|
#13
|
|
Senior Member
|
|
Join Date: Jul 2010
Location: Washougal, WA
Posts: 1,253
|
|
|
Senior Member
Join Date: Jul 2010
Location: Washougal, WA
Posts: 1,253
|
Quote:
Originally Posted by STX4Runner
I remember the front being easier to reattach. I also remember using ratchet straps on the back once I detached oe side and at that point I gave up on the back. I was suprised I was able to do the front myself but not the back, as I anticipated the front would be harder.
|
Very interesting. I also remember when I was researching the lift install procedure with kdss prior to my build, it seemed like everybody had fewer issues with the rear. I will report back after we do Jim82's lift to let you know how that goes.
__________________
2013 TE w/ KDSS, Icon ET CO's, LR UCA's, OME 898's, OME Rear Shocks, MT Lower Links, 315/70/17 BFG KM3's, 17x8 FN FX Pros, Spidertrax, MT Sliders, Heated Seats, Console Vault, Satoshi Grill, Cl, Shrockworks Front Bumper/Full Skids, Warn XD9000, CBI Rear, Safari Snorkel, ARB Front Locker, ARB Twin Compressor, 4.56 Gears, Xventure XV-2 Trailer
|
|
|
Reply With Quote
|
|
11-07-2013, 04:01 PM
|
#14
|
|
Senior Member
|
|
Join Date: Aug 2012
Location: My Computer
Posts: 3,113
|
|
|
Senior Member
Join Date: Aug 2012
Location: My Computer
Posts: 3,113
|
Quote:
Originally Posted by jbstrd
The thing I noticed I did differently is attach the drivers side first. This may have made it more difficult. When Jim82 and I install his 5100's I will be sure to do the drivers side last.
I can tell everybody, in my experience, the rear KDSS bar was WAY easier re-attaching.
|
Bingo, it is near impossible to get it line it all up if you start with the driver side first, ask me how I know, lol.
Quote:
Originally Posted by Narkhelek
I had the plastic boot pop off the hydraulic cylinder when I let mine fully extend. I was able to get it back on but it's something to beware of.
|
Thanks for that note, so now I guess I will stick to my statement about supporting the front KDSS cylinder with a jack while you're wrenching on the suspension. Will update my post.
Quote:
Originally Posted by jbstrd
It has been a year since I installed my lift and I do not recall which side of the rear bar I installed first. But, I remember I had to use ratchet straps and a lot of muscle to get the front bar re-attached. The rear went back on with the use of a jack and minor muscling around.
|
To be honest, using my method you really have no need for much muscle; the key is to use the jack as your muscle and line things up as close as possible and then start threading on the bolts. Once you've got the bolts threaded, it's all smooth sailing.
It is critical you start with the lower bolt of the front brackets and then use a center punch or screw driver to pry the bracket into position for attaching the top bolt. Having the lower bolt in allows the bracket to pivot easily into place while you're prying.
A ratchet strap would definitely come in handy to pull the bar towards the LCA on the driver side though.
Quote:
Originally Posted by jbstrd
Very interesting. I also remember when I was researching the lift install procedure with kdss prior to my build, it seemed like everybody had fewer issues with the rear. I will report back after we do Jim82's lift to let you know how that goes.
|
Again you are correct sir, the rear was a whole lot simpler to take off and put back on, there isn't much tension on the bar from the pistons at all. Keep in mind thought I did do this with the opposite end of the vehicle on the ground so I am not sure if things would be different if you jacked up all four corners...
Quote:
Originally Posted by STX4Runner
I remember the front being easier to reattach. I also remember using ratchet straps on the back once I detached oe side and at that point I gave up on the back. I was suprised I was able to do the front myself but not the back, as I anticipated the front would be harder.
|
In all honestly, neither end was that bad to attach once you've cracked the code, lol; but I will say this, if you're not following the exact order things get pretty difficult in a hurry. So if it's not going on relatively easily reassess the situation and start over.
I am sure there are other ways to get it back on, but try not to force anything because the last thing you want to do is break/bend/rip something.
If I had to do it all over again, I think I can have the front bar back up in ~5-10 minutes and the rear on in under 5 minutes.
|
|
|
Reply With Quote
|
|
11-07-2013, 04:58 PM
|
#15
|
|
Senior Member
|
|
Join Date: Jul 2010
Location: Washougal, WA
Posts: 1,253
|
|
|
Senior Member
Join Date: Jul 2010
Location: Washougal, WA
Posts: 1,253
|
Funny, I took a completely different approach to the rear swaybar and it worked fine for me. I disconnected the bar at the axle, not at the piston brackets. Your method almost looks easier than mine. See, this is why we have forums like this, to compare different experiences and help others.
As far as keeping one shock connected, that is a non-issue IMO. I disconnected both shocks and I did not remove any brake line brackets at all. I was still able to coerce my OME 898 heavy springs in without damaging any lines. You can never be too safe though, so removing the line brackets is definitely a safe step. I still don't think it is necessary to keep one shock attached, however. I think that would actually hinder your progress a bit.
Thank you very much for taking the time to do this write up. It will be very helpful for many DIY'ers and hopefully give some the confidence to work on their own rig.
Thanks, Jason
__________________
2013 TE w/ KDSS, Icon ET CO's, LR UCA's, OME 898's, OME Rear Shocks, MT Lower Links, 315/70/17 BFG KM3's, 17x8 FN FX Pros, Spidertrax, MT Sliders, Heated Seats, Console Vault, Satoshi Grill, Cl, Shrockworks Front Bumper/Full Skids, Warn XD9000, CBI Rear, Safari Snorkel, ARB Front Locker, ARB Twin Compressor, 4.56 Gears, Xventure XV-2 Trailer
|
|
|
Reply With Quote
|
 Posting Rules
|
You may not post new threads
You may not post replies
You may not post attachments
You may not edit your posts
HTML code is On
|
|
|
|


 Linear Mode


