Colemanfu
New member
04 coil spring air bag experience.........a must do!
Got to start by saying, I love them and wish I had done this $100 15min. mod when I 1st got the rig!
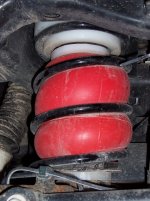
If you haul, tow or just want to slightly stiffen up the rear end get a set of Airlift 1000's. I also noticed less side to side sway when turning . Just made it feel a bit more solid and less mush. I also have zero sag when hauling - I always hated that low rider look when the truck full. It did give about an inch more lift but that was way too stiff. I did add a 1/2 spacer made from a plastic cutting board on the top of the bag to gain a bit more lift but that's just pure red neck. Just like the lower spacer, same size but was not sure how the bag would react to sitting on the nub of a bump stop (there is a gap between the bump stop and spacer. I wanted to make it a flush fit (and 1/2 lift) on the top just like the bottom. Don't know why they dont include a second dics in the kit like the bottom?
Yes, it only took 15 min. to put them in. By nature I always try to find the easy way of doing things and did not want to break down the rear end like I did during the lift (take the springs out drop the sway and pan hard, jack stands) all that crap. I did chuck the front so I did not roll.
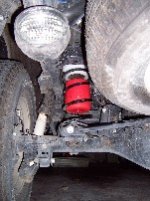
I started with the seak knife - cut down the bump stop level with the lift spacer above the coil. Tool out the HiLift and stuck it in the reciever hitch and jacked that sucker up till it was just about off the ground - it started to go side to side and I quickley backed it down. With the tires just touching and the coils at almost max flex I removed the black end cap on the air bag so I could fold and squeez as much air out as I could so I could fit it in between the coils. With the back end jacked up you have about 4 inches above and below the air bag when it's deflated - plenty of room just like if the coil was removed?. I did wait to put the valve on the end of the hose till I lowered the jack. I think that allowed the bags let air in and out and to sit in place and makeing sure nothing was pinching. Put both bags in and ran the lines. There is a stock hole in the lower seat for the coils so no drilling was needed. I put hose up the rear drivers side and out the small hole below the gas cap. All the extra hose fits in below and you can pull out as much as you need to fill up then tuck it back in with just about 3 inches sticking out.
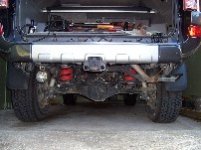
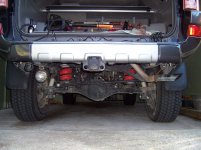
I love the look of it with the bags at about 10-12 psi with the back slightly higher then the front yet not too stiff. At 22psi I had 39 3/4 at the rear wheel fender - 39 1/4 loaded. I had them at 12 and loaded it up with gear for the trip and it only went up to about 20 psi with only loosing 1/2 inch of lift.
I am out of town for the week but will post the pix when I return.
Got to start by saying, I love them and wish I had done this $100 15min. mod when I 1st got the rig!
If you haul, tow or just want to slightly stiffen up the rear end get a set of Airlift 1000's. I also noticed less side to side sway when turning . Just made it feel a bit more solid and less mush. I also have zero sag when hauling - I always hated that low rider look when the truck full. It did give about an inch more lift but that was way too stiff. I did add a 1/2 spacer made from a plastic cutting board on the top of the bag to gain a bit more lift but that's just pure red neck. Just like the lower spacer, same size but was not sure how the bag would react to sitting on the nub of a bump stop (there is a gap between the bump stop and spacer. I wanted to make it a flush fit (and 1/2 lift) on the top just like the bottom. Don't know why they dont include a second dics in the kit like the bottom?
Yes, it only took 15 min. to put them in. By nature I always try to find the easy way of doing things and did not want to break down the rear end like I did during the lift (take the springs out drop the sway and pan hard, jack stands) all that crap. I did chuck the front so I did not roll.
I started with the seak knife - cut down the bump stop level with the lift spacer above the coil. Tool out the HiLift and stuck it in the reciever hitch and jacked that sucker up till it was just about off the ground - it started to go side to side and I quickley backed it down. With the tires just touching and the coils at almost max flex I removed the black end cap on the air bag so I could fold and squeez as much air out as I could so I could fit it in between the coils. With the back end jacked up you have about 4 inches above and below the air bag when it's deflated - plenty of room just like if the coil was removed?. I did wait to put the valve on the end of the hose till I lowered the jack. I think that allowed the bags let air in and out and to sit in place and makeing sure nothing was pinching. Put both bags in and ran the lines. There is a stock hole in the lower seat for the coils so no drilling was needed. I put hose up the rear drivers side and out the small hole below the gas cap. All the extra hose fits in below and you can pull out as much as you need to fill up then tuck it back in with just about 3 inches sticking out.
I love the look of it with the bags at about 10-12 psi with the back slightly higher then the front yet not too stiff. At 22psi I had 39 3/4 at the rear wheel fender - 39 1/4 loaded. I had them at 12 and loaded it up with gear for the trip and it only went up to about 20 psi with only loosing 1/2 inch of lift.
I am out of town for the week but will post the pix when I return.
Last edited: