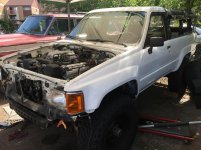
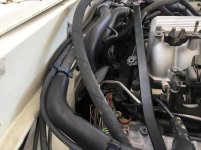
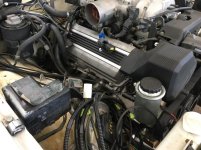
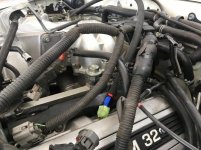
1989 4Runner 1UZ engine swap

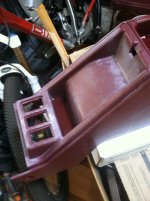
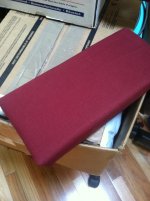
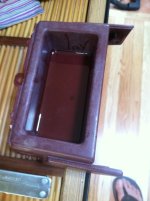
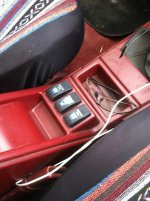
Center console and dash repairs

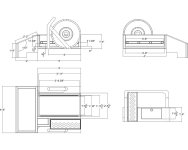
So, this truck will be a dedicated two-seater with full time soft top. I'm drawing up the 48" lockable/sliding drawers for the rear on CAD. The rear seat wells are going to contain the dual battery set-up, 1uz ECM (I wired it long enough), ARB compressor, amplifier, Painless aux fuse block and inverter.
I've also planned a wheel well into the rear for the spare tire, tools, spares, high lift jack and emergency gear. The idea is to keep everything possible clean, dry and secure inside the truck.
 

Attachments

  • IMG_2483.jpg
    IMG_2483.jpg
    129.8 KB · Views: 1,378
  • IMG_2485.jpg
    IMG_2485.jpg
    130.2 KB · Views: 1,349
  • IMG_2492.jpg
    IMG_2492.jpg
    135.7 KB · Views: 1,354
  • IMG_2490.jpg
    IMG_2490.jpg
    136.2 KB · Views: 1,357
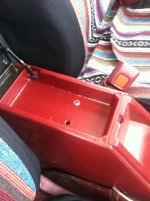
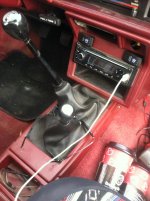
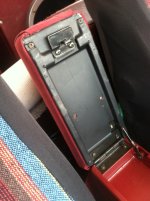
Console with ARB switches installed

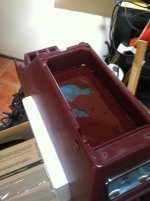
Came out great, however, I need one more long screw to finish. I used two-part polyurethane bar top finish, poured at 1/2" (it puts off lots of heat). Then drilled the holes and sprayed the plastics with Rust-Oleum ultracover for plastics in claret wine satin followed by two layers of flat clear to take away the shine. This method works perfectly and the color/sheen match is uncanny.
 

Attachments

  • IMG_2572.jpg
    IMG_2572.jpg
    134.4 KB · Views: 1,373
  • IMG_2574.jpg
    IMG_2574.jpg
    133.4 KB · Views: 1,321
  • IMG_2573.jpg
    IMG_2573.jpg
    133.6 KB · Views: 1,413
  • IMG_2575.jpg
    IMG_2575.jpg
    134.3 KB · Views: 1,351
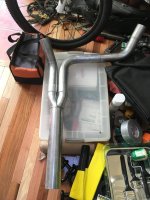
Crossover pipe

I'm still planning on welding a gusset top and bottom at the joint for safety sake. Not sure I trust those seams to not flex under load, and I did buy a 6" flex to place between the cat and the crossover.
 

Attachments

  • IMG_1264.jpg
    IMG_1264.jpg
    133 KB · Views: 1,367
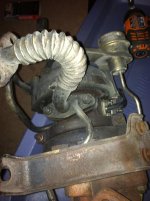
22RE Turbo for my '85

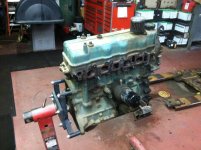
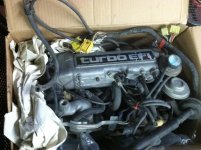
As I mentioned a lonnnnnggggg time ago, I was playing with this build as well. I managed to track down a bunch of parts.....really cheaply I might add, and started the engine rebuild. I got a lot of it from a junk yard, they had a 1987 turbo pickup that was a rusty hulk. So, I got the complete engine w/ harness, ecm, gauge cluster, R150, t-case rear axle and a bunch of underhood ancillaries for $450!

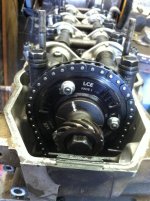
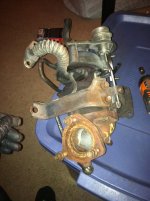
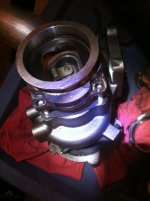
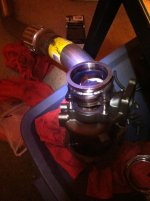
The plan for this one is '82 Supra vafm, 270 cam, HD springs, 7m-gte injectors, stock turbo exhaust manifold, Mustang SVO T3 turbo w/ 3" v-clamp exhaust housing and Thunderbird turbo coupe intercooler. Once I tore down the engine, bore measurements showed I needed a .020 piston, but the crank was almost perfect, as were the rods.....SCORE!! I replaced the stock dished turbo pistons for a set of forged 22re pistons to go with the rebuilt turbo head. The higher compression should help this engine out quite a bit, while eliminating many of the problems associated with trying to turbocharge a stock 22re with its smaller combustion chambered head.
 

Attachments

  • IMG_1982.jpg
    IMG_1982.jpg
    136.2 KB · Views: 1,787
  • IMG_1995.jpg
    IMG_1995.jpg
    135.5 KB · Views: 1,385
  • IMG_1980.jpg
    IMG_1980.jpg
    134.9 KB · Views: 3,159
Old CT20 vs new T3

Yeah, this should make a difference.
 

Attachments

  • IMG_2083.jpg
    IMG_2083.jpg
    133.6 KB · Views: 1,457
  • IMG_2084.jpg
    IMG_2084.jpg
    130.1 KB · Views: 1,426
  • IMG_2102.jpg
    IMG_2102.jpg
    134.3 KB · Views: 1,356
  • IMG_2103.jpg
    IMG_2103.jpg
    137.6 KB · Views: 1,329
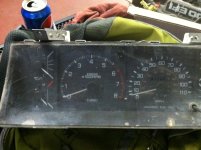
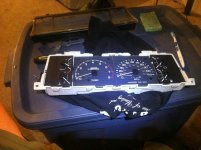
Turbo gauge cluster clean up

This came out wonderfully! I carefully disassembled the face, cleaned everything up, repainted the needles and replaced the odometer with the one in the current truck. This makes it a true mileage truck, as I fully documented the entire (super easy) process.
 

Attachments

  • IMG_1979.jpg
    IMG_1979.jpg
    136.1 KB · Views: 1,369
  • IMG_1984.jpg
    IMG_1984.jpg
    136.4 KB · Views: 1,687
Rear storage CAD drawings

Also going to add a sliding platform on top of the cabinet for coolers, gear boxes, etc.
 

Attachments

  • 4Runner bed storage-Model.jpg
    4Runner bed storage-Model.jpg
    115.4 KB · Views: 1,396
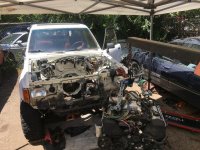
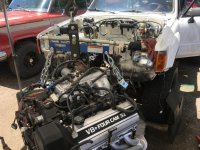
Engine is in !!!!!!

Finally found the time to start working on this little beast again. The last week has been a flurry of activity, I will definitely provide you guys with a thorough explanation of everything I had to do with regards to making this fit. And fit it does.........barely.

Enjoy the pics
 

Attachments

  • IMG_2212.jpg
    IMG_2212.jpg
    138.6 KB · Views: 1,273
  • IMG_2213.jpg
    IMG_2213.jpg
    139.1 KB · Views: 1,942
  • IMG_2217.jpg
    IMG_2217.jpg
    124.7 KB · Views: 1,356
Curious to see how this turned out. This doesn't seem as much plug- and - play as the 3.0 to 3.4 swap. How hard was the wiriing?
 
Curious to see how this turned out. This doesn't seem as much plug- and - play as the 3.0 to 3.4 swap. How hard was the wiriing?

Wiring has been pretty straight forward...so far. I had Don at Northwest Toys build the harness, he also supplied the engine mounts, headers, crossmember, custom bellhousing, flywheel and clutch kit.

So far, everthing has lined up as it should, bolted together without issue....although I did have to grab new bellhousing hardware, as the old 3.0 bolts were too long. No biggie. The fully dressed engine is a bit nose heavy, so I used a floor jack and block of wood to keep everything lined up as I mated the engine and tranny.

Headers are snug, but offer more than enough room to access the flange bolts. I do need to re-route the fuel and clutch slave lines, as they are a bit closer to the header than I feel comfortable with. Most likely going to fab high pressure AN lines and eliminate that stock mess altogether.

I'll update more tomorrow, it was 95 here today and I was working on the truck in that heat all day. I'm beat, but the progress is really better than I anticipated, very few issues with anything......and it looks so freaking cool, definitely the swap worth the effort.
 

Attachments

  • IMG_2235.jpg
    IMG_2235.jpg
    116.5 KB · Views: 1,622
  • IMG_2237.jpg
    IMG_2237.jpg
    94.1 KB · Views: 1,595
  • IMG_2238.jpg
    IMG_2238.jpg
    60.8 KB · Views: 1,499
  • IMG_2239.jpg
    IMG_2239.jpg
    126.3 KB · Views: 1,631
  • IMG_2240.jpg
    IMG_2240.jpg
    119.4 KB · Views: 1,584
did ya get this done? updates on progress??


Oh yeah! She's running.....very well. I'm including a couple of pics for you guys, I'll update in a bit on what I've been doing and finishing up.

The thing is absolutely off the hook. So much fun to drive.
 

Attachments

  • 0218212052[1].jpg
    0218212052[1].jpg
    131 KB · Views: 1,070
  • 0218212103[1].jpg
    0218212103[1].jpg
    127.2 KB · Views: 1,410
  • 1125201400_HDR[1].jpg
    1125201400_HDR[1].jpg
    64.2 KB · Views: 1,068
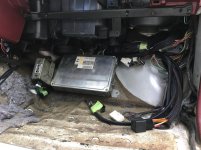
No to both questions. The second box is the fuel pump control, and I mounted the ecm behind the glove box. Since the AC wasn't being used, I removed the unit between the heater core and fan, replacing it with a simple duct. Both front and rear heaters crank. I'm running the soft top full time now.
 
This swap was done without using a body lift, cutting the radiator support or bashing the trans tunnel. As well as not having to modify the stock shift linkage pass-through, as the trans/t-case are tucked one inch up in the rear and one inch back from stock. Also, I didn't have to modify either of the driveshafts. They both worked fine.

I am running all of the stock gauges, although the tach is still not adjusted perfectly. It still shows 400 rpm too high. The check engine light functions, I corrected initial codes for a cam position sensor and crank sensor. Now it's good. It's pretty much a stock 1uz that I resealed, had injectors cleaned, new upper gaskets, JDM non-trac throttle body and SC400 air box.

The electrical is really not that bad. I picked up a good set of wiring diagrams for both vehicles and literally removed 40% of the old 1uz harness, as well as the same from the old 3vze. Everything is plug and play, wired correctly and works. I even solved the license plate and reverse lights that never worked before.
 
Cooling for this is a bit different. It uses a HD LS swap aluminum radiator for a Jeep TJ, a shortened stock upper hose and a convoluted mess of SS pipe, flex and regular hose. I still have some work to do on this....but it doesn't overheat and that's what matters for now. The fans are two 12" pushers on the front with a custom mount I made to use the stock radiator bolts. I have rarely needed them, as the truck likes to stay at about 40% gauge. I wheeled it about a week after finishing the swap and the fans kicked twice. The vents I installed on the hood really help to get rid of excess heat.

The hood scoop in the pictures was necessary to clearance the engine. I was too high to close the hood. So, I bought this steel replica of a 1965 Shelby Mustang hood scoop, cut the hood and used body panel adhesive to mount the scoop and steel vents I got off Ebay.

With all of this done, on the highway enroute to Fruita, the temp gauge was down to 1/3 while I was climbing I-70 in 5th gear, doing 70. The old girl never had that kind of power before.
 

Members online

Forum statistics

Threads
278,309
Messages
3,554,075
Members
248,016
Latest member
Advally Service

Trending content

Back
Top