DeclansDaddy
New member
Well it wasn't long after I got my '86 that I realized the front seats were much more uncomfortable than my '95's so I decided to swap them out. And the back seat of my DLX was in no way shape or form safe for my children so I decided to tackle that project too. This write up will be more detailed about the back seat more than the front as the front seats were easy. I got 2 in awesome shape front seats from a '94 at the local pick and pull for $32. The drivers seat was an exact bolt in although I did have to put the two bolts closest to the center of the truck in first and pull the outer track about 1/4 of an inch to get those bolts in but it wasn't hard and doesn't effect the functionality of the track. The passenger front seat wasn't direct bolt in. The two front bolts aligned just like the drivers however both back bolts were about 3" further back. However under the carpet on the rear hole closest to the door there was a threaded hole and sure enough the bolt went right in. The inner back bolt had to be drilled and to my surprise where the hole had to be drilled was still in the reinforced section of the floor so I feel a thick washer and lock nut will suffice. Now on to the rear seat..
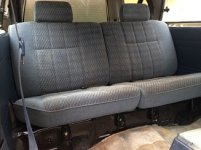
My rear seat was a metal bench seat with a thin cushion that velcroed to the metal. The back was hinged with the latching system bolted to the rollbar. Apparently this was about the most base grade back seat ever put in any 4Runner. I know it would of been ideal to find a SR5 1st gen and snatch the back seat but they aren't exactly easy to come by so instead I picked up a split seat from a '93. Seat and all hardware for $14.
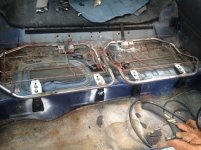
I started with the bottoms. It was clear that the bolt holes weren't going to be the same. But while I had the seats mocked up like this I went ahead and marked where the new holes were going to be.
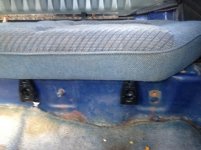
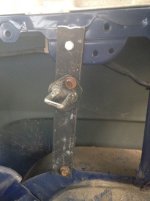
First I pulled off the hinges from the frame and the hinges had the number 3 or 4 stamped into them so I marked their location.
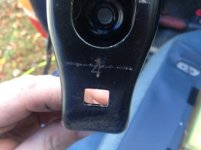
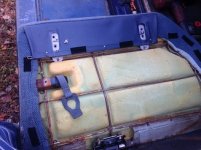
I went ahead and cut the hog rings and pulled the cushions off the frames to protect them from and grinding and welding I might do.
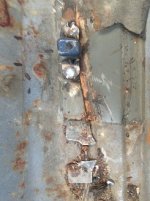
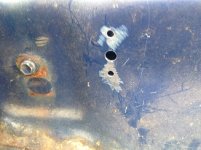
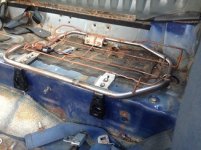
So then I decided I'd drill the holes in the body that I had marked and my plan was to use a 1/8 flat bar with a nut welded to it to reinforce the bolt holes. And to keep the installation and removal of the seats in the future easy I drilled 2 smaller holes on both sides of the bolt hole that I will later fill with weld to keep the nuts in place.
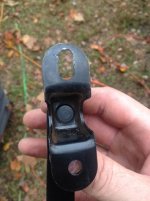
Here are the brackets I made with grade 8- 3/8 nuts tacked to the back.
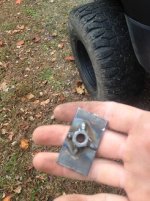
the front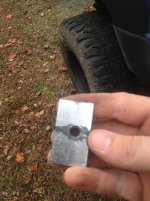
I was able to access the area that the nuts needed to be from the fuel pump access hole for the passenger side. the drivers side I needed a helping hand. I just put a bolt through them for the time being just to get them welded up.
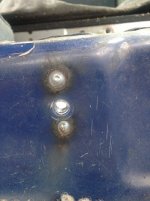
Now the frames were ready to bolt in.
My rear seat was a metal bench seat with a thin cushion that velcroed to the metal. The back was hinged with the latching system bolted to the rollbar. Apparently this was about the most base grade back seat ever put in any 4Runner. I know it would of been ideal to find a SR5 1st gen and snatch the back seat but they aren't exactly easy to come by so instead I picked up a split seat from a '93. Seat and all hardware for $14.
I started with the bottoms. It was clear that the bolt holes weren't going to be the same. But while I had the seats mocked up like this I went ahead and marked where the new holes were going to be.
First I pulled off the hinges from the frame and the hinges had the number 3 or 4 stamped into them so I marked their location.
I went ahead and cut the hog rings and pulled the cushions off the frames to protect them from and grinding and welding I might do.
So then I decided I'd drill the holes in the body that I had marked and my plan was to use a 1/8 flat bar with a nut welded to it to reinforce the bolt holes. And to keep the installation and removal of the seats in the future easy I drilled 2 smaller holes on both sides of the bolt hole that I will later fill with weld to keep the nuts in place.
Here are the brackets I made with grade 8- 3/8 nuts tacked to the back.
the front
I was able to access the area that the nuts needed to be from the fuel pump access hole for the passenger side. the drivers side I needed a helping hand. I just put a bolt through them for the time being just to get them welded up.
Now the frames were ready to bolt in.
Attachments
-
 thomas' phone 171.JPG49.1 KB · Views: 5,138
 -
 thomas' phone 173.JPG65.2 KB · Views: 3,898
 -
 thomas' phone 174.JPG47.7 KB · Views: 3,991
 -
 thomas' phone 175.JPG68.6 KB · Views: 4,055
 -
 thomas' phone 176.JPG63.3 KB · Views: 3,860
 -
 thomas' phone 177.JPG67.4 KB · Views: 3,877
 -
 thomas' phone 178.JPG61.9 KB · Views: 3,788
 -
 thomas' phone 179.JPG55.9 KB · Views: 3,816