2012 SR5 rear bumper question - Custom Rear Fog Light (for EU)

RysiuM

New member
Hi,

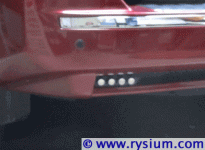
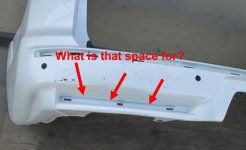
In 2012 SR5 on the very bottom of the stock rear bumper cover there are slots: on on the driver side and two on the pass side (it would be symmetrical like on the driver side but the exhaust pipe is in the way) like on the image below.

In my T4R the slot is filled with some black plastic insert looks like just for show for not particular practical reason. What I like to do is use these slots for rear fog lights (red LED). Is there any stock option or aftermarket lights that would be a direct fit replacing these black plastic inserts?
 

Attachments
  • 4runner_rearbumper_cover.jpg
    4runner_rearbumper_cover.jpg
    69.5 KB · Views: 2,158
Last edited:
Register to hide this ad
"rear fog lights"? what?

California, so isn't it smog?

Depending on what you actually want to acheive, you may want to look for something that you make a cut out for rather than trying to squeeze into that space. Especially since I don't think it's the same size on the other side.
 
"rear fog lights"? what?

It's a very Euro thing.

OP: you will have to go pretty custom for that small of a space. LED strip lighting, small DRL lights with red lens, small individual LEDs, etc. Not to mention you'll have to consider if you want it to have the existing asymmetric design OR make it symmetrical and blend it into the existing black trim pieces. Best of luck.
 
It's a very Euro thing.

Yep, exactly. In order to drive it in Europe you need that. While it is not required here in US, actually it makes perfect sense. If you drive in heavy fog (sometimes we have nice fog in Sacramento area) the only way to see the car in front of you is when driver steps on brakes. Red markers are not visible in fog at all. Euro "rear for lights" are additional red "marker" light of the same brightness as brake lights. They need to be at least 10 inches of the ground and not higher than 3 ft. And 4 inches away from a red marker light (don't ask me why). Don't need to be symmetrical - one on the left side is enough.

One option often used is replacing bulb of the left backup light with red LED (and routed to separate switch). Other option (which I like more) is to replace rear red reflector plates with "real" LED powered lights.

I was hoping for answer, that in some models these slots are used for red reflector plates like in many other cars have, and just my T4R is "cheap low end" version which has black plastic inserts in there. It is easier to convert reflector plates to "real" lights than making one from scratch.

Not to mention you'll have to consider if you want it to have the existing asymmetric design OR make it symmetrical and blend it into the existing black trim pieces. Best of luck.

The symmetry is only cosmetic issue (I don't say it is not important). I would need only 5W of LED light which will give more light than 20W incandescent bulb so technology is available, just a matter of making it the easiest way.
 
Last edited:
More research and I found part numbers for these black trim pieces. Got them from ebay for "experiments" - I did not want to mess around my original trims in case something goes wrong. I wanted to keep my 4Runner close to stock look but legal for "euro thing".

From Amazon I got total 8 bred LED bulbs (ZITRADES High Power Car 1.5W SMD Ultra bright LED Eagle Eye Red Light). Actually they are only 0.9W each but still very bright with light output about 100 lumens each. I made my own housing from 3/8 aluminum plate, trim pieces I got from ebay and silicon seal. I don't have pictures from the build but got the final "product" installed.

4runner_rear-fog-light-01.jpg


4runner_rear-fog-light-02.jpg


As you can see there are two LED lamps 100% weather sealed (they must survive salt on the road) with the light output about 400 lumens per lamp. The brightness is same or better than stock brake lights. That is enough to be legal on the other side of the pond.

4runner_rear-fog-light-03.jpg


In USA they are connected to trailer connector so they give me extra brake/blinkers - kind of high power tail bar. For Europe both lamps will be reconnected to additional switch on the dash (''AIR ON BOARD'') powered from rear marker lights circuit (rear fog lights have to be independent from front fog lights). BTW they are mounted in the bumper cover using the original stock trim mounting so in case I need to replace the bumper cover it will be easy to move these lamps to the new bumper cover. These LED bulbs are "made for tanks" so they should survive minor rear-end run-over.
 
Last edited:
I think that's pretty cool. Definitely see the use of rear brights for foggy conditions having driven through the thule fog in the central valley. My only critique is that it looks like you can see some of the silicone seal on the top of the lights. I would have liked to clean that up, but like I said I think this is a cool idea.
 
My only critique is that it looks like you can see some of the silicone seal on the top of the lights. I would have liked to clean that up

That is not a silicone. It is reflection of each bulb lenses in the bumper. Looks like a white/semi-transparent blob but it is how the clear lenses would look from the top :-)
 
It looks like this would be useful when it's raining really hard. For some reason, people down here feel it's a good idea to use their hazards...
 
That is not a silicone. It is reflection of each bulb lenses in the bumper. Looks like a white/semi-transparent blob but it is how the clear lenses would look from the top :-)

I made two pictures with light off and on. This shows as white "blobs" are turning red when lamp is on.
 

Attachments

  • blink.gif
    blink.gif
    78.5 KB · Views: 1,826
This is awesome. I am looking to do this myself. I was going to try to integrate it in with the turn signal somehow, just the one side, but this gives me some direction. You don't have a write up on making these?
 
You don't have a write up on making these?

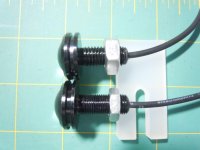
Nothing more that I already put in this thread. ZITRADES Leds are screwed into 6061 3/8 aluminum plate which works as a heat sink. Aluminum plate is painted black for the look. ZITRADES Leds have quite long thread (some have M10-coarse other M10-fine thread) so they go through the black trim piece (the one I was asking about). All four wires are bundled behind the trim piece and go through the plastic bumper behind the trim (I drilled 10mm hole in the bumper for these wires). Of course all four bulbs are connected in parallel.

Now there is an ugly part, may sound like ghetto, but actually it works. The entire space between the aluminum plate and plastic trim is filled up with black silicone (gasket maker). It works as a glue making sure the metal plate stays with the plastic trim (does not vibrate off) and protect the guts of the lamp from the environment. It simple looks like the lamp is one solid piece with the original plastic trim. So far LED bulbs are holding up and I hope I will never have to replace them (it would require some major surgery to remove all silicone).

Below there is a picture of two ZITRADES bulbs one with M10-1 (fine) thread, the other with M10-1.5 (coarse) thread
 

Attachments

  • M10-coarse and M10-fine threaded bulbs.jpg
    M10-coarse and M10-fine threaded bulbs.jpg
    80.8 KB · Views: 1,548
Thanks! After looking at my rear bumper though, I don't have those trim pieces to add to. I have a 16 Trail. I am trying to be sleeper about it using factory locations and don't necessarily want to blast holes I the bumper.
 
Now I will have some time to wire a switch to rear fog lights. I bought Air On Board switch, very nice quality switch that fits 4R like a factory switch with few exceptions:

- the back-light is red, not orange. The switch contains red 3mm LED on the board. I'm going to replace it with orange 3mm LED that I just ordered.
- the back-light for both LEDs (upper and lower) have the same common ground. It means that if I want the switch to dim with the rest of switches, the back-lighting indicating that switch is "ON" will also be dimmed. I don't like it.

So first I disassembled the switch and reverse engineered the circuit (very simple). With some trace cutting and soldering I'm going to achieve:

1. Lower back-light (the text) will be orange (like all other 4R switches) and will dim with all other switches.

2. Upper back-light (symbol) will be red (now it is green) and will shine full brightness regardless of the dim position.

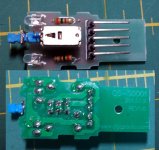
I will post pictures after the modification, for now here is how the switch looks inside.
 

Attachments

  • switch.jpg
    switch.jpg
    56.8 KB · Views: 1,495
I'll be interested to see your results. I tried replacing the red backlight LED in an AOB switch and couldn't quite get it working the way I wanted. Which LEDs did you order?

Now I will have some time to wire a switch to rear fog lights. I bought Air On Board switch, very nice quality switch that fits 4R like a factory switch with few exceptions:

- the back-light is red, not orange. The switch contains red 3mm LED on the board. I'm going to replace it with orange 3mm LED that I just ordered.
- the back-light for both LEDs (upper and lower) have the same common ground. It means that if I want the switch to dim with the rest of switches, the back-lighting indicating that switch is "ON" will also be dimmed. I don't like it.

So first I disassembled the switch and reverse engineered the circuit (very simple). With some trace cutting and soldering I'm going to achieve:

1. Lower back-light (the text) will be orange (like all other 4R switches) and will dim with all other switches.

2. Upper back-light (symbol) will be red (now it is green) and will shine full brightness regardless of the dim position.

I will post pictures after the modification, for now here is how the switch looks inside.
 
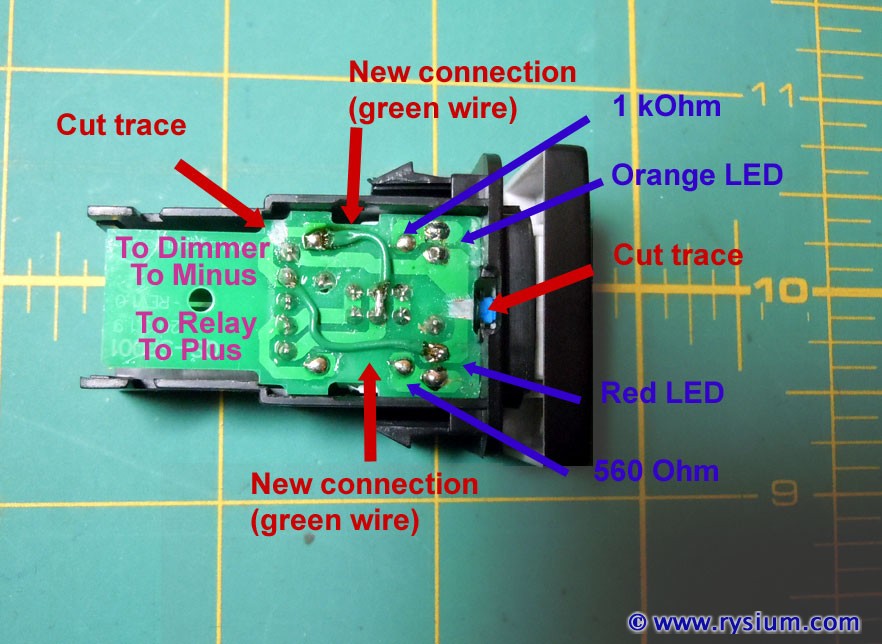
The set from Amazon contained 14 LEDs in orange color, quite close to what we have in 4Runner. So I did the following modification to the switch:

1. Green LED (lighting the symbol) replaced with red LED
2. Red LED (lighting the text) replaced with orange LED
3. Cut traces in two places
4. Added two jumpers making new connection in circuit board
5. Replaced 3kOhm resistor limiting the current of Orange LED with 1 kOhm
6 Replaced 3kOhm resistor limiting the current of Red LED with 560 Ohm

4runner-fog-light-switch-mod-01.jpg


I think LEDs were to dim with current limited to 3mA. After replacing resistors they are much better visible.

The result:
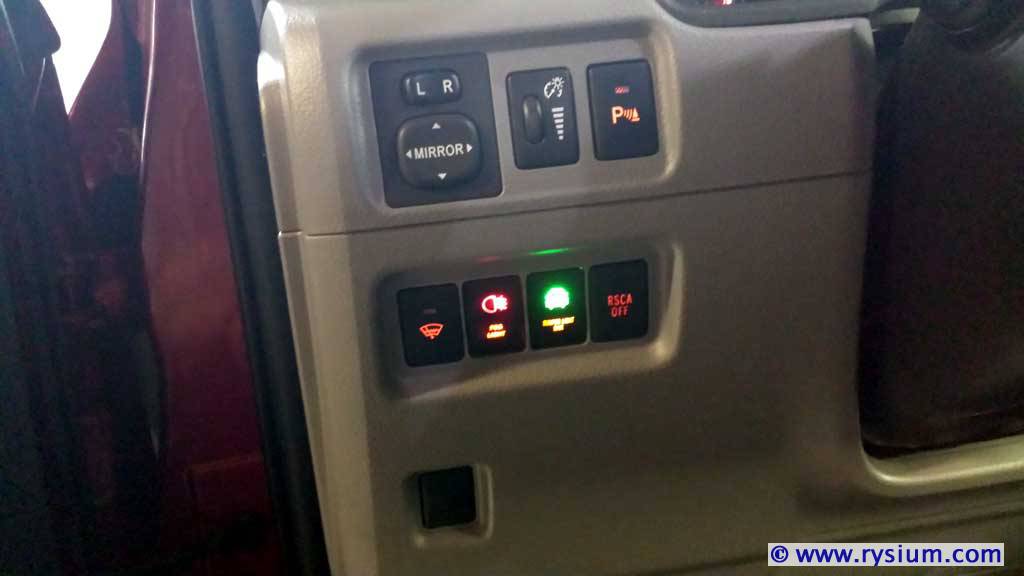
Orange LED can be dimmed with all other switches and is always ON regardless of the switch position. Red LED shines with full power when the switch is ON, and is off when the switch is OFF. I want to power back anti-fog light (red) only when there is a real fog (otherwise my anti-fog light would blind drivers behind me) so high visibility red indication on the switch was desired. Because my anti-fog lights turned on by this switch can be turned on only at bad visibility (night and/or fog) (front fog lights together with marker lights would be ON) I will power the switch from Illumination fuse.

Now it is extremely hard to take a picture of LED light so it shows true color. Somehow digital cameras don't see LED colors the same as human eye does. Anyway the true orange color is something between these two pictures:

4runner-fog-light-switch-mod-02.jpg


4runner-fog-light-switch-mod-03.jpg
 
Last edited:
5. Replaced 3kOhm resistor limiting the current of Orange LED with 1 kOhm
....
I think LEDs were to dim with current limited to 3mA. After replacing resistors they are much better visible.


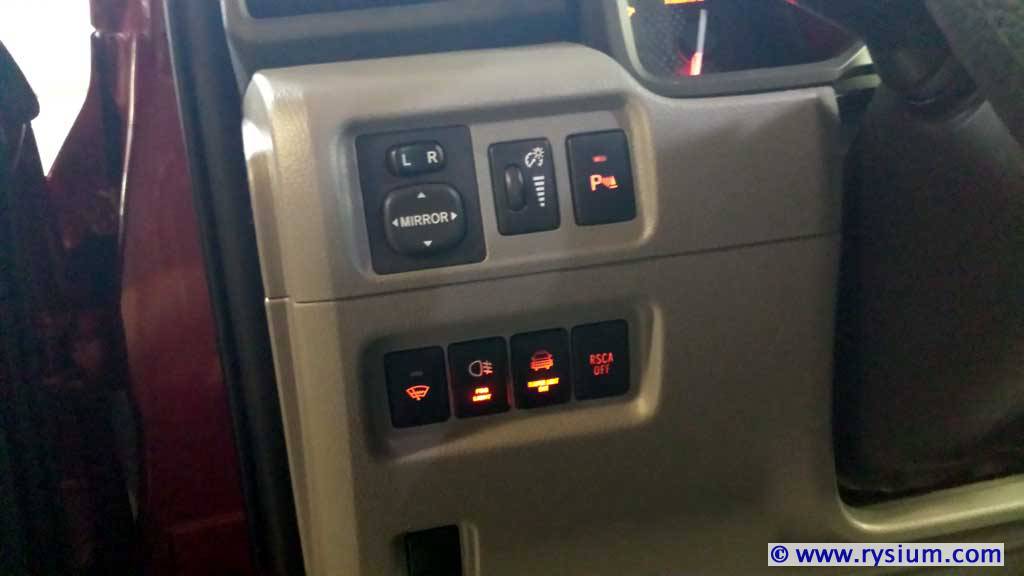
After finishing the installation of this switch I found this was a mistake. Orange back-light is visibly brighter than other stock switches. The color is good, brightness is not.

4runner-light-bar-switch-inst-10.jpg


When I have a chance I will replace orange LED resistor and I will put back 2kOhm as it was originally.

The red LED is OK

4runner-light-bar-switch-inst-11.jpg


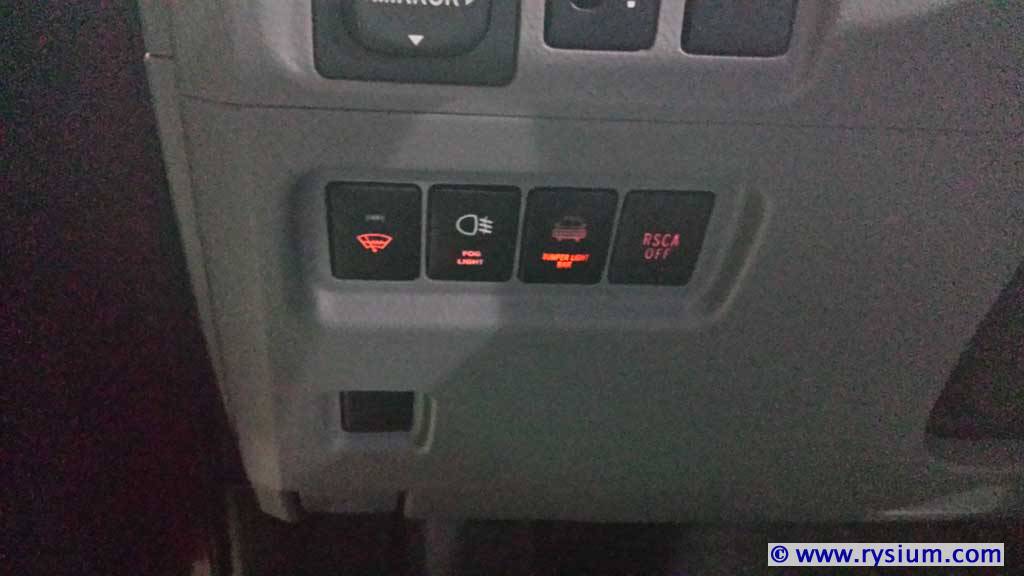
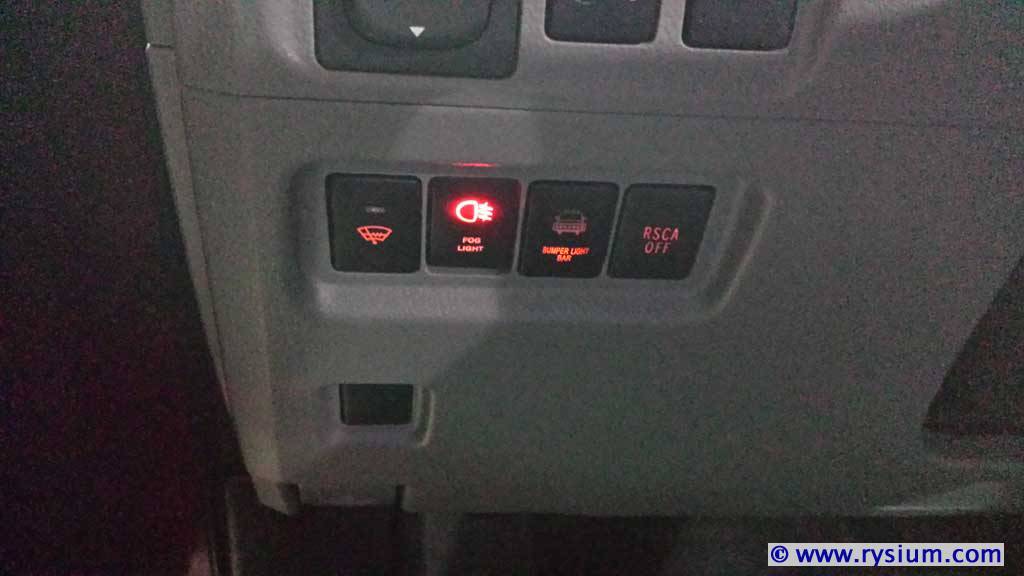
EDIT: Actually what I found the original 3kOhm resistor was still to mall making orange LED glowing to bright, compared to other stock switches. I found that 10kOhm resistor was OK. Here is the same dash with switches modified by replacing original 3kOhm resistors with 10kOhm resistors.

Fog light off, dimmer set to half brightness:

4runner-light-bar-switch-mod-03.jpg


Fog light on, dimmer is set for 50% brightness:
4runner-light-bar-switch-mod-04.jpg


The other thing is that AOB switch does not fit 100% in place of knock-off plugs. There are "notches" in each corner of the hole (two are visible on this picture) that are raised above the base of mounting hole. When the switch is installed the back of the switch button is hitting these notches not allowing to engage the switch.

4runner-light-bar-switch-inst-04.jpg


The solution was to cut all notches flat before installing AOB switch.

4runner-light-bar-switch-inst-05.jpg
 
Last edited:
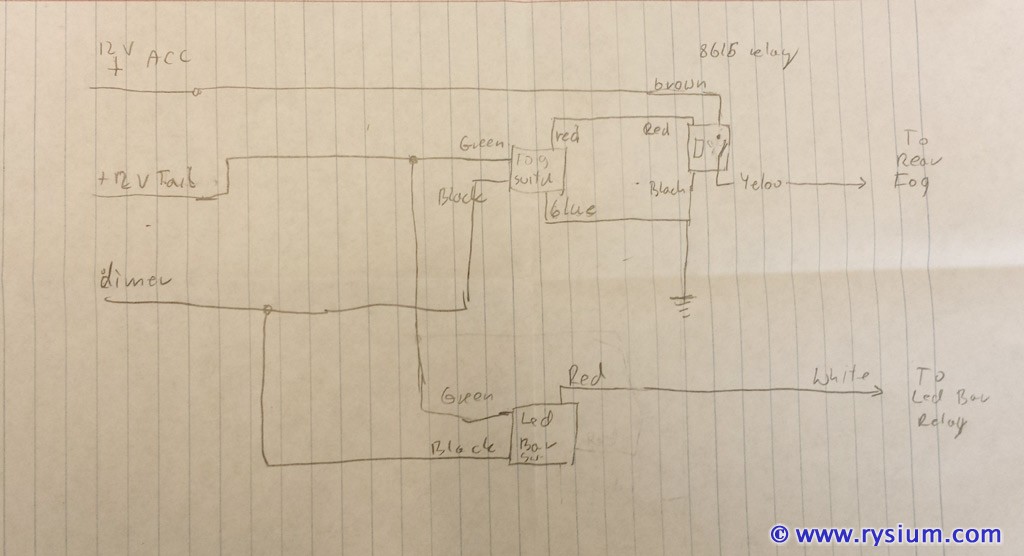
To complete the documentation of this mod I'm attaching the electrical diagram and connections I made while I was doing My install of 28 inch 145W LED Bar (14k lumen)

Here is the diagram of connections "behind dash":

4Runner-Ledbar-15.jpg


The top part is related to rear fog light, the bottom is LED Bar connection.

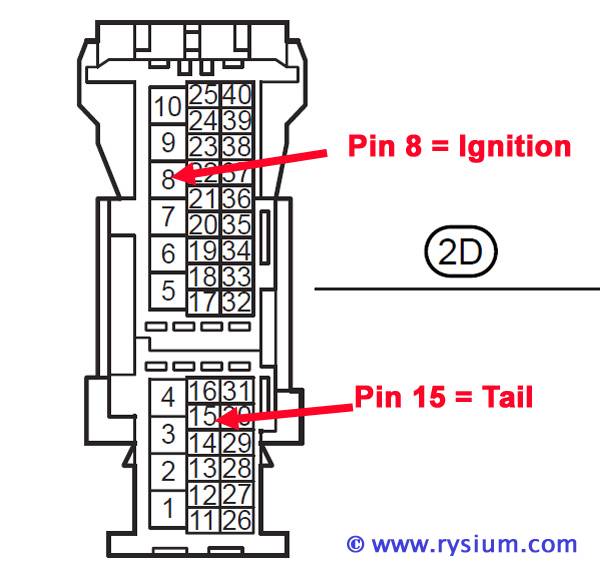
Both power connections come from connector 2D in Master Body ECU:
+12V ACC comes from pin 8
+12V Tail comes from pin 15

4Runner-2D-15.jpg


Both are unused pins in my 2012 SR5so I used "repair wire" to get into these pins. There are two different contacts, one smaller for pin 15 and bigger for pin 8
Toyota Part No.: 82998-24290 TERMINAL, REPAIR W/WIRE
and
Toyota Part No.: 82998-24350 TERMINAL, REPAIR W/WIRE

179844d1447356921-osram-ledfog101-installed-2012-sr5-c2-connector.jpg


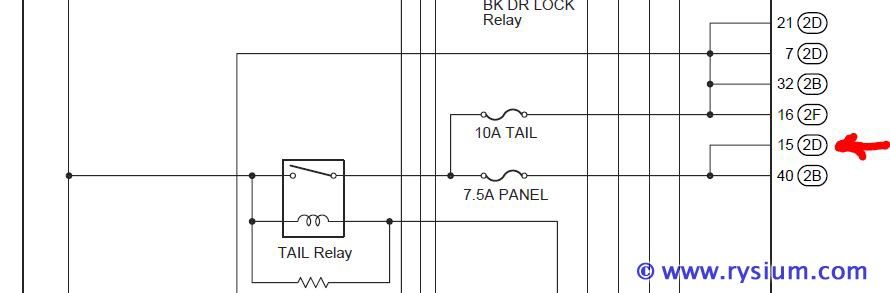
Pin 15 is already fused with 7.5A fuse ("Panel") so make sure you don't take much power from it. I used it only for switch backlighting (less than 2mA) and relay power (less than 200mA)

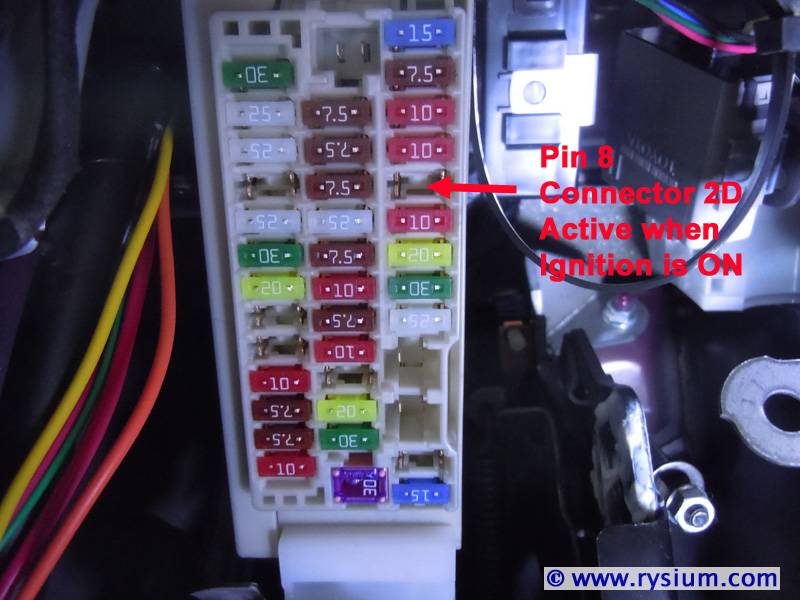
4Runner-2D-15-fuse.jpg


Pin 2 is connected to empty fuse slot which is powered when ACC s on

4Runner-2D-8-fuse.jpg


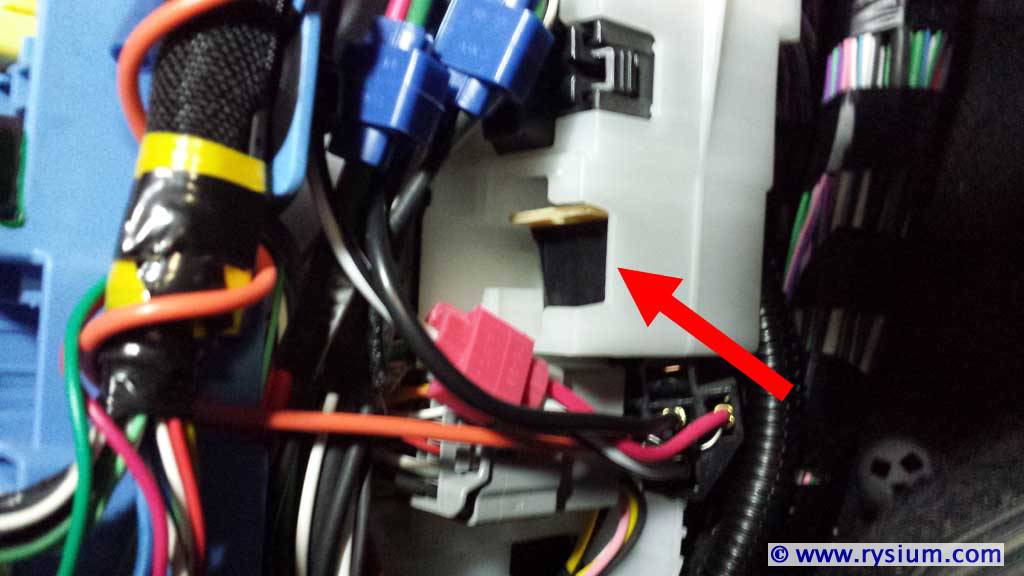
Here is the picture with arrow pointing into this empty slot

4Runner-2D-8.jpg


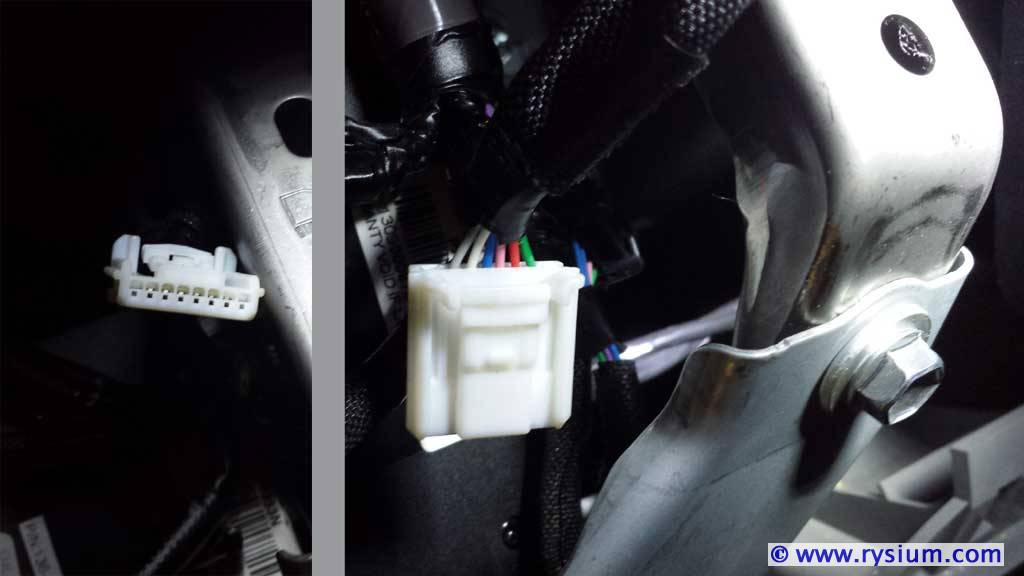
Dimmer wire can be a grey wire coming from any any of backlighted switches. In my SR5 I found white 8-pin flat plug not connected to anything. It was for Automatic Running Board Switch, which my truck does not have.

4runner-light-bar-switch-inst-02.jpg


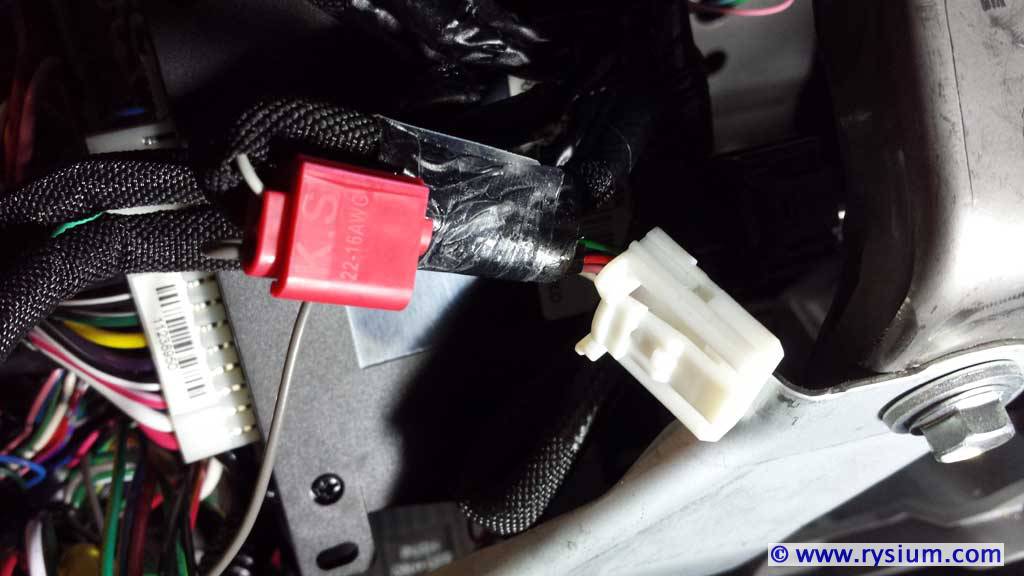
Grey wire in that plug was also connected to dimmer so I tapped into this wire using 22-16 AWG tap connector.

4runner-light-bar-switch-inst-07.jpg


The 8616 relay is installed in the empty slot behind the kick panel. The red arrow points to the relay.

4runner-light-bar-switch-inst-08.jpg


Yellow wire from the relay is routed to the back of the truck through the channel under the driver side door weather strip (I don't have picture of that).

I think that's all. If I missed something, just ask.
 

Members online

Forum statistics

Threads
278,316
Messages
3,554,120
Members
248,016
Latest member
Advally Service

Trending content

Back
Top