2019 SAS 5th gen Build

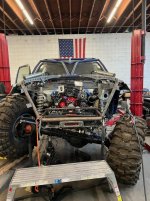
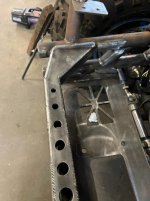
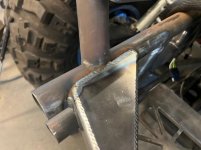
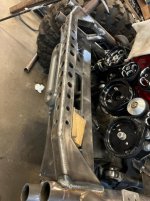
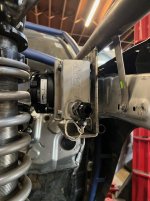
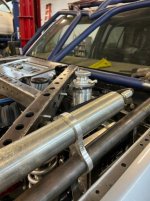
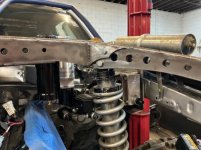
Working on front shocks today

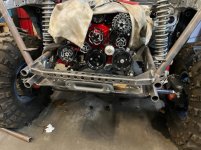
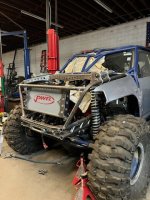
Made the mount for the front shocks today. I think mentioned in my last video we are moving the lower mounting point a little forward and shock will be canted back toward the firewall.
 

Attachments

  • 60208.jpg
    60208.jpg
    141.5 KB · Views: 671
Rear mounting solutions and truck on its own weight

The last week we got the truck down on its own weight and we measured from the bottom of the frame rail to the ground and we got an astonishing 22". Sadly I did not take any pictures of that.

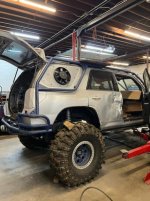
As a point of reference, my 2012 has a small lift and I measured from the bottom of the winch Mount to the ground and compared it to this one and it was only 1.5" higher. The 2012 is on 33" tires and of course this one 43" so this was quite an amazing job we've done with the new frame rails and suspension setup, etc.

I have much more up travel and the same down travel and right now on the up travel we can go all the way up to the motor mounts with the top links and just below the dry sump pump on the other side.

We will put some 1.5" bump stops in to make sure we never get quite that high but as high up as physically possible without causing any damage.

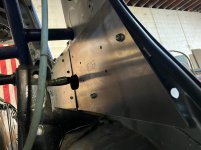
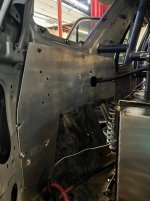
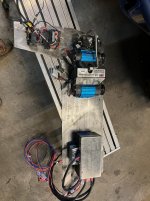
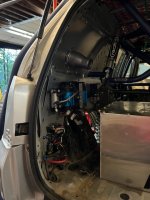
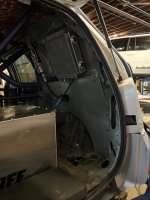
Today we fabricated some panels to go in the back to mount the winch relocation controller, ARB compressor and the welder control panel. Yes I have decided to put a welder in the vehicle to do a both stick and coil welding with the bun welder.

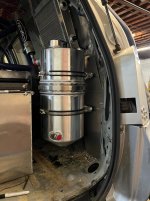
We will make a similar amount on the passenger side where we will ultimately Mount the oil tank and other things. Will build a simple box in the front where I will keep liquids, my main tools and Jack.

 

Attachments

  • 60842.jpg
    60842.jpg
    112.7 KB · Views: 622
  • 60840.jpg
    60840.jpg
    117 KB · Views: 620
  • 60810.jpg
    60810.jpg
    136.5 KB · Views: 622
Here's a few photos from the past couple days.

All the panels in the rear of the were sent to powder. They should be back tomorrow and I'll get everything finished mounted.


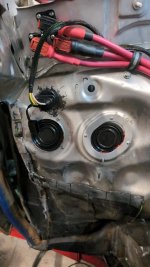
The photos with the three radlock connectors and four pin trailer connector are for the front winch controller relocation which is now inside the vehicle. The ugly bulkhead for the 4 wire connector is a hole I drilled a long time ago which I had to drill and put wires through blind which is why all that stupid sealant is all over the place.

Started the rear firewall this week as well. The bottom is steel and the top is going to be lexan to keep a little bit of visibility

It's definitely coming together quickly now and should have the engine fired for the first time later in August.
 

Attachments

  • 61256.jpg
    61256.jpg
    131.9 KB · Views: 602
  • 61068.jpg
    61068.jpg
    134.6 KB · Views: 593
  • 61373.jpg
    61373.jpg
    133.5 KB · Views: 590
  • 61594.jpg
    61594.jpg
    81 KB · Views: 581
  • 61595.jpg
    61595.jpg
    80 KB · Views: 598
  • 61596.jpg
    61596.jpg
    50.6 KB · Views: 595
  • 61597.jpg
    61597.jpg
    71.3 KB · Views: 584
Last edited:
Update from past week or so

Here we are finally approaching the finish line.

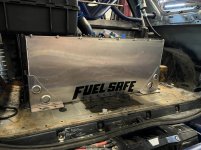
All coolers and reservoirs have been mounted just about everything is back from powder in the back and reassembled.

Now we are finishing up the mount for the radiator and evaporator, but sadly we found out when we took it out of the box the evaporator was 3/4 of an inch out of square so it needs to get replaced.

Due to the massive amount of up travel we now have, we are going with a dual bump stop solution which should be completed next week.

Before the end of next week the engine and trans will be coming out so we can paint everything then reinstall and plumb. I don't have a count but I think it's going to be at least 80 to 90 ft of hose to plumb the entire vehicle.

Once all of that is done, the wiring will start and the first fire. Given all of the stumbling blocks we have had, we are estimating to start wiring 3 weeks from today
 

Attachments

  • 62041.jpg
    62041.jpg
    127.7 KB · Views: 529
  • 62371.jpg
    62371.jpg
    50.5 KB · Views: 527
  • 62372.jpg
    62372.jpg
    50.1 KB · Views: 530
  • 62373.jpg
    62373.jpg
    49.6 KB · Views: 526
  • 62374.jpg
    62374.jpg
    55.6 KB · Views: 527
  • 62375.jpeg
    62375.jpeg
    126 KB · Views: 538
  • 62376.jpeg
    62376.jpeg
    122.6 KB · Views: 525
  • 61942.jpg
    61942.jpg
    115.1 KB · Views: 517
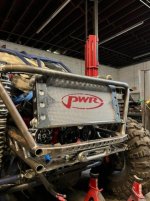
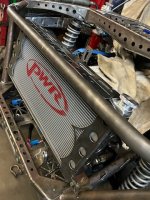
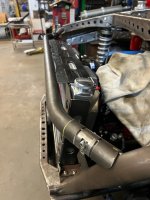
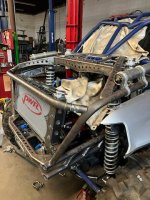
Here is the the radiator mount all tacked up and ready to be finished. The new evaporator will be here on Monday and we can finish it. It will sit 0.5" off the front of the radiator.

This entire Mount can be removed in a single piece, making it very easy to access everything. We have put a tremendous amount of thought into ease of maintenance and access to important parts.
 

Attachments

  • 62919.jpeg
    62919.jpeg
    130.5 KB · Views: 540
  • 62918.jpg
    62918.jpg
    53.5 KB · Views: 538
  • 62917.jpeg
    62917.jpeg
    119.9 KB · Views: 523
  • 62916.jpeg
    62916.jpeg
    122.9 KB · Views: 520
  • 62915.jpeg
    62915.jpeg
    110.6 KB · Views: 517
  • 62914.jpeg
    62914.jpeg
    134.5 KB · Views: 521
It's such a massively over built/complex build.

Overbuilt for what; going to mall, overlanding, riding blue trials, sure it is I don't plan on doing any of that. I will welcome you to come down to Windrock, Black mountain or any other park in the SE and we can ride together in late September or October.

It's not as complex as you believe. it's actually much more simple than most other builds. We chose not use tube on the top of the engine bay and do something different. There is no other 5th gen like it so why use tube and make it look like every other buggy?
 
Getting closer to finalizing this. Next Friday it will go for wiring and the first fire should be very soon.
 

Attachments

  • 64161.jpg
    64161.jpg
    139.6 KB · Views: 463
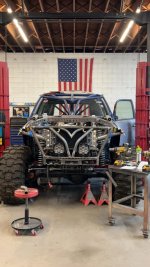
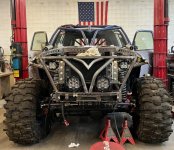
Finally got the headlights done. Plan was always t use my existing LP9's but after getting the biggest radiator we could fit the LP9's were too big. Therefore I got some LP4's to use as my main headlights. Would have preferred LP6's since they have low and high beam just like the 9's, now I will just use the LP9's in conjunction with the 4's for the high beam and will have a dimmer on them once they are very bight.

Hopefully by the end of the weekend it will be all painted and engine back in so we can complete the plumbing next week. It's insane the quantity of fittings we are using.
 

Attachments

  • 64453~2.jpg
    64453~2.jpg
    137.2 KB · Views: 442
Finally fired the engine the first time today

today after a long time we finally fired the engine for the first time.


<iframe width="560" height="315" src="https://www.youtube.com/embed/bdmBCCC5DwY?si=aJ9IQvlHRt01wR-u" title="YouTube video player" frameborder="0" allow="accelerometer; autoplay; clipboard-write; encrypted-media; gyroscope; picture-in-picture; web-share" referrerpolicy="strict-origin-when-cross-origin" allowfullscreen></iframe>
 
I was wondering about you and this project yesterday, if it was ever going to come to a conclusion and actually hit some trails. Looks like ... maybe.
 
Work always gets in the way. Regardless, this week the throttle cable bracket was installed which was harder than anticipated because with the FAST LSXR intake the two bolts removed to attach the bracket had nuts on the other side which fell into the engine so we had to fish those out. An absolutely stupid design.

The engine will be dyno tuned next week.

My first event will be the Shamrock shakedown in Windrock in March and then Toyota Jamboree and I'll be wheeling with the freshly rebuilt Megalex after his run in with a concrete truck last year. I hope to take it out for the first time on some local private land in February.
 
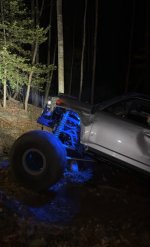
A little night wheeling

A nice little fireball while climbing a snotty wet leaf covered obstacle.
 

Attachments

  • attachment1763436272275.jpg
    attachment1763436272275.jpg
    118.3 KB · Views: 229
Been wondering about you with the "Rocks and Flops" SAS build on here. Thought you might chime in on his.
 

Forum statistics

Threads
278,312
Messages
3,554,089
Members
248,016
Latest member
Advally Service

Trending content

Back
Top