2nd Gen Stereo Removal w Pics

n8buddy

New member
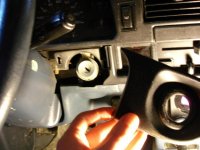
First, remove the plastic around the ignition.
 

Attachments

  • dsc01682.jpg
    dsc01682.jpg
    115.8 KB · Views: 22,471
Register to hide this ad
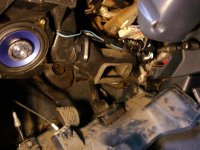
then unscrew the plastic below the steering whell and pull it off.
 

Attachments

  • dsc01684.jpg
    dsc01684.jpg
    125.3 KB · Views: 21,638
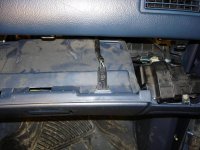
then unscrew the glove box and pull it off after unpluging the speaker and light.
 

Attachments

  • dsc01685.jpg
    dsc01685.jpg
    122.8 KB · Views: 21,327
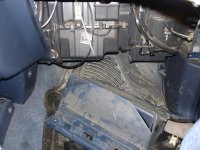
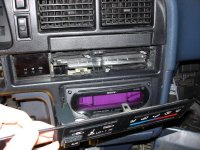
then take the knobs off the heater control (they just pull off), and pull the panel behind the knobs out.(the A/C button comes with it, so you dont have to try and pry it out)
 

Attachments

  • dsc01688.jpg
    dsc01688.jpg
    117.6 KB · Views: 22,613
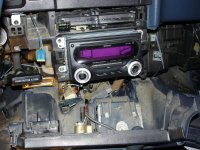
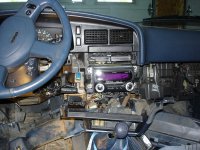
Then just grab hold of the panel surrounding the stereo and yank er out. I only remove the clock wire, and not the cig lighter wire etc, and just let the panel rest around the shifer.
 

Attachments

  • dsc01689.jpg
    dsc01689.jpg
    123.5 KB · Views: 21,926
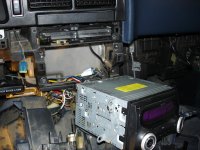
Then its just a matter of unbolting the stereo from the dash (4 bolts, one on each corner.)The unit is attached to a frame like contraption with is bolted to the dash(see pic). it may be a pain to remove, but at least its less likely to have your stereo stolen!
Hope this helped anyone looking for info on the subject, i wish i had a step by step guide when i was removing mine for the first time!
 

Attachments

  • dsc01691.jpg
    dsc01691.jpg
    128.2 KB · Views: 26,898
one more thing, the panel below the head unit panel (square ish, youll know what im talking about when you see it) has a plastic thing on each side and a metal 'popper' or whatever you call them, which hold it on. im not sure how to remove the plastic pieces without breaking them, but if you do break them the metal thing will still hold it on, and makes it easier to remove in the future.

 
First time I've seen in the dash of an SR5... You have a few more wires than I did.

Where were these pics back in 1995 when I pulled my dash apart for the first time?

:lol:
 
i recently installed a new deck in my 87 runner. i took a few pitures, but i haven't had time to post them yet due to school. in the picture im attaching (i modified yours, i circled the "adaptor" yellow) the green is the tabs that attach the deck to the "frame". the red is the holes that you can pretty much add any deck to the adaptor. this is important. DONT THROW THE YELLOW THAT I CIRCLED OUT!!!!! all you need are some screws to attach the adaptor to the deck. i will be posting a write up of my 87 runner once finals are over. if the pic doesn't work, then i might need some help attaching it :(
 
thanks ovrrdrive. i will post it tommorow when im at school on a spare or after welding exams. thanks again buddy. you can pretty much mate any deck to it, as far as my understanding goes. you just have to find some screws to fit. but if your like me, and have bolts coming out of places they souldn't, lol, then you will be fine. would anyone be interested in a write up/photos of the first gen? its much easer than this one...
 
email sent. thanks again buddy. would anyone be interested in a write up with pics of deck removal on a first gen? its much easier than this one....
 
in the picture that was attached (i modified yours, i circled the "adaptor" yellow) the green is the tabs that attach the deck to the "frame". the red is the holes that you can pretty much add any deck to the adaptor. this is important. DONT THROW THE YELLOW THAT I CIRCLED OUT!!!!! all you need are some screws to attach the adaptor to the deck. thanks to ovrrdrive for posting...
and i take pride in my mad paint skills lol. you can soooo tell im a teen. it was really hard NOT to draw in some stick men lol
 

Members online

Forum statistics

Threads
278,312
Messages
3,554,083
Members
248,016
Latest member
Advally Service

Trending content

Back
Top