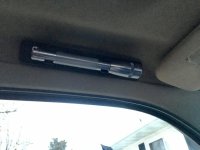
It's probably not clear from the pictures so let me see if I can't explain it.
If you look at the metal clips, on the body you'll notice flares that come out from the top and bottom. If you were to push the clip into the opening of the liner those flares will pop in behind the metal wall. That first picture of the handle with one of the clip inserted is a good one for reference.
With all the pieces taken off, here's the sequence for putting it all back together. Again, using that first picture as reference, you put the clips into the handle first just as pictured. Then you take the entire handle, with clips inserted, and push each side into the openings on the liner. Each side should click in as those flares set behind the metal wall of the liner. OK, with just the clip and handle inserted, the handle is very loose and moves around.
What keeps the clips in are those plastic caps. I deliberately took a picture where I slipped the clips over the cap to show you how the profile of the body of the cap lines up with the clips. So back to the last step of the installation. The cap ends have this "hook" which requires you to start the install side way to make sure the hook goes in first, then the rest of the cap will align properly. After that it's just pushing the cap in until you hear another "click" and the cap is flushed with the handle. Once those caps are in, they keep the metal clips opened so that the flares on the clips stay behind the metal wall on the liner. When both clips are in, the handles feel solid and won't budge.
There's one picture where I dry-fitted all the parts. In that picture you can see the handle, the clip inserted in the handle, and the cap almost fully inserted. You also see the cap's plastic "hook" in between the metal clip.
Hope this helps. Let me know if you have more questions.
Edit: I formatted my earlier post a bit and added a couple of comments related to the steps above.