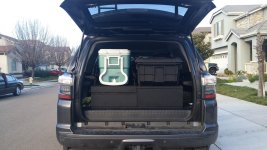
3rd row drawer system Part 1

Magnetic4R

New member
Magnetic4R's 3rd row drawer system Part 1

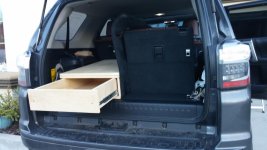
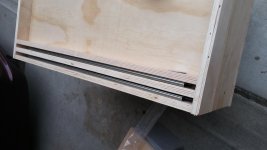
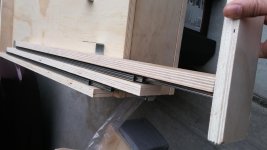
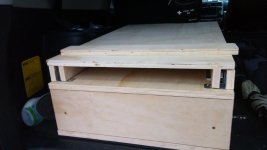
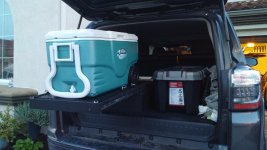
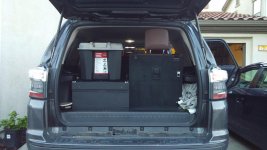
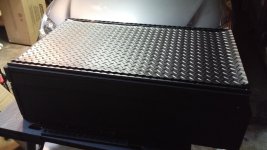
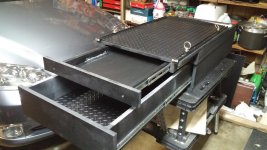
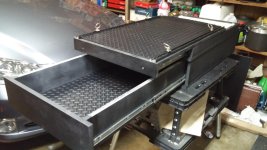
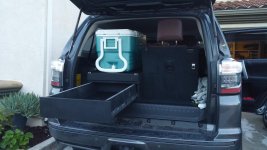
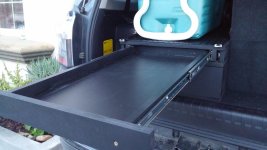
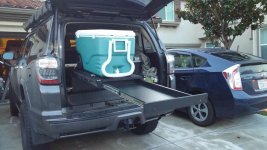
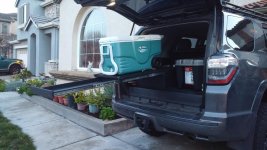
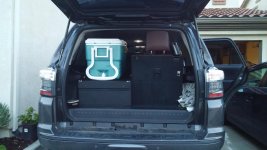
It's almost there, 90%. Need to do the detail final touch up and figure a way to secure them. I had revised the original plan and decided to add a couple of extra slide out. The main bottom will be for my recovery gears. The top drawer is for tools and the top tray is my slide out for the cooler or whatever. Overall dimension is 10H x 21W x 35L. Obviously, I wemy this route to allow the use of the used row. Part 2 will be the right second half. Can't post multiple pix on my phone so this one will do.

Material Lists:
1. Home Depot 5/8" Sanded Pine Plywood - $35
2. 28" GlideRite 100lbs ball bearing drawer slides x3 - $45
3. Rubber-Cal Diamond Plate Rubber Flooring 1/8" x 4' x 6' - $48
4. Pit Posse - two 4' Aluminum tied down track w/ 4 rings - $56
5. Rustoleum Bed Liner Spray x 3 - $18
6. Black 3/16" x 2' x 4' Black chalk board - $10

Total: $212
You can cut the cost in half by eliminating the Diamond Plate rubber flooring and the Aluminum tied down track.
 

Attachments
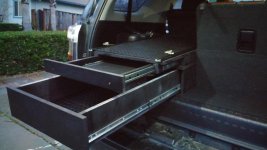
  • 0122161733.jpg
    0122161733.jpg
    131.5 KB · Views: 4,162
  • 0110161638.jpg
    0110161638.jpg
    127.6 KB · Views: 5,826
  • 0117161550.jpg
    0117161550.jpg
    128.3 KB · Views: 3,374
  • 0117161552b.jpg
    0117161552b.jpg
    130.7 KB · Views: 3,493
  • 0117161652a.jpg
    0117161652a.jpg
    128 KB · Views: 3,410
Last edited:
Register to hide this ad
Gonna definitely follow this thread. I considered the same thing because I use the 3rd row quite often. I'm curious to see how you have them bolted down and how easy it is to remove. I racked my brain several ways and just couldn't come up with something I was satisfied with.

Also, how are you dealing with the shallow height of the cargo area for a fridge?

Anyway, thanks for leading this for us 1%ers that need the 3rd row but still want to wheel our trucks and have storage.
 
Coming along quite nicely!

Gonna definitely follow this thread. I considered the same thing because I use the 3rd row quite often. I'm curious to see how you have them bolted down and how easy it is to remove. I racked my brain several ways and just couldn't come up with something I was satisfied with.
Also, how are you dealing with the shallow height of the cargo area for a fridge?

Anyway, thanks for leading this for us 1%ers that need the 3rd row but still want to wheel our trucks and have storage.

Thanks!

There's a few things that needs to be work out. Going to Yosemite so won't have much time until I get back to finish. Since the 2nd row slide and have rails, I will most likely secure and mount to that bolt. I don't have a fridge and don't think I need one any time soon but I have plenty of space for my 70qt cooler.
 

Attachments

  • 0123160708.jpg
    0123160708.jpg
    134.8 KB · Views: 4,167
Thanks!

There's a few things that needs to be work out. Going to Yosemite so won't have much time until I get back to finish. Since the 2nd row slide and have rails, I will most likely secure and mount to that bolt. I don't have a fridge and don't think I need one any time soon but I have plenty of space for my 70qt cooler.

Very nice
 
very nice [MENTION=107460]Magnetic4R[/MENTION]!

I was planning on building something similar for me, would be interested in hearing/seeing how you have the unit secured...

pjo
 
very nice [MENTION=107460]Magnetic4R[/MENTION]!

I was planning on building something similar for me, would be interested in hearing/seeing how you have the unit secured...

pjo

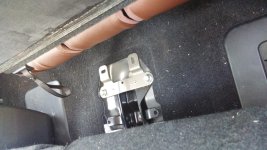
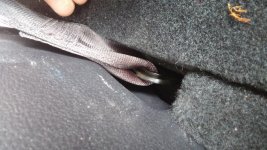
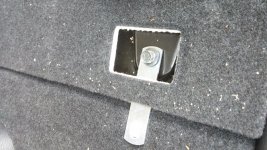
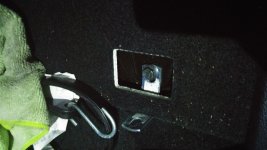
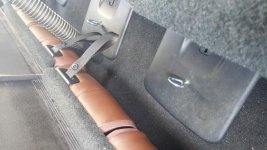
Still working on it but most likely 2 D-rings mounted to the back and lashing strap mounted to the 2 seat rails bolts
 
Here's a few more pix
 

Attachments

  • 0122161512a.jpg
    0122161512a.jpg
    129.5 KB · Views: 3,353
  • 0122161725a.jpg
    0122161725a.jpg
    137.6 KB · Views: 3,593
  • 0122161725b.jpg
    0122161725b.jpg
    132.2 KB · Views: 3,355
  • 0123160713b.jpg
    0123160713b.jpg
    134.2 KB · Views: 3,453
  • 0123160714a.jpg
    0123160714a.jpg
    130.9 KB · Views: 3,365
Hopefully it gives you an idea of it's function.
 

Attachments

  • 0123160709d.jpg
    0123160709d.jpg
    138.3 KB · Views: 6,534
  • 0123160709c.jpg
    0123160709c.jpg
    138 KB · Views: 3,526
  • 0123160713.jpg
    0123160713.jpg
    135.8 KB · Views: 4,931
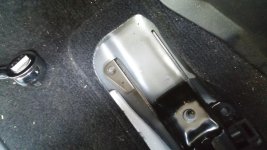
Here's where I plan to secure it
 

Attachments

  • 0124161112a.jpg
    0124161112a.jpg
    138.4 KB · Views: 3,246
  • 0124161109.jpg
    0124161109.jpg
    130 KB · Views: 3,210
  • 0124161147.jpg
    0124161147.jpg
    143 KB · Views: 3,205
  • 0124161146.jpg
    0124161146.jpg
    145.6 KB · Views: 3,207
Last edited:
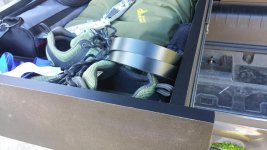
very interesting mounting idea [MENTION=107460]Magnetic4R[/MENTION]... definitely interested to see more pics and follow along as it looks awesome :tea:

BTW, how much does the unit way empty? 5/8 is pretty hefty stuff...

pjo
 
Need to bend that tab in the back 90 degree. Not too many choices but those should do for its purpose.

Both drawers should be about <80-100lbs ?
 
Last edited:
Top left drawer for tools, bottom left for recovery gears , right for camping gesrs and Husky mobile his for camera gears or mt. biking gears.
 

Attachments

  • 0131161542b.jpg
    0131161542b.jpg
    138.8 KB · Views: 3,007
This is "sticky" worthy! Now I need some detailed measurements so I can copy the hell out of this. All 3rd row owners rejoice!
[MENTION=66316]1engineer[/MENTION] sticky? "3rd row with removable storage drawers" or something like that?
 
Last edited:
Magnetic4R

Great build... looking to copy most of what you have done. Question for you though... did you have to remove some parts to get to the tie downs as you have shown in your pictures? i just got a 2016 and am struggling to match up what you show to mine.
 

Members online

Forum statistics

Threads
278,307
Messages
3,554,054
Members
248,016
Latest member
Advally Service

Trending content

Back
Top