You are using an out of date browser. It may not display this or other websites correctly.
You should upgrade or use an alternative browser.
You should upgrade or use an alternative browser.
4runner PC
- Thread starter rando
- Start date

rando
Senior Member
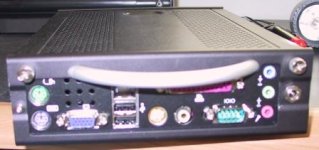
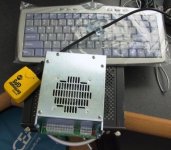
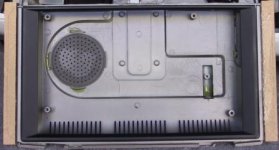
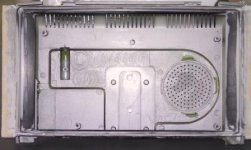
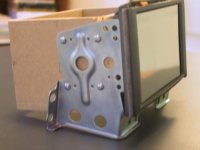
Modified LCD Case. I had to chop the front top, notch the back top, chop the bottom front, and chop and notch the bottom back.
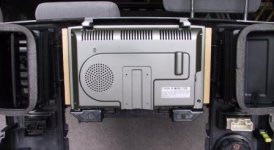
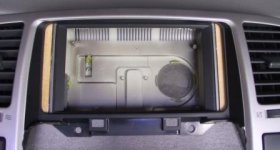
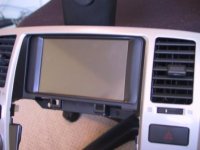
Strips of MDF are glued to the side to fill out the dash opening. Bondo and paint will be applied to give a smooth finish.
Strips of MDF are glued to the side to fill out the dash opening. Bondo and paint will be applied to give a smooth finish.
Attachments
Last edited:


rando
Senior Member
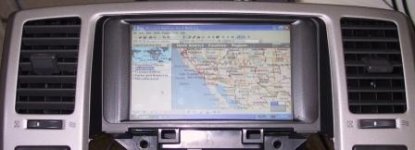
OK, I finished up some electrical modifications to the LCD circuitry and got it mounted last night. There is still some clean-up to do but everything works! 
I installed my GPS in the factory cubby, behind the screen. It appears to get excellent reception there.
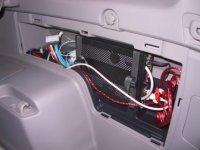
I put the Computer and Power Supply in the passenger side storage bin in the back.
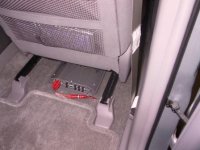
I installed a 4ch amplifier under the passenger seat (blocks the vent a bit).
I pulled 4 guage from the battery (fused), down the driver side wire tunnel, to a power distribution block under the rear seats. The fuses in the distribution block can be accessed by folding the rear seat bottoms forward. I ran 8 guage to the amplifier and 10 guage to the computer. The computer and amplifier have a common ground, under the passenger seat. The RCA cables run down the passenger side wire tunnel and are are kept apart from the power cables. Speaker wires run up the center console and into the dash and attach to the factory speaker wires using a harness. The turn-on wire is the same but running in the opposite direction. USB and VGA cables are also run from the dash to the center console.
There is a (for now unpowered) USB hub I tossed under the center console to help make up the connections to the GPS and Touch screen controller. This will be either moved to the dash or I'll make some holes in the center storage box which will allow other USB devices (keyboard, mouse, Network, Memory cards, Disks) to be attached, when needed.
At the moment, the LCD is still powered from the ciggarette lighter port. I still need to run a power wire from the PSU up to the screen to eliminate that problem. Also the amp turn-on needs to come from the computer, and not the ignition switch. This should eliminate the 'thud' I get when the computer turns-on.
I also plan to tap the gear select lever switch(es) and run that back to the computer. This will allow me to disable certain software features (movies, etc) when the 4runner is in motion.
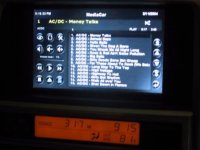
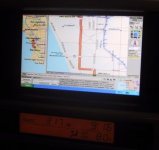
Right now I'm still working out which software package(s) to run. For GPS, I'm using Street Atlas 2004 and I also have MapPoint 2002. For a front-end and A/V playback I've been trying, MediaCar, MediaEngine, FrodoPlayer, and VOICES. None of them are (yet) the perfect solution, but each has capabilities far in excess of anything off-the-shelf navigation / stereo system.
I'll post pictures of the complete install when I get a moment.
I installed my GPS in the factory cubby, behind the screen. It appears to get excellent reception there.
I put the Computer and Power Supply in the passenger side storage bin in the back.
I installed a 4ch amplifier under the passenger seat (blocks the vent a bit).
I pulled 4 guage from the battery (fused), down the driver side wire tunnel, to a power distribution block under the rear seats. The fuses in the distribution block can be accessed by folding the rear seat bottoms forward. I ran 8 guage to the amplifier and 10 guage to the computer. The computer and amplifier have a common ground, under the passenger seat. The RCA cables run down the passenger side wire tunnel and are are kept apart from the power cables. Speaker wires run up the center console and into the dash and attach to the factory speaker wires using a harness. The turn-on wire is the same but running in the opposite direction. USB and VGA cables are also run from the dash to the center console.
There is a (for now unpowered) USB hub I tossed under the center console to help make up the connections to the GPS and Touch screen controller. This will be either moved to the dash or I'll make some holes in the center storage box which will allow other USB devices (keyboard, mouse, Network, Memory cards, Disks) to be attached, when needed.
At the moment, the LCD is still powered from the ciggarette lighter port. I still need to run a power wire from the PSU up to the screen to eliminate that problem. Also the amp turn-on needs to come from the computer, and not the ignition switch. This should eliminate the 'thud' I get when the computer turns-on.
I also plan to tap the gear select lever switch(es) and run that back to the computer. This will allow me to disable certain software features (movies, etc) when the 4runner is in motion.
Right now I'm still working out which software package(s) to run. For GPS, I'm using Street Atlas 2004 and I also have MapPoint 2002. For a front-end and A/V playback I've been trying, MediaCar, MediaEngine, FrodoPlayer, and VOICES. None of them are (yet) the perfect solution, but each has capabilities far in excess of anything off-the-shelf navigation / stereo system.
I'll post pictures of the complete install when I get a moment.
Last edited:

kglueck
New member
very nice setup! You were correct in deciding to put it all up higher in the dash than the small storage bin below the environmental controls. I mod'd my storage bin and to hold a matrix orbital 240x64 serial graphics display to incorporate into a piece of ham software that I joined the development team on. I let the door swing down open and then cut the top of the cubby so it was a cradle for the display. that worked fine for a while. until I'd want to use the cup holder. there's not much room down there to operate if you want to keep the cup holders...
So...good move. I like your mounting using the existing radio brackets. smart! I've since pulled my display out as it's been acting up. it's time for a redesign on my part, tho.
Kev
So...good move. I like your mounting using the existing radio brackets. smart! I've since pulled my display out as it's been acting up. it's time for a redesign on my part, tho.
Kev
rando
Senior Member
The amp under the passenger seat. This makes it fairly easy to adjust its settings by simply moving the seat all the way forward. When the seat is the normal position, you can't even see it. The only problem is that it sits on top of the vent under the seat.
Attachments

rando
Senior Member
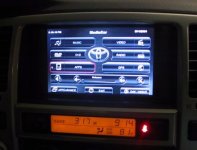
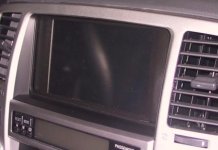
The computer boots into Windows XP. For now, I manually launch a front-end called MediaCar. It looks blue in the picture but it's actually a brushed silver color. Eventually, I will set it up to load the front-end directly so that I will never see the Windows Explorer desktop.
Notice the cool Toyota logo!
Notice the cool Toyota logo!
Attachments