

DavisTN
Member
I just replaced my timing belt, water pump, timing belt idlers, timing belt tensioner, & serpentine belt all for less than $300, so I figured I'd post to share the help that I found.
I did a lot of research on this before committing to doing it myself. It seems like the cost to have a dealer perform this service ranges from $1,200-$2,000, and if you have a reputable mechanic, probably $700-$1,400. I couldn't justify spending that type of money for something that doesn't add HP or increase performance-- other than keeping the engine from dying, which is kind of important, I guess.
Here are the two MOST useful links that I was able to find.
Text:
M3 PINK: Changing it up! Toyota Land Cruiser 2UZ-FE Timing Belt Change
Video:
How To Change The Timing Belt In A Toyota V8 2UZ-FE / 3UZ-FE Tundra Sequoia LS430 - YouTube
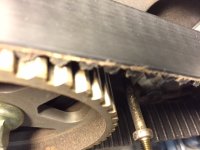
The text version from m3pink was my primary manual, and it is very well written. I did create a word doc (attached) since his format did not print cleanly. I also removed some of the commentary and made the document as step-by-step as possible so I could have a quick reference handy. **One step that was omitted from m3pink's instructions was the advancement of the crank/cams from TDC to the neutral timing position prior to removal/re-installation of the timing belt. This step was covered in the video. After noticing the discrepancy in information, I did further research and found that some that changed the belt without advancing to the neutral timing position later had problems. This is an important step to remember. Make sure everything lines up at TDC, then advance about 10 degrees clockwise to the neutral timing position. This is indicated with a circular knob(?) extending from the block at the crank and by a "T" behind the camshaft gears.
Other than that, the only things that I found missing from both sets of instructions was the location of the engine block drain plug and a method for keeping track of which bolts/nuts/plugs/hoses go where and in which order to re-install them.
Engine Block Coolant Drain Plug is located on the passenger side of the block, below the exhaust manifold, at about the 3rd cylinder exhaust port. Connect a piece of tubing to the nipple and loosen the plug using a 10mm socket. It was a PITA to do this with a hose that did not hold itself on the drain nipple. I strongly suggest draining the block, as the advantages are two-fold: less mess when you remove the old water pump & a full system replacement when you refill the cooling system. Also, it was not mentioned which coolant to use. Use a Toyota coolant. If you had red (LLC) and didn't do a full flush, it is recommended to use red (LLC) again. The LLC does not come pre-diluted, so you'll also need to pick up distilled water to mix 50/50. I did a full flush, so I opted to change to the pink fluid (SLLC) which comes pre-diluted and has a bit longer change interval.
For the classification of which bolts go where, I used a simple system that I have used on other jobs. I simply assigned each bolt/nut a number in the order that I removed them in ascending order and put that number (with a sharpie) on the bolt/nut & on the part near the hole/bolt that it came off/out of. This system makes re-assembly a breeze, because you just go backwards. If you go from bolt #20 straight to #10, chances are you're going to have to remove some of those bolts to be able to install bolts numbered 19-11. This worked well for me and I did not have to guess which bolts went where when putting everything back together. I also made sure to label the crank gear as to which side is supposed to face towards the block and which side faces out. I read several writeups where the OP got this wrong and had to tear everything back apart simply to flip it around. I also noted the direction of any hoses that I removed (i.e. to block, to radiator, etc.)
All in all, the job took me about 10 hours of actual labor time. I have a greater appreciation for the way Toyota's are engineered and the quality control they are able to maintain. After 130,000 miles, everything still looked new, was easy to remove (no broken/stripped bolts), and went back together without any "I'll make it fit" moments with a mallet.
Here's how I came up with my cost of $276.48:
1. Timing Belt Kit: Mitsuboshi (OEM) timing belt, idler, idler tensioner, OEM water pump (Denso?), gaskets & o-rings cost $144.46 with free shipping on eBay
2. Serpentine Belt (OEM) $18.55 shipped from eBay
3. New timing belt tensioner (OEM) $32.15 shipped from eBay
4. Toyota SLLC (pink) coolant; system calls for about 3.5 gallons. I ordered 4. $67 shipped from Amazon.com
5. Misc.- Blue loctite, RTV silicon, rubber gloves $14.32
6. Harmonic/Crank Pulley tool- free rental from AutoZone
Tools that I already had that made the job easier:
- lots of extensions in various lengths
- torque wrench (ft lbs & inch lbs)
- cheater bar
-a clean, open work space to lay out the parts that you take out and the parts that are going back in
I had all the necessary parts for almost a full year before deciding to do the job. I was dreading tearing my engine apart with the chance of not being able to put it back together correctly. I'm glad that I did it myself, and I hope that this helps anybody considering doing it yourself to save money or to get a better understanding of your engine. With the help of the video and other writeups, the task was pretty straight forward. Good luck!
Chris
I did a lot of research on this before committing to doing it myself. It seems like the cost to have a dealer perform this service ranges from $1,200-$2,000, and if you have a reputable mechanic, probably $700-$1,400. I couldn't justify spending that type of money for something that doesn't add HP or increase performance-- other than keeping the engine from dying, which is kind of important, I guess.
Here are the two MOST useful links that I was able to find.
Text:
M3 PINK: Changing it up! Toyota Land Cruiser 2UZ-FE Timing Belt Change
Video:
How To Change The Timing Belt In A Toyota V8 2UZ-FE / 3UZ-FE Tundra Sequoia LS430 - YouTube
The text version from m3pink was my primary manual, and it is very well written. I did create a word doc (attached) since his format did not print cleanly. I also removed some of the commentary and made the document as step-by-step as possible so I could have a quick reference handy. **One step that was omitted from m3pink's instructions was the advancement of the crank/cams from TDC to the neutral timing position prior to removal/re-installation of the timing belt. This step was covered in the video. After noticing the discrepancy in information, I did further research and found that some that changed the belt without advancing to the neutral timing position later had problems. This is an important step to remember. Make sure everything lines up at TDC, then advance about 10 degrees clockwise to the neutral timing position. This is indicated with a circular knob(?) extending from the block at the crank and by a "T" behind the camshaft gears.
Other than that, the only things that I found missing from both sets of instructions was the location of the engine block drain plug and a method for keeping track of which bolts/nuts/plugs/hoses go where and in which order to re-install them.
Engine Block Coolant Drain Plug is located on the passenger side of the block, below the exhaust manifold, at about the 3rd cylinder exhaust port. Connect a piece of tubing to the nipple and loosen the plug using a 10mm socket. It was a PITA to do this with a hose that did not hold itself on the drain nipple. I strongly suggest draining the block, as the advantages are two-fold: less mess when you remove the old water pump & a full system replacement when you refill the cooling system. Also, it was not mentioned which coolant to use. Use a Toyota coolant. If you had red (LLC) and didn't do a full flush, it is recommended to use red (LLC) again. The LLC does not come pre-diluted, so you'll also need to pick up distilled water to mix 50/50. I did a full flush, so I opted to change to the pink fluid (SLLC) which comes pre-diluted and has a bit longer change interval.
For the classification of which bolts go where, I used a simple system that I have used on other jobs. I simply assigned each bolt/nut a number in the order that I removed them in ascending order and put that number (with a sharpie) on the bolt/nut & on the part near the hole/bolt that it came off/out of. This system makes re-assembly a breeze, because you just go backwards. If you go from bolt #20 straight to #10, chances are you're going to have to remove some of those bolts to be able to install bolts numbered 19-11. This worked well for me and I did not have to guess which bolts went where when putting everything back together. I also made sure to label the crank gear as to which side is supposed to face towards the block and which side faces out. I read several writeups where the OP got this wrong and had to tear everything back apart simply to flip it around. I also noted the direction of any hoses that I removed (i.e. to block, to radiator, etc.)
All in all, the job took me about 10 hours of actual labor time. I have a greater appreciation for the way Toyota's are engineered and the quality control they are able to maintain. After 130,000 miles, everything still looked new, was easy to remove (no broken/stripped bolts), and went back together without any "I'll make it fit" moments with a mallet.
Here's how I came up with my cost of $276.48:
1. Timing Belt Kit: Mitsuboshi (OEM) timing belt, idler, idler tensioner, OEM water pump (Denso?), gaskets & o-rings cost $144.46 with free shipping on eBay
2. Serpentine Belt (OEM) $18.55 shipped from eBay
3. New timing belt tensioner (OEM) $32.15 shipped from eBay
4. Toyota SLLC (pink) coolant; system calls for about 3.5 gallons. I ordered 4. $67 shipped from Amazon.com
5. Misc.- Blue loctite, RTV silicon, rubber gloves $14.32
6. Harmonic/Crank Pulley tool- free rental from AutoZone
Tools that I already had that made the job easier:
- lots of extensions in various lengths
- torque wrench (ft lbs & inch lbs)
- cheater bar
-a clean, open work space to lay out the parts that you take out and the parts that are going back in
I had all the necessary parts for almost a full year before deciding to do the job. I was dreading tearing my engine apart with the chance of not being able to put it back together correctly. I'm glad that I did it myself, and I hope that this helps anybody considering doing it yourself to save money or to get a better understanding of your engine. With the help of the video and other writeups, the task was pretty straight forward. Good luck!
Chris




 and go buy parts to finish the job. She was pissed but I loved it. And I got the truck reassembled properly.


