

HokieRunner
New member
This is just the initial version while it's somewhat fresh in my head. Some editing to come in the next week or two when we do another swap on Zak's truck. [MENTION=55855]zopperman[/MENTION]
----------------------------------------------
DIY 4th Gen Power Steering Rack Replacement How to:
NOTE: This is just the writeup. I'll add pics in the coming week or two. There are some very good youtube videos on this swap. After installing mine this weekend, I felt like the below steps were the most efficient order.
The following DIY is a step by step guide to replacing your power steering rack for a 2003-2009 4Runner. There may be minor variations between the V6 and V8 models in terms of obstructions underneath (ie. the oil filter on the V8 will need to be removed whereas I believe the V6 oil filter is in a different location and probably wouldn't need to be touched). Most other steps should be identical between models.
As always, I'm not liable for anything bad that happens if you follow this DIY and you follow it at your own risk blah blah blah....
1. Why replace the steering rack? This will vary from vehicle to vehicle but after 140k miles, my rack ends each had a minor leak, the bushings were deteriorated and the steering had some play in it. Last year I replaced the inner and outer tie rods and flushed the power steering about a month ago so the problems were definitely stemming from the rack.
How to test rack bushings: With the truck running and in park, have someone turn the wheel lock to lock while you watch the steering rack mounting points. The rack should have little to no deflection - if the rack is moving on the mounting points, chances are the bushings are shot.
2. Choices for replacement: Your options come down to OEM new (cheapest price I found was around $1000), new aftermarket (generally very poor quality), and remanufactured. I did some research and after emailing back and forth with Steve at CVJ axles, bought a remanufactured OEM rack from CVJ axles in Colorado. Cost was just over $300. I will be doing a separate review on the CVJ rack but in a nutshell, they were priced competitively and do a much higher quality rebuild than most reman companies. The fact that I have been running reman'd OEM CV axles from CVJ for the past year with no issues also made the choice easier.
3. Necessary tools:
assortment of wrenches/ratchets
air hammer/chisel or a hammer and long punch (12"+)
jack/jackstands
plumbers wrench
tie rod joint seperator
flare socket (11/16" or metric equivalent)
pliers
impact wrench or breaker bar
crescent wrenches
4. Replacement Procedure:
Jack up the truck and get it safely on jack stands. Remove the wheels. If you have a lift, you may want to unscrew the speed sensor bracket from the UCA so that you don't risk tweaking the wire. Remove the front skid plate.
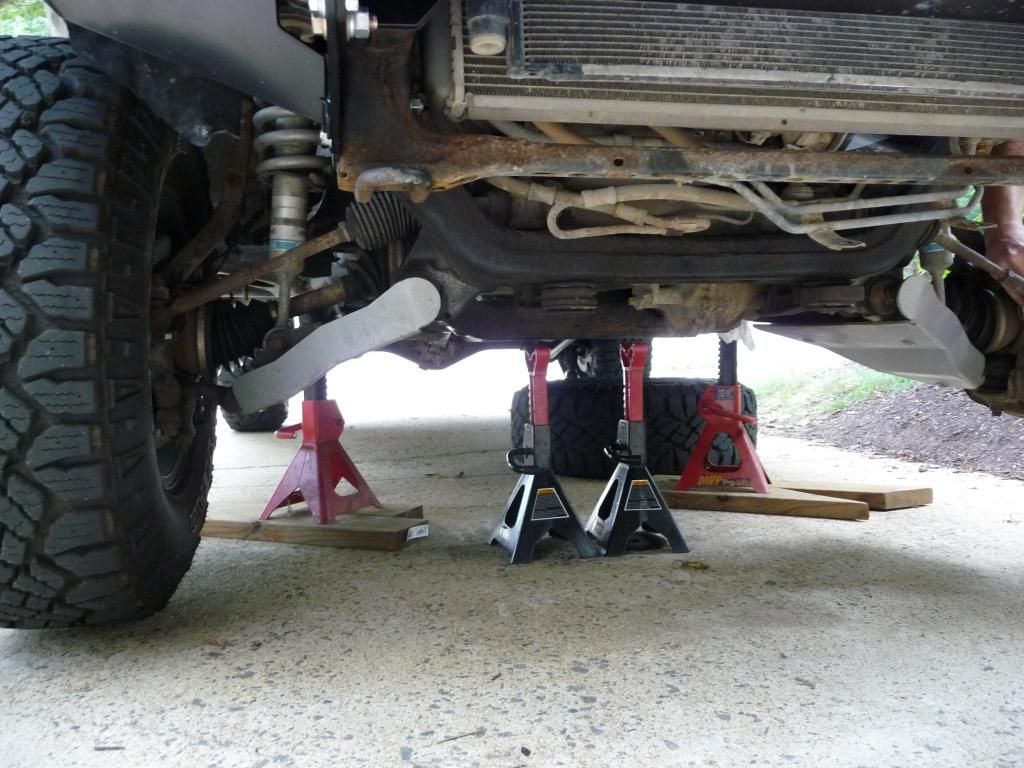
Remove the cotter pin from the outer tie rod on each side and remove the castle nuts. Using the tie rod separator, pop the outer tie rods off the steering knuckle. Or use the BFH method which some folks prefer.
Castle Nut is 19MM.
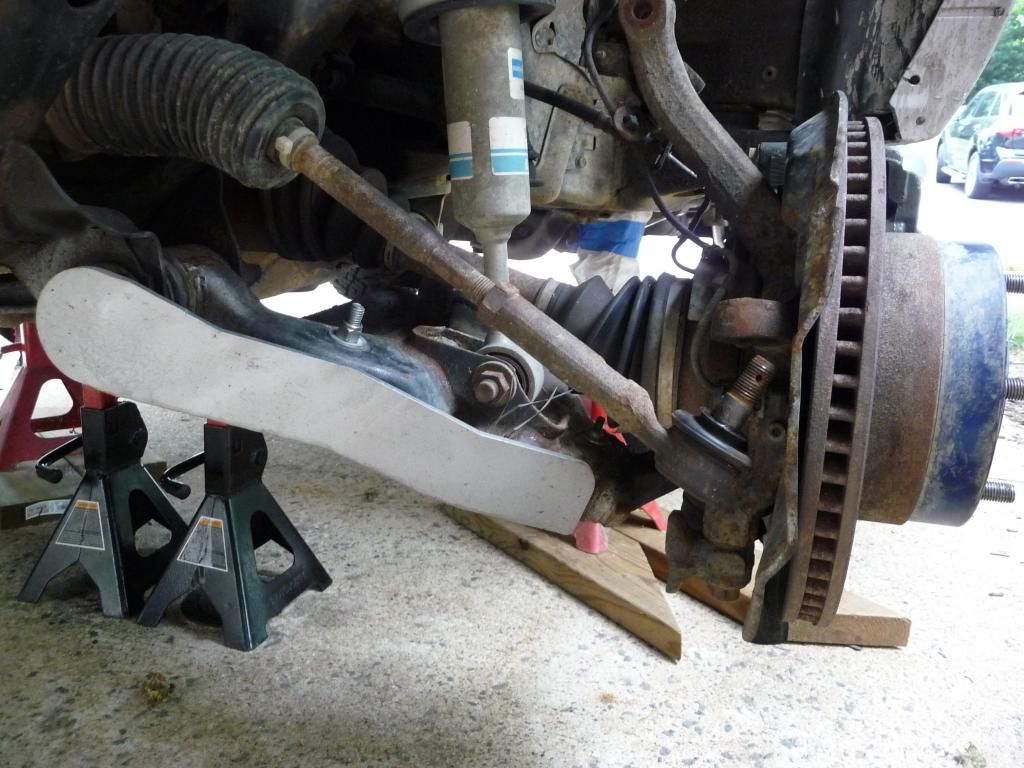
NOTE!! When replacing the rack is it important that both the lower steering shaft (where it connects to the rack) and the tie rods are centered and put back as close to their original position as possible. This will ensure that your steering wheel is correctly orientated and the alignment (toe) is very close to proper spec. Before you undo the outer tie rod from the inner tie rod, count the threads on each side and write it down. Regardless of how well you align everything, you will need an alignment after the new rack is in.
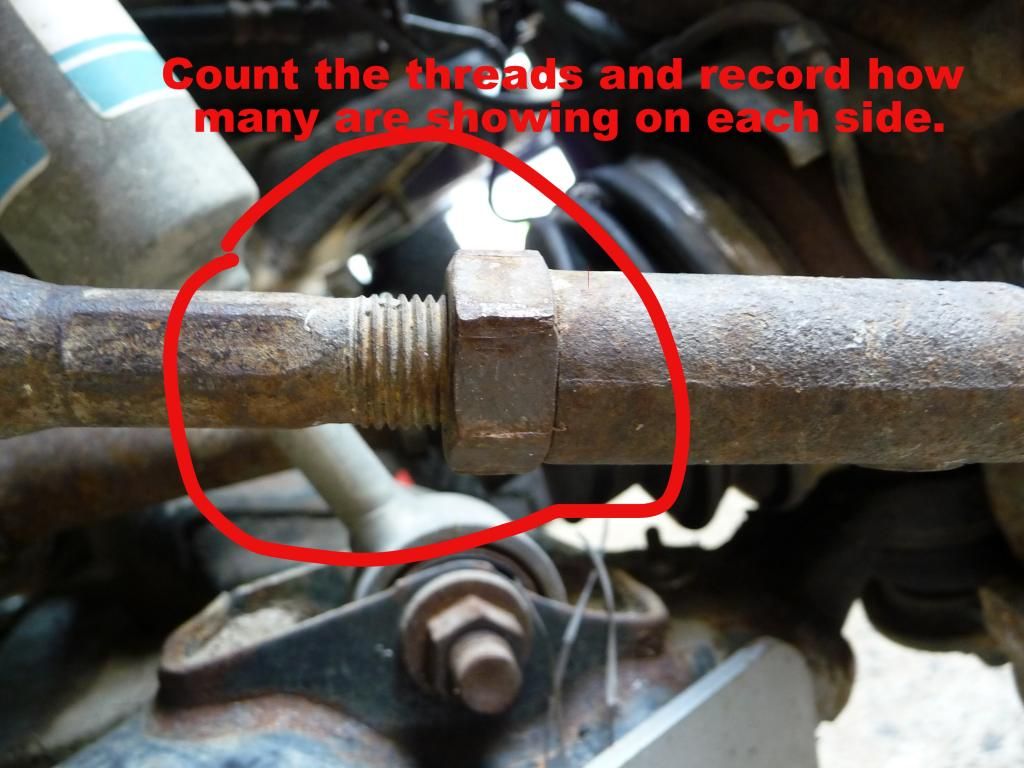
Now that you've written down the thread count for each side, you can unscrew the outer tie rods. Loosen the lock nut that's on the threaded portion of the inner tie rod and unscrew the outer tie rod. If you're not putting new ones on, mark right and left so they go back on the proper sides.
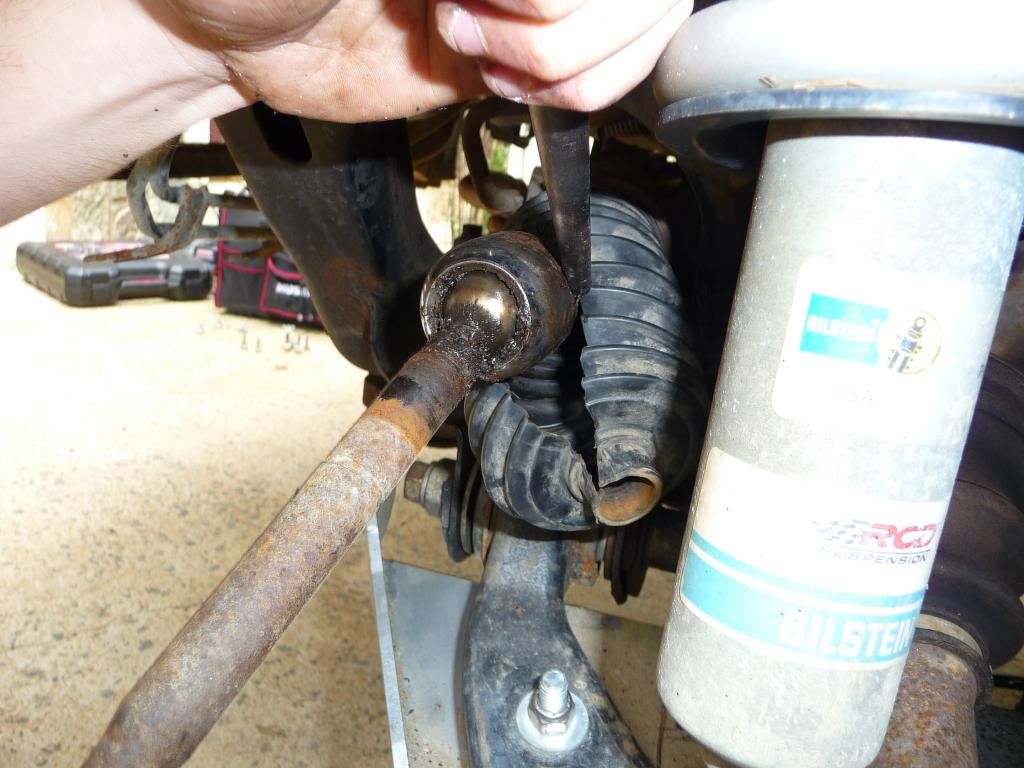
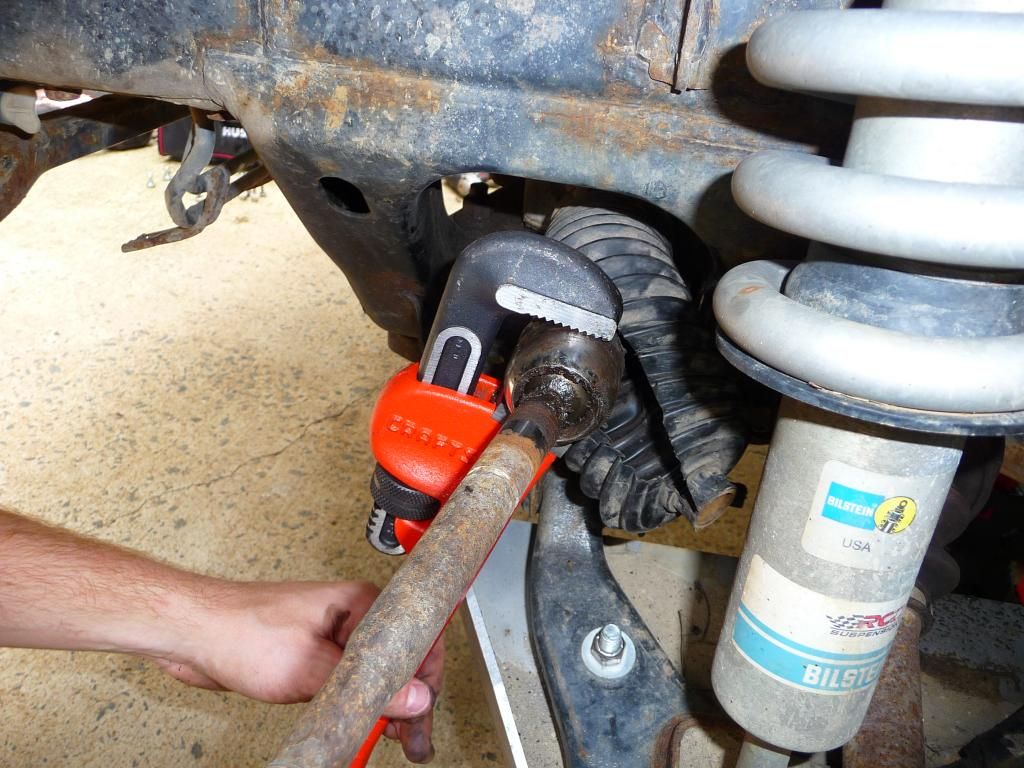
Now it's time to remove the DRIVER SIDE inner tie rod. First remove the boot by breaking the inner boot clip and sliding off the small clip with pliers. To make the process easier, you can crank the wheel all the way to the left. The flattened down tabs on the inner tie rod washer will need to be hammered flat with a screwdriver or the punch. Now use the plumbers wrench and loosen the tie rod. **Through the course of the swap, I figured out that you can actually leave the passenger side inner tie rod on. This will save time on both removal and install as most new/reman'd racks come with new inners.
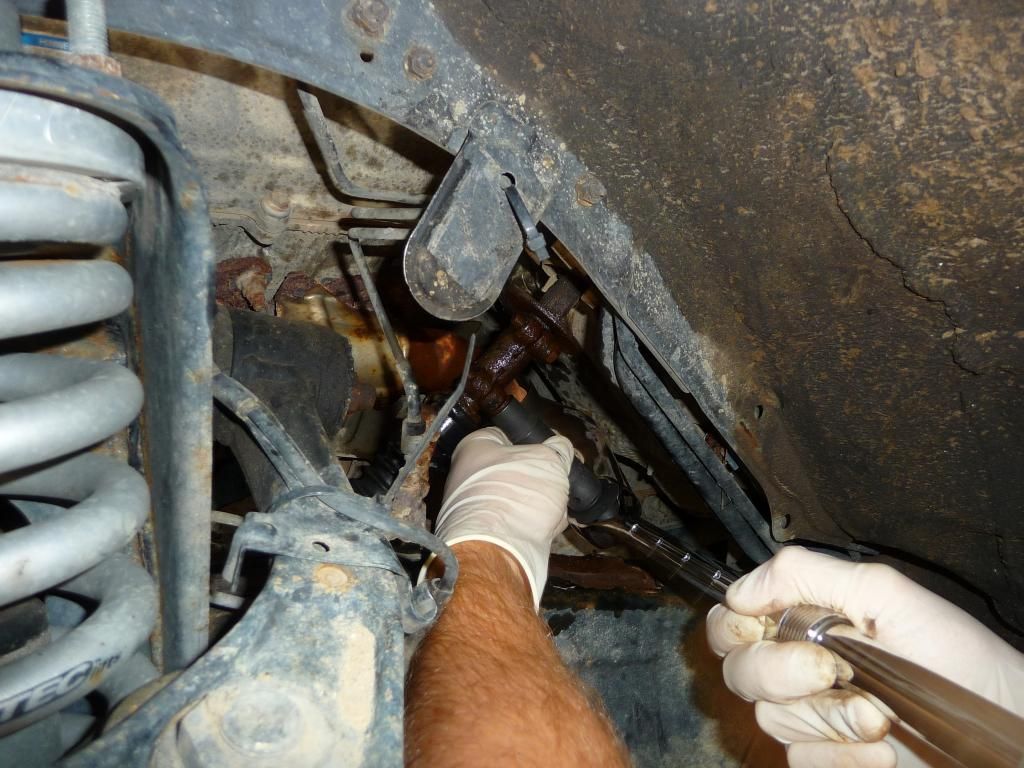
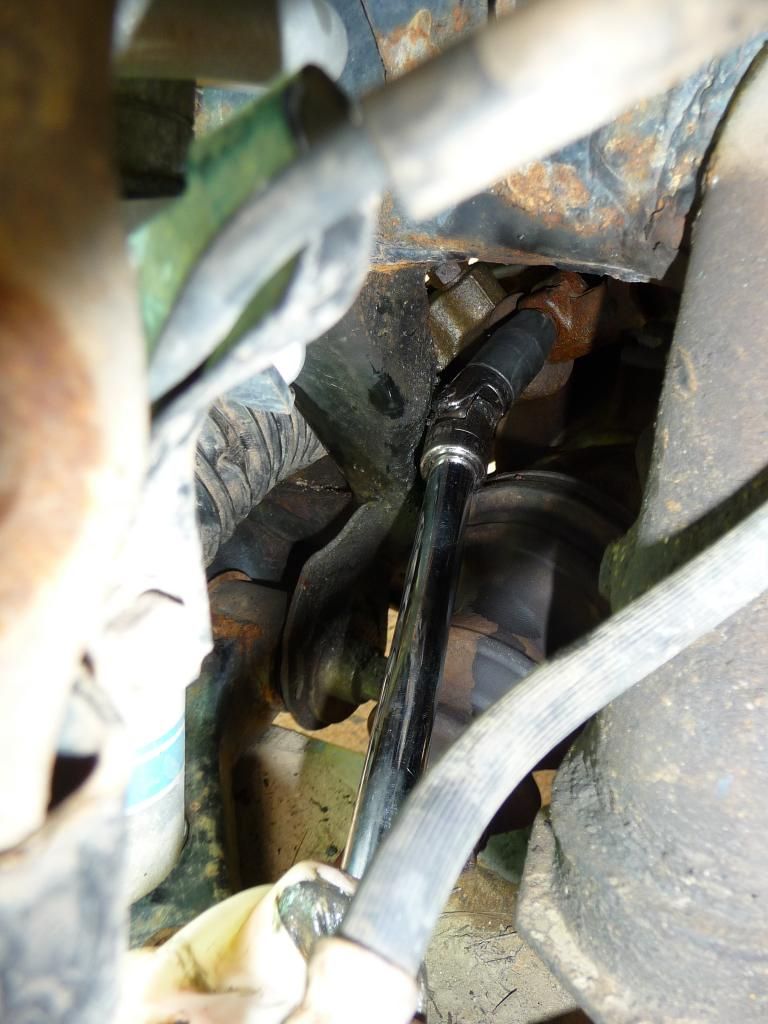
Next up is the lower steering shaft disconnect. If you remove the Driverside inner fender splashshield, you'll see a collar with two bolts that connects the steering shaft to the lower steering shaft. Remove these two bolts. The 3rd and lower bolt will need to be reached with a u-joint, socket, and extension. You can rotate the steering wheel to get the proper orientation. Loosen and remove that bolt.
IMPORTANT: The next step will have you removing the lower steering shaft. NOW is the time to center the steering wheel and lock it in place so it doesn't turn. Tie it with rope, have someone hold it, etc.
Grab the air hammer or the long punch and a hammer. Whack at the lower steering shaft near the u-joint to drive it towards the rear of the truck and off the steering rack splined gear.
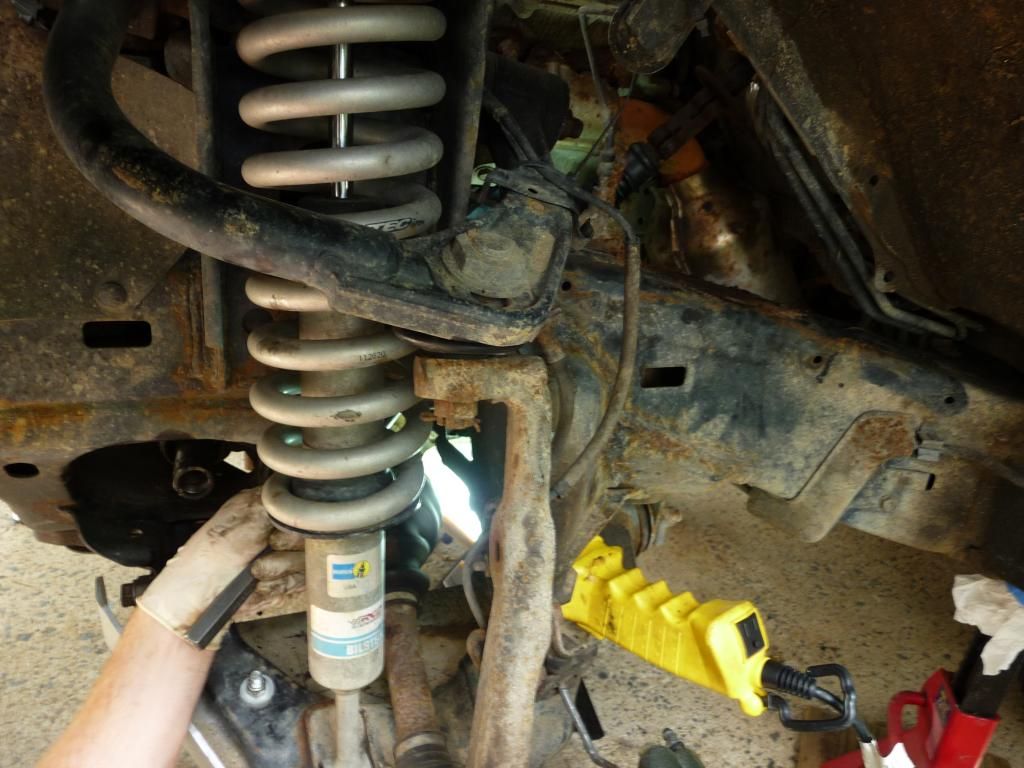
Next up are the high pressure line and low pressure hose. Get your drain pan ready! Using the flare wrench, loosen the high pressure fitting. PB Blast and some extra muscle should do the trick. Now loosen the 2 bolts holding the high pressure hose run to the front crossmember and rack. Let the line drain and move it out of the way. **NOTE: depending where you live, take extra care with these lines as they're very expensive. If they're rusty, don't try to force them too much or you'll be buying new lines from the dealer!
The lower pressure hose just has a hose clamp. Slide it off and the hose as well. The hose slides over a fitting that will need to be unscrewed. Now is a good time to remove it as it will afford extra clearance for the rack removal. Again, let the low pressure hose drain.
You're getting close! All that's left are 4 bolts. Grab the breaker bar or impact and undo the 2 bolts holding the rack in place.
Grab 2 jacks stands and place under the front diff housing. You'll need to drop the two stabilizer arms for the front diff. Undo the two bolts and let the housings hang.
FOR V8 owners. You will need to remove the oil filter. Do this now.
Remove the rack. If there are children in the viscinity, they may need ear muffs. With some choice words and a bit of sweat, yank out the old rack.
Now stand over your kill and enjoy a beer
:thumb:
----------------------------------------------
DIY 4th Gen Power Steering Rack Replacement How to:
NOTE: This is just the writeup. I'll add pics in the coming week or two. There are some very good youtube videos on this swap. After installing mine this weekend, I felt like the below steps were the most efficient order.
The following DIY is a step by step guide to replacing your power steering rack for a 2003-2009 4Runner. There may be minor variations between the V6 and V8 models in terms of obstructions underneath (ie. the oil filter on the V8 will need to be removed whereas I believe the V6 oil filter is in a different location and probably wouldn't need to be touched). Most other steps should be identical between models.
As always, I'm not liable for anything bad that happens if you follow this DIY and you follow it at your own risk blah blah blah....
1. Why replace the steering rack? This will vary from vehicle to vehicle but after 140k miles, my rack ends each had a minor leak, the bushings were deteriorated and the steering had some play in it. Last year I replaced the inner and outer tie rods and flushed the power steering about a month ago so the problems were definitely stemming from the rack.
How to test rack bushings: With the truck running and in park, have someone turn the wheel lock to lock while you watch the steering rack mounting points. The rack should have little to no deflection - if the rack is moving on the mounting points, chances are the bushings are shot.
2. Choices for replacement: Your options come down to OEM new (cheapest price I found was around $1000), new aftermarket (generally very poor quality), and remanufactured. I did some research and after emailing back and forth with Steve at CVJ axles, bought a remanufactured OEM rack from CVJ axles in Colorado. Cost was just over $300. I will be doing a separate review on the CVJ rack but in a nutshell, they were priced competitively and do a much higher quality rebuild than most reman companies. The fact that I have been running reman'd OEM CV axles from CVJ for the past year with no issues also made the choice easier.
3. Necessary tools:
assortment of wrenches/ratchets
air hammer/chisel or a hammer and long punch (12"+)
jack/jackstands
plumbers wrench
tie rod joint seperator
flare socket (11/16" or metric equivalent)
pliers
impact wrench or breaker bar
crescent wrenches
4. Replacement Procedure:
Jack up the truck and get it safely on jack stands. Remove the wheels. If you have a lift, you may want to unscrew the speed sensor bracket from the UCA so that you don't risk tweaking the wire. Remove the front skid plate.

Remove the cotter pin from the outer tie rod on each side and remove the castle nuts. Using the tie rod separator, pop the outer tie rods off the steering knuckle. Or use the BFH method which some folks prefer.
Castle Nut is 19MM.

NOTE!! When replacing the rack is it important that both the lower steering shaft (where it connects to the rack) and the tie rods are centered and put back as close to their original position as possible. This will ensure that your steering wheel is correctly orientated and the alignment (toe) is very close to proper spec. Before you undo the outer tie rod from the inner tie rod, count the threads on each side and write it down. Regardless of how well you align everything, you will need an alignment after the new rack is in.

Now that you've written down the thread count for each side, you can unscrew the outer tie rods. Loosen the lock nut that's on the threaded portion of the inner tie rod and unscrew the outer tie rod. If you're not putting new ones on, mark right and left so they go back on the proper sides.
Now it's time to remove the DRIVER SIDE inner tie rod. First remove the boot by breaking the inner boot clip and sliding off the small clip with pliers. To make the process easier, you can crank the wheel all the way to the left. The flattened down tabs on the inner tie rod washer will need to be hammered flat with a screwdriver or the punch. Now use the plumbers wrench and loosen the tie rod. **Through the course of the swap, I figured out that you can actually leave the passenger side inner tie rod on. This will save time on both removal and install as most new/reman'd racks come with new inners.


Next up is the lower steering shaft disconnect. If you remove the Driverside inner fender splashshield, you'll see a collar with two bolts that connects the steering shaft to the lower steering shaft. Remove these two bolts. The 3rd and lower bolt will need to be reached with a u-joint, socket, and extension. You can rotate the steering wheel to get the proper orientation. Loosen and remove that bolt.


IMPORTANT: The next step will have you removing the lower steering shaft. NOW is the time to center the steering wheel and lock it in place so it doesn't turn. Tie it with rope, have someone hold it, etc.
Grab the air hammer or the long punch and a hammer. Whack at the lower steering shaft near the u-joint to drive it towards the rear of the truck and off the steering rack splined gear.

Next up are the high pressure line and low pressure hose. Get your drain pan ready! Using the flare wrench, loosen the high pressure fitting. PB Blast and some extra muscle should do the trick. Now loosen the 2 bolts holding the high pressure hose run to the front crossmember and rack. Let the line drain and move it out of the way. **NOTE: depending where you live, take extra care with these lines as they're very expensive. If they're rusty, don't try to force them too much or you'll be buying new lines from the dealer!
The lower pressure hose just has a hose clamp. Slide it off and the hose as well. The hose slides over a fitting that will need to be unscrewed. Now is a good time to remove it as it will afford extra clearance for the rack removal. Again, let the low pressure hose drain.
You're getting close! All that's left are 4 bolts. Grab the breaker bar or impact and undo the 2 bolts holding the rack in place.
Grab 2 jacks stands and place under the front diff housing. You'll need to drop the two stabilizer arms for the front diff. Undo the two bolts and let the housings hang.
FOR V8 owners. You will need to remove the oil filter. Do this now.
Remove the rack. If there are children in the viscinity, they may need ear muffs. With some choice words and a bit of sweat, yank out the old rack.
Now stand over your kill and enjoy a beer
:thumb:
Last edited:


