MarcusAurelius
New member
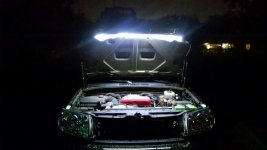
This afternoon amid sporadic rainfall, Bob J and I decided to install our newly acquired Anti-Dark Underhood LED lights on our 4th Gen T4R's purchased through a group buy found here: http://www.toyota-4runner.org/sale-...d-led-lighting-*group-buy*-spring-2015-a.html
I would like to illustrate our process of installation in order to save time for many members that plan to install on their 4th gens.
We used the bolt directly behind the headlight mounting bracket.
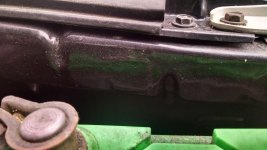
In order to mount the bolt included in the kit, you will need to drill the hole and re-tap with a 5/16-18 tap.
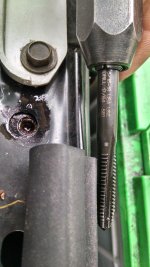
If you notice from the above picture, there is no access to the underside of this bolt, so an access hole will be needed to drilled on the side with a step drill bit. File down the hole of all sharp edges.
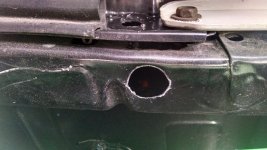
In order to create an easier connection, we decided to bend the bottom electrical connection 90 degrees so that it could more easily be snapped in from the side. Use a thin set of needle nose pliars to make the connection through the drilled hole.
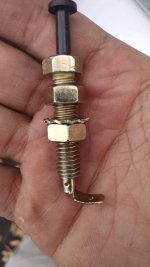
When installing the bolt, I recommend adding a 3/8 washer underneath the lock washer so it does not pull through the hole completely. I did not use the second nut that was included for the underside (was not needed in this application). Also, I highly recommend throwing on a 7/8 rubber grommet so that the wire does not come in contact with the drilled edges. It fits nicely and prevents any damage to the wire.
Make sure to orient the height of the bolt so that the top of the switch is slightly higher above the side panel of your car (to insure in shuts off when hood is closed)
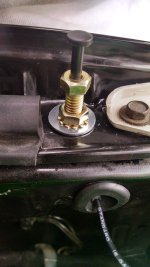
Next, feed the LED string exactly where you want it. Feed it along the inner frame of the engine, on the right of the hood lift and up the side of the hood.
Use acetone or brake cleaner to thoroughly clean the inner frame of the engine, along the flat hood hinge and on the underside of the inner hood. You should clean the area on the top of the hood behind the rubber water seal. I was careful not to put the wire anywhere that there was a rubber seal to keep the connection between the hood and the seal.
Note: On a black 4runner such as mine, acetone will eventually strip the black paint on the inner hood/engine frame. Use lightly to remove grime, but not aggressively enough to remove paint.
Once you are ready to install the lighting, it is easiest to have another person hold the opposite end of the LED and keep it tight. Orient the adhesive and stick the far end first, and press as you go so you get a nice straight line.
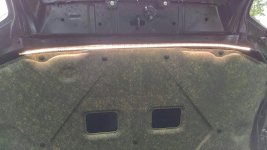
Follow the wires along and be sure to zip tie using the included adhesive patches all areas along the path, making sure to keep the wires away from any hinged points that could pinch the wires. Here is a layout of where I attached mine. Last step is to close the hood and confirm from underneath that the LED's shut off properly.
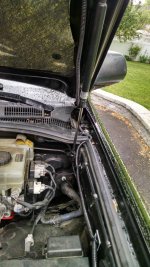
Here are all the tools needed to complete this project:
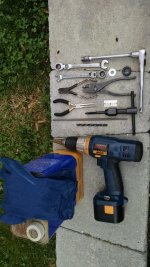
Including: Step Drill
1/4 Drill
Round File
5/16X18 Tap
Needle Nose Pliars / Regular Pliars
3/8 Washer
7/8 Grommet
10mm Socket
Razor Blade
Acetone & Rag
[MENTION=89165]Bob J[/MENTION]
I would like to illustrate our process of installation in order to save time for many members that plan to install on their 4th gens.
We used the bolt directly behind the headlight mounting bracket.
In order to mount the bolt included in the kit, you will need to drill the hole and re-tap with a 5/16-18 tap.
If you notice from the above picture, there is no access to the underside of this bolt, so an access hole will be needed to drilled on the side with a step drill bit. File down the hole of all sharp edges.
In order to create an easier connection, we decided to bend the bottom electrical connection 90 degrees so that it could more easily be snapped in from the side. Use a thin set of needle nose pliars to make the connection through the drilled hole.
When installing the bolt, I recommend adding a 3/8 washer underneath the lock washer so it does not pull through the hole completely. I did not use the second nut that was included for the underside (was not needed in this application). Also, I highly recommend throwing on a 7/8 rubber grommet so that the wire does not come in contact with the drilled edges. It fits nicely and prevents any damage to the wire.
Make sure to orient the height of the bolt so that the top of the switch is slightly higher above the side panel of your car (to insure in shuts off when hood is closed)
Next, feed the LED string exactly where you want it. Feed it along the inner frame of the engine, on the right of the hood lift and up the side of the hood.
Use acetone or brake cleaner to thoroughly clean the inner frame of the engine, along the flat hood hinge and on the underside of the inner hood. You should clean the area on the top of the hood behind the rubber water seal. I was careful not to put the wire anywhere that there was a rubber seal to keep the connection between the hood and the seal.
Note: On a black 4runner such as mine, acetone will eventually strip the black paint on the inner hood/engine frame. Use lightly to remove grime, but not aggressively enough to remove paint.
Once you are ready to install the lighting, it is easiest to have another person hold the opposite end of the LED and keep it tight. Orient the adhesive and stick the far end first, and press as you go so you get a nice straight line.
Follow the wires along and be sure to zip tie using the included adhesive patches all areas along the path, making sure to keep the wires away from any hinged points that could pinch the wires. Here is a layout of where I attached mine. Last step is to close the hood and confirm from underneath that the LED's shut off properly.
Here are all the tools needed to complete this project:
Including: Step Drill
1/4 Drill
Round File
5/16X18 Tap
Needle Nose Pliars / Regular Pliars
3/8 Washer
7/8 Grommet
10mm Socket
Razor Blade
Acetone & Rag
[MENTION=89165]Bob J[/MENTION]
Attachments
-
 2015 Cell 011.jpg136.4 KB · Views: 1,054
 -
 2015 Cell 019.jpg138.1 KB · Views: 1,027
 -
 2015 Cell 021.jpg137 KB · Views: 1,023
 -
 2015 Cell 013.jpg134.2 KB · Views: 989
 -
 2015 Cell 024.jpg135.3 KB · Views: 1,086
 -
 IMG_20150531_140910533.jpg136.2 KB · Views: 1,031
 -
 IMG_20150531_140920146_HDR.jpg144.6 KB · Views: 1,134
 -
 2015 Cell 026.jpg140.2 KB · Views: 1,026
Last edited: