4th Gen Camping/Storage System - DIY-

Any cabinet building tips for noobs? Tools required? Links to cabinet building references? I’m thinking about tackling this setup myself but not too confident in my wood working skills. Thanks for the plans by the way! I’m putting donation in my costs spreadsheet for the build.
I keep debating on doing this but damn those slides are expensive. Maybe with my tax return. Truthfully you need a circular saw and a drill. A table saw may make it easier or harder depending on your skill.

Sent from my SM-G950U1 using Tapatalk
 
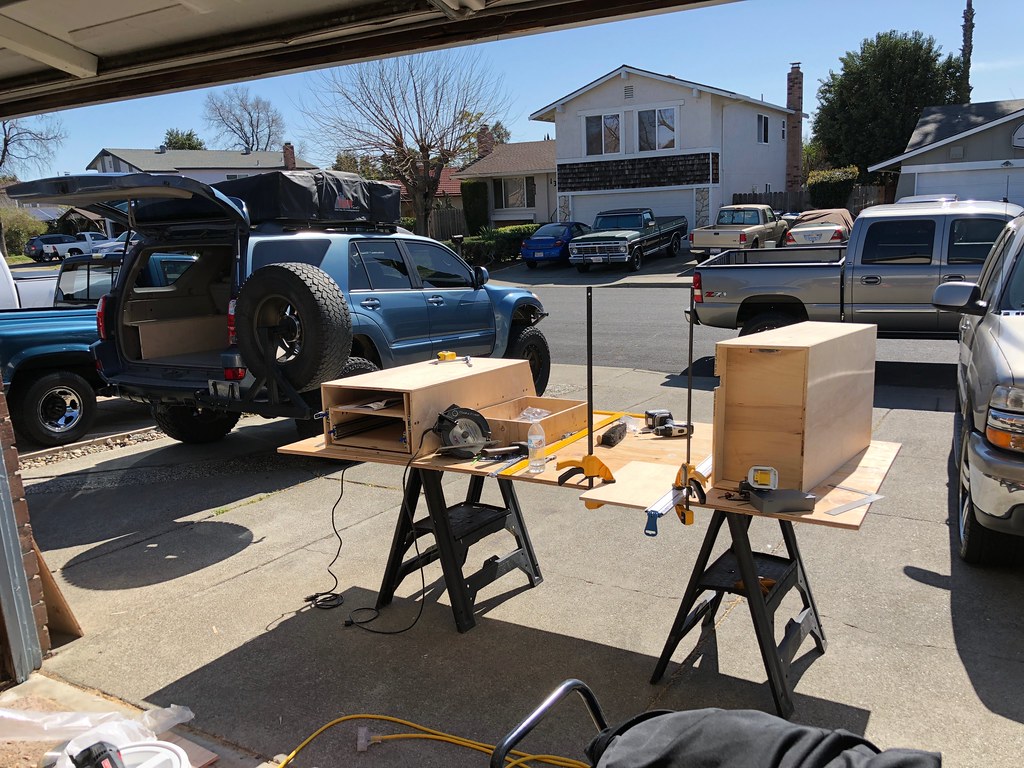
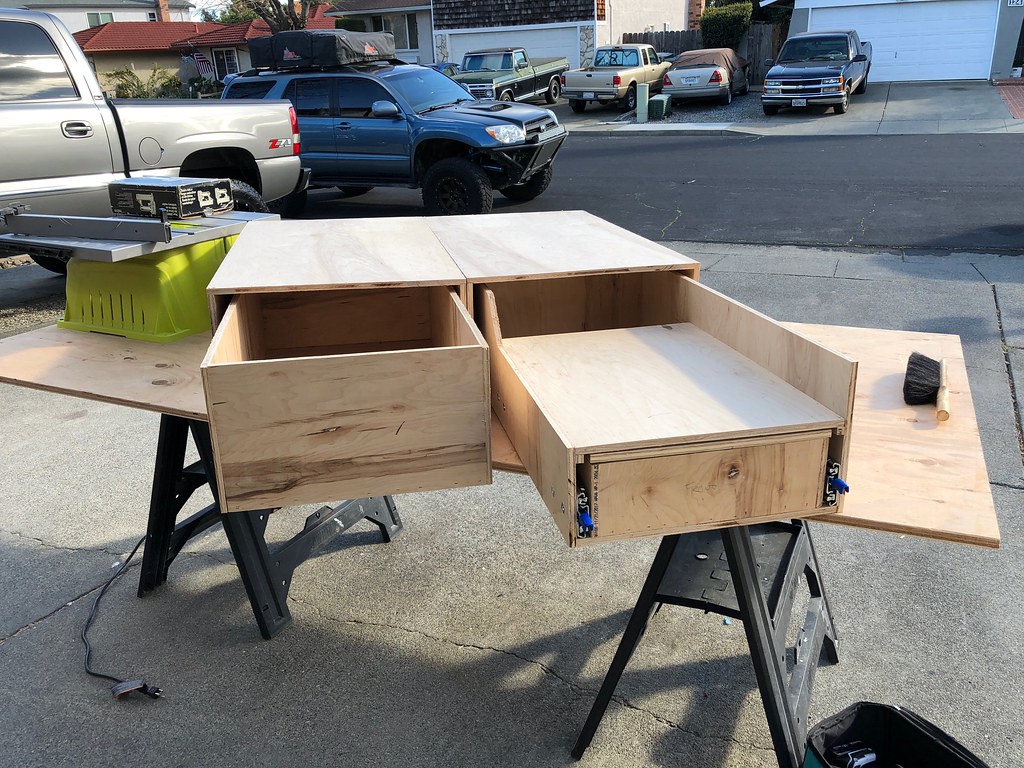
For these plans I ended up using table saw, circular saw, jigsaw, router, and air nailer. Overall the plans were spot on except one missing dado on the prints but easily found when assembling. I got the drawer slides form ORR and ORR they are HEAVY DUTY. I haven't figured out the mounting yet or why the plans have 1/4"-20 and #10-32 threaded inserts. I'll post up some pics when I get them a little closer to finished. I'm only two nights of work in and so far have raw assembled boxes.
 
For these plans I ended up using table saw, circular saw, jigsaw, router, and air nailer. Overall the plans were spot on except one missing dado on the prints but easily found when assembling. I got the drawer slides form ORR and ORR they are HEAVY DUTY. I haven't figured out the mounting yet or why the plans have 1/4"-20 and #10-32 threaded inserts. I'll post up some pics when I get them a little closer to finished. I'm only two nights of work in and so far have raw assembled boxes.

i ran into sizing issues with the metric measurements from solid works. Otherwise so far its worked well. Mine are about done and thats with me changing some things to make it my own and change some finishes around.
 
For these plans I ended up using table saw, circular saw, jigsaw, router, and air nailer. Overall the plans were spot on except one missing dado on the prints but easily found when assembling. I got the drawer slides form ORR and ORR they are HEAVY DUTY. I haven't figured out the mounting yet or why the plans have 1/4"-20 and #10-32 threaded inserts. I'll post up some pics when I get them a little closer to finished. I'm only two nights of work in and so far have raw assembled boxes.

The difference sizes are for the connecting of the drawers to themselves versus the sliders to the drawers. You can use whatever sizes you want but thats just want tried to optimize with.

Would love to see what you made! Any pics?

Also, where is the missing dado? would love to know.

Yes, the sliders are HEAVY DUTY indeed. build it right the first time and itll last through many vehicles!

If your on instagram send me a message so I can keep up with your build. :hello:
 
The difference sizes are for the connecting of the drawers to themselves versus the sliders to the drawers. You can use whatever sizes you want but thats just want tried to optimize with.

Would love to see what you made! Any pics?

Also, where is the missing dado? would love to know.

Yes, the sliders are HEAVY DUTY indeed. build it right the first time and itll last through many vehicles!

If your on instagram send me a message so I can keep up with your build. :hello:

I tried to find where the missing dado was but now I can't recall looking through the prints. They appear to make sense, but I know I dado'ed 13 pieces then when assembling had to dado one more. Maybe I just screwed up an edge, who knows! It's an Easter egg hunt.

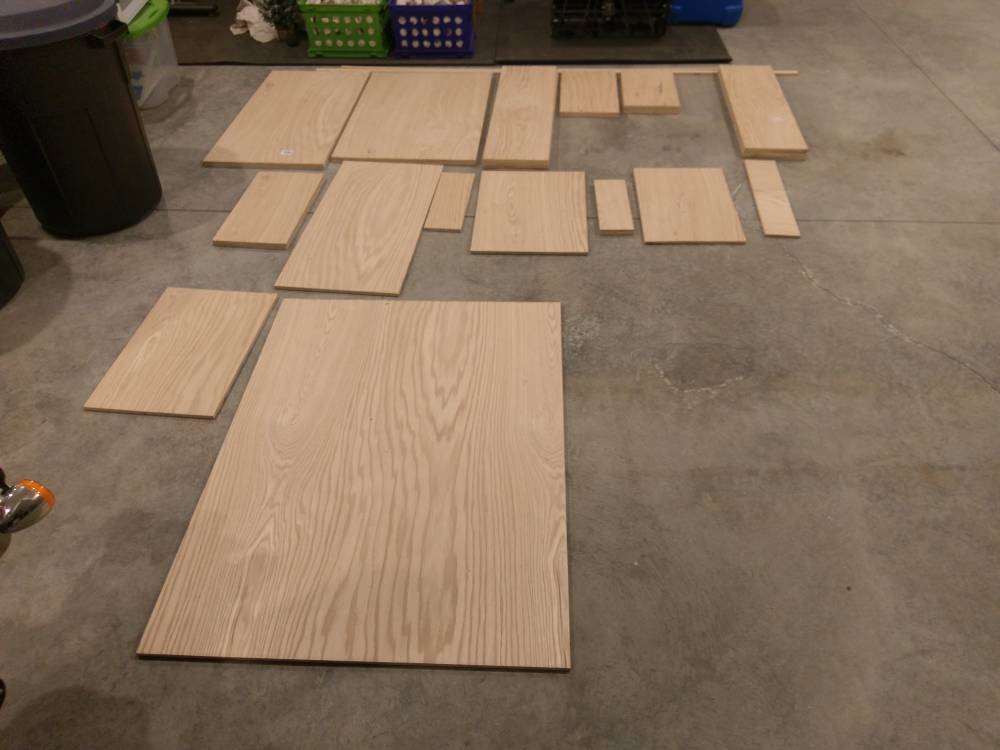
I also put together a cut list that I found very helpful and used workshopbuddy.com to optimize the panel cuts (although it doesn't use decimals so just multiply everything by 1000). Without the left and right beauty panels and also including a 36x48 piece for my front extension/sleeping platform I was able to fit it all on 3 full 4x8 sheets.

I got my slides from ORR & ORR so the hole patterns don't line up with the prints but that's easy enough to lay out using the slides as a template.

I'll post some finished pics on instagram [MENTION=117708]blackoutt[/MENTION]_adv when they're done but that'll probably be a couple more weeks to finish hardware dry assembly, sand and finish, then final assembly. So far I'm very happy with the size and light weight (before the slides!). These should last a very long time.

8a4bc1c87186323c0050106196cef74e.jpg
f34db4754f85d6eefcfb3ac2885819bd.jpg
a080a97400e2eebfc0dcd0a2f7616643.jpg
 
Last edited:

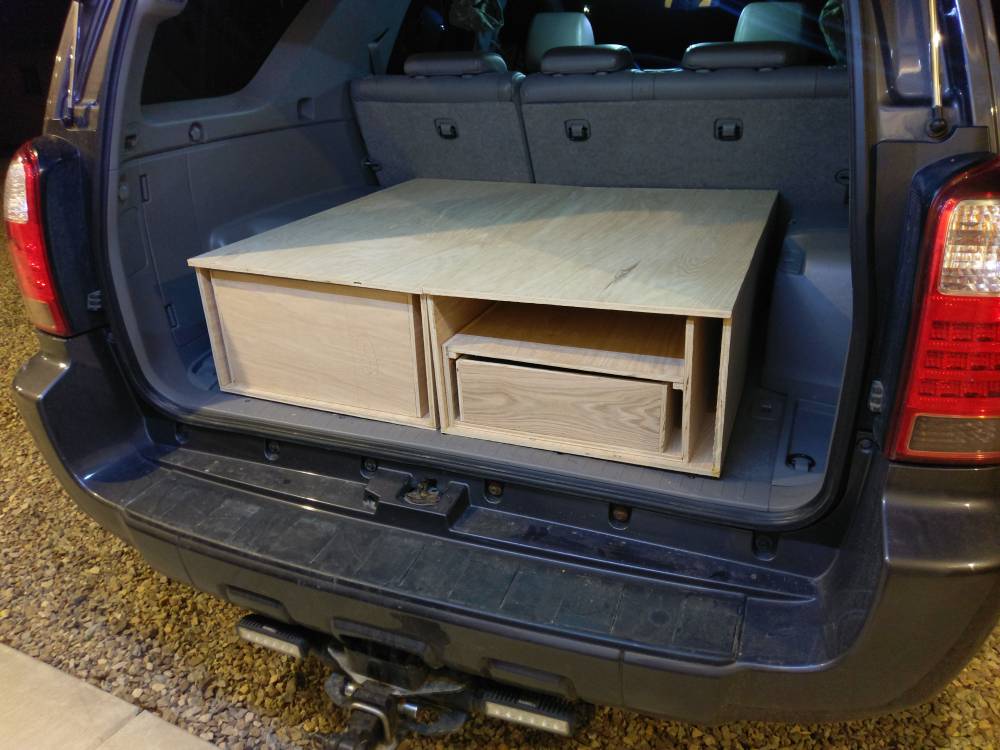
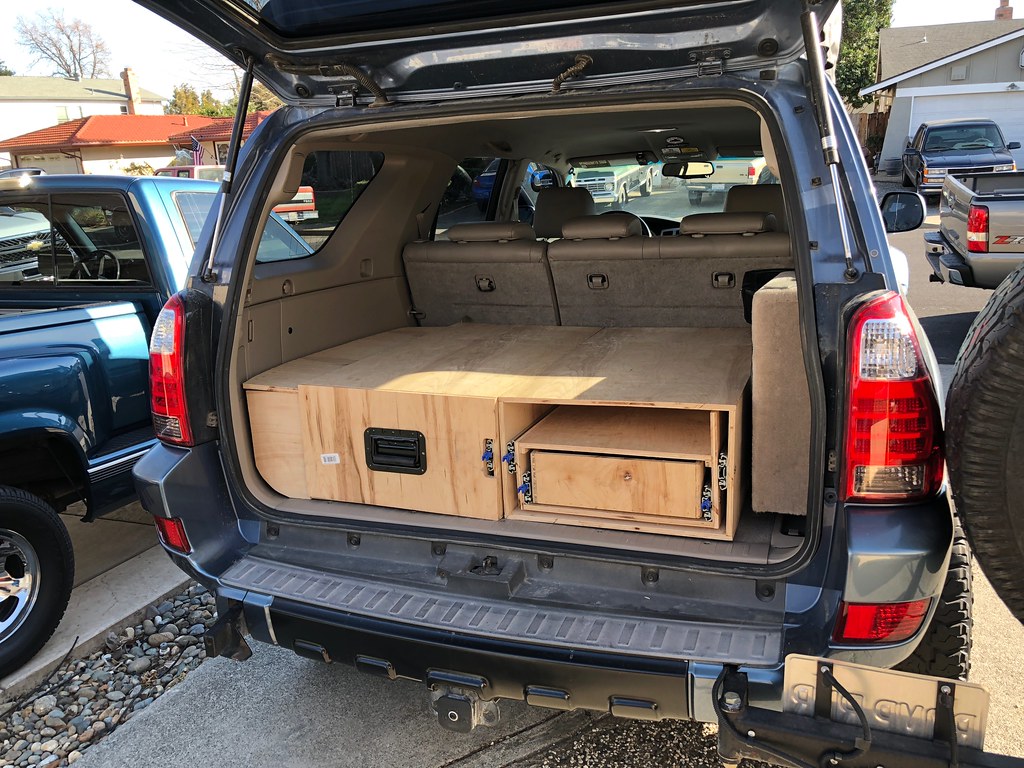
Yours leans into eachother like mine does. I plan to add a sheet of 1/2" under it then secure them to eachother so they dont eventually bow again.

Looks good! The slides are 90% of the drawer weight.

I also found it easier to draw the holes of the slides instead of measuring as some of the measurements didnt line up when i first tried it for the holes to make.
 
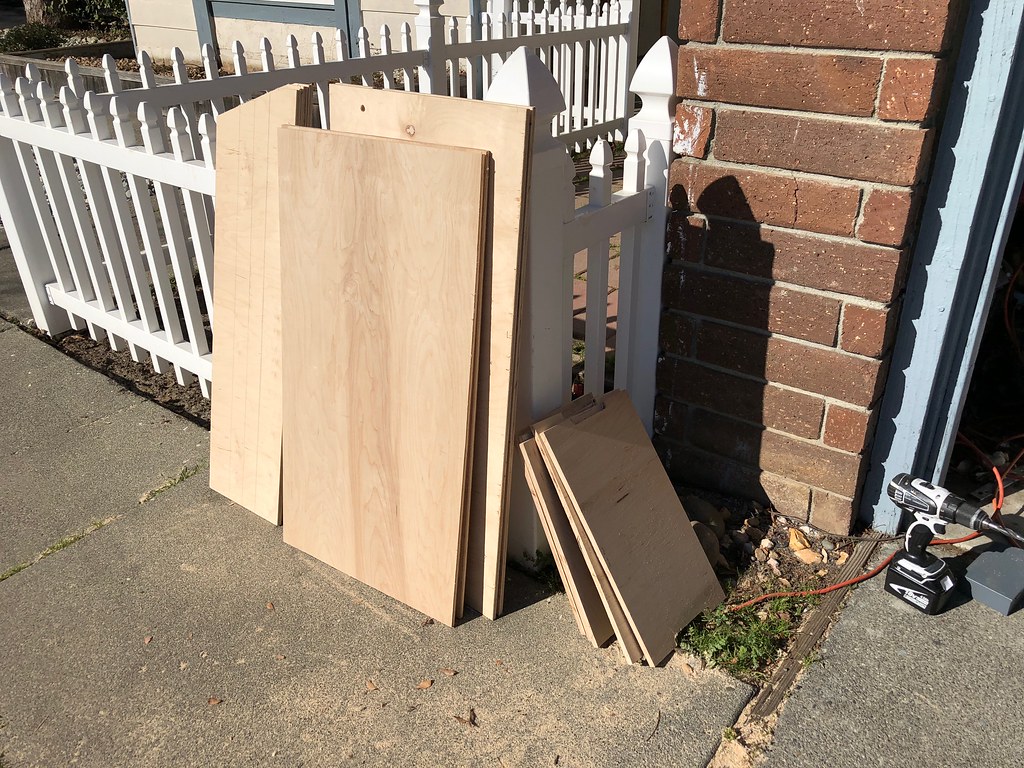
i guess ill add my pics to the thread too

25082968897_c43d8681ec_b.jpg


26667872588_0861884e26_b.jpg


40368964351_a02a667700_b.jpg


38728984230_00a8f7ecd4_b.jpg


With this rainstorm this weekend im not sure ill be able to get a chance to work on them but hopefully.
 
Yours leans into eachother like mine does. I plan to add a sheet of 1/2" under it then secure them to eachother so they dont eventually bow again.

Looks good! The slides are 90% of the drawer weight.

I also found it easier to draw the holes of the slides instead of measuring as some of the measurements didnt line up when i first tried it for the holes to make.

I accounted this to the floor not being flat under the where I removed the double decker do-dad. I plan on making a shim under just the corners near the rear seat where the two boxes meet to level them out and support the sag. I'll also be using part of that flat area on the rear of the boxes to support sleeping platform legs so I need it to be solid touching the floor there. I think adding 1/2" under the entire assembly would work too but then raises the whole thing up into precious space.
 
I accounted this to the floor not being flat under the where I removed the double decker do-dad. I plan on making a shim under just the corners near the rear seat where the two boxes meet to level them out and support the sag. I'll also be using part of that flat area on the rear of the boxes to support sleeping platform legs so I need it to be solid touching the floor there. I think adding 1/2" under the entire assembly would work too but then raises the whole thing up into precious space.

I might do the same. Ill have to see how much a pain it is to keep it level and make it right. Like you said i dont want to lose any more valuable cargo space height.
 
The difference sizes are for the connecting of the drawers to themselves versus the sliders to the drawers. You can use whatever sizes you want but thats just want tried to optimize with.

Would love to see what you made! Any pics?

Also, where is the missing dado? would love to know.

Yes, the sliders are HEAVY DUTY indeed. build it right the first time and itll last through many vehicles!

If your on instagram send me a message so I can keep up with your build. :hello:
I believe the missing dado is on the back of the top panel of the casings. I ended up having to do that one while assembling the first casing.

My drawer slide holes didn't line up either. For those still planning I would definitely recommend marking through the slides. Also, don't drill the middle holes until you have the slide mounted in the first two. Made life a lot easier for me.
 
I believe the missing dado is on the back of the top panel of the casings. I ended up having to do that one while assembling the first casing.

My drawer slide holes didn't line up either. For those still planning I would definitely recommend marking through the slides. Also, don't drill the middle holes until you have the slide mounted in the first two. Made life a lot easier for me.

Yes that's it! I thought it was a bigger piece.

Adam, looking at LH_RH_Carcass.pdf page 2 part 4 (Rear panel) there's no dimension for the height of the panel so it's assumed that it's the same height as the side panels at 10.625" but really since it's not fitting into a dado top or bottom it should be 0.25" shorter than the side panels, dimensioned at 10.375" tall. I ended up taking .125" off of it and dado'ing the back edge of the top panels for a tighter fit.

So it might not be a missing dado but it is a missing dimension for the height of the carcass rear panel that caused the slight confusion.
 
Yes that's it! I thought it was a bigger piece.

Adam, looking at LH_RH_Carcass.pdf page 2 part 4 (Rear panel) there's no dimension for the height of the panel so it's assumed that it's the same height as the side panels at 10.625" but really since it's not fitting into a dado top or bottom it should be 0.25" shorter than the side panels, dimensioned at 10.375" tall. I ended up taking .125" off of it and dado'ing the back edge of the top panels for a tighter fit.

So it might not be a missing dado but it is a missing dimension for the height of the carcass rear panel that caused the slight confusion.

i had the same issue for the tops as well.
 
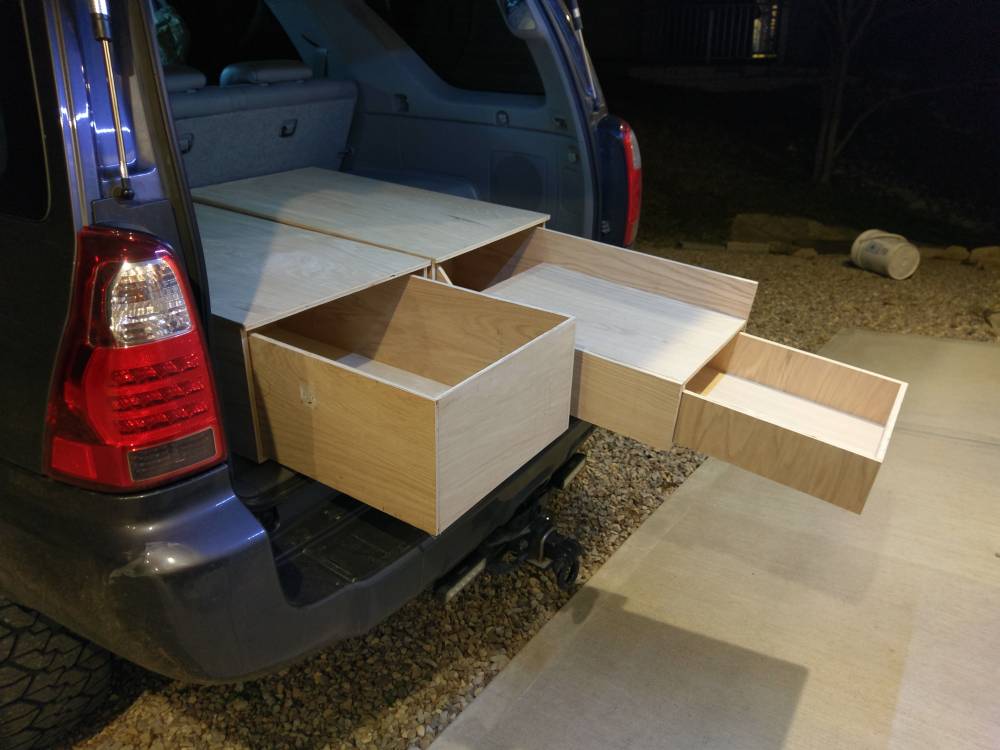
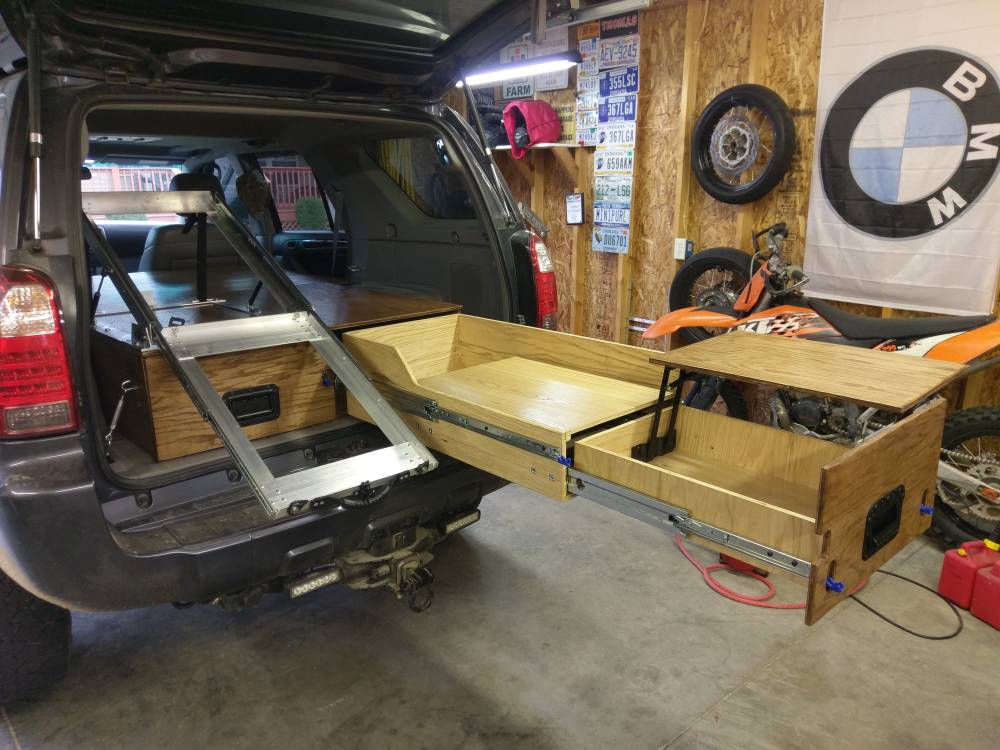
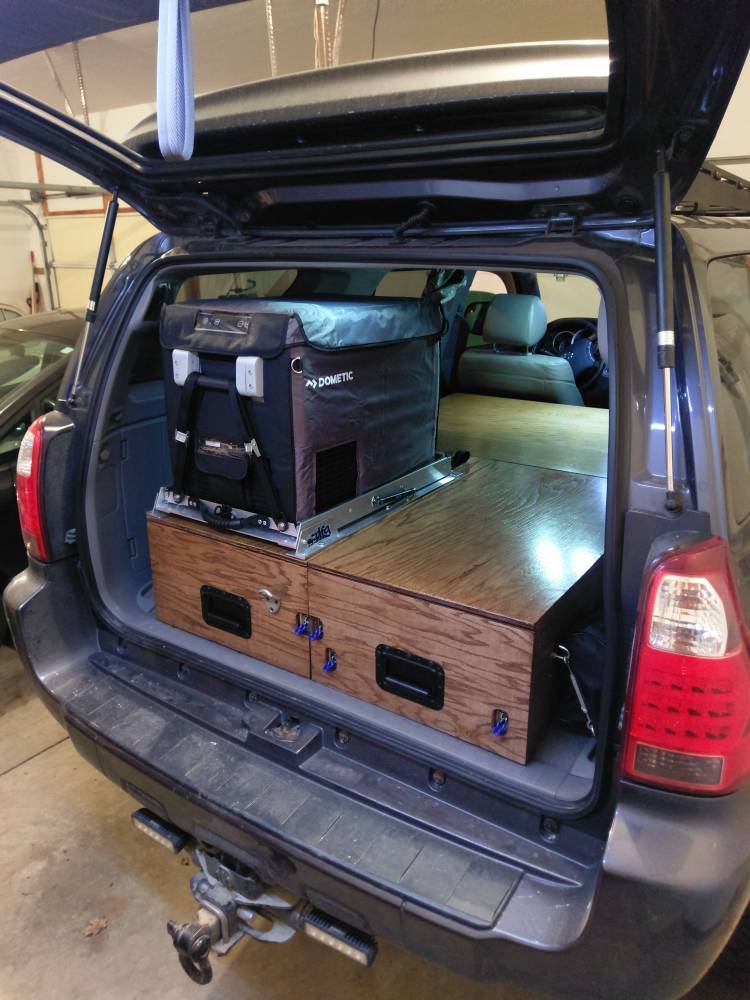
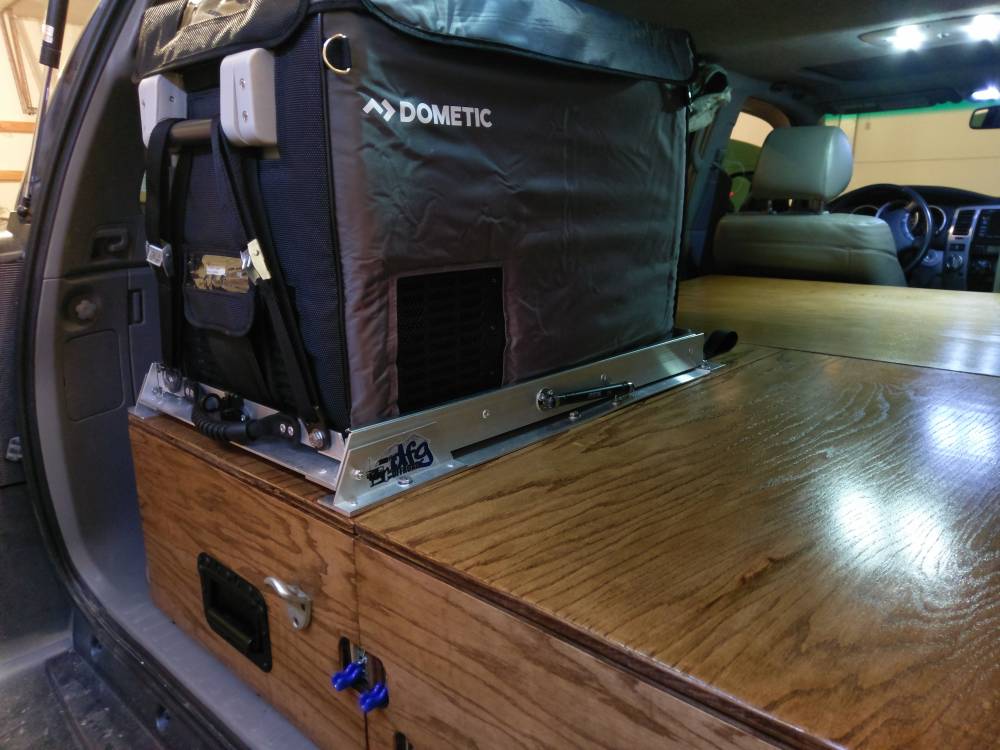
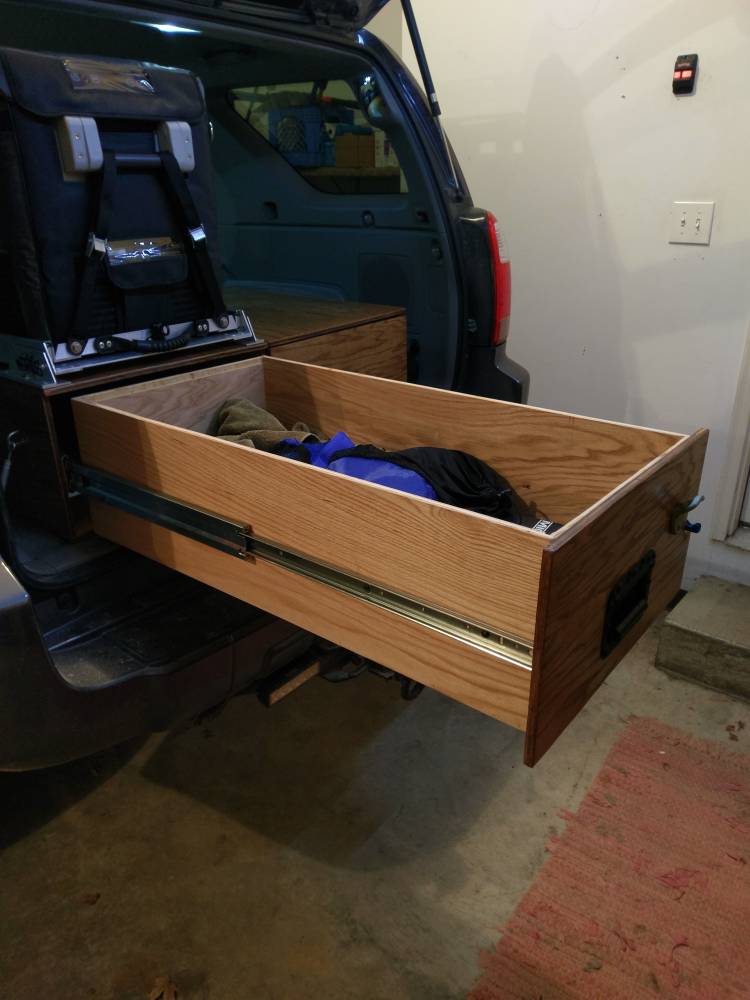
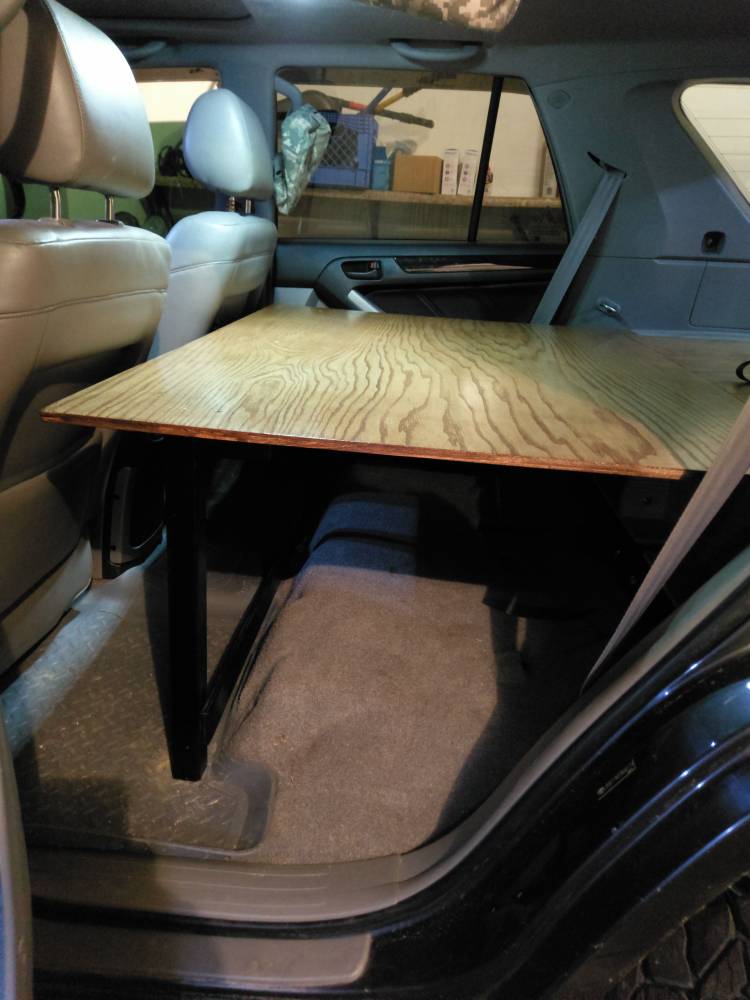
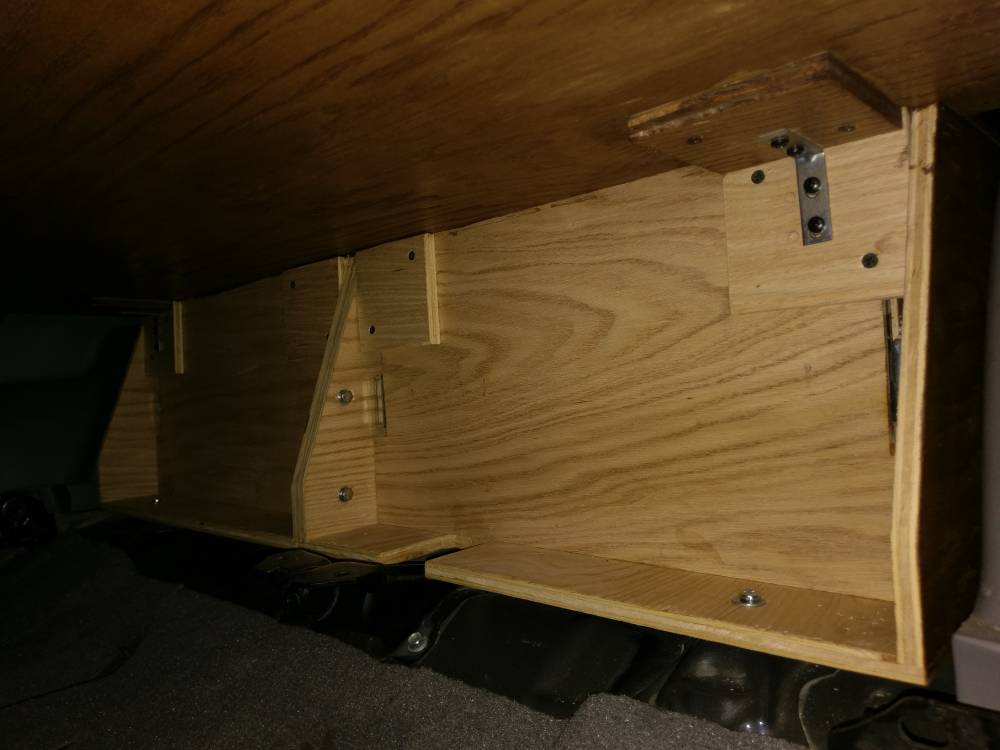
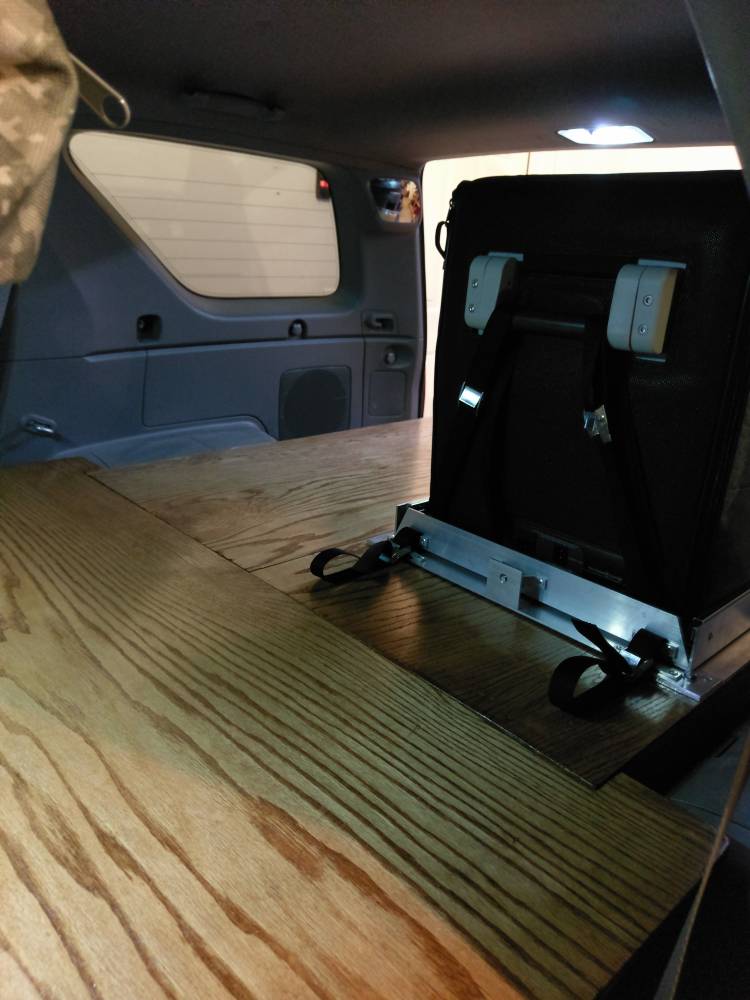
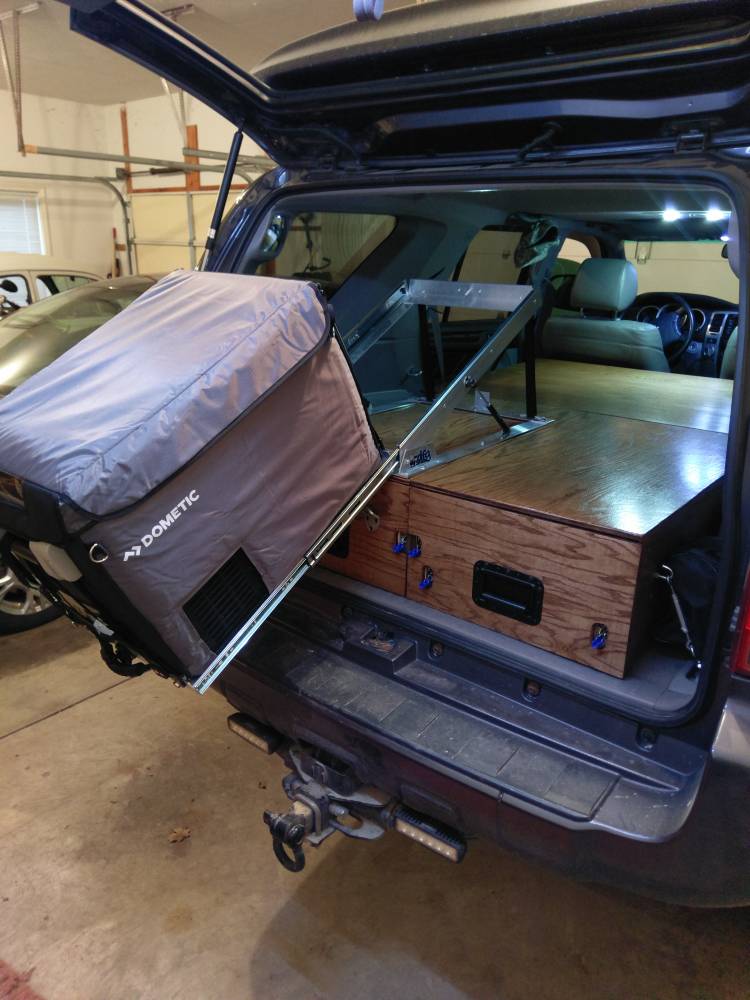
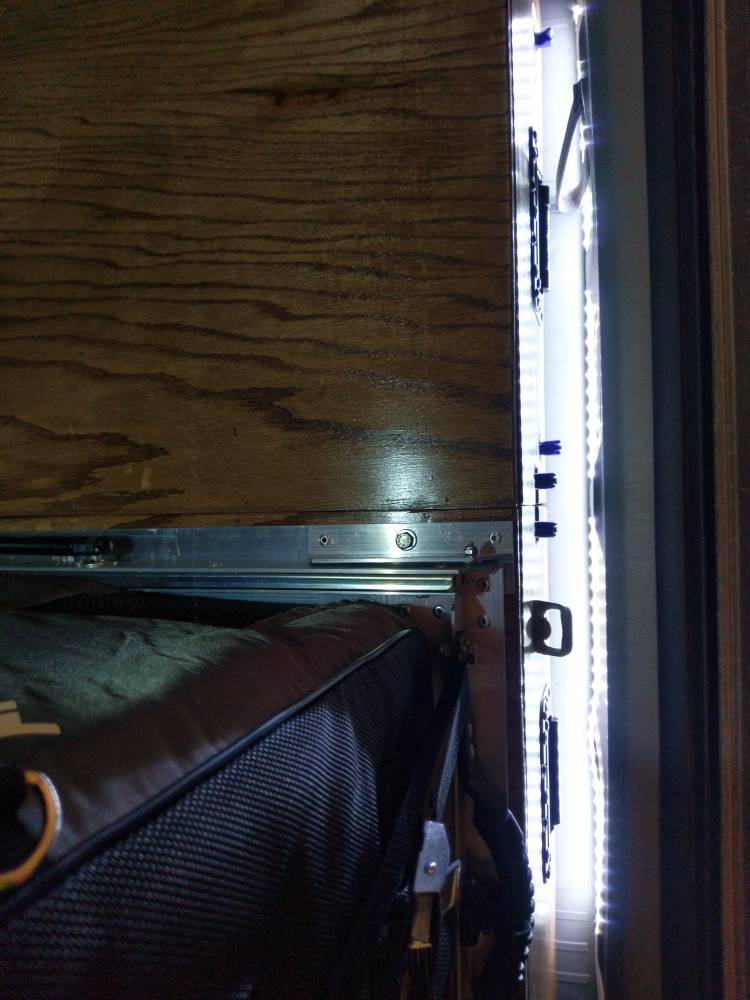
Finished up the finish work on my drawers and sleeping platform this weekend. I choose "special walnut" stain on the outside and left the insides raw red oak then polyurethane coated the whole thing. I added some extra squares to create a ledge for the sleeping platform to sit on the drawers, built a front support for the platform, added some turnbuckles to hold the back end of the drawers down tight since I opted to not build the side wheel well covers, added speaker cabinet handles, added bottle opener that's been floating around on various projects of mine for years. The only downside I've found is that my coleman stove is too tall to fit in the grill spot 3.75" max height and it's like 4". Also the 4runner floor doesn't appear flat even when shimming various places/my wood working skills are mediocre so the beauty panels on the drawer faces don't sit 100% flush level and square on the drawer fronts. Aside from those nitpicks it should be VERY nice functionality wise. Next up is wiring up the dual battery setup to power the fridge and accessories.

07a9e2c4202ad2d19ffe4db1e33295b2.jpg


5d75ed6f54a789ebb723d5dd993d1243.jpg


243e705dd4157be28a0b0d70d464f58d.jpg


d82bbc10e2320a47eaefac620d76dcef.jpg


c559521dc43afc2ab653eaf81249dd61.jpg


596404525da346423336d353dff9b71b.jpg


9f5ab63946a325c76c21c2de4bdcfee3.jpg


b7baae6604bfa45015381ea7b0b9b24b.jpg


2403cf739b488a3c91cebcb687fd5d4e.jpg
 
Last edited:
May be a dumb question but is everyone just using CDX plywood thats 1/2 inch or something other.
Most people use birch plywood, I chose red oak because my local menards didn't have enough sheets of birch and Lowe's selection was worse. You could really use anything cheaper that's 1/2" but the hardwood stuff is better to work with for a finished look. Supposed to be better for dados and edge nailing. I think I could have made cdx look almost as good in the end but for all the hours in I'm happy with spending a little more for a solid drawer setup.
 
Last edited:
Also another dumb question but what screws are you guys using to hold it together? The 3/4 inch screws that bagels has https://www.amazon.com/gp/product/B075DJ18QX/ref=oh_aui_detailpage_o02_s00?ie=UTF8&psc=1
posted they seem really small to be honest.

Wood glue and 18ga brad nails shot through an air nailer. Luckily I have a buddy that had the gun, router, and table saw so I cut and assembled at his house. He seemed to think the glue was the strength and the brads just held it clamped til the glue dried. Based on how flimsy the brads were I'd agree. The dado'ed and glued boxes are pretty strong when assembled!
 
Last edited:
Also another dumb question but what screws are you guys using to hold it together? The 3/4 inch screws that bagels has https://www.amazon.com/gp/product/B075DJ18QX/ref=oh_aui_detailpage_o02_s00?ie=UTF8&psc=1
posted they seem really small to be honest.

with being routed and using glue i also used a flooring clean nail. Just for more added grip. They're impressively strong when put together and dried.

I just loaded all my camping gear in my drawers and have some room to spare. Im headed to Pismo this weekend and will take pics while in use.
 

Members online

Forum statistics

Threads
278,311
Messages
3,554,082
Members
248,016
Latest member
Advally Service

Trending content

Back
Top