4th Gen OPOR Sliders installed

HiVel-JR

New member
Does anyone have these OPOR sliders installed on their 4Runner?

Outpost Off Road Toyota 4th Gen 4Runner Sliders

I cannot follow their directions (they are terrible) and some pictures of what they look like attached to the frame would be awesome. The directions say to drill holes in the frame etc... and I cannot get the holes to line up for me to drill. The website just shows the sliders from the side view. They could be duct taped on for all I know.

http://www.metaltech4x4.com/Images/document/Instructions/4th Gen 4Runner Installation Guide.pdf


prule84 started a post last year, but it died.
http://www.toyota-4runner.org/4th-gen-t4rs/200136-metaltech-opor-4th-gen-sliders.html

I am either missing some bolts, missing brain cells or these things barely hang on the frame with a single U-bolt in the back and two bolts up front.

The engineer side of me says these are too heavy and do not have enough anchor points to the frame to provide any strength.

I will call MetalTech4x4 in the morning, but i feel like i have been hoodwinked into thinking these would bolt on with no issues (per the instructions)


Thanks in advance.
 
Last edited:
Register to hide this ad
There diections are absoulty usless. I called them 2 or 3 times getting clarification. Ill take some pics of mine tomorrow. I ended up using slightly different hardware on some parts because like you, i wanted to improve them.

They strong though. I slide the hell out of mine and lift the truck up as well by them. Dont even flex.
 
There diections are absoulty usless. I called them 2 or 3 times getting clarification. Ill take some pics of mine tomorrow. I ended up using slightly different hardware on some parts because like you, i wanted to improve them.

They strong though. I slide the hell out of mine and lift the truck up as well by them. Dont even flex.

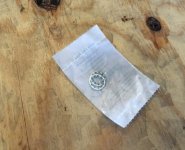
You Rock! thank you for coming to the rescue. My one question is what are the square metal disc (x2) for. They look like a think metal credit card with a hole in the middle.

I am taking pictures and documenting this install so others after me will not have any issues.

Thanks again. Billy
 
You Rock! thank you for coming to the rescue. My one question is what are the square metal disc (x2) for. They look like a think metal credit card with a hole in the middle.

I am taking pictures and documenting this install so others after me will not have any issues.

Thanks again. Billy

Thise go on the back side of the frame for the middle support bolt. On the drivers side you will need to loosen the brake line bracket to slip it in. Or at least I did.

My frame also already had bolt holes with threads for both front mounting holes. The instructions say you need to drill holes for the hidden nuts though. I just used the existing holes/threads and they worked great.

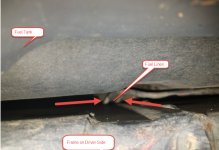
On the back for the U bolt, the passinger side is easy, but the drivers side sucks. The gas tank is in the way and there is 2 fuel lines against the rail on top you can hardly see. Be very carefull you dont pinch them with the u bolt.

As i said, ill try and post pics tomorrow. Im on my phone and have a hard time typing/posting pics.
 
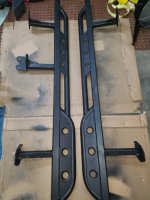
Okay, so here is the what I have so far.

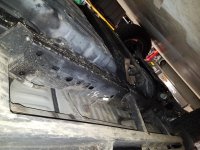
Sliders left and right. Passenger side has three mounts to frame. Drivers side has two mounts.
2016-07-01_1-09-06.jpg

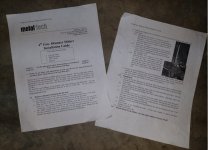
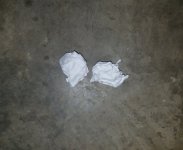
Take These two pieces of paper
2016-07-01_1-02-36.jpg

And do this to them....
2016-07-01_1-02-55.jpg

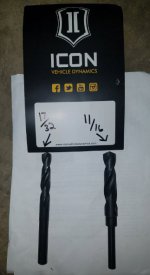
Get these two bits from Amazon, because no local store had these sizes.
2016-07-01_1-03-45.jpg
 

Attachments

  • 2016-07-01_1-09-06.jpg
    2016-07-01_1-09-06.jpg
    68.4 KB · Views: 964
  • 2016-07-01_1-02-36.jpg
    2016-07-01_1-02-36.jpg
    83.5 KB · Views: 1,007
  • 2016-07-01_1-02-55.jpg
    2016-07-01_1-02-55.jpg
    63.5 KB · Views: 993
  • 2016-07-01_1-03-45.jpg
    2016-07-01_1-03-45.jpg
    27 KB · Views: 1,000
Last edited:
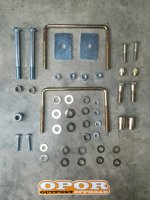
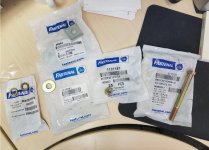
Inventory your bolts. - I think i may have one extra nut (the big one over on the left middle of picture)
2016-07-01_1-03-16.jpg

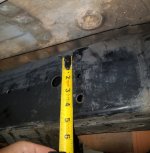
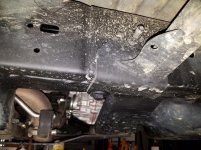
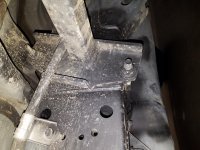
Drill your two holes in the front part of frame for front mount. The top hole should already be there with threads in it. Chase the threads. (Hole to be drilled is the bottom hole and should already be there, just make the hole bigger) Do this on both passenger and driver side.
2016-07-01_1-04-12.jpg

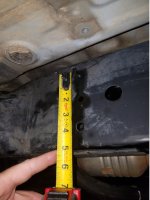
Passenger side hole on bottom. This is where the directions tell you to install the slider to find the proper alignment for drilling the second hole. Mark the area to be drilled, then remove the slider and drill your second hole.
2016-07-01_1-04-29.jpg

Driver side hole.
2016-07-01_1-53-05.jpg
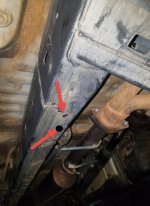
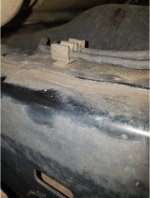
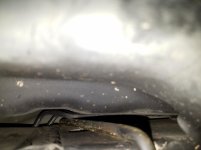
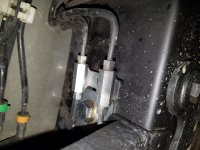
As mentioned in earlier post, watch out for fuel lines on top of frame on drivers side. (x2)
2016-07-01_1-06-04.jpg

View from below.
***The U-bolt goes through this part of the frame so watch out for the fuel lines.
2016-07-01_1-06-28.jpg
 

Attachments

  • 2016-07-01_1-03-16.jpg
    2016-07-01_1-03-16.jpg
    82.4 KB · Views: 1,011
  • 2016-07-01_1-04-12.jpg
    2016-07-01_1-04-12.jpg
    50.6 KB · Views: 983
  • 2016-07-01_1-04-29.jpg
    2016-07-01_1-04-29.jpg
    60.3 KB · Views: 1,021
  • 2016-07-01_1-06-04.jpg
    2016-07-01_1-06-04.jpg
    53.3 KB · Views: 982
  • 2016-07-01_1-06-28.jpg
    2016-07-01_1-06-28.jpg
    84.5 KB · Views: 1,100
  • 2016-07-01_1-53-05.jpg
    2016-07-01_1-53-05.jpg
    59.4 KB · Views: 1,116
Last edited:
The Rivet Nuts are your next step. Watch the video....

https://www.youtube.com/watch?v=3Og-tHIR_0I

Get some of the washers to help with the install.

2016-07-01_1-35-23.jpg

Also Chase the threads on the threaded holes already in the frame. (see instructions that you already waded up and threw in the trash)
 

Attachments

  • 2016-07-01_1-35-23.jpg
    2016-07-01_1-35-23.jpg
    54.4 KB · Views: 1,087
More to follow tomorrow once I get more pictures added and finish the install.

Thanks Brian3676 for posting in as well. If you can add pics of how the sliders look attached to the frame from the inside of the frame and the outside of the frame that would be helpful.
 
Why does your driver side only have 2 mounts?
I asked MetalTech that same question last week. John said the sliders will fit multiple vehicles built that way plus they had fitment issues with the KDSS/X-REAS???? SO I figured they knew what they were doing with the design.
 
I got a pair last year when they were on sale. It took 3-4 months to arrive. I currently have them attached with just the U-bolts and the front machine screws. They are not secure enough for offroading but fine to stand on. The attachment is ridiculous, not to mention they sent the wrong hardware. I don't know what other manufacturers do for attachment but rivnuts seem weird.
 
I currently have them attached with just the U-bolts and the front machine screws. They are not secure enough for offroading but fine to stand on. The attachment is ridiculous, not to mention they sent the wrong hardware. I don't know what other manufacturers do for attachment but rivnuts seem weird.

And I am bothered by that as well.... every video i watch for rivet nuts are for light duty things like small armor plates or headlight screens on land rovers. Not 50+ pounds of sliders. Other bolt on sliders are held in place with large bolts and plating that wraps around 3 of the 4 sides of the frame.

I am starting to think about welding these on, I can do it in a weekend, but what a pain in the neck.

I have no issues with MetalTech, but I hope someone at MetalTech or OPOR sees this thread and shakes their head realizing they have created a mess for their customers.
 
Although I have 3 feet on both sides as I say this, I have slid the hell out of mine and been teter totering on then holding my truck up off rocks and logs as I get towed off griding them along the way. They are strong. Too bad they deleted that center foot now though :-(
 
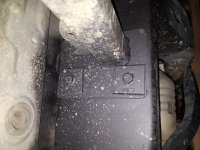
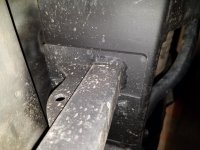
As you can see, I used a lot of my own hardware, especially on the front foot as the stuff they give you sucks. The washers are thin flimsy crap and are not sized correcty either.
 

Attachments

  • 20160701_100412.jpg
    20160701_100412.jpg
    136.8 KB · Views: 474
  • 20160701_100423.jpg
    20160701_100423.jpg
    133 KB · Views: 490
  • 20160701_100457.jpg
    20160701_100457.jpg
    139.1 KB · Views: 459
  • 20160701_100609.jpg
    20160701_100609.jpg
    133.6 KB · Views: 455
  • 20160701_100506.jpg
    20160701_100506.jpg
    137.5 KB · Views: 494
  • 20160701_100518.jpg
    20160701_100518.jpg
    106.2 KB · Views: 462
  • 20160701_100536.jpg
    20160701_100536.jpg
    137.2 KB · Views: 486
Those are great pictures. Perfect. I appreciate you doing that.

You have no idea how that helps me.
Thanks again!
 
Those are great pictures. Perfect. I appreciate you doing that.

You have no idea how that helps me.
Thanks again!

No problem, let me know if you need any other pics. If your wanting stronger/bigger washers, those are strut washers. I got them from Home Depot. I think there were about $1 each. I also got grade 10.9 flanged bolts for up front.
 
Okay, went to Fastenal, going to do my own thing. Drill out holes on both sides of the frame and bolt these things in the correct way.

There is an off road fabrication shop behind the Fastenal that works on RAZRs/ATVs etc. and I showed him the Rivet nuts and he started laughing and said... "good luck". That tells me the rivet nuts are a bad design for these sliders.

Come on MetalTech for $600+ dollars i think you can do better or hold OPOR to a higher standard of design and fab work.

$38 bucks later.... Plus now I am going to drill more holes in the frame and drill more holes in the slider mounts.

2016-07-01_14-16-01.jpg
 

Attachments

  • 2016-07-01_14-16-01.jpg
    2016-07-01_14-16-01.jpg
    133.8 KB · Views: 453

Members online

Forum statistics

Threads
278,309
Messages
3,554,070
Members
248,016
Latest member
Advally Service

Trending content

Back
Top