
Mr.emergency
New member
Well I started to develop a squeal coming from my rear passenger side. It first only occurred when the car was cold, or had been sitting for longer than a day. Buuuut it started getting worse. So I decided I was going to replace the wheel bearing. Upon much research I found that no one has done even a partial DIY for our 4th gen T4R. I kind of followed this https://youtu.be/dxWuSt3LFjE because the FJ and T4R rear are so similar.
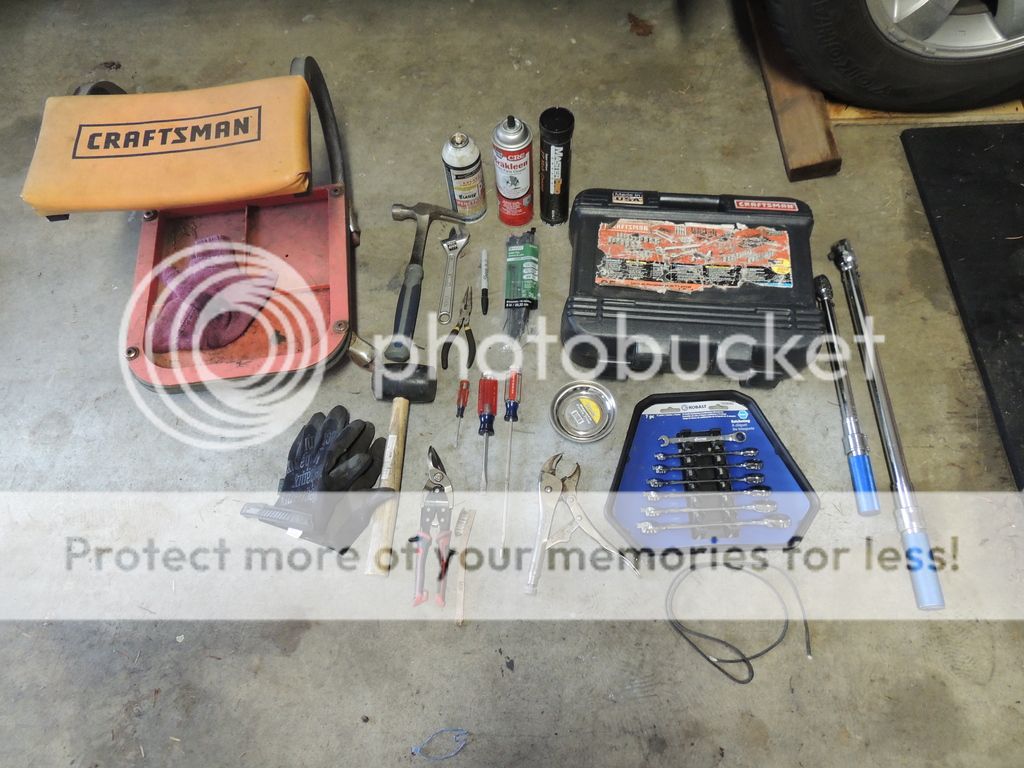
Here are the tools I used (+jack/stands, and wheel chocks):
Parts I used:
1 Timken HA590050 wheel bearing assembly off Amazon for 107$
1 Toyota snap ring PN 9052041019 -$1.98
1 Toyota axle seal PN 9031058003 -$8.26
1 Toyota rear axle shaft washer PN 9020844001 -$4.77
1 Toyota O ring PN 9030183002 -$3.71
1 Toyota rear axle bearing inner retainer PN 4242360050 -$25.46
Total: $155.02
1. Chock the wheels not performing surgery on
2. Jack up the rear from the diff housing and place a jack stand under the side you are performing surgery on.
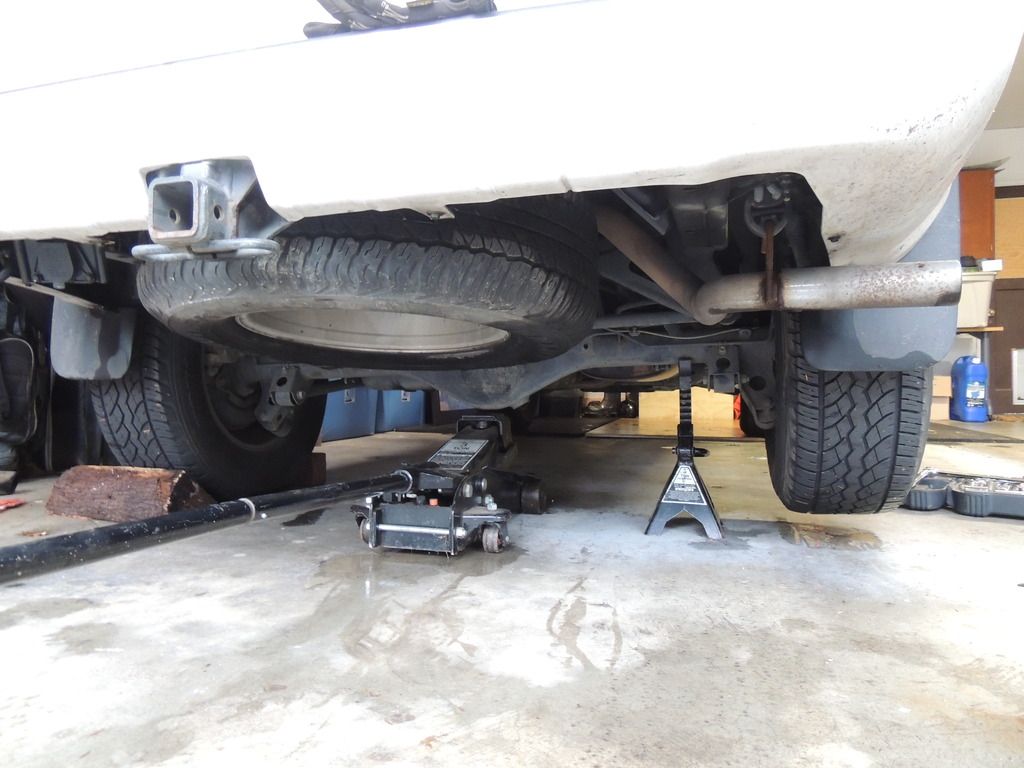
3. Remove wheel/ tire
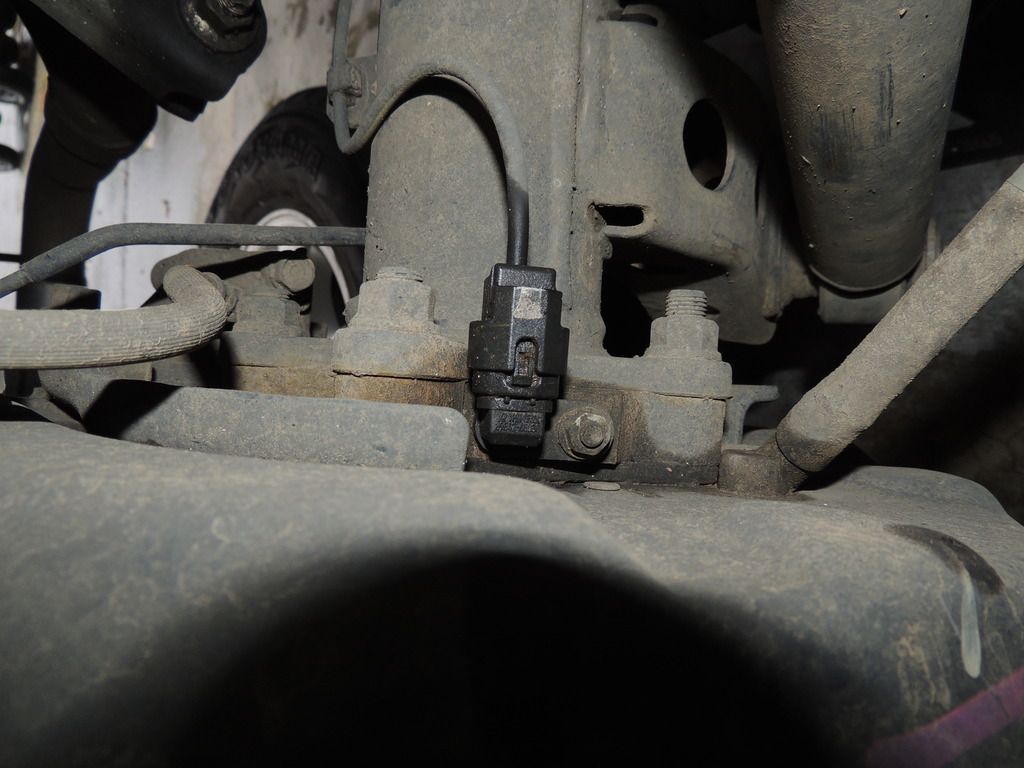
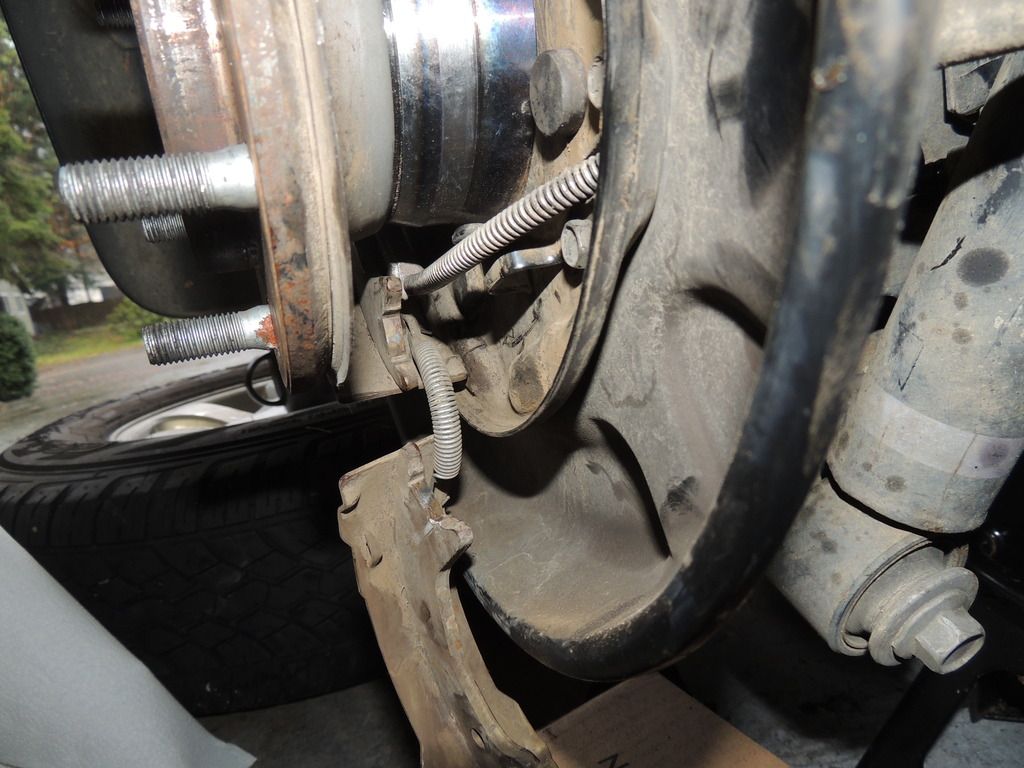
4. Remove brake line retainer clip, also remove 12mm bolt holding brake line to axle. At this stage, it appears this square-esque hole does not hace a split in it to remove brake line from, so I cut one into it so that I could slide brake line out, so as to be able to remove the hub later on.
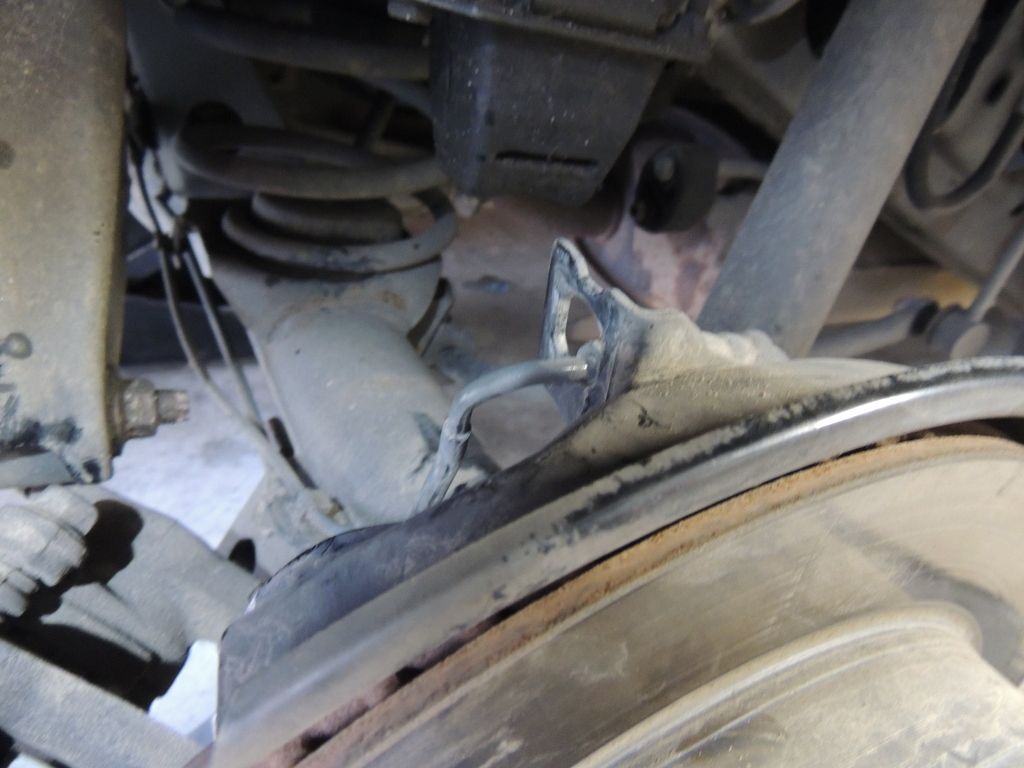
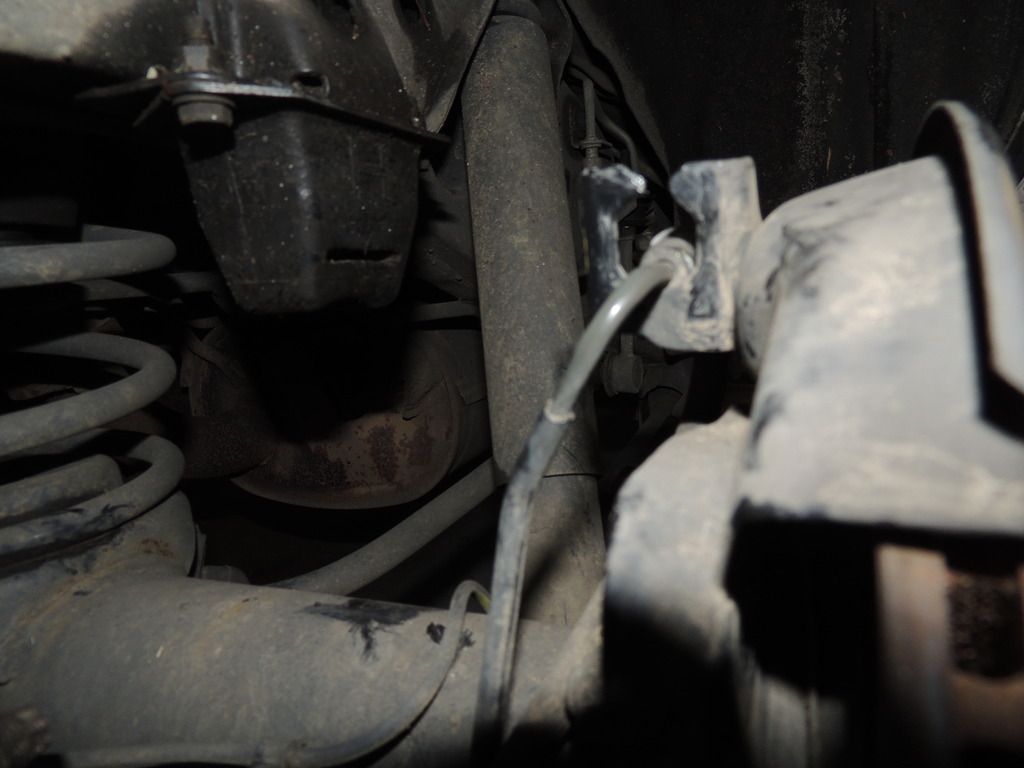
This is also a good time to remove the little 10mm nut that holds in the ABS sensor. Place the ABS sensor out of the way so it does not get damaged.
5. Now remove the 2- 17mm bolts holding the caliper on and either twirl the caliper around so that it hangs out on top of the axle, or hang it from a hole using a hangar. (I started with the hanger, then maneuvered it out of the way later).
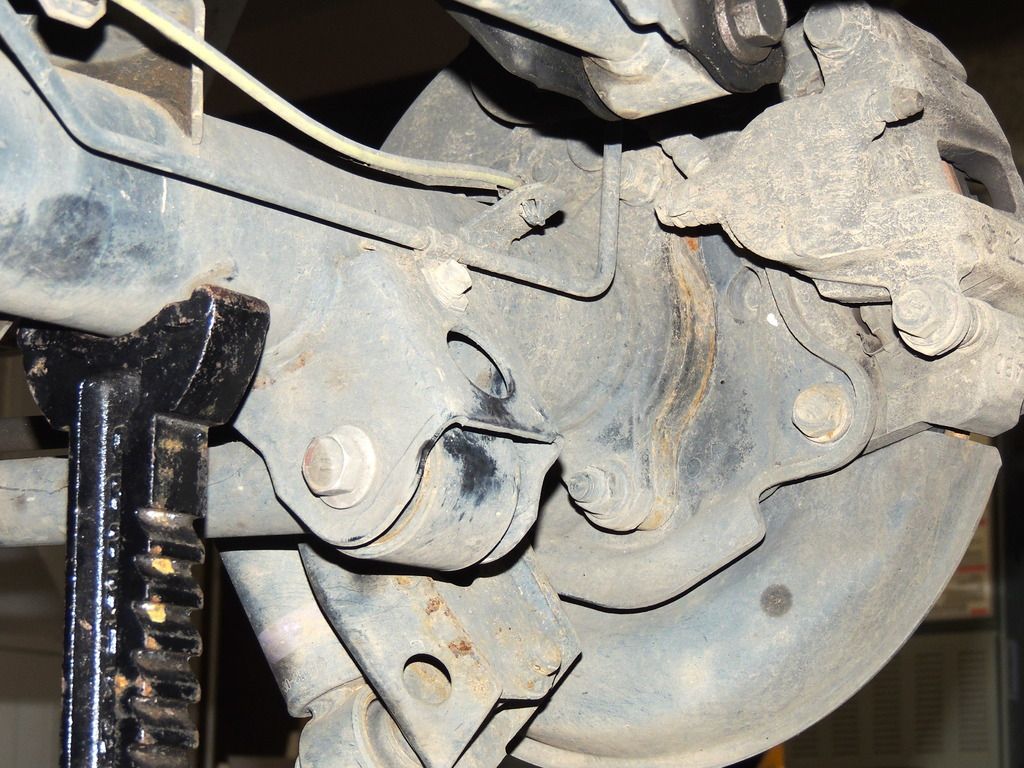
6. Remove disk brake. This was kind of challenging at first. I used the "spray with PB blaster and hit with a rubber mallet" technique. Apparently there is an even easier way to do it that Eric the car guy goes over here: https://youtu.be/Po-WXqIKjHQ
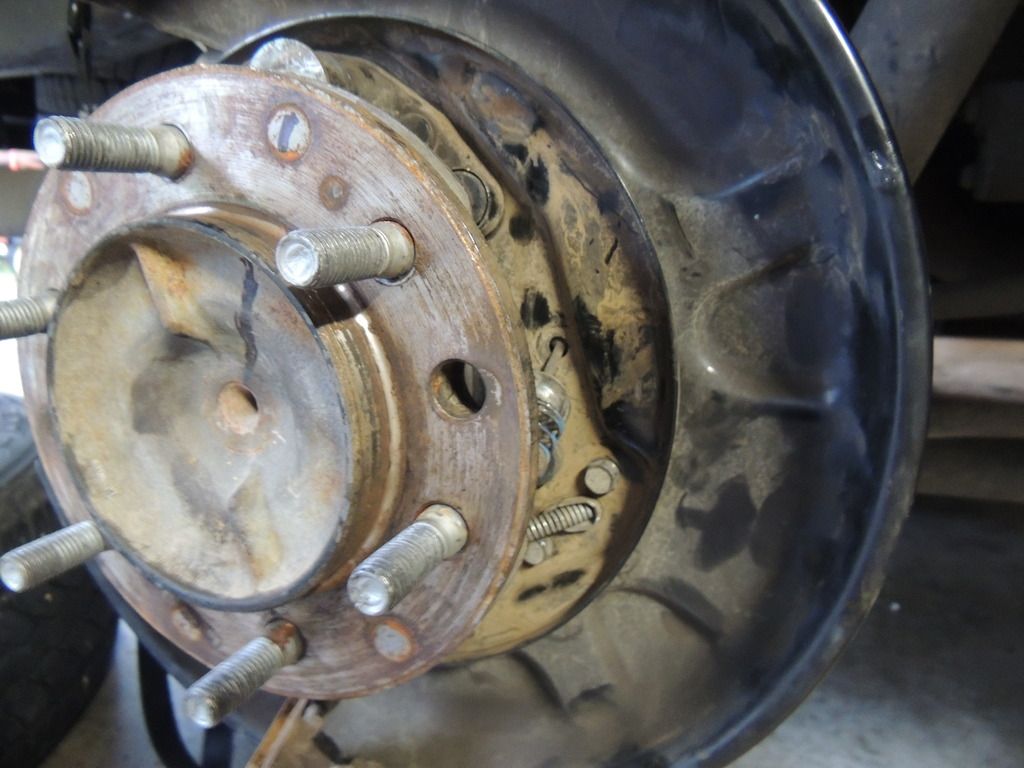
7. Once disc is off, you will have exposed the hub and parking brake assembly. Use the FJ video as a guide and remove the assembly as they do. I started with both superior parking brake shoe return tension springs->parking brake shoe hold down spring cups(line up the hole in the hub for easy access)-> and then the shoes easily came out with remaining components. TAKE PICTURES, and line up the whole assembly as you take it off like Eric the car guy mentions in this post: https://youtu.be/sTpKpkxJjLQ (at about 6:45)
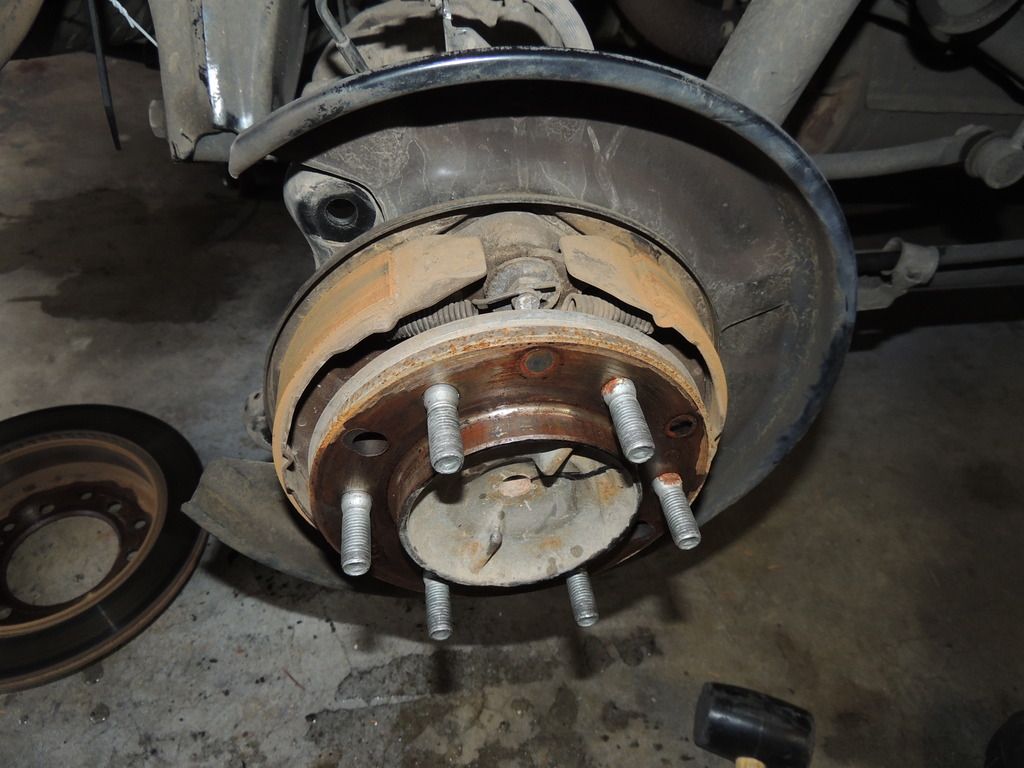
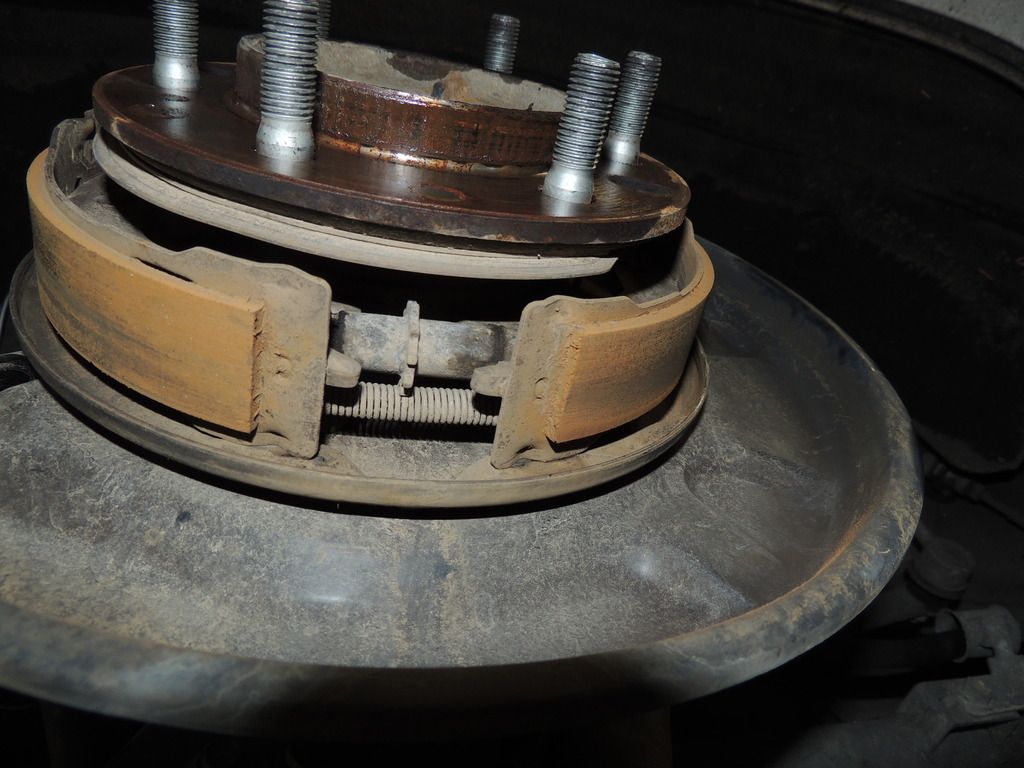
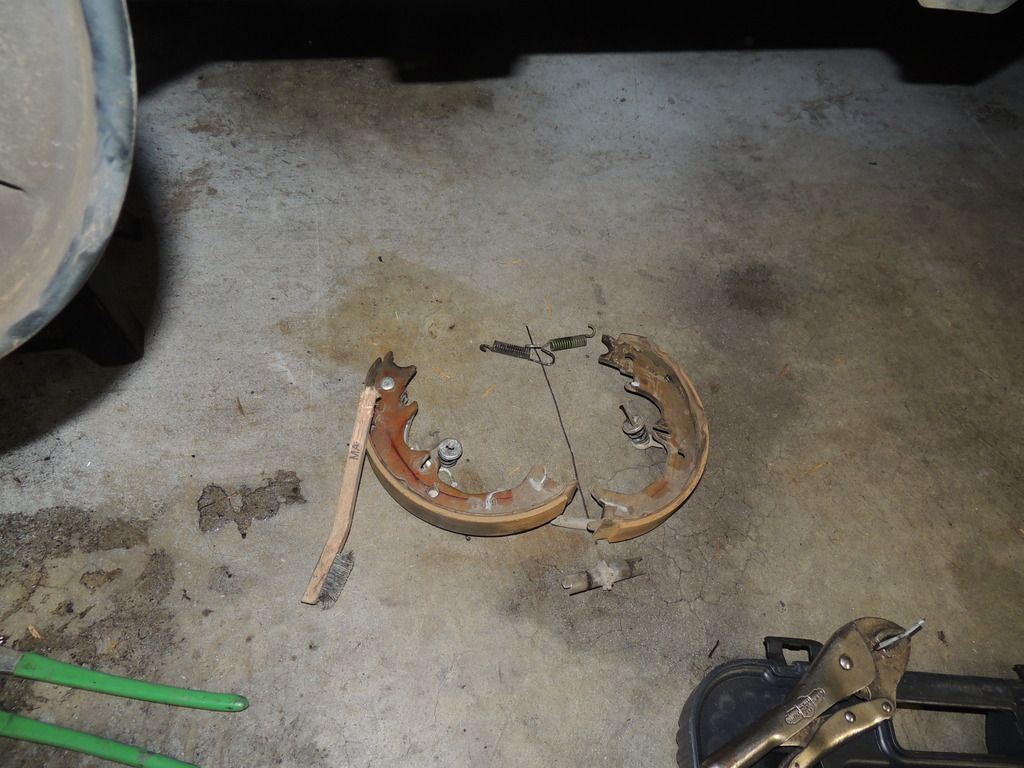
8. Remove parking brake cable from pad assembly using needle nose pliers, then unbolt parking brake assembly from the hub (10mm) and the 12mm bolt/ brace that holds the parking brake cable to the frame, so as to allow for wiggle room of parking brake cable.
9. Unbolt the 4- 17mm bolts holding the hub/ wheelbearing/axle assembly together, and slide the axle carefully out, holding a shop rag as there is probably some gear oil all over the axle shaft.
10. I then took my hub/ axle assembly along with my new wheel bearing, new snap ring, new inner bearing retainer, new rear axle shaft washer to my local NAPA machine shop and paid $47 to have them press the old bearing out, and place the new bearing. Those guys definitely know what they are doing and have done many wheel bearings before. took them about 2 hours and they had my axle shaft all ready for me.
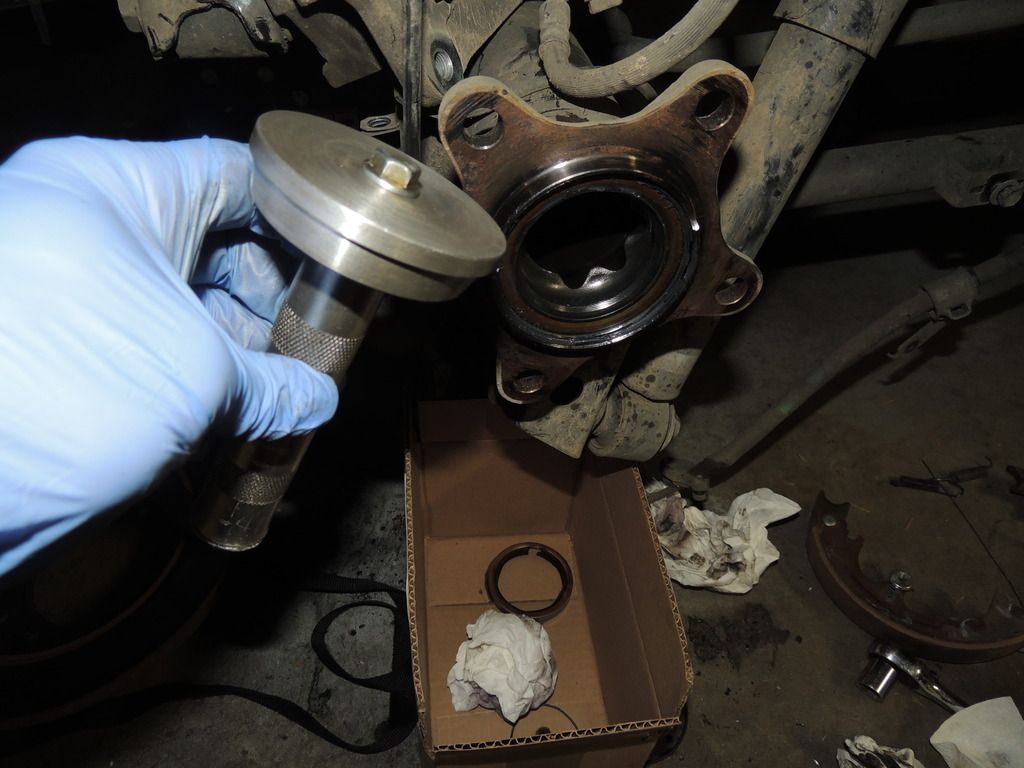
11. I then stopped by my local O-reillys on the way home and rented a bearing race and seal driver set from them. This is really the only way to install the new rear axle shaft oil seal safely. Ive effed this up on my old runner multiple times by trying to install with just a hammer, and had to do the whole job over again. It's free to rent, so dont eff around.
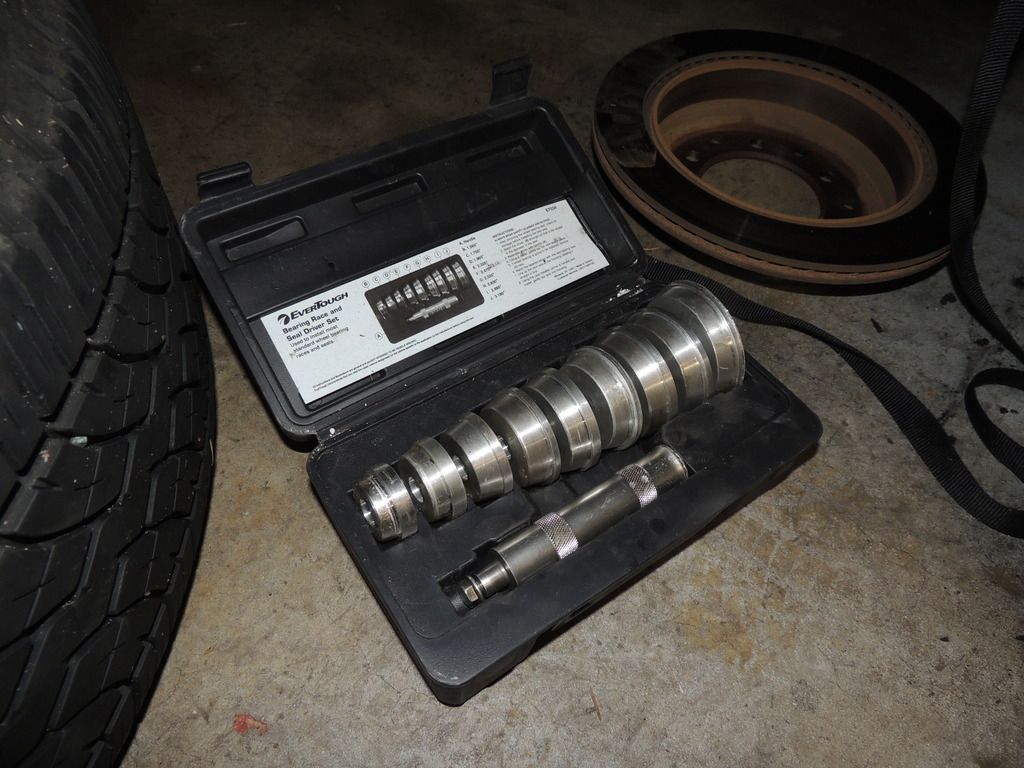
12. I cleaned up the hub and placed my new exterior o-ring. I then made sure to rub some moly fortified grease all over the seal prior to install, and then reinstalled the axle. MAKE SURE you clean off the axle shaft, especially the teeth that are going back into your delicate differential. Machine shop guys are great at what they do, but they aren't supposed to keep your axle shaft pretty and clean. Thats your job. Now it's just a matter of reversing the process
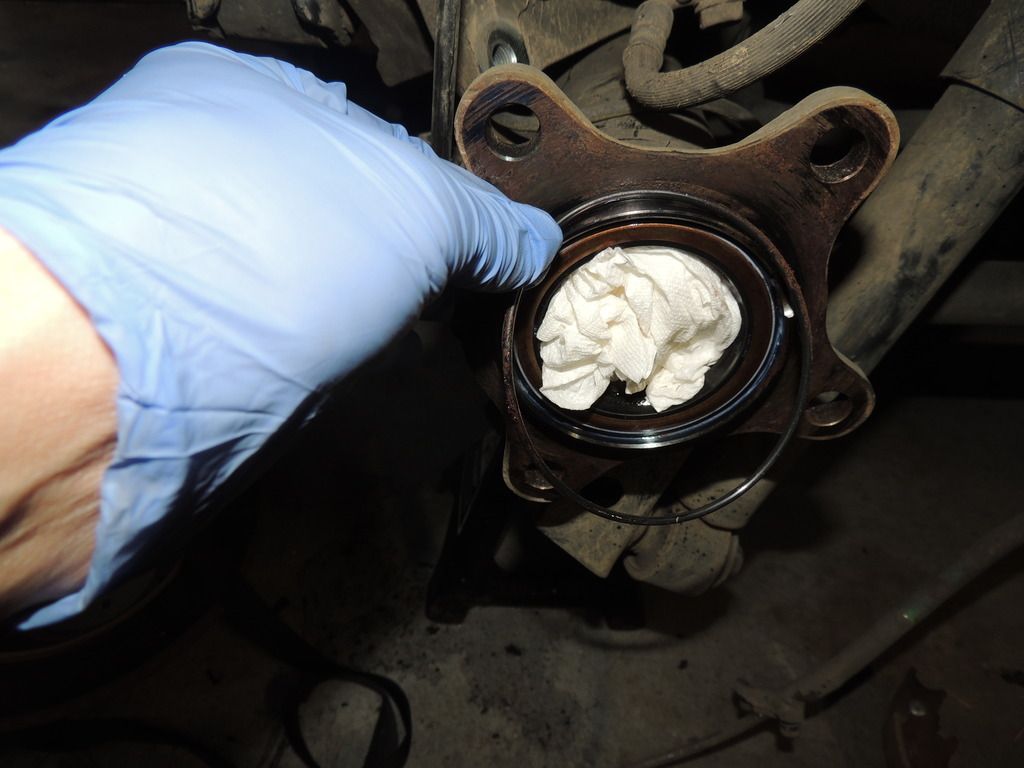
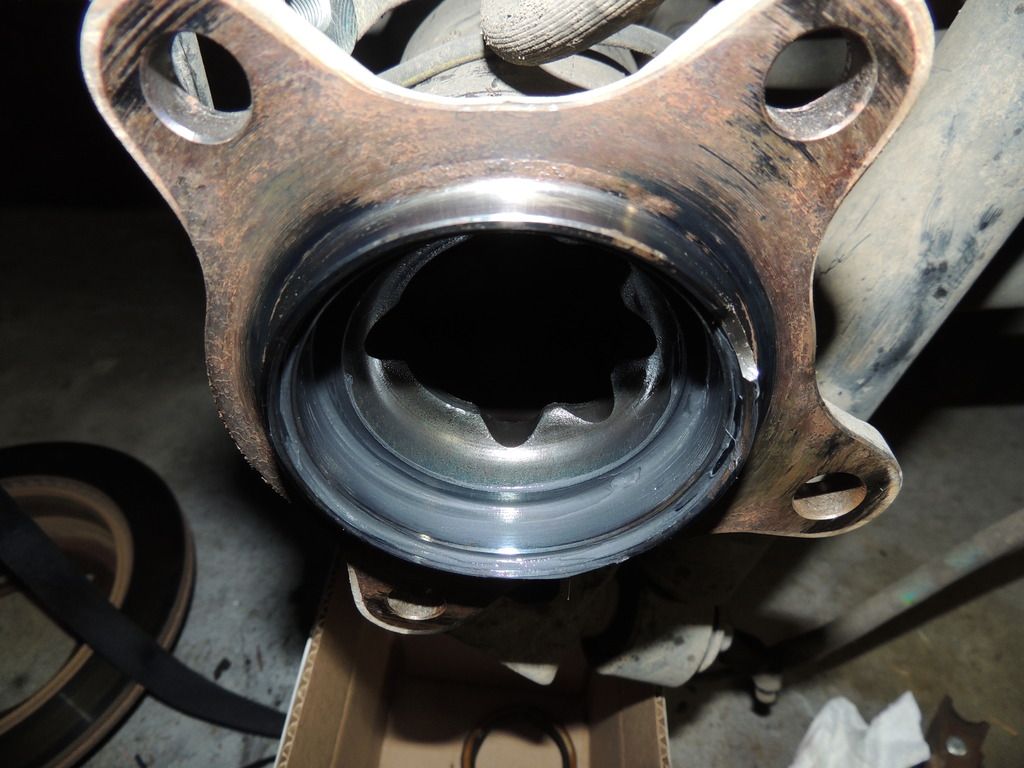
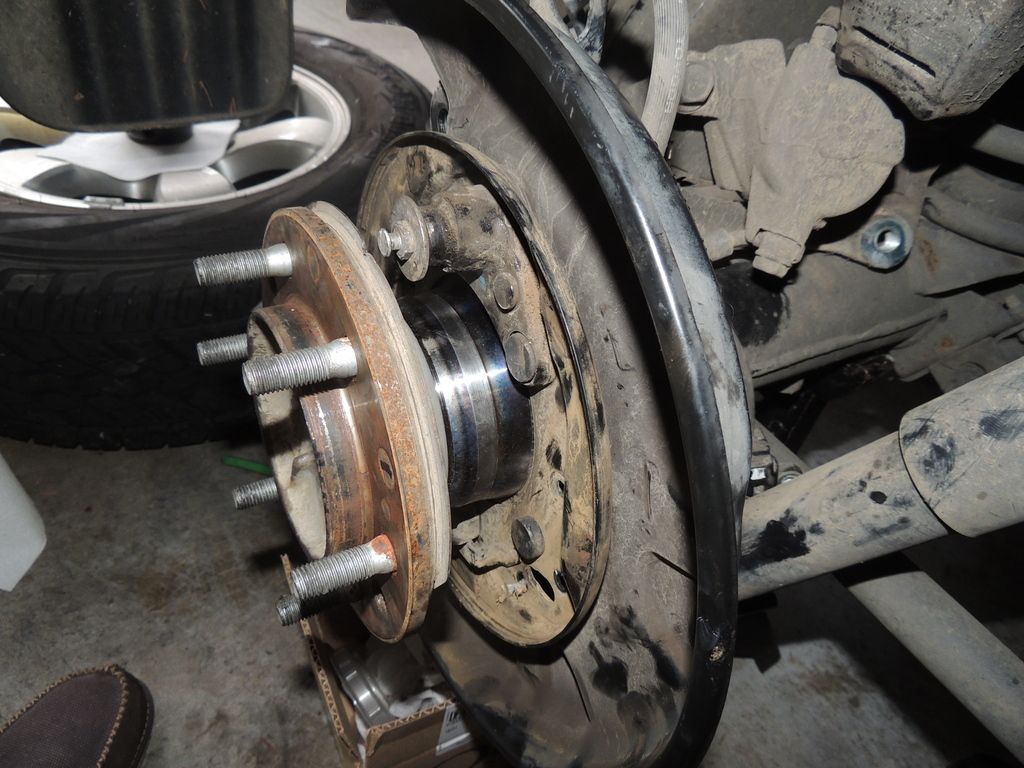
13. Torque 4-17mm bolts to 90lb-ft
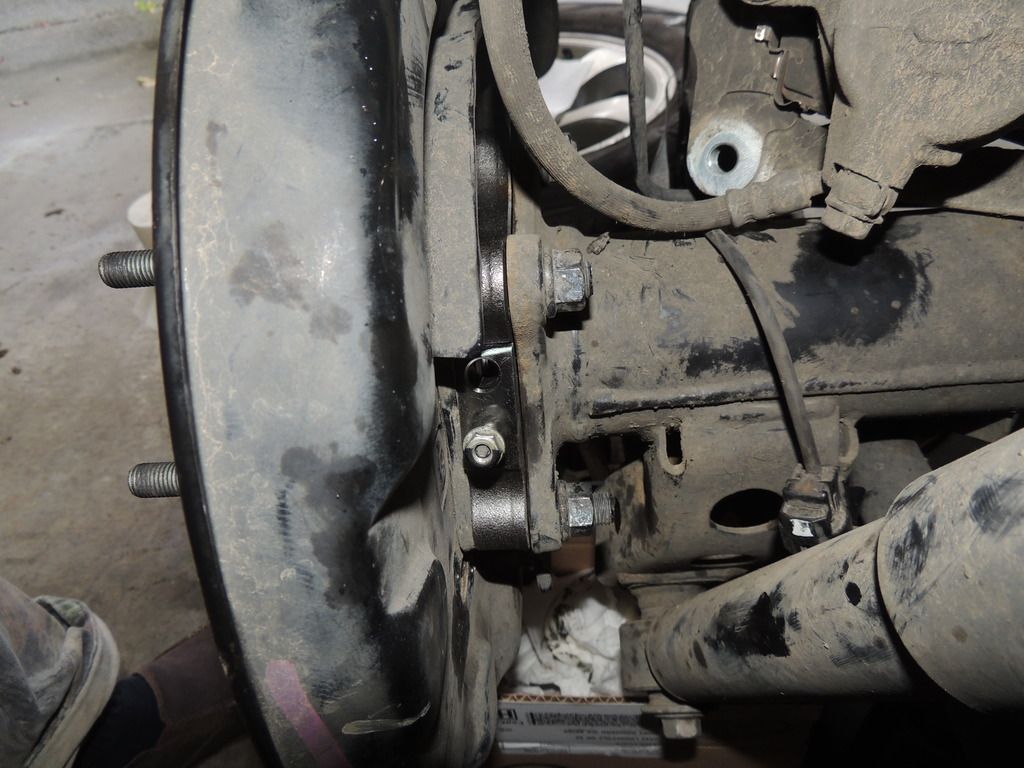
14. Re-install parking brake cable/bolts.
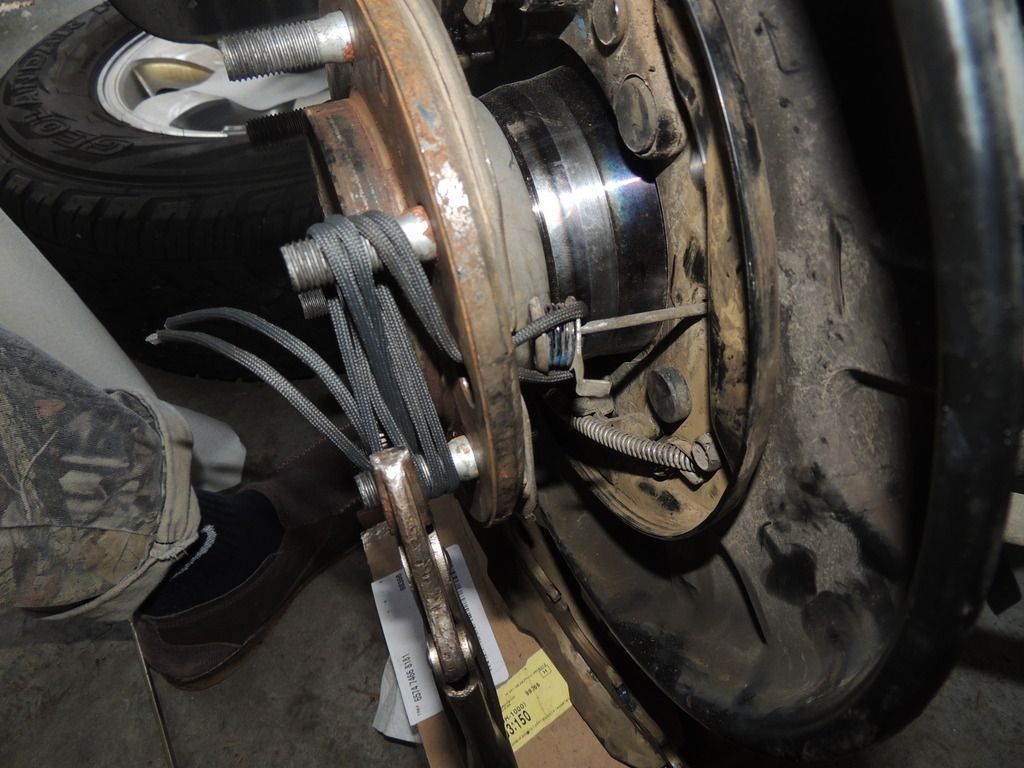
15. Re-install parking brake shoes starting with reverse of how you removed it. The hardest part of this reinstall is getting those friggin shoe hold down spring cups back into position (with tooth/ lip in the hole). So I used some paracord I had laying around and aligned the hole in the hub with the cup and used traction to compress the spring and hold it steady. Then I slid the shoe behind it into position and released tension. Then using a screwdriver I pushed the tooth into the hole to secure the spring cup hold down (you’ll know what I mean when you’re in there). Then replaced the lower tension spring and put the adjuster between the bottom of the two pads, paracord- tricked the remaining hold down spring cup and replaced the upper tension springs. To note, the shoes won’t look right until you get those upper tension springs back into place. Also, while replacing all the components, I used a q-tip and some of my moly grease to lube the contact points between the moving parts. I think you’re supposed to use anti0seize though… O well.
http://i1204.photobucket.com/albums/bb410/bigbroncostyle/DSCN1705_zpsrco6xqmn.jpg[/img}
[img]http://i1204.photobucket.com/albums/bb410/bigbroncostyle/DSCN1704_zpsedi9lhls.jpg~original
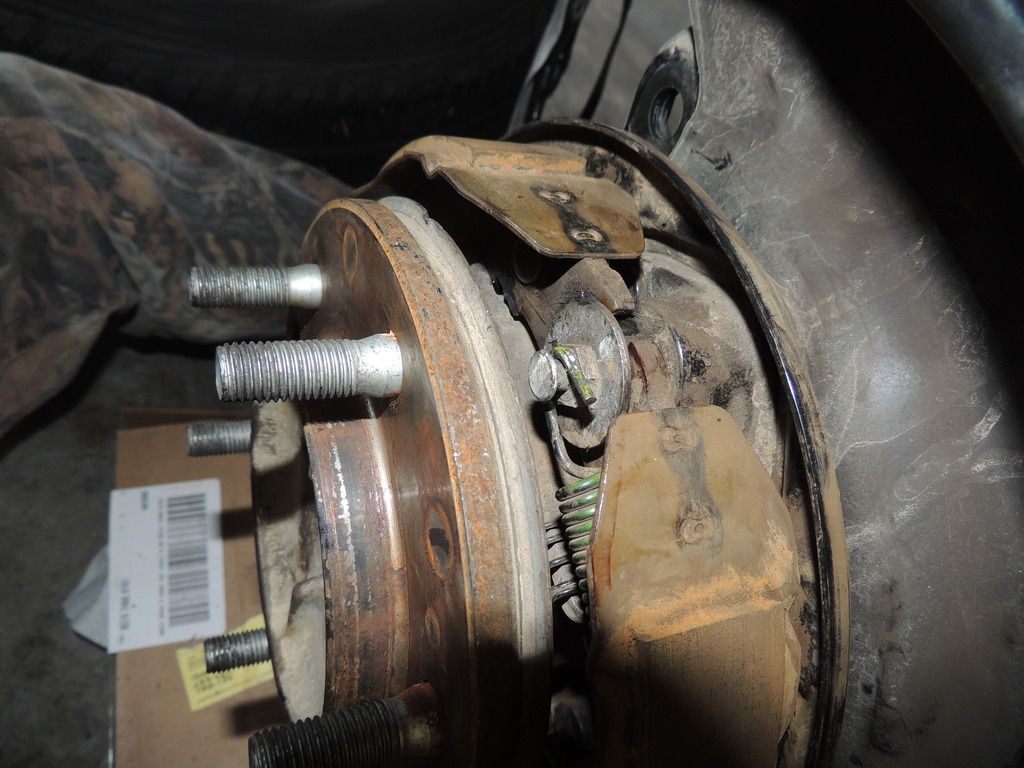
16. Test the parking brake, I propped up my iphone and took a video while I walked around and pressed on the parking brake. Then I came back around and checked the video. If all is good then clean your brake shoes, entire brake disc, and caliper pads with brakleen. Be liberal, and then wipe off the disc brake with a rag. Once that dries use a q-tip and lubricate or use anti-seize on the contact points between the shoes and hub backing plate.
17. Re-install your disc brake and apply your parking brake again, checking pedal tension, and trying to turn the hub to see if the adjuster is set correctly. Mine was, so I didn’t worry about adjusting it.
18. Re-install brake caliper/caliper bracket by torqueing those 2 caliper bolts to 77lb-ft (I went rogue and torqued to 80).
19. Place brake line back into slot and slide that clip back in. Now go back and reinstall your ABS sensor and bolt down that 10mm bolt securing the brake line to the axle, and 12mm bolt securing the parking brake cable.
20.Replace your wheel and lug nuts torque to 90ish lb-ft.
21. BOOM, go for a test drive
Hope this helps some other guys out there. If anyone knows better than I do and has something to add to this post, please comment- I don’t want any bad info circulating around. Thanks guys, cheers.
Here are the tools I used (+jack/stands, and wheel chocks):
Parts I used:
1 Timken HA590050 wheel bearing assembly off Amazon for 107$
1 Toyota snap ring PN 9052041019 -$1.98
1 Toyota axle seal PN 9031058003 -$8.26
1 Toyota rear axle shaft washer PN 9020844001 -$4.77
1 Toyota O ring PN 9030183002 -$3.71
1 Toyota rear axle bearing inner retainer PN 4242360050 -$25.46
Total: $155.02
1. Chock the wheels not performing surgery on
2. Jack up the rear from the diff housing and place a jack stand under the side you are performing surgery on.
3. Remove wheel/ tire
4. Remove brake line retainer clip, also remove 12mm bolt holding brake line to axle. At this stage, it appears this square-esque hole does not hace a split in it to remove brake line from, so I cut one into it so that I could slide brake line out, so as to be able to remove the hub later on.
This is also a good time to remove the little 10mm nut that holds in the ABS sensor. Place the ABS sensor out of the way so it does not get damaged.
5. Now remove the 2- 17mm bolts holding the caliper on and either twirl the caliper around so that it hangs out on top of the axle, or hang it from a hole using a hangar. (I started with the hanger, then maneuvered it out of the way later).
6. Remove disk brake. This was kind of challenging at first. I used the "spray with PB blaster and hit with a rubber mallet" technique. Apparently there is an even easier way to do it that Eric the car guy goes over here: https://youtu.be/Po-WXqIKjHQ
7. Once disc is off, you will have exposed the hub and parking brake assembly. Use the FJ video as a guide and remove the assembly as they do. I started with both superior parking brake shoe return tension springs->parking brake shoe hold down spring cups(line up the hole in the hub for easy access)-> and then the shoes easily came out with remaining components. TAKE PICTURES, and line up the whole assembly as you take it off like Eric the car guy mentions in this post: https://youtu.be/sTpKpkxJjLQ (at about 6:45)
8. Remove parking brake cable from pad assembly using needle nose pliers, then unbolt parking brake assembly from the hub (10mm) and the 12mm bolt/ brace that holds the parking brake cable to the frame, so as to allow for wiggle room of parking brake cable.
9. Unbolt the 4- 17mm bolts holding the hub/ wheelbearing/axle assembly together, and slide the axle carefully out, holding a shop rag as there is probably some gear oil all over the axle shaft.
10. I then took my hub/ axle assembly along with my new wheel bearing, new snap ring, new inner bearing retainer, new rear axle shaft washer to my local NAPA machine shop and paid $47 to have them press the old bearing out, and place the new bearing. Those guys definitely know what they are doing and have done many wheel bearings before. took them about 2 hours and they had my axle shaft all ready for me.
11. I then stopped by my local O-reillys on the way home and rented a bearing race and seal driver set from them. This is really the only way to install the new rear axle shaft oil seal safely. Ive effed this up on my old runner multiple times by trying to install with just a hammer, and had to do the whole job over again. It's free to rent, so dont eff around.
12. I cleaned up the hub and placed my new exterior o-ring. I then made sure to rub some moly fortified grease all over the seal prior to install, and then reinstalled the axle. MAKE SURE you clean off the axle shaft, especially the teeth that are going back into your delicate differential. Machine shop guys are great at what they do, but they aren't supposed to keep your axle shaft pretty and clean. Thats your job. Now it's just a matter of reversing the process
13. Torque 4-17mm bolts to 90lb-ft
14. Re-install parking brake cable/bolts.
15. Re-install parking brake shoes starting with reverse of how you removed it. The hardest part of this reinstall is getting those friggin shoe hold down spring cups back into position (with tooth/ lip in the hole). So I used some paracord I had laying around and aligned the hole in the hub with the cup and used traction to compress the spring and hold it steady. Then I slid the shoe behind it into position and released tension. Then using a screwdriver I pushed the tooth into the hole to secure the spring cup hold down (you’ll know what I mean when you’re in there). Then replaced the lower tension spring and put the adjuster between the bottom of the two pads, paracord- tricked the remaining hold down spring cup and replaced the upper tension springs. To note, the shoes won’t look right until you get those upper tension springs back into place. Also, while replacing all the components, I used a q-tip and some of my moly grease to lube the contact points between the moving parts. I think you’re supposed to use anti0seize though… O well.
http://i1204.photobucket.com/albums/bb410/bigbroncostyle/DSCN1705_zpsrco6xqmn.jpg[/img}
[img]http://i1204.photobucket.com/albums/bb410/bigbroncostyle/DSCN1704_zpsedi9lhls.jpg~original
16. Test the parking brake, I propped up my iphone and took a video while I walked around and pressed on the parking brake. Then I came back around and checked the video. If all is good then clean your brake shoes, entire brake disc, and caliper pads with brakleen. Be liberal, and then wipe off the disc brake with a rag. Once that dries use a q-tip and lubricate or use anti-seize on the contact points between the shoes and hub backing plate.
17. Re-install your disc brake and apply your parking brake again, checking pedal tension, and trying to turn the hub to see if the adjuster is set correctly. Mine was, so I didn’t worry about adjusting it.
18. Re-install brake caliper/caliper bracket by torqueing those 2 caliper bolts to 77lb-ft (I went rogue and torqued to 80).
19. Place brake line back into slot and slide that clip back in. Now go back and reinstall your ABS sensor and bolt down that 10mm bolt securing the brake line to the axle, and 12mm bolt securing the parking brake cable.
20.Replace your wheel and lug nuts torque to 90ish lb-ft.
21. BOOM, go for a test drive
Hope this helps some other guys out there. If anyone knows better than I do and has something to add to this post, please comment- I don’t want any bad info circulating around. Thanks guys, cheers.
Last edited:


