5th Gen Sliding cargo tray Install - Pics/Steps

alpinecowboy

New member
Hey guys - I know that the rear sliding cargo tray/deck is a bit of a love it or hate it thing.

Although my rig (2016 SR5) didn't come with one from the factory, I found myself squarely in the "love it" crowd so I decided to take matters into my own hands. With a little help from another forum member (Thanks jrob!) I was able to source a complete deck kit as he had just installed a drawer system in his Trail Edition and didn't need the parts anymore.

This was an easy "one banana" job in my opinion. Total time spent was less than an hour and it fit like a champ.

Without further ado, here goes....

Parts needed:
COMPLETE sliding tray assembly - all of it. You will need:
- under tray carpet liner
- sliding rail sub assembly
- horizontal storage box and cargo tie downs (you can't use your original ones)
- cargo tie down brackets (2x) to reposition the tie downs (see pics)
- sliding tray itself (duh)
- Carpet liner (1x)
- carpeted access covers (2x)
- all mounting hardware

If you buy one from someone who has taken theirs out make sure you get EVERYTHING. You will truly need it all as nothing from my SR5 was able to repurpose to the new deck. (Thanks again jrob - you are a bad-a$$ for making sure I had all that I needed - much appreciated).

Tools wise:
- Socket wrench with 10mm, 12mm and 14mm drivers (i.e. the 3 most used drivers on a Toyota)
- Flat head screwdriver (the larger the spade the better)
- Drill with 2-3 bits ranging from 5mm to 10mm in size
- 1 beer or coffee depending on time of day (or something else if you don't like the hard stuff)
 
Register to hide this ad
step 1: removal of standard deck

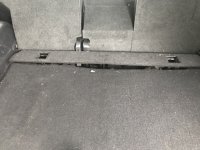
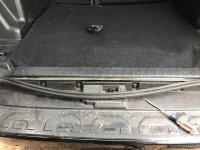
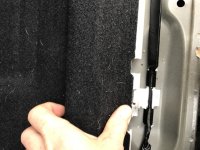
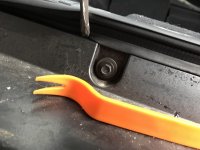
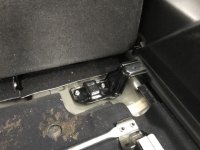
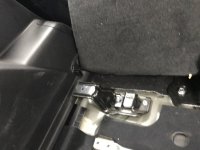
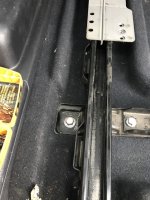
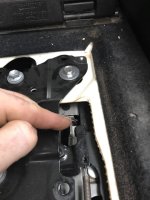
1) Remove the two cargo tie downs closest to the rear seats - it helps to fold the seats down to get them out of the way. To access the bolts, just use your flat head screwdriver to flip up the access cover (see pics 1 and 2). Neatly bag these up for whoever you sell your SR5 deck pieces to.

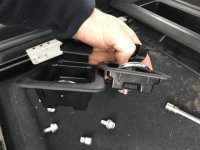
2) Gently pry/pop the carpeted horizontal panel that the cargo tie-downs are attached to out of the way (see pic 3 below). Move it out of the vehicle as you won't need it again.

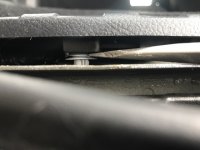
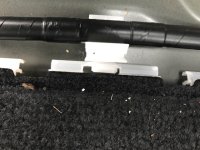
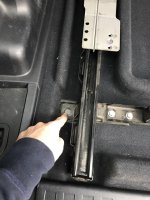
3) Gently slide the weatherstripping from around the bottom of the cargo hatch (see pic 4). Don't go crazy, you only need to remove enough to access the plastic rivets holding the trim piece nearest the rear door.

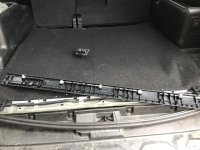
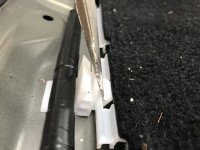
4) Using your screwdriver, GENTLY pop the plastic rivets up (5x) and remove the trim piece - set this aside and keep it handy for reinstall in about two minutes. (see pics 5 & 6)

5) Remove the carpet liner clips nearest the cargo door by GENTLY prying the plastic clips that hold it in place (4x). (see pics 7 and 8)

6) Voila! You have removed the standard SR5 cargo liner!! 1/3 of the way there!
 

Attachments

  • 101.jpg
    101.jpg
    71.7 KB · Views: 37,119
  • 102.jpg
    102.jpg
    106.4 KB · Views: 41,820
  • 103.jpg
    103.jpg
    110.4 KB · Views: 41,307
  • 104.jpg
    104.jpg
    100.1 KB · Views: 37,376
  • 105.jpg
    105.jpg
    63.6 KB · Views: 36,899
  • 106.jpg
    106.jpg
    94.4 KB · Views: 37,496
  • 107.jpg
    107.jpg
    98.8 KB · Views: 36,931
  • 108.jpg
    108.jpg
    84.1 KB · Views: 36,785
Step 2: Installing the carpet liner, cargo tie downs and storage box

Now that you have the old liner out, it is time to start getting that nifty new sliding deck installed....

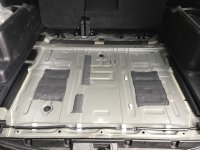
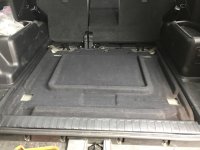
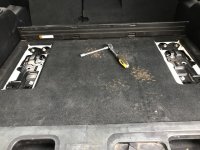
Here is what your bare cargo area should look like:
 

Attachments

  • 109.jpg
    109.jpg
    79.9 KB · Views: 38,005
No... honestly this thing seems ridiculously quiet to me... But I come from rigs like a 81 Bj60, an 88 T4R, a 67 Fj40... you get the idea... a 2016 T4R seems like a monastery in comparison
 
Lucky!! I've been looking for a tray in close to new condition for a couple weeks and haven't had much success.

Thank for the install notes too. I've read a couple on here, but always interested in another one. What year was the tray you installed?
 
Step 2 (cont): Installing the carpet liner, cargo tie downs and storage box

I like to install in the exact reverse order that I take things out. It is a trick I learned reading "Zen and the Art of Motorcycle Maintenance". (By the way, that book and the tricks in it has allowed me to tackle many projects that I'm otherwise totally unqualified to even consider and I can't recommend it enough.)

So, with that, let's get our new base carpet liner in. That step is really easy.
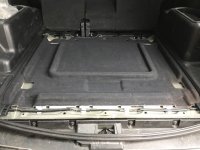
1) Orient the carpet liner from your sliding tray system so that the plastic clips run along the cargo door opening. The raised center should form a large "U" ridge if you are looking it from the rear bumper (see pic 10)

2) Gently snap the plastic trim into the same clips you disconnected the old liner from. (pic 11)

3) Gently push your weather stripping back in around the door channel. Pro-tip: note that the weather stripping has a little flat "flap" at the upper edge - DO NOT leave this exposed as it is prone to tearing. Instead, carefully push it back into the channel using a flathead screwdriver or plastic trim spludger (pic 12)

4) Replace the plastic trim piece that protects the edge of your cargo opening that you removed in Step 2 of part 1 above. It should just snap back into place. Don't force it - that just means you aren't lined up correctly over the clip points. (pic 13)

Now it's time to replace the front tie-downs and get the front horizontal cargo box installed. This nifty little void gives you a great place to store tools and roadside emergency gear. Or if you are a nervous little fella you can put your squirt-gun in there, but my guess is you're better off with tools...

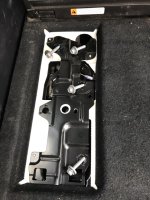
5) Place the front cargo tie down mounting brackets from your slider "kit" so that the two bolt holes line up over the position of the old brackets with the arrows pointing toward the front of the truck. They will look like "wings" and work to offset the mounts to their new location (see pics 14, 15 & 16)

6) You won't be able to use your old Tie-downs here because they are totally different depth than the ones in the slider (pic 17).

7) Once you have the mounts in, lay the horizontal cargo box over the mounts and attach the cargo tie-downs to their mounts which will hold everything in place.
 

Attachments

  • 111.jpg
    111.jpg
    83.7 KB · Views: 36,844
  • 110.jpg
    110.jpg
    99.2 KB · Views: 36,309
  • 112.jpg
    112.jpg
    85.4 KB · Views: 36,257
  • 113.jpg
    113.jpg
    79 KB · Views: 40,179
  • 117.jpg
    117.jpg
    76.8 KB · Views: 36,223
  • 118.jpg
    118.jpg
    84 KB · Views: 36,261
  • 119.jpg
    119.jpg
    70 KB · Views: 36,091
  • 120.jpg
    120.jpg
    69 KB · Views: 36,023
Last edited:
Step 3: Siding rail sub-assembly installation

This is the only part of the install that is even somewhat tricky, and that is only because it requires you to do a little drilling... but don't worry, if you are willing to tackle a Kullen, Herdal or Hemnes then you should feel emboldened here as well....:reddance: (and if you no idea what I am talking about please close this window and go watch Deadpool immediately).

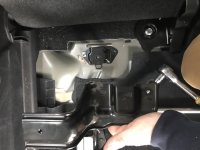
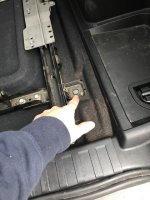
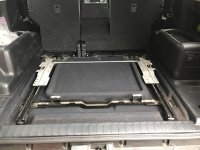
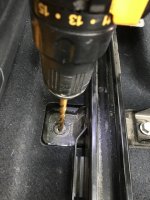
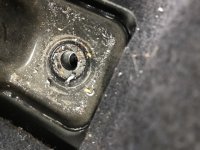
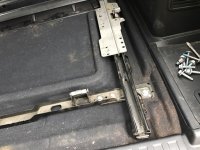
As you will see in the first two pictures below, there are two mounting points for the sliding rail sub-assembly nearest the cargo door opening that are hidden under the floorpan of the SR5 cargo area. Luckily for you, Mister Toyoda knew you were a crafty little devil and so he left the threaded mounts there under the pan - so all you need to do is drill through a relative thing piece of metal to access the mounting hard points (see pics 18 & 19). Let's get to it:

1) Place the sliding rail sub-assembly into position in the cargo area. The two mounting points nearest the back seat are pretty obvious. You will have it in the correct position if the round linking bar between the two sliding arms is nearest the back seat and your afore-mentioned bolt holes line up (see pic 20).

2) Bolt the sub-assembly into position with the holes that are there nearest the seat. Pro-tip: make sure that thing is centered so that when you start drilling the other two mounting holes it all lines up.

3) Bust out that drill and start with small pilot holes for the two mounting points nearest the cargo door. Then gradually work your way through a couple of larger bits to make sure your hole is perfectly positioned over the threading mounting points you are accessing. (see pics 21 & 22)

4) Go slow. Take your time. Don't rush. The last thing you want to do is mar the threads with your overzealous drilling. The metal of the floor pan is thin and it won't take you more than 20 seconds of drilling (maximum) to break through.

5) Clean up your holes and then insert your remaining two bolts to finish attaching the sub-assembly. Bam! (pics 23 & 24)
 

Attachments

  • 114.jpg
    114.jpg
    108.6 KB · Views: 37,269
  • 115.jpg
    115.jpg
    101.6 KB · Views: 36,601
  • 116.jpg
    116.jpg
    81 KB · Views: 44,315
  • 121.jpg
    121.jpg
    102.4 KB · Views: 36,271
  • 122.jpg
    122.jpg
    90.7 KB · Views: 36,263
  • 123.jpg
    123.jpg
    113.1 KB · Views: 36,254
  • 124.jpg
    124.jpg
    110.9 KB · Views: 36,211
Step 4: Sliding tray install

It's the home stretch. I'm so proud of you. Really.

So let's wrap this up and get this done so we can go back to running errands and raking leaves. This part is really straight forward, especially now that you've gotten the hard part of drilling through the sheet metal behind you.

1) With the sub-assembly in the fully closed position, place the sliding tray deck down onto the sub assembly with the handle/thumb switch nearest the cargo door opening (captain obvious).

2) You should have 4 bolts for each of the two mounts. The three shorter bolts on each side go on the "inside" position and the single longer bolts take the "outside" position nearer the upper corners (closest to the rear seat). (See pic 25)

3) Ensuring it is all lined up and straight, go ahead and bolt that sucker down. It might be wise to get all of the bolts in position and down before you do your final tightening although I found it to be trouble free. (pic 26)

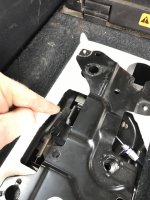
4) Pro-Tip: Check out pic 27 & 28 closely. You really want to ensure that cable actuated levers are making good contact with the release pins on the drawer. One side of mine was a little loose and it enabled the latch to "jump" off the position lock. It is easy to adjust these with a little thumb pressure (i.e. push on it with your thumb until they make contact). This makes sure your sliding deck can lock into position without worry. (pic 27 & 28)

5) Pop the carpeted mounting access covers into place (they only go one way) and voila'! You are effectively done!

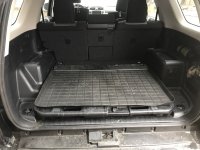
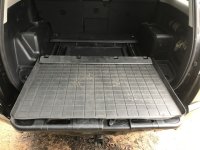
6) I trimmed my weathertech cargo liner to fit the new sliding deck and flipped down the little divider clamp at the top of the deck to hold it in place (pics 29 & 30).

Good luck and have fun!!
 

Attachments

  • 125.jpg
    125.jpg
    114.4 KB · Views: 35,699
  • 126.jpg
    126.jpg
    95.9 KB · Views: 35,769
  • 127.jpg
    127.jpg
    81.5 KB · Views: 35,456
  • 128.jpg
    128.jpg
    107 KB · Views: 35,835
  • 129.jpg
    129.jpg
    85.5 KB · Views: 47,797
  • 130.jpg
    130.jpg
    87 KB · Views: 37,839
Dude, nice work!! I was pretty meticulous taking everything apart, though I do wish I would have bagged and labeled everything a bit better. Would have eliminated any guess work, but doesn't look like you had any trouble.

Stoked it worked out for you man!

Sneak peak at my 90% completed system:

16707385_10155216177219267_3124174927047313062_o.jpg
 
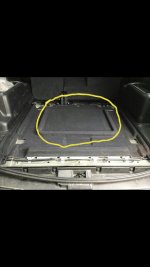
How much distance/space do you think there is between the panel I circled and the metal floor panel?
I was thinking about removing this section to give me more room to store something under the deck when it's closed.
IMG_0497.jpg
 

Attachments

  • IMG_0497.jpg
    IMG_0497.jpg
    116.5 KB · Views: 36,489
Space under drawer

I'd say there is about 1 1/5 inches under the drawer. The carpet is so thin there I don't know if it would add much to that - but depending on what you are putting there it could be the "magic amount"...

I also was considering putting something between the sliding tray and the deck - but whatever it ends up being would need to be secured somehow to the deck of the truck so that it didn't impede the drawer or get bounced around and end up jamming everything closed...
 
I like to install in the exact reverse order that I take things out. It is a trick I learned reading "Zen and the Art of Motorcycle Maintenance"...

So fantastic that you referenced that book, I loved it. Without knowing the story, I read that while moving from MN to OR and my Dad drove out with me. Crazy irony!

Also, awesome write-up. I think I'm getting a tray for my rig sometime this week, glad to know it's an easy install!
 
Although my rig (2016 SR5) didn't come with one from the factory, I found myself squarely in the "love it" crowd so I decided to take matters into my own hands.


Parts needed:
COMPLETE sliding tray assembly - all of it. You will need:
- under tray carpet liner
- sliding rail sub assembly
- horizontal storage box and cargo tie downs (you can't use your original ones)
- cargo tie down brackets (2x) to reposition the tie downs (see pics)
- sliding tray itself (duh)
- Carpet liner (1x)
- carpeted access covers (2x)
- all mounting hardware


Tools wise:
- Socket wrench with 10mm, 12mm and 14mm drivers (i.e. the 3 most used drivers on a Toyota)
- Flat head screwdriver (the larger the spade the better)
- Drill with 2-3 bits ranging from 5mm to 10mm in size
- 1 beer or coffee depending on time of day (or something else if you don't like the hard stuff)

I was in the same boat as you! Thanks to your write up and a guy off craigslist, I now have the slide out tray.

Thanks!
 
SR5 swap... if anyone wants to sell a tray

If anyone wants to sell or trade out a stock rear for the Tray - I'd like to get the sliding cargo tray. So, PM me. Thanks.
 
Help

Thanks for this excellent thread and the fantastic detailed photos which have convinced me to find someone else to remove our sliding cargo tray - my question is, what kind of a shop might be best? I assume the dealer would charge a lot. Maybe an auto upholstery shop? Body shop? Ideas? Thanks. (Also suggestions on how/where to buy replacement flat carpet deck would be appreciated)
 
Thanks for taking the time to write the install up. I stalled mine in about 1 hour, including vacuuming the old and new carpet and putting tools back in the box.

Other than the 2 holes that need to be drilled it is plug and play.
 

Members online

Forum statistics

Threads
278,311
Messages
3,554,082
Members
248,016
Latest member
Advally Service

Trending content

Back
Top