A-Ha's Build.

aha2988

New member
Well I finally got a free night to sit back and compile all my 4runner mod's, Photo's, a video or two, and just some of my personal experiences with my truck. So here goes nothin lol to anyone interested.....

Interior mods/additions:
-Weather tech front and rear digital fit floor liners
-Kennwood DDX419 HU w/ 250watt JL amp & 10" port/slotted JL sub woofer
-ARB twin on board air compressor
-AC 115V switch moved to center console
-ARB compressor and locker solenoid switches left of steering wheel.
-t4r LED gauge swap (by Alex)

Exterior mods/additions:
-Oakley emblems on limited roof rack
-window vent visors
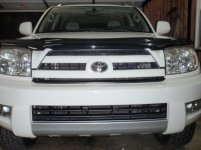
-blacked out grill w/ std. chrome emblems
-weather tech bug shield
-weather tech sunroof visor
-depo black bezel headlights & tail lights
-JRU (jeep recovery unit) sticker :biggrin2:
-TJM stealth 9000lb winch


Suspension/ wheels mods/additions:
-Radflo 2.5 extended travel 650lb spring adjustable coilovers
-Overland warehouse 2.5 rear extended travel kit (minus coils)
-All pro 3.5in lift rear springs (with 1.5 inch daystar rear spacer on driver side coil, driver lean eliminated)
-restuded front hub (1/4" longer studs for 1/4" wheel spacer)
-1/4" wheel spacer plate (to remove wheel/brake caliper interference)
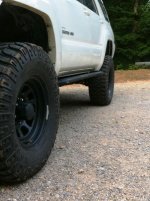
-Black rock D-window 16"x8" rims with 4.25 BS (wheel back spacing + 1/4" wheel spacers equals 1" wheel spacer on stock wheels)
-Mickey Thompson MTZ's 305/70/R16 tires
-SPC performance LR UCA's caster set at -3 degrees
-front sway bar removed
-Medic extended rear sway bar links (from toyota120)
-Roger brown 1.25 inch body lift
-body mount chop


Armor:
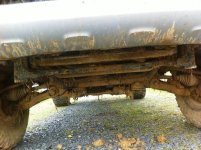
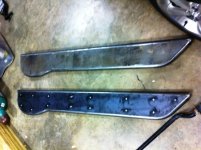
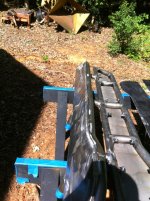
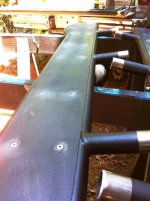
-4xinnovations 66" DOM upgrade w/ kick out sliders (custom plated BY me)
-Bay Area Metal Fabrication LCA skid plates
-Bud built diff skid
-CBI front bumper
-....needs more....

Engine/ drive train additions/mods:
-VSC system cut off
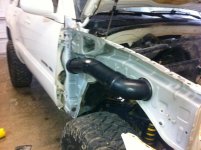
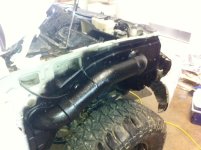
-internal snorkel mod
-k&n air filter (factory box)
-HFC delete
-Resonator Delete
-toyteclift diff-drop kit
-4.56 gear ring an pinion front an rear
-ARB front/rear air locker(s)!
-Fj Tcase w/ Frontrange offroad twin sticks


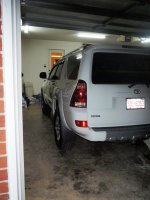
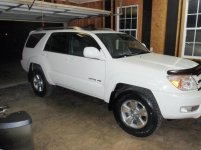
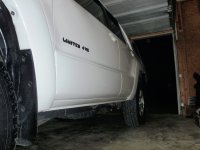
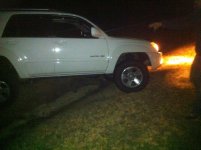
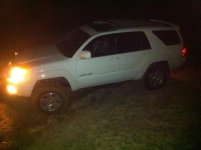
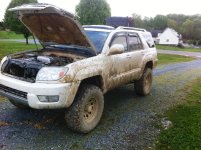
These first shots were the earliest photo's i could drag up. These shots were taken after i replaced the radial tires with cooper A/T's and installed the front bug sheild, as well as liners. So not fresh from the lot but as close as i could get lol.
P3270081.jpg P3270095.JPG
P3270086.jpg P3270098.jpg
P3270093.JPG P3270079.JPG

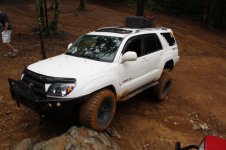
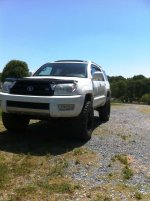
This is how she sits now:
IMG_1480.jpg
 

Attachments

  • P3270086.jpg
    P3270086.jpg
    59 KB · Views: 10,690
  • P3270081.jpg
    P3270081.jpg
    56.1 KB · Views: 10,717
  • P3270095.JPG
    P3270095.JPG
    70.2 KB · Views: 10,668
  • P3270098.jpg
    P3270098.jpg
    46.5 KB · Views: 10,573
  • P3270093.JPG
    P3270093.JPG
    110.8 KB · Views: 10,698
  • P3270079.JPG
    P3270079.JPG
    135.3 KB · Views: 10,594
  • IMG_1480.jpg
    IMG_1480.jpg
    105.4 KB · Views: 7,674
Last edited:
Register to hide this ad
So after I installed the A/T's I had a bit more inspiration to venture with friends here and there off road. I quickly found the need for a bit more ground clearance....
IMG_0978.jpg

...

IMG_0979.jpg

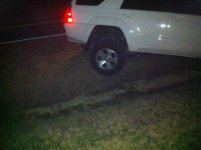
So I went and grabed up an OME HD 886 front, 896 rear shock/spring 3" lift setup with intentions of adding armor and extra daily weight. Heres some of the first little "ditch test" runs just checking out the travel...

IMG_0111.jpg
IMG_0112.jpg
IMG_0113.jpg

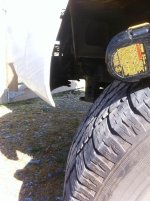
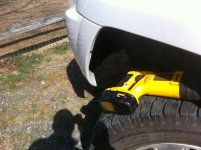
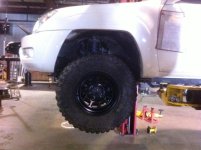
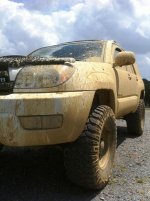
After checking out the travel and getting a feel for the truck off road through a few other amature offroad adventures, I ventured into running larger tires to get a bit more ground clearance as well as traction. I debated between factory wheels with spacers or after market's with less back spacing. I chose to go with Black rocks D-window steel "nascar" wheel it was very affordable to grab 5 rims (having a matching spare). I ordered them as toyota hub pattern 16"x 8" with a 4.25 backspacing. compared to factory rims this would equal adding a 3/4" spacer. I Had a local tire shop order them from black rock to have them there to mount and balance my tires. They were $95 bucks a rim when i purchased. Durring install however we ran into a slight caliper interference in the front. I had to add a 1/4" wheel spacer, as well as re-stud the front hubs with longer studs to accomidate the spacers. This allowed the rim to mount; however, it was slightly rubbing against the face of the brake caliper. So we removed the wheel, and by using an angle grinder with a 4" sanding disc we were able to shave off just enough material to allow the caliper to clear. So in preperation for the new tires as i knew i wanted as close to 33's as i could get I did a little bumper trimming up front. as well as removed all the mud flaps.
IMG_0109.jpg
IMG_0108.jpg
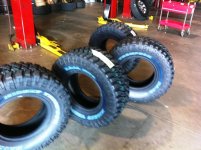
I was low on funds as things just go up and down at times so to go ahead and step into the tire size i wanted i went to a local 4x4 shop that has a feild dedicated to used mud tires, as you are free to roam the lot in search of any used tires in your size range. After about 3 hours of digging out all the 305/70/16's and the 33x12.50r16's we wound up with more of the 305/70's with better tread life available. Some approach to pick out a tire size right lol. Anyway wound up with 1-BFG mud terrain, 1- parnelli jones mud terrain, 1-maxis mudder, 1-adventura (walmart brand), and 1- TSL super swamper biased ply lol. All measured 305/70/16 except for the PJ & the TSL they were true 33x12.50's. I picked up the whole set of five for 100 bucks and ran that setup for about 8-9 months (yes this is my daily driver). It was cool however to get a feel for a few different types of mud tires available. The PJ would be my favorite its one narly tire its unfortunate there hardly available anymore. this shot is of the BFG i think lol or maybe the Maxis mudder haha. I will say though the next diff fluid change was mighty dirty, and the ride wasnt so great at that with 4 different tires all around and coils with a preload requiring a couple hundred extra pounds it was interesting to give new passengers a ride lol.
 

Attachments

  • IMG_0111.jpg
    IMG_0111.jpg
    57.2 KB · Views: 10,204
  • IMG_0112.jpg
    IMG_0112.jpg
    60 KB · Views: 10,205
  • IMG_0113.jpg
    IMG_0113.jpg
    52.5 KB · Views: 10,182
  • IMG_0109.jpg
    IMG_0109.jpg
    89 KB · Views: 10,254
  • IMG_0108.jpg
    IMG_0108.jpg
    76.2 KB · Views: 10,138
  • IMG_0184.jpg
    IMG_0184.jpg
    57.9 KB · Views: 9,975
  • IMG_0978.jpg
    IMG_0978.jpg
    86.8 KB · Views: 10,825
  • IMG_0979.jpg
    IMG_0979.jpg
    77 KB · Views: 10,773
Last edited:
So after I got my tire size setup, lift on, factory running boards out of the way, and mud flaps removed it was time to hit the trail and see what this thing had!!

Muddin At Uhwarrie National park.MOV - YouTube

Muddin At Uhwarrie National park2.MOV - YouTube

Muddin At Uhwarrie National park3.MOV - YouTube

IMG_0201.jpg
IMG_0202.jpg
IMG_0203.jpg
IMG_0204.jpg
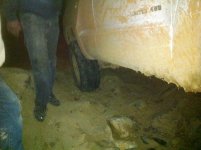
hey Superman does that tree stump look familiar? this was a night run of rocky mountain loop that first trail we hit before cj and mike got there the other weekend. This was that hard spot you got those first two videos of this was the first time i ran that trail lol specially at night. But that tree was still standing the first time i went through that section, this past weekend it looks like they have cut that tree down to just a stump for some reason.
IMG_0753.jpg
Little coffee and peaches & cream oat meal in the morning after a hard night of trail riding great way to start the morning camping!!
IMG_0440.jpg
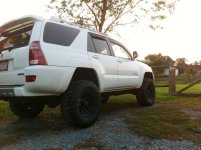
So the variety pack of mud terrains certainly did there job, held up great offroad with the help of some tire slime to help seal the warn out beadseals lol. But after 8-9 months of driving the set around on the road i felt i had givin my sacrifice of saving money it's due and it was time for some new tires!! brand new set of Mickey Thompson Baja MTZ's 305/70/R16!!!
IMG_0446.jpg
Also while i was out on the expedition camping trail ride, I noticed my resonator was getting beat up and banged on all over the rocks so i hacked it off with a saw zaw and left the exhaust pipe where it turns down just behind the axel and kinda points to the 11 mark (on a clock postion) of the passenger rear tire.
IMG_0447.jpg
pretty truck with brand new shoes!!
 

Attachments

  • IMG_0201.jpg
    IMG_0201.jpg
    74.3 KB · Views: 9,837
  • IMG_0202.jpg
    IMG_0202.jpg
    65.3 KB · Views: 9,851
  • IMG_0203.jpg
    IMG_0203.jpg
    46.9 KB · Views: 9,847
  • IMG_0204.jpg
    IMG_0204.jpg
    63.6 KB · Views: 9,755
  • IMG_0440.jpg
    IMG_0440.jpg
    75.2 KB · Views: 9,778
  • IMG_0446.jpg
    IMG_0446.jpg
    73 KB · Views: 9,780
  • IMG_0447.jpg
    IMG_0447.jpg
    70.2 KB · Views: 9,755
  • IMG_0753.jpg
    IMG_0753.jpg
    60.3 KB · Views: 9,770
Last edited:
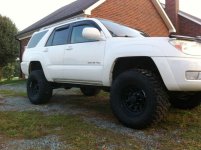
So after the new m/t's i felt i was pretty set, road with the setup a while and had some fun

IMG_0833.jpg

IMG_0759.jpg

So one night at a local mudbog competition I got ansi watching all the other guys have fun so i got out and lined up for the competition!! The distance to beat in the street truck class was 169ft the bog length was 200ft I pulled in at 171ft baby!! won my class's competition!! the video doesnt do much justice but it still shows my pretty white truck jumping into a sticky ass mud hole!
03 4runner wins mud bog.mp4 - YouTube

IMG_0848.jpg

IMG_0851.jpg

IMG_0853.jpg

IMG_0856.jpg

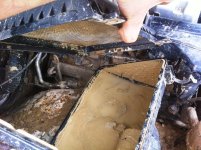
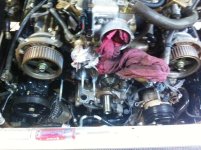
Unfortunatly I submerged my timing belt housing in the thick sticky mud. however after running the truck fine all weekend after the competition, When i started the truck up monday morning I ran into some issues. Evidently some of the mud hardened into clay inside my timing belt houseing. When i started the car that morning a chunk of clay fell into my timing belt, traveling with the belt under the crank pully causing the timing belt to jump a few teeth. My timing was about 15-20 degrees off and the whole driver side of my engine was missfiring.

IMG_0859.jpg
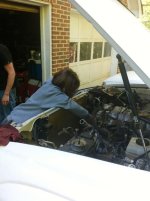
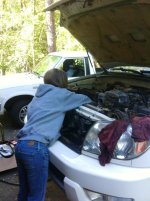
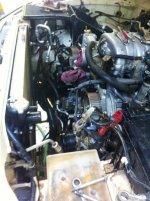
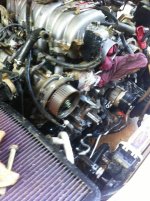
So we loaded the truck on the car hauler and pulled out the trusty old dodge 2500 1st gen cummins to tote the 4runner over to a friend of mines house. He used to work for toyota an has done a number of 4runner timing belts. It was nice to drink some beer and have him watch my back while i tore into the front of my engine to rebuild the timing belt houseing companants.
IMG_0867.jpg
My wife even found herself useful she said " man this engine is dirty can i help clean it?" I said of course hunny!!! cant beat that right!
 

Attachments

  • IMG_0833.jpg
    IMG_0833.jpg
    99 KB · Views: 9,657
  • IMG_0759.jpg
    IMG_0759.jpg
    63.2 KB · Views: 9,667
  • IMG_0848.jpg
    IMG_0848.jpg
    97.8 KB · Views: 9,592
  • IMG_0851.jpg
    IMG_0851.jpg
    117.9 KB · Views: 9,605
  • IMG_0853.jpg
    IMG_0853.jpg
    95 KB · Views: 9,597
  • IMG_0856.jpg
    IMG_0856.jpg
    80.7 KB · Views: 9,588
  • IMG_0859.jpg
    IMG_0859.jpg
    51.5 KB · Views: 9,594
  • IMG_0867.jpg
    IMG_0867.jpg
    60.6 KB · Views: 9,665
Last edited:
IMG_0866.jpg

So i left my wife to do her thing she hates me watching her work, came back with some food and had this to work with!

IMG_0868.jpg

IMG_0870.jpg

IMG_0872.jpg

Got the timing belt, water pump, idler pully, tensioner pully, and auto tensioner installed. Along with new antifreeze coolant, and a new front drive belt (it came in the kit so why not lol) the kit also came with a new Tstat but im just holding on to that until the one i have goes bad. anywho good as new!

IMG_0877.jpg

After experiencing mud in my air intake i was rather nervous to venture off into water crossings or mud holes. So I did a little research and found some old 3rd gens had installed an internal snorkel mod I did a write up for the 4th gens here: http://www.toyota-4runner.org/off-roading-home-monst4rs/113733-internal-snorkel-mod-4th-gen.html
but heres a few pics for the record... I also raised the rear differential breather to the gas tank fill neck or in other words i also did the DIff breather mod.

IMG_0914.jpg

IMG_0924.jpg

so with my worries out of the way it was time to play again!!!

IMG_0900.jpg
 

Attachments

  • IMG_0866.jpg
    IMG_0866.jpg
    74.8 KB · Views: 9,665
  • IMG_0868.jpg
    IMG_0868.jpg
    81.7 KB · Views: 9,582
  • IMG_0870.jpg
    IMG_0870.jpg
    89.4 KB · Views: 9,621
  • IMG_0872.jpg
    IMG_0872.jpg
    103.7 KB · Views: 9,589
  • IMG_0877.jpg
    IMG_0877.jpg
    82.5 KB · Views: 9,603
  • IMG_0914.jpg
    IMG_0914.jpg
    62 KB · Views: 9,517
  • IMG_0924.jpg
    IMG_0924.jpg
    60.9 KB · Views: 9,511
  • IMG_0900.jpg
    IMG_0900.jpg
    80.6 KB · Views: 9,577
Last edited:
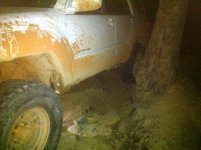
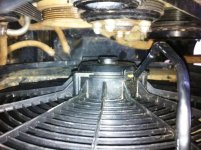
So due to a mis placed radiator hose clamp durring assembly after timing belt install. My plastic fan blade had been slightly catching the radiator hose clamp until finally the the plastic became unbalanced, caused the fan clutch to fail then wobbled around breaking off huge chunks of plastic fan blade on the hose clamp lol. needless to say I needed a new fan. The dealer ship wants $126.00 for just the plastic fan blade then you still have to replace the fan clutch. I said no way am i paying 126 dollars for peace of plastic. So i ventured down to my local parts store and bought the biggest electric fan with controller they had. I only payed $107.00 for the whole repair. I also did a write up on the install...http://www.toyota-4runner.org/4th-gen-t4rs/113933-new-fan-clutch-fan-electric-fan-mod-2.html (post #17)

IMG_0942.jpg

IMG_0951.jpg

I started to look into armor and began with some sliders. I decided if i added the sliders i would loose ground clearance so to help i went ahead and installed an RB 1.25 BL. I chose the 1.25 because it was the tallest you can body lift and run into the least about of issues. (i certainly entertained the idea of going taller just went the practical route).

IMG_0991.jpg
^^driver side with body lift passenger without lol.
IMG_0992.jpg

Got the body lift installed and looked around for some sliders. 4xinnovations sold me with the fact i could essentially weld the sliders on where ever i pleased at what ever angle i wanted and get the finished look i wanted. They were also the best priced and still sold me a quality set of d.o.m. sliders with kickout!

IMG_1018.jpg
IMG_1043.jpg

So after i got them i decided i wanted to plate the bottom for a better "sliding effect" as well as plate the top. I have the limited trim package that came with running board lights for entry/exiting the vehichle I've got a good thought to incorporate that wiring into these sliders so i made the top plate bolt on with counter sunk allan head 1/4" bolts. I plan to removed the top plate and install ground spot lights for night trail riding to better see obtacles that I need to manuver around underneath the truck. I'm still working up a good design to have the lights flood well without being exposed to rocks (some sort of housing inside the slider with perhaps expanded metal covering the opening)

IMG_1050.jpg

finished and painted ready to weld up to the truck

IMG_1053.jpg
welded up ready to crush some rocks!!
 

Attachments

  • IMG_0942.jpg
    IMG_0942.jpg
    77.8 KB · Views: 9,443
  • IMG_0951.jpg
    IMG_0951.jpg
    76.4 KB · Views: 9,435
  • IMG_0991.jpg
    IMG_0991.jpg
    57.6 KB · Views: 9,419
  • IMG_0992.jpg
    IMG_0992.jpg
    65.3 KB · Views: 9,382
  • IMG_1018.jpg
    IMG_1018.jpg
    69.3 KB · Views: 9,408
  • IMG_1043.jpg
    IMG_1043.jpg
    115.3 KB · Views: 9,477
  • IMG_1050.jpg
    IMG_1050.jpg
    82.6 KB · Views: 9,465
  • IMG_1053.jpg
    IMG_1053.jpg
    91 KB · Views: 9,467
Last edited:
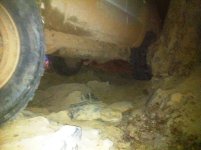
whoa, how were you able to fit that 16" rims, I heard people are having hard time fitting the.

the 03 limiteds didn't have the bigger "sport" brakes up front yet atleast mine didn't so the 16" part wasn't an issue the x-factor of the rim was my dilemma the angle in which the rim "wall" for lack of a better word cuts forward away from the hub wasn't steep enough to clear the caliper without 1/4" spacer and a little sanding on the caliper faces the backs mounted up like they belonged there
 
Last edited:
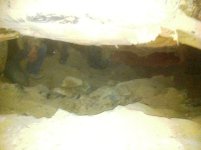
lol thanks matt, how those flaps workin for you btw you get a chance to get them installed?

yeah i need a few skids and some stronger/harder lower links lol all in good time.
 
They're working, I'm' just not 100% sure I wanna keep em on. Thanks again though!

Hopefully you'll get your liners soon, sorry for the delay!
 
Thanks PD!! saved me a few mouse clicks to get them posted. for the record to that second video, after growing a pair i managed to give it enough gas to hop right up over those rocks just didnt grab it on video. gotta work on my throttle control a little here an there lol.
 
Yeah for some reason I thought I did get you going over it in that vid, but when I watched it back, I realized I stopped the filming short. Whoops. The videos will get better Dawg!
 

Members online

Forum statistics

Threads
278,306
Messages
3,554,045
Members
248,016
Latest member
Advally Service

Trending content

Back
Top