Adding hardwired automatic LED light inside center console

emmantik

New member
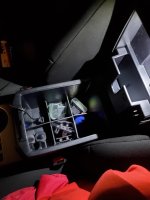
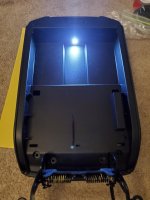
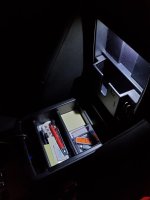
Added a hardwired light inside my center console storage box. It is hardwired by accessory power and it is turned on and off with a tilt switch. The light will turn on when the key is in the accessory position and the console lid is in the open position. Here is a quick write up if anyone is interested.

I bought the 11mm flush mount bulb from Oznium, no lens.

LED Bolt Flush Mount Lights | Bright + 12 Volt | Oznium LEDs

I used this but ordered from Amazon (Canada)

https://www.ebay.ca/i/321717417881?...MIwdzEw_ew6AIVmK_sCh2G_AzuEAQYCyABEgJ6aPD_BwE

But you should be able to use any type of tilt switch you prefer.
 

Attachments
  • 20200320_194940_resized.jpg
    20200320_194940_resized.jpg
    110.6 KB · Views: 3,580
  • 20200320_194955_resized.jpg
    20200320_194955_resized.jpg
    117.6 KB · Views: 3,531
Last edited:
Register to hide this ad
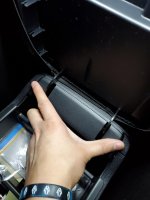
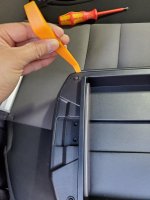
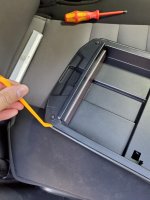
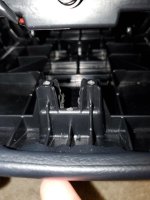
Pull back towards the rear at these 2 points. No screws just pull to release.
 

Attachments

  • 20200319_175904_resized.jpg
    20200319_175904_resized.jpg
    126.6 KB · Views: 3,474
  • 20200319_180156_resized.jpg
    20200319_180156_resized.jpg
    125.4 KB · Views: 3,554
Last edited:
Remove 6 screws to detach the lid from the console. Careful not to drop anything down the vent...ask me how I know SMH!
 

Attachments

  • 20200319_180222_resized.jpg
    20200319_180222_resized.jpg
    132.6 KB · Views: 3,482
Last edited:
Remove 4 screws and 2 screws holding the lock latch in place. Tissue box holder pops right off - just tug from bottom.
 

Attachments

  • 20200319_180537_resized.jpg
    20200319_180537_resized.jpg
    138.7 KB · Views: 3,479
Last edited:
Use pry tool to remove the inside cover from the lid at these 2 points
 

Attachments

  • 20200319_180755_resized.jpg
    20200319_180755_resized.jpg
    132.4 KB · Views: 3,465
  • 20200319_180806_resized.jpg
    20200319_180806_resized.jpg
    129.8 KB · Views: 3,475
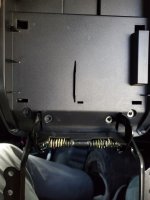
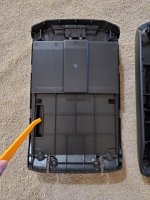
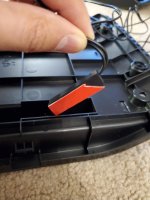
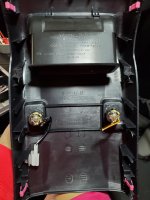
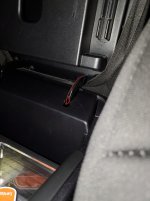
Here's what it looks like with the inside cover removed. I am pointing to the space where I mounted the tilt switch. I mounted the tilt switch at a 45 degree downward angle as opposed to flat. I realized that the driving motion will close and open the circuit intermittently even when the lid was closed. Having it at a 45 degree angle reduces unwanted ON/OFF of the LED by the motions of stop/go driving. Mounted it to the outer side of the slot mentioned. (red is the double sided tape)
 

Attachments

  • 20200319_181010_resized.jpg
    20200319_181010_resized.jpg
    133.2 KB · Views: 3,445
  • 20200319_181447_resized_1.jpg
    20200319_181447_resized_1.jpg
    117.8 KB · Views: 2,931
Last edited:
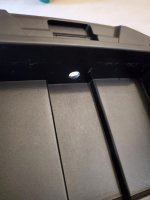
Drill hole for flush mount LED bolt. Take your time here! Your hole needs to be dead center or you will have to re-drill more holes if necessary. The LED bolt needs to fit exactly between the 2 screw mounts for the other part of the console lid. There are also tabs on the other side that the LED bolt may hit. What I did was play around where the bolt would go (on the backside) and traced and marked accordingly. If you are dead center you will clear the screw mounts. But you need to play around with the north/south distancing.
 

Attachments

  • 20200319_185344_resized.jpg
    20200319_185344_resized.jpg
    124.9 KB · Views: 3,395
  • 20200319_185556_resized.jpg
    20200319_185556_resized.jpg
    115 KB · Views: 3,446
Last edited:
Testing that my wiring is right before installing in the truck
 

Attachments

  • 20200319_223740_resized.jpg
    20200319_223740_resized.jpg
    121.6 KB · Views: 3,396
Last edited:
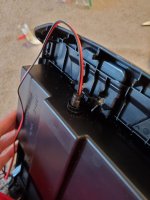
Had to dremel out some space between these 2 screw mounts. The LED bolt fits right between when the inner cover is in place.
 

Attachments

  • 20200320_002154_resized-1.jpg
    20200320_002154_resized-1.jpg
    122 KB · Views: 3,416
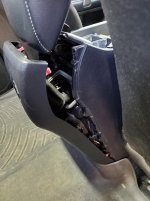
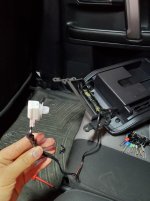
I cut off the connector from one of the 12V sockets of the rear passenger vent panel and spliced in my wires from the LED/switch. Green wire from existing harness should give you 12V. (you may want to circuit test to make sure. may be different depending on trim level). If you don't have these sockets you may be able to tap wires from the center console or run wires to the fuse box.
 

Attachments

  • 20200320_090816_resized.jpg
    20200320_090816_resized.jpg
    128.3 KB · Views: 3,418
  • 20200320_090843_resized.jpg
    20200320_090843_resized.jpg
    126.7 KB · Views: 3,459
Last edited:
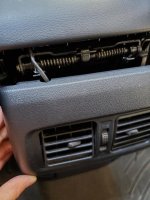
EDIT! See Post #20 - you don't have to drill this out. I re-ran the wires after the fact that won't require modifying this panel.

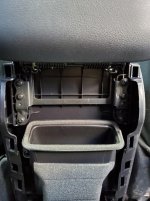
Drilled out a hole for the wires. Connect newly spliced on connector onto existing factory harness/connector that feeds the 12V sockets. You can now put everything back together and your light should be good to go!
 

Attachments

  • 20200320_144014_resized.jpg
    20200320_144014_resized.jpg
    134.1 KB · Views: 3,405
Last edited:
Judging from the insulated Phillips screw driver in the photo you appear to be an electrician. Nice clean job and write up.
What model 4Runner do you have.
Because mine doesn't have outlets in the console.
 
Judging from the insulated Phillips screw driver in the photo you appear to be an electrician. Nice clean job and write up.
What model 4Runner do you have.
Because mine doesn't have outlets in the console.

LOL! Good eye but I'm not an electrician. But I did used to work at an electrical wholesaler.

I have an SR5 PREM 2015.
 
This is a great idea. I have spare oznium bolt LED, this would be a good use for it.
Could you recommend a part number for the tilt switch you used? Thx.
 
Awesome job and write up. Can you list all the parts and where you got them from. I think I may have some spare time on my hands to do this mods [emoji40]
 
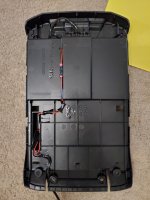
EDIT! You actually don't need to notch out a hole in your rear vent panel like I did in my last pic. I re-ran the wires along the top of the bracket/hinge and kept it in place with black electrical tape. I ran it along the top because if you taped it along the sides it would potentially rub against the plastic and maybe damaging the wires. No drilling required other than the hole for the LED.
 

Attachments

  • 20200322_183217_resized.jpg
    20200322_183217_resized.jpg
    131.9 KB · Views: 1,230
Last edited:

Members online

Forum statistics

Threads
278,304
Messages
3,554,041
Members
248,016
Latest member
Advally Service

Trending content

Back
Top