Adjusting Brake Shoes

stever1000

New member
A few weeks ago I adjusted the brake shoes of my 2000 limited with the drums off and turning the starwheel with a screw driver. I went from 19.6 mpg to 15.6 mpg in one tank because the shoes are now over adjusted...funny enough my brakes are more responsive than before...

I had trouble feeling/hearing the shoe tension on the drum and found it changed depending on how I held the drum and rotatted to feel and heal for dragging, and it also changed depending if the wheel was on as well.

Is there any easier way to adjust the starwheel than with the drum off and rotating it with a screw driver? No matter how little or how much pressure I applied to turn it, it wouldn't rotate consistently, sometimes 1 notch, sometimes 4 notch, but because the screwdriver would slip as it rotated, I found it tricky to tell how much it moved.

Anyone have some helpful tips? Especially since I now have to work backwards?

Thanks!
 
Register to hide this ad
I use a small flat screwdriver for the star screw, and a mini (glasses) flat screwdriver to push-on the auto-adjustment one-way lever to back off the star screw.

Only with brake drums on, no tires. Back off both brake shoes until everything is turning freely.

Adjust each side until you get friction, then back off just enough so the drum turns free. You are adjusted.

You also need to screw or unscrew the exterior handbrake cable adjustement so the screw is 1 millimeter far from the back of the drum or you'll be over-adjusting. see this image

138744d1417891605-drum-brake-help-image.jpg
 
Last edited:
I use a small flat screwdriver for the star screw, and a mini (glasses) flat screwdriver to push-on the auto-adjustment one-way lever to back off the star screw.

Only with brake drums on, no tires. Back off both brake shoes until everything is turning freely.

Adjust each side until you get friction, then back off just enough so the drum turns free. You are adjusted.

You also need to screw or unscrew the exterior handbrake cable adjustement so the screw is 1 millimeter far from the back of the drum or you'll be over-adjusting. see this image

138744d1417891605-drum-brake-help-image.jpg

oops, I definitely didn't adjust the exterior handbrake cable adjustment...
If I adjust that now would that balance out the over adjustment? (assuming the shoes were adjusted right the first time?)
 
Last edited:
The automatic adjusters (which operate every time the handbrake lever is pulled) only tighten the brakes, they will never loosen them. The parking brake action pulls a little spring loaded lever which will tighten the starwheel by one notch - if the brakes are loose enough to need it (and the star wheel isn't frozen).

If you put it together really, really loose then it could take a ridiculous number of handbrake lever pulls to get everything snugged up properly. If you install it too tight, it will just have to wear down to fit unless you manually back the adjustment off.

The adjusters on the external handbrake levers were probably adjusted properly, unless someone messed around with them for some reason. It's not something you'd take apart or loosen when working on the brakes (normally, anyhow).

I just replaced both sets of shoes on mine (leaking wheel cylinder on one side, replaced it and the wheel bearings on both sides just to be over-reactive - after makign sure the breather wasn't the issue). And I put it together without manually getting it close to the correct setting (starwheels manually screwed all the way in), and then it took me about 100 - 150 pulls of the handbrake lever to get it feeling right again.
 
When i did my rear shoes, I left the breaks a little on the loose side and just used the hand brake to tighten.

you can remove the access port to the star wheel on the back (axle side) of the drum to loosen/lessen the pad contacts a few clicks and go from there.

this way you dont have to go through the process of taking the drum off again.
 
The automatic adjusters (which operate every time the handbrake lever is pulled) only tighten the brakes, they will never loosen them.

He clearly stated that his brakes were over-tightened. He should definitely look if the adjusters are to specs instead of assuming, and it takes just a few minutes to verify and adjust.
 
I find it a little easier doing it with the drum off. If you get it too tight you have to go in the backing plate hole with a second screwdriver and push the lever off the starwheel while turning the starwheel with another screwdriver. Unless you've done this a lot and have the "feel" for it, it can be a pain. The starwheel has an lever that catches in the notches and prevents it from turning in one direction. You just pull that little arm away (with the drum off) from the starwheel and you can push it with a screwdriver in either direction. It might help to turn it all the way in (completely loose) and remove the 2 pieces (should be able to pop the asy out) and unscrew them and clean up the threads and put it back the way you found it. Adjust the starwheel until it just barely hits the drum. You will have to slip the drum on and off a couple times (or maybe not if you take your time). Then push your brake pedal down a couple times and make sure you can turn the drum with your hands. If you hear the shoes hitting the drum it's OK just as long as you can turn the drum by hand. I would also pull the ebrake up a couple times and release it and make sure the brakes are backing off there too. If not you may have a bell crank problem

As far as the bell cranks are concerned, there's a procedure to adjust them but if you look close at the adjustment screw it should "almost" touch the backing plate. I mean the spec is like .32" or something like that. If that gap is bigger then your ebrake is engaged to some degree (the bigger the gap, the more tension on the ebrake cable the more engagement) If the screw is resting on the backing plate then you'll get no auto adjustment when you use your ebrake.
 
For the bellcrank you remove the springs and pull up on the arm until all the slack is removed. With all the slack removed you adjust the bolt for a .031 or so air gap to the backing plate. Then you install the springs and the bolt will rest against the plate.


Sent from my iPhone using Tapatalk
 
For the bellcrank you remove the springs and pull up on the arm until all the slack is removed. With all the slack removed you adjust the bolt for a .031 or so air gap to the backing plate. Then you install the springs and the bolt will rest against the plate.


Sent from my iPhone using Tapatalk

I adjusted the bellcrank, but noticed my drivers side had more movement than the passenger. Also, when I engaged the ebrake and released it, the passenger side kind of stuck (the gap between the bolt and the backing plate increased) until I manually pushed it back. This made adjustment difficult, even with the drum off and following the procedure in the FSM...althought I didn't remove the spring...I left a small gap (eye balled what the manual said) on either side, then pulled the ebrake a few times. The drivers side was good, but the gap increased again on the passenger side. I will monitor it for now and see if i changes. Is this the cable sticking or the bellcrank?
I will hit it with PB Blaster to loosen the moving parts of the bell crank if they are sticking as well
 
Last edited:
I find it a little easier doing it with the drum off. If you get it too tight you have to go in the backing plate hole with a second screwdriver and push the lever off the starwheel while turning the starwheel with another screwdriver. Unless you've done this a lot and have the "feel" for it, it can be a pain. The starwheel has an lever that catches in the notches and prevents it from turning in one direction. You just pull that little arm away (with the drum off) from the starwheel and you can push it with a screwdriver in either direction. It might help to turn it all the way in (completely loose) and remove the 2 pieces (should be able to pop the asy out) and unscrew them and clean up the threads and put it back the way you found it. Adjust the starwheel until it just barely hits the drum. You will have to slip the drum on and off a couple times (or maybe not if you take your time). Then push your brake pedal down a couple times and make sure you can turn the drum with your hands. If you hear the shoes hitting the drum it's OK just as long as you can turn the drum by hand. I would also pull the ebrake up a couple times and release it and make sure the brakes are backing off there too. If not you may have a bell crank problem

As far as the bell cranks are concerned, there's a procedure to adjust them but if you look close at the adjustment screw it should "almost" touch the backing plate. I mean the spec is like .32" or something like that. If that gap is bigger then your ebrake is engaged to some degree (the bigger the gap, the more tension on the ebrake cable the more engagement) If the screw is resting on the backing plate then you'll get no auto adjustment when you use your ebrake.

Thanks - I had the drums off again this evening to back off the starwheel using the two screwdrivers. I marked the notches on the starwheel and backed the passenger side off 12 notches and the drivers side 6 notches based on the sound and feel of the drums. Not sure what this equates to in braking performance but I will find out this weekend with my fuel economy...

I much prefer taking the drum off and seeing what I am doing - I tried laying under the truck using the access port and two screw drivers and it was a huge pain...
 
First off, make sure the adjuster mechanism is clean and lubed. If it's full of gunk and half frozen like most the auto adjuster won't work and you'll be out of adjustment before long even if you get it perfect.

Make sure the parking brake works and is adjusted properly.

I found it very difficult to back off the star adjuster from the little port on the inside. Instead I got it reasonably close with the drum off. From there I put the drums on both sides and pulled the parking brake. Then tried to spin the drums by hand. If they spun, I released the brake and advanced the adjuster a few clicks. Rinse, repeat, until the parking brake would hold them still no matter how much I tried to spin them. For the final adjustment I put the wheels on and repeated the test, just because they give you a better grip and make it easier to spin, a few more clicks may be needed on the adjuster. You should have little to no resistance when the brake is off, and when it's on the wheel should be held in place no matter what you do.

From there just get in the habit of setting the parking brake when you park it for the night and you should be good. When I first got mine everything was wrong. Shoes were worn very unevenly, mechanism was gunked up, parking brake was frozen. Fixed it all up, adjusted it, and two years later they are still looking good and well adjusted.
 
I adjusted the bellcrank, but noticed my drivers side had more movement than the passenger. Also, when I engaged the ebrake and released it, the passenger side kind of stuck (the gap between the bolt and the backing plate increased) until I manually pushed it back. This made adjustment difficult, even with the drum off and following the procedure in the FSM...althought I didn't remove the spring...I left a small gap (eye balled what the manual said) on either side, then pulled the ebrake a few times. The drivers side was good, but the gap increased again on the passenger side. I will monitor it for now and see if i changes. Is this the cable sticking or the bellcrank?
I will hit it with PB Blaster to loosen the moving parts of the bell crank if they are sticking as well


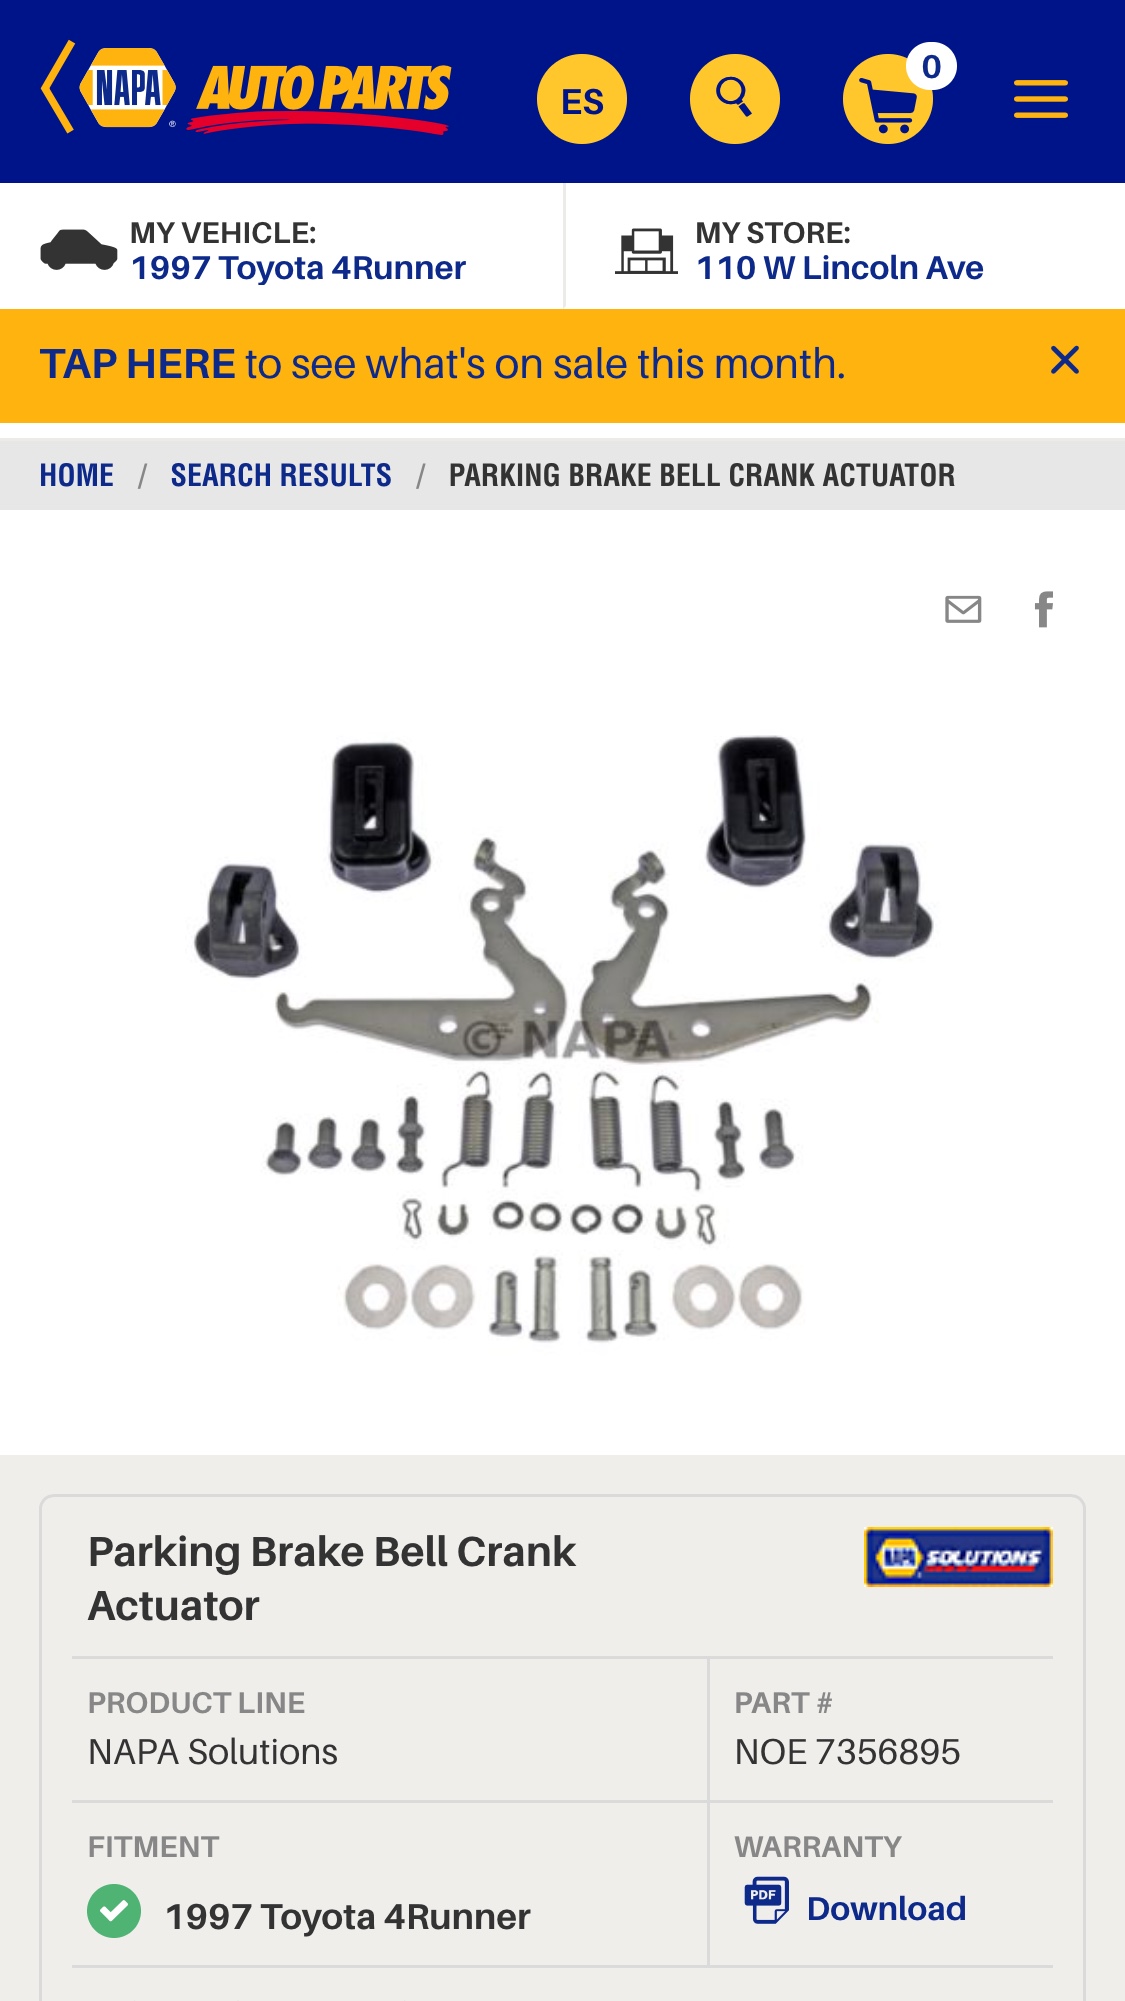
The bellcranks need replaced if they stick. The springs are suppose to keep the bolt against the backing plate. All 3 4runners needed the bellcranks replaced when I bought them. I bought Napa units. But I'll buy the OEM rubber covers when it's time.


Sent from my iPhone using Tapatalk
 
The bellcranks need replaced if they stick. The springs are suppose to keep the bolt against the backing plate. All 3 4runners needed the bellcranks replaced when I bought them. I bought Napa units. But I'll buy the OEM rubber covers when it's time.


Sent from my iPhone using Tapatalk

Ok that's good to know...I figured it wouldn't be the cable itself sticking.

Both springs aren't holding it against the backing plate.

Is it the whole assembly or just one piece that normally needs replacing?
 
Ok that's good to know...I figured it wouldn't be the cable itself sticking.


Both springs aren't holding it against the backing plate.


Is it the whole assembly or just one piece that normally needs replacing?


You can remove the whole thing and try and lube and free it up. Or just get new ones. At napa is a left unit and a right unit. Not individual parts for each side. I do not know how Toyota has them listed parts wise.


Sent from my iPhone using Tapatalk
 
Hey Stever I'm swapping out my axle tomorrow with an e-locker axle, maybe you can come over and help me adjust the brakes on the new one!!! I'd figure it out myself but I am heading out on a road trip the following weekend. I have a welder and other tools if you need them, you can use.
 
Hey Stever I'm swapping out my axle tomorrow with an e-locker axle, maybe you can come over and help me adjust the brakes on the new one!!! I'd figure it out myself but I am heading out on a road trip the following weekend. I have a welder and other tools if you need them, you can use.

Hey Mark,

Sorry for the late reply, didn't see this earlier and I am out of town (in Squamish) at the moment

Not sure if you have done the swap yet, but with the drums off its pretty straight forward following the advice here. I was just overthinking it earlier and made it more complicated than it should be
 

Members online

Forum statistics

Threads
278,308
Messages
3,554,058
Members
248,016
Latest member
Advally Service

Trending content

Back
Top