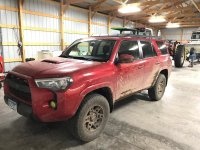
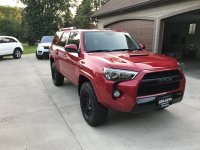
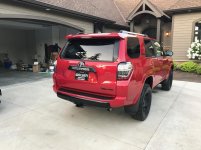
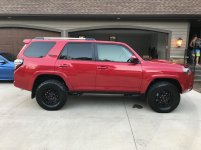
AELarson TRD Pro OEM+ Update/Mod/Build/Adventure Thread

aelarson

New member
SOLD!: I am keeping this thread alive if anyone is interested in some of the items that were changed on the truck. Enjoy!

Completed Updates/Mods/Additions:
- Custom 3D Printed Phone Mount
- Tailgate Stopper
- Toyota OEM Black Badge Kit
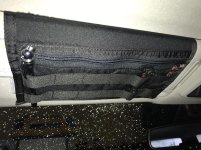
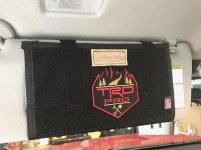
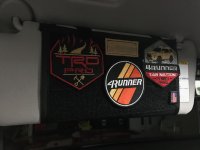
- Blue Ridge Overland Visor Organizer
- Patches
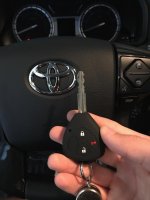
- Key Fob Condom
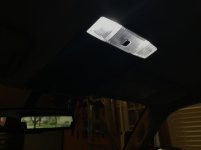
- Fyre Fly Interior Light Kit
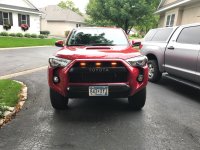
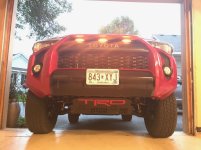
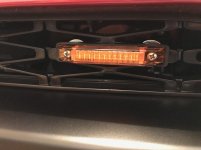
- Raptor Lights
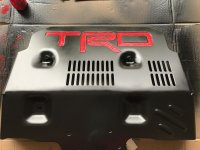
- Black & Red TRD front Skid Plate
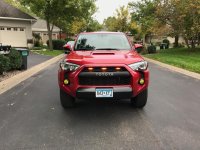
- Yellow Fog Lights
- Black Roof Rails (REMOVED)
- Rola Basket (REMOVED)---> Upgraded: Prinsu 7/8 Roof Rack
- Beaver Step
- Ellis Precision Shift Knobs
- Drawer System
- TRD Pro Floor Mat Emblems
- RCI-Toytec Rock Sliders (REMOVED)
- Grdian Dash Cam
- Canvasback Liners
- DRL High Beam Delete and Smoked Lens
- Morimoto 2.0 LED Headlight Bulbs
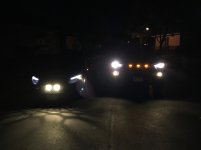
- DDM Saber 50W LED High Beam
- Prinsu Riser Bars and Thule Cargo Box
- X Bull Traction Boards (x4)
 

Attachments
  • 2.jpg
    2.jpg
    138.1 KB · Views: 1,931
  • 3.jpg
    3.jpg
    137.4 KB · Views: 2,100
  • 1.jpg
    1.jpg
    137.7 KB · Views: 1,807
Last edited:
Register to hide this ad
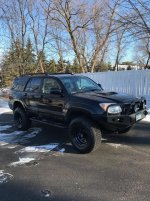
The Old Toys:
 

Attachments

  • IMG_1158.jpg
    IMG_1158.jpg
    135.9 KB · Views: 4,914
  • IMG_1229.jpg
    IMG_1229.jpg
    138.6 KB · Views: 4,909
  • IMG_1230.jpg
    IMG_1230.jpg
    149.8 KB · Views: 4,947
  • IMG_1297.jpg
    IMG_1297.jpg
    142.1 KB · Views: 4,866
  • IMG_1466.jpg
    IMG_1466.jpg
    142.8 KB · Views: 4,860
Last edited:
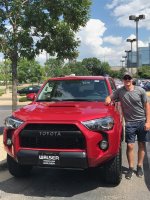
Delivery

Delivery of the TRD Pro!!! (07/31/17) :cheer2:
 

Attachments

  • IMG_1518.jpg
    IMG_1518.jpg
    151.5 KB · Views: 4,927
  • IMG_1523.jpg
    IMG_1523.jpg
    135.4 KB · Views: 5,294
  • IMG_1525.jpg
    IMG_1525.jpg
    140.4 KB · Views: 5,109
  • IMG_1524.jpg
    IMG_1524.jpg
    136.6 KB · Views: 4,991
Last edited:
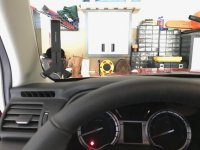
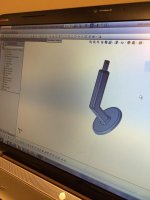
Custom 3D printed phone holder (also had this in my old 4Runner)

Edit:

I did not like the original position of the holder, so I moved it to the windshield.

Install:
-Cleaned the area on the window
-3M double sided Adhesive to stick to widow
 

Attachments

  • IMG_1531.jpg
    IMG_1531.jpg
    126.1 KB · Views: 4,799
  • IMG_0348.jpg
    IMG_0348.jpg
    136.9 KB · Views: 2,683
Last edited:
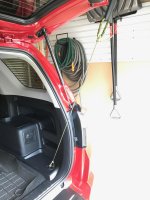
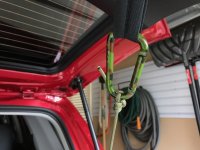
Tailgate Stopper

I saw this on another thread months ago and I knew I would have to make one so my pretty paint doesn't get scratched on the garage door!

To make:
- 50 inches of paracord
-2 Carabiners
 

Attachments

  • IMG_1534.jpg
    IMG_1534.jpg
    132.4 KB · Views: 4,789
  • IMG_1533.jpg
    IMG_1533.jpg
    127.5 KB · Views: 4,811
Last edited:
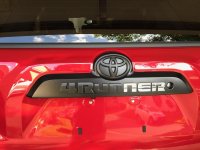
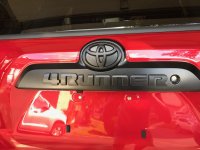
Blacked Out Overlay Kit

Bought an overlay kit on Amazon, turns out it is an OEM kit that came from a dealership. Also cheaper than other options! This is how it should come from factory in my opinion, or at least be an option...so much better looking!

Install:
-Clean chrome badges with rubbing alcohol
-Place new overlays on top of chrome badges
 

Attachments

  • IMG_1535.jpg
    IMG_1535.jpg
    125.4 KB · Views: 4,750
  • IMG_1537.jpg
    IMG_1537.jpg
    126.6 KB · Views: 4,738
Last edited:
Sorry for the lame start on the "Mod/Build/Adventure" thread...gotta save up a little cash before jumping into the big stuff!

Also, I am going on a 1.5 month road trip in my Dad's Tundra, so I won't be doing anything with the 4Runner for a while :ohwell:

:thanks:
 
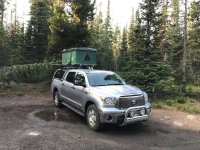
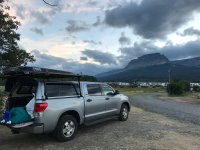
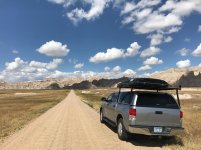
After 37 days, 13 states, and 11 National Parks, I am finally home! Unfortunately, the 4Runner wasn't ready for this type of adventure, so I took my Dad's Tundra. I won't post too many non-4runner related pictures...just a few to show some of the adventure!

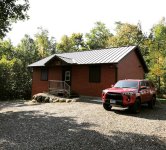
Now I am up in Northern Wisconsin at the family hunting cabin, showing the 4Runner his first gravel road! Need to start doing some more serious modding...

Pictures are in Yellowstone, Glacier, Badlands, and Minong, WI.
 

Attachments

  • IMG_1653.jpg
    IMG_1653.jpg
    140.3 KB · Views: 4,607
  • IMG_1708.jpg
    IMG_1708.jpg
    132.7 KB · Views: 4,605
  • IMG_1569.jpg
    IMG_1569.jpg
    133.3 KB · Views: 4,605
  • IMG_2524.jpg
    IMG_2524.jpg
    136.8 KB · Views: 4,544
Last edited:
Blue Ridge Overland Visor, Patches, Key FOB Condom, Fyre Fly Interior Kit

These are all little modifications so I will bundle them all into 1 post!

-Bought a Blue Ridge Overland Visor Organizer. This thing is really sweet because it satisfies the OCD, and the quality is great!

-Added 15HP with a TRD Pro Patch. I stuck it on the back of the visor organizer. I think it looks pretty nice! EDIT: I added a couple more patches. Got a solid 45 extra HP to the wheels :lookout:

-Key FOB Condom. Bought this off Amazon (search for "Toyota Silicone Key Cover"). This really makes the key feel nice and not as cheap. This was one of my gripes about the truck from day 1. Solved!

-Fyre Fly LED Interior Swap. This was a great Mod...makes the truck feel like a 2017, not a 1999. Took about 45 mins, pretty straight forward (I used this video tutorial to see how all the plastic covers come off because I didn't want to break any tabs)! The output on the map/dome lights is incredible, it's almost too bright!

Edit 10/31/19: My license plate bulbs and the interior dome light have started flickering. I was very happy with this lighting package and had zero issues for over 2 years. Kind of a bummer, but should have expected it from a cost saving lighting package. Ordered replacement lights for the flickering bulbs through Xenon Depot. If color temperature is off, I will order all new interior lights through XD.
 

Attachments

  • IMG_2540.jpg
    IMG_2540.jpg
    140.2 KB · Views: 4,431
  • IMG_2539.jpg
    IMG_2539.jpg
    135.8 KB · Views: 4,509
  • IMG_2542.jpg
    IMG_2542.jpg
    116.4 KB · Views: 4,513
  • IMG_2543.jpg
    IMG_2543.jpg
    116.7 KB · Views: 4,569
  • IMG_2592.jpg
    IMG_2592.jpg
    123.8 KB · Views: 4,187
Last edited:
Raptor Lights

Added the infamous "Raptor" Lights! All I have to say is wow...this added a badass element to the truck! I followed the Rock Creek Overland writeup, but added some of my own flare. All of the wires, crimps, and any connection is all sealed with heat shrink tubing, and I used stainless steel hardware to secure the lights to the grille. Looks way nicer than zip ties!
 

Attachments

  • IMG_2544.jpg
    IMG_2544.jpg
    138.3 KB · Views: 4,521
Last edited:
Painted TRD Skid Plate

Turns out that when I was installing my Raptor lights, I dropped one of my washers...of course it landed on the skid plate. So I removed the plate to retrieve my washer and figured it was a good opportunity to paint her up! The red letters are a little rough around the edges...literally, but it turned out pretty well for a 24 hour turn around!

Install:
-Remove Plate
-Applied 4 thick coats of gloss black rattle can paint
-Free hand painted the red letters
-Reinstall plate
 

Attachments

  • IMG_2550.jpg
    IMG_2550.jpg
    133.7 KB · Views: 4,446
  • IMG_2559.jpg
    IMG_2559.jpg
    133.3 KB · Views: 4,432
Last edited:
Hello Everyone!

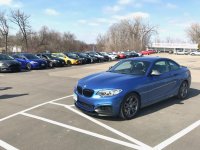
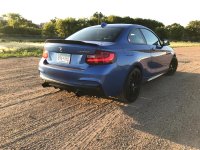
To make a long story short, I previously owned 2008 4Runner that I loved dearly. I drove it for 7 years and it never let me down. My car guy instinct told me to go sell my 4Runner and buy a BMW, which was a lot of fun, but also a lot of work to keep on the road. I owned the M235i for a year and the luxury started to wear off, so I sold it to get this beautiful Barcelona Red TRD Pro 4Runner. I am so happy to be back in a 4Runner and apart of this community!

My goal of this "build" is to maintain an awesome vehicle for daily driving purposes, meaning that there won't be huge tires, lift kits, etc. As most of us know, all of that stuff looks cool and functions well offroad, but kills daily drivability. This is a wildly capable vehicle in stock form, so I plan to keep the suspension components, wheels, and tire size. Most importantly, I have a bumper to bumper warranty that I would love to keep because I plan on running this truck for many years. Don't worry, there are still plans for cools mods (Roof rack, light bars, rear organization system, and maybe an aluminum bumper?)

Enjoy the random pictures of mods and whatever else is going on with the 4Runner, thanks for stopping by! Cheers!


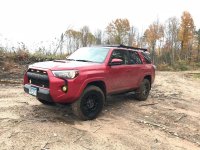
How my TRD Pro sits today:

Funny. Had a Audi Q7 which wore on me after time for the same reasons. Sold it and bought a TRD off road. Pretty doing the same stuff to mine as yours except I added air seats.
 
Funny. Had a Audi Q7 which wore on me after time for the same reasons. Sold it and bought a TRD off road. Pretty doing the same stuff to mine as yours except I added air seats.

Isn't it funny how "luxury" cars end up being a big pain in the ass. Also, what are air seats? Please explain!
 
Isn't it funny how "luxury" cars end up being a big pain in the ass. Also, what are air seats? Please explain!

Basically the seats in the limited. Ventilated seats. Essentially they remove the middle portion of the seats, install the ventilation system(fans) and then sow in a perforated leather or similar material to what you previously had. The seats works the same as having heat/cooling and warrantied by the dealer as OEM. Apparently there are several companies who do this work. I went home and looked it up prior to agreeing to it and its legit. The truck should be done by the time I get back from work monday so I'll let you know how it goes.

It’s florida, hot as sheet during the summer.

Also, what mounts did you use for the raptor lights. I ordered all the parts for the install but if there is a better mounting system I'd sure like to give that a try. Got any pics?
 
Last edited:
Basically the seats in the limited. Ventilated seats. Essentially they remove the middle portion of the seats, install the ventilation system(fans) and then sow in a perforated leather or similar material to what you previously had. The seats works the same as having heat/cooling and warrantied by the dealer as OEM. Apparently there are several companies who do this work. I went home and looked it up prior to agreeing to it and its legit. The truck should be done by the time I get back from work monday so I'll let you know how it goes.

It’s florida, hot as sheet during the summer.

Also, what mounts did you use for the raptor lights. I ordered all the parts for the install but if there is a better mounting system I'd sure like to give that a try. Got any pics?

Mmm that's interesting, I may have to check that out myself. Thanks for the short description!

I used 1.50 inch stainless steel bolts (I would suggest 1.25 inch, mine were a bit long), stainless steel fender washers and stainless nylon lock nuts. I don't remember the size of the bolts, but just bring your lights into a hardware store and see what fits in the light holes. Unfortunately, I didn't take any pictures from behind the lights/grille, but here is an up close look from the front. The next little project is getting all that stainless painted black so you can't see it behind the grille!
 

Attachments

  • IMG_2573.jpg
    IMG_2573.jpg
    129.9 KB · Views: 4,228
Mmm that's interesting, I may have to check that out myself. Thanks for the short description!

I used 1.50 inch stainless steel bolts (I would suggest 1.25 inch, mine were a bit long), stainless steel fender washers and stainless nylon lock nuts. I don't remember the size of the bolts, but just bring your lights into a hardware store and see what fits in the light holes. Unfortunately, I didn't take any pictures from behind the lights/grille, but here is an up close look from the front. The next little project is getting all that stainless painted black so you can't see it behind the grille!

That looks good. I like that better than the zip ties as well.

I get the truck back Monday so Ill let you know how the seats go.
 
That looks good. I like that better than the zip ties as well.

I get the truck back Monday so Ill let you know how the seats go.

Thank you, I like the look better as well. I had originally used zip ties because I didn't have stainless hardware laying around the garage, but later that afternoon I had to switch them out.

Awesome, feel free to post some pics in here of the seats!
 
Yellow Fog Lights

My good friend had ordered some yellow film to cover his Hella 500's on his Focus ST, he was nice enough to lend me some of the extra film. It looks great during the day, but adds zero value when the lights are on :rofl:

This was a VERY sloppy install, we did not remove the housing or the bezel. Just cleaned the light, stuck on the film, applied heat, and used popsicle sticks to shove the film in. This was mainly to see how I liked the yellow look because I am planning on replacing these with Squadron Pros in the coming months!
 

Attachments

  • IMG_2589.jpg
    IMG_2589.jpg
    145.8 KB · Views: 1,731
  • IMG_2588.jpg
    IMG_2588.jpg
    146.2 KB · Views: 1,733
Last edited:
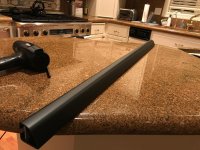
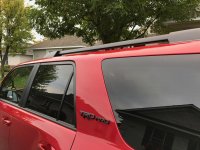
Matte Black Roof Rails (REMOVED, Upgraded to Prinsu Rack)

I am super stoked about this, it turned out great! I used Vvivid Vinyl matte black wrap, purchased off Amazon. I decided to do this mod myself because I was quoted $300-350 by several shops in the MSP area, which is total bologna. This marks the end of Project Blackout (Emblems, Skid plate, and roof rails). Total install (removing rails, wrapping rails, re-installing rails) took me about 2.5 hours. I couldn't be happier, the wrap turned out perfect, matches the other matte black goodies and should last for many years!

Install:
-Remove plastic housing on ends of rails
-Unbolt supports
-Unbolt rails from support
-Carefully clean and wrap the rails
-Reinstall
 

Attachments

  • IMG_2586.jpg
    IMG_2586.jpg
    137.8 KB · Views: 1,730
  • IMG_2590.jpg
    IMG_2590.jpg
    141.8 KB · Views: 1,714
Last edited:
Mod #11: Matte Black Roof Rails


I am super stoked about this, it turned out great! I used Vvivid Vinyl matte black wrap, purchased off Amazon. This marks the end of Project Blackout (Emblems, Skid plate, and roof rails). Total install (removing rails, wrapping rails, re-installing rails) took me about 2.5 hours. I couldn't be happier, the wrap turned out perfect, matches the other matte black goodies and should last for many years!


Install:

-Remove plastic housing on ends of rails

-Unbolt supports

-Unbolt rails from support

-Carefully clean and wrap the rails

-Reinstall


Nice job on your updates and it looks nice and classy!


Sent from my iPhone using Tapatalk
 

Members online

Forum statistics

Threads
278,309
Messages
3,554,071
Members
248,016
Latest member
Advally Service

Trending content

Back
Top