Atomic6
New member
Since moving out to Denver from Chicago in October, my wife and I have taken every chance we get to drive west into the Rockies. While the drive is breathtaking (literally and figuratively), the elevation has been a bit of a problem for the 4Runner’s cooling system (285s and stock gearing doesn't help). In all honesty, a stock replacement and new cap would have solved the problem, but I wanted to fit a larger capacity radiator in for peace of mind.
After searching high and low for a radiator with the correct core size, inlet/outlet location, mounting style, and thickness I found a suitable upgrade…
The Champion All-Aluminum Radiator. P/N: EC433
The EC433 is a 2-row replacement for the 1968-79 Ford F-Series 2WD and 1978-79 Bronco 2WD. There is a larger (thicker) 3-row CC433 that would probably work as well, but the EC is more than enough for the 3.4L. It also has a trans cooler just like our OEM, but I didn't use it as I bypassed mine to an external cooler.
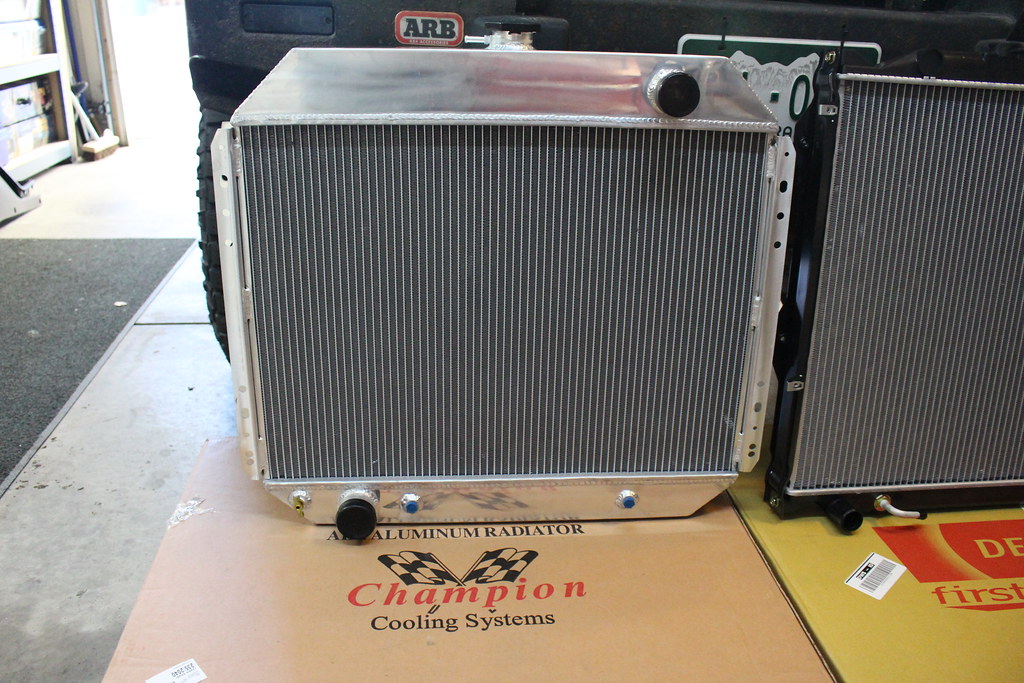
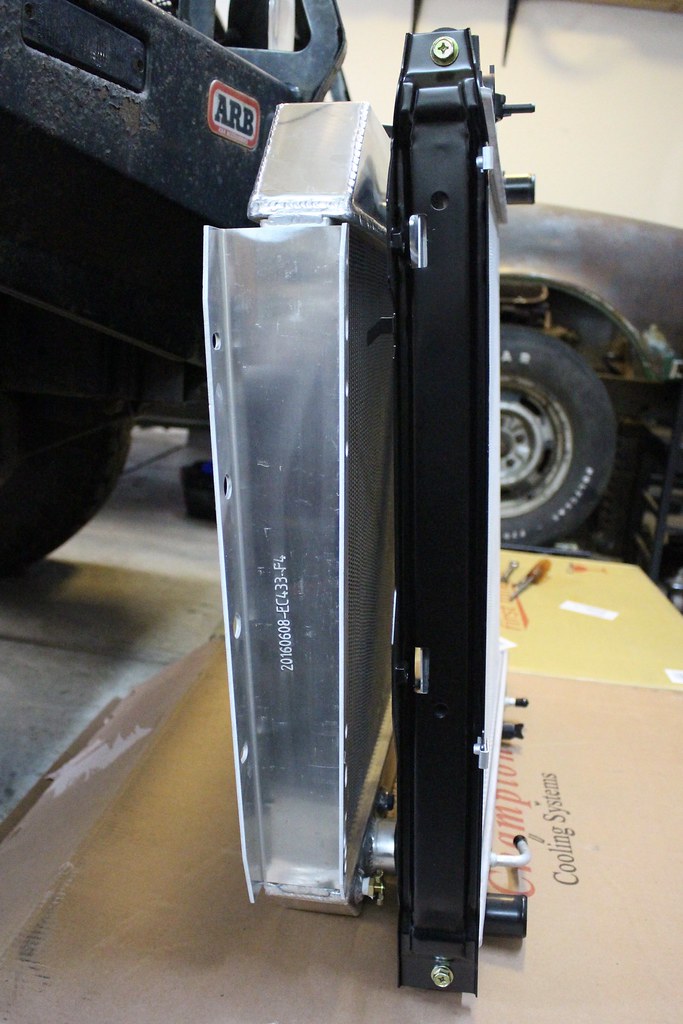
As of writing this the EC433 is $175.99 at JEGS, but I got it for $160.95 shipped with their “Lowest Price Guarantee”. This is not the the out-the-door price for this mod though. There are a few more things you’ll have to buy.
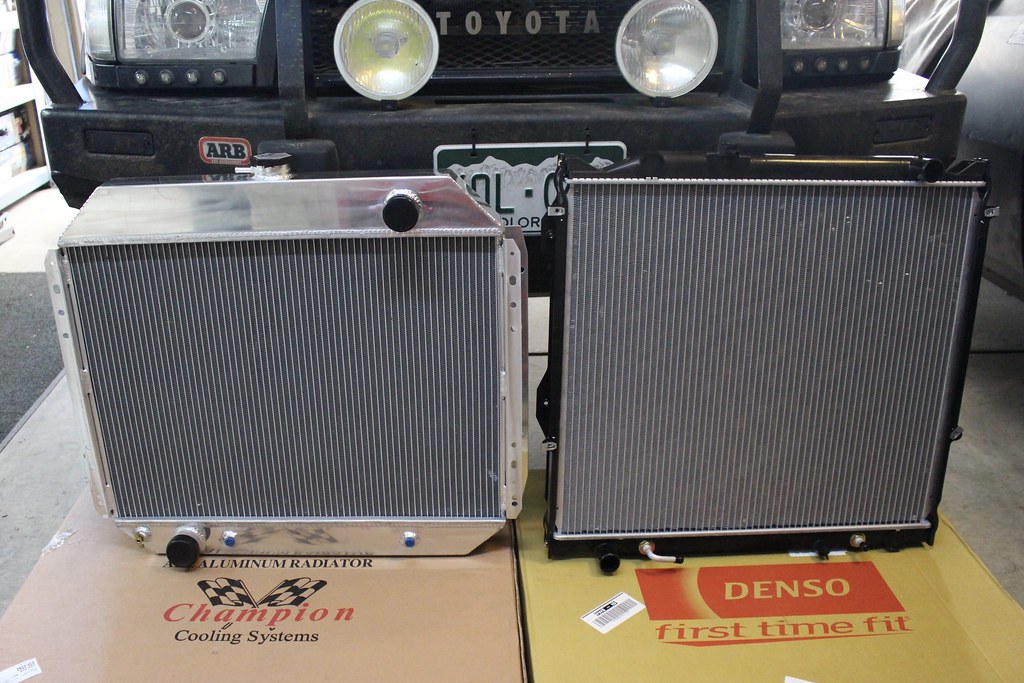
Some specs to compare on the EC433 vs a stock replacement:
Core size:
EC433: 19-1/4”(H) x 25-3/4” (W) x 1-3/4” (T)
Stock: 22-5/8” (H) x 25-1/8” (W) x 1” (T)
So yes, the frontal surface area is smaller on the EC433, but the fluid capacity is much larger...
Volumes (not really since the core isn't completely full of fluid):
EC433: ~867.5in^3 (not counting the larger tanks)
Stock: ~586.45in^3 (not counting the smaller tanks)
Here's how I installed it…
Parts:
1- Champion EC433
1- 2” to 1-3/8” reducer coupler hose
1- 1-3/4” to 1-3/8” reducer coupler hose
1- 1-3/8 tubing joiner
1- 1-3/8 tubing joiner with sensor bung
1- Temp gauge
1- Stock lower radiator hose (modified for upper fitment)
1- Dayco 81031 1-1/4 Flex hose (still looking for a better solution than this for the lower hose)
4- Clip-on nuts (I bought them at my local ACE with some 1/4-20 bolts for the fan shroud)
4- 1/4-20 bolts
4- M8 bolts and nuts
Foam tape
Hose clamps
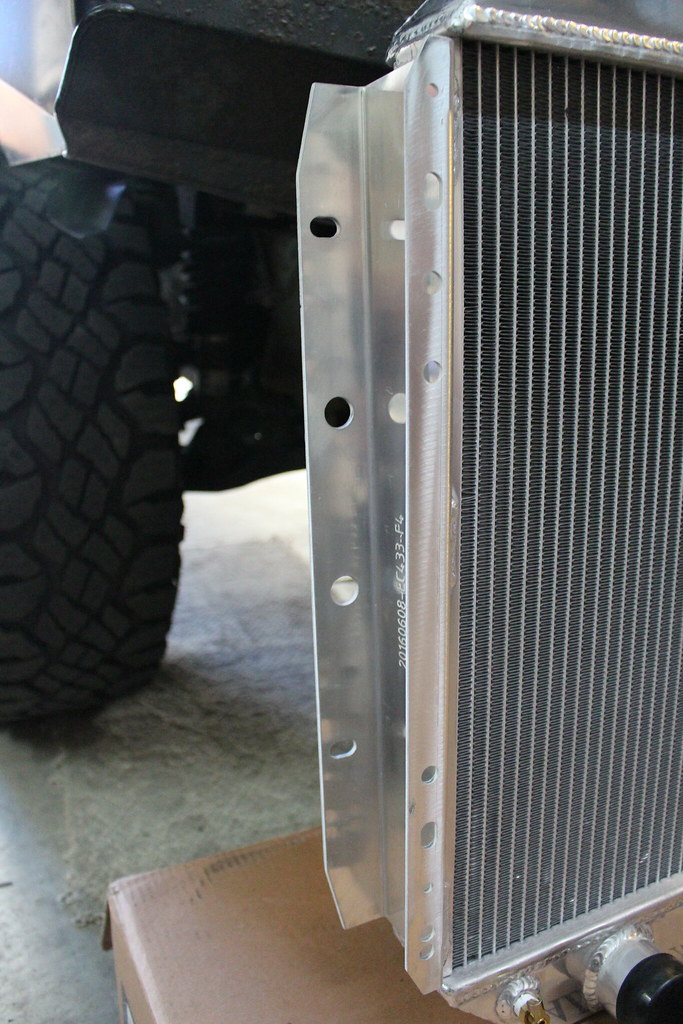
The aluminum radiator mounts will need to be cut for it to fit between the frame rails.
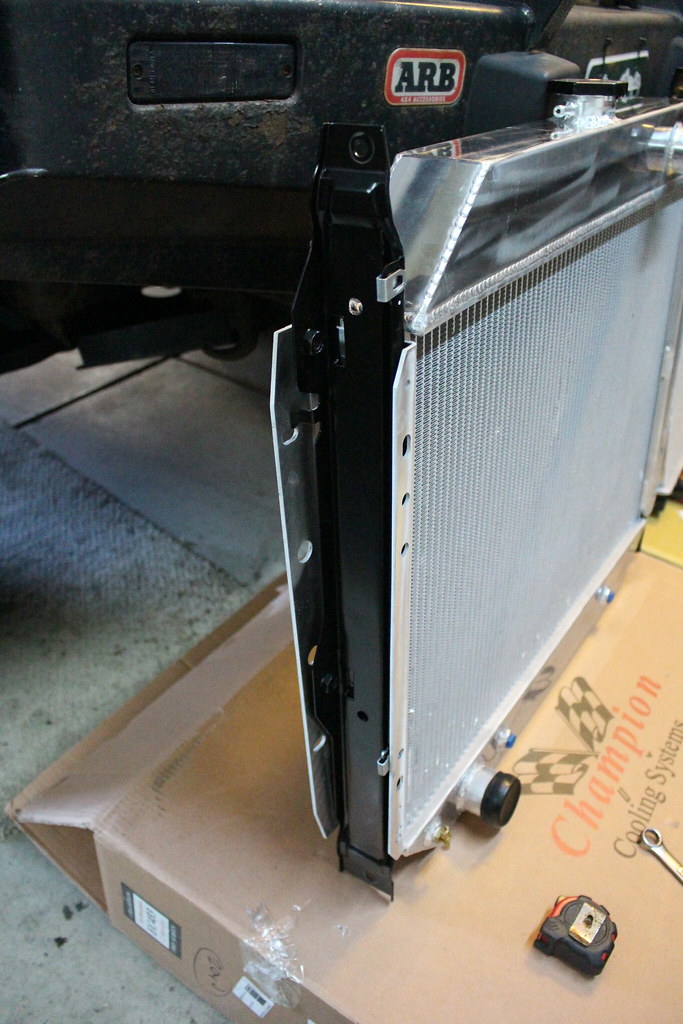
The best way I found to mark the locations was to remove the steel mounts from the stock radiator and push them into the new radiator. This is only for marking the vertical locations since the width is incorrect. I didn’t re-use these mounts. Note in the picture below, the top shroud bolts will need an additional support bracket.
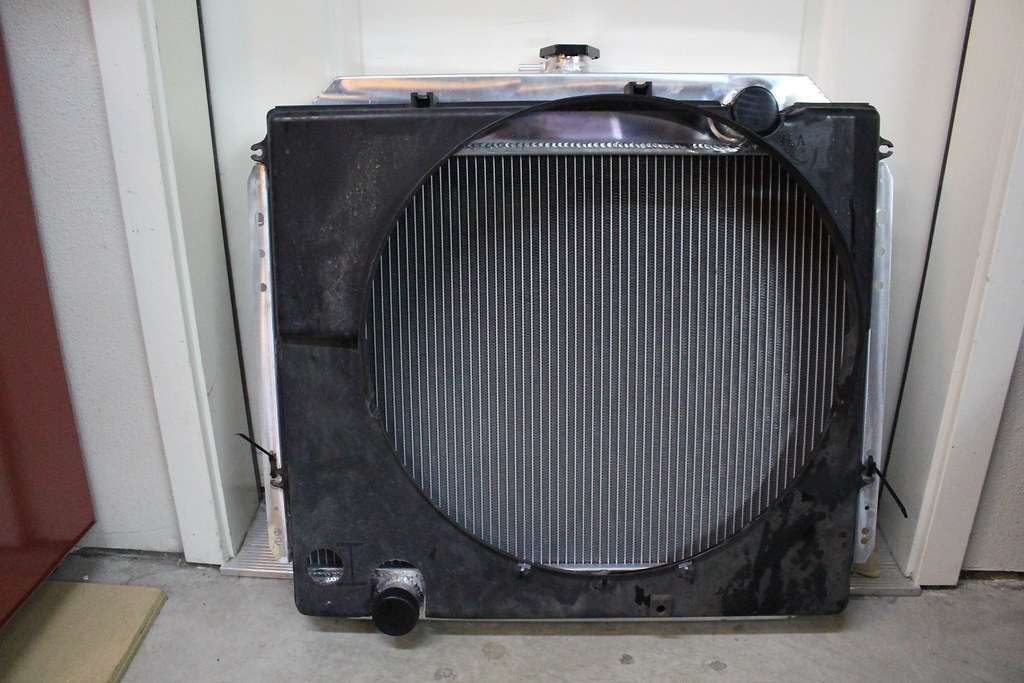
After laying the shroud on the new radiator to check the placement, I marked, drilled, and installed the clip-on nuts for the lower mounts. These clips/holes are 14-3/4" (H) x 27-1/8" (W).
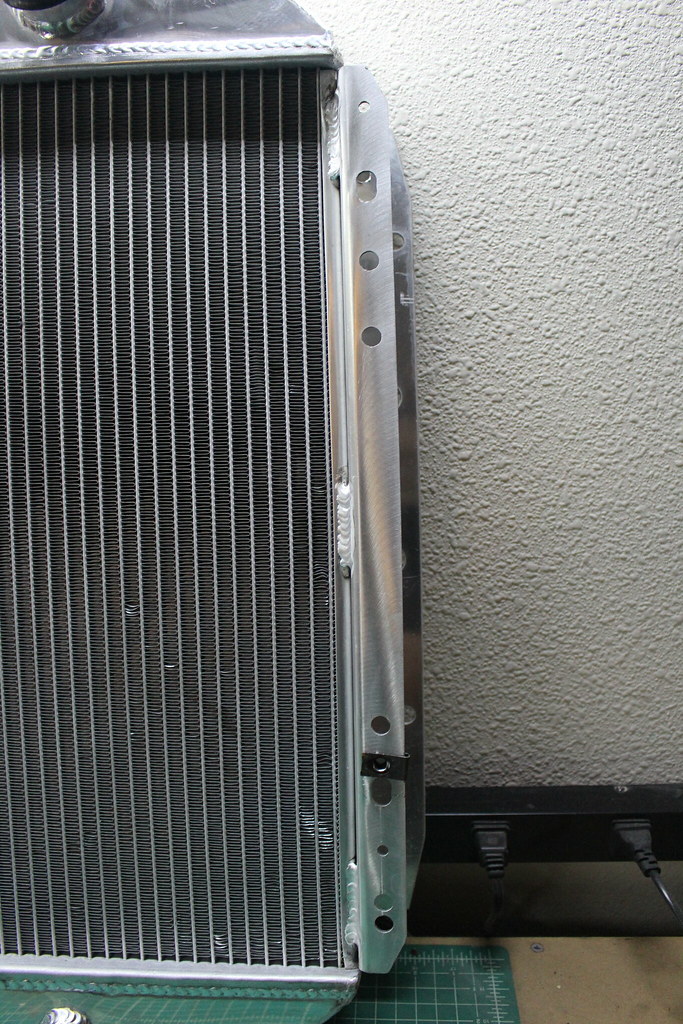
I had some aluminum stock laying around, so I used that as a bracket for the top shroud bolts, but you could use the off-cuts from a future step. Pictures of these are below after I cut the mounts.
Once the shroud bolted up, I used the same process to align, mark, and drill the holes for the mounting bolts to the core support. These mounting holes are 10-7/8" (H) x 27-1/4" (W). The new holes are the ones closest to the core in the below picture.
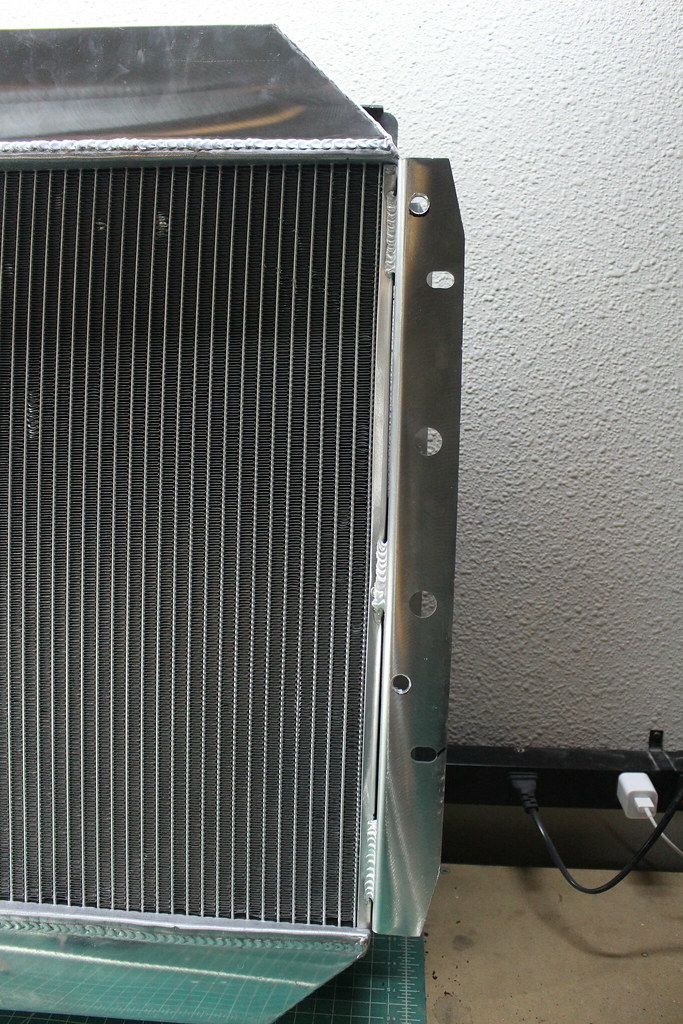
Then I cut the excess material off the brackets.
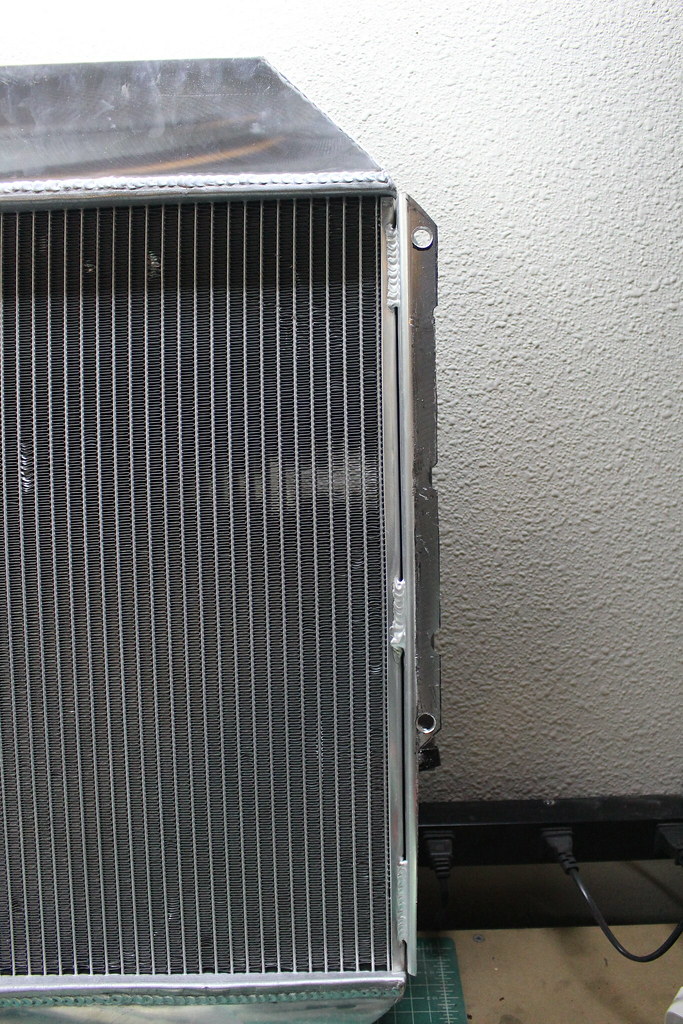
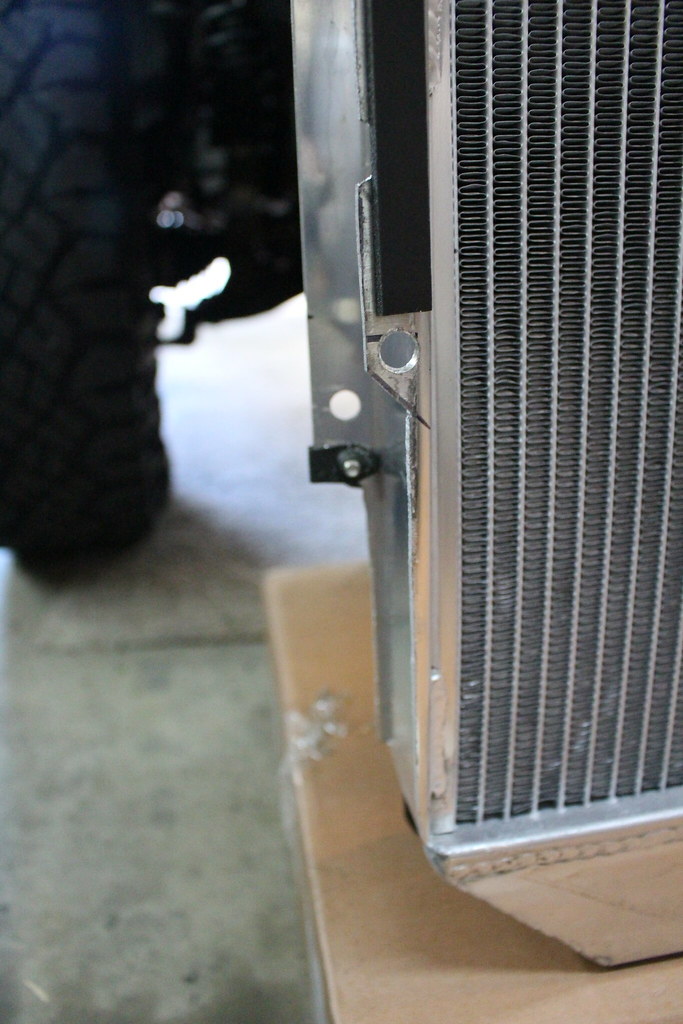
The brackets also had to be cut flush at the bottom to fit between the frame rails.
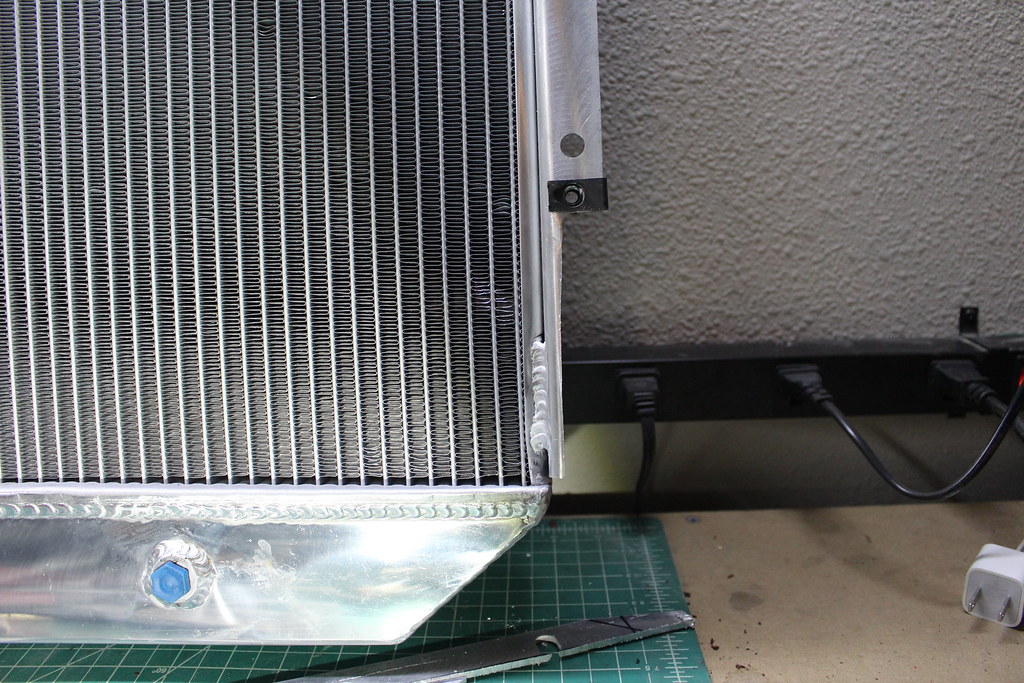
I didn't like that the aluminum would be in contact with the steel core support (even though its painted), so I added some foam tape between the two. (Also shown are the upper shroud brackets)
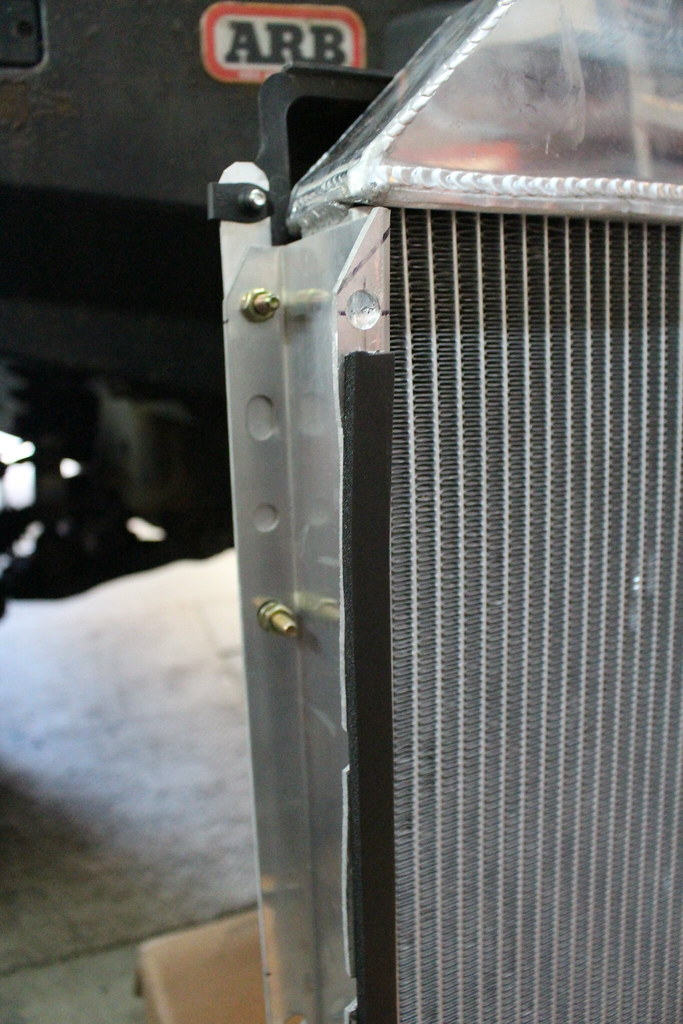
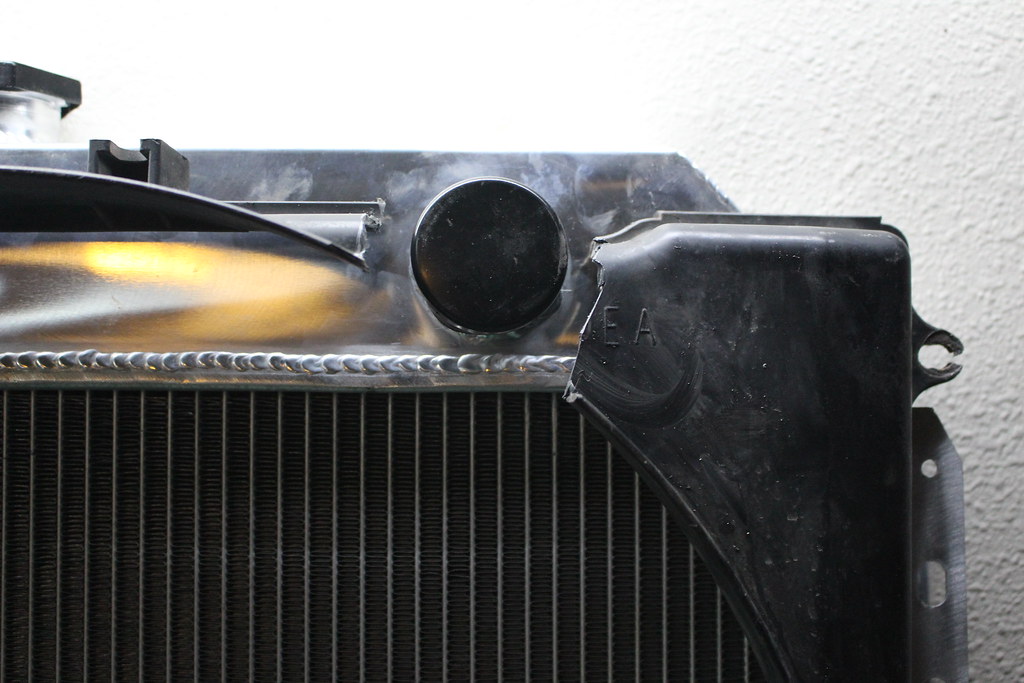
You can see the radiator shroud will need to be cut up to accommodate the inlet and outlets. I ruined this shroud by experimenting with mounting locations, but I have another that I'll be installing shortly.
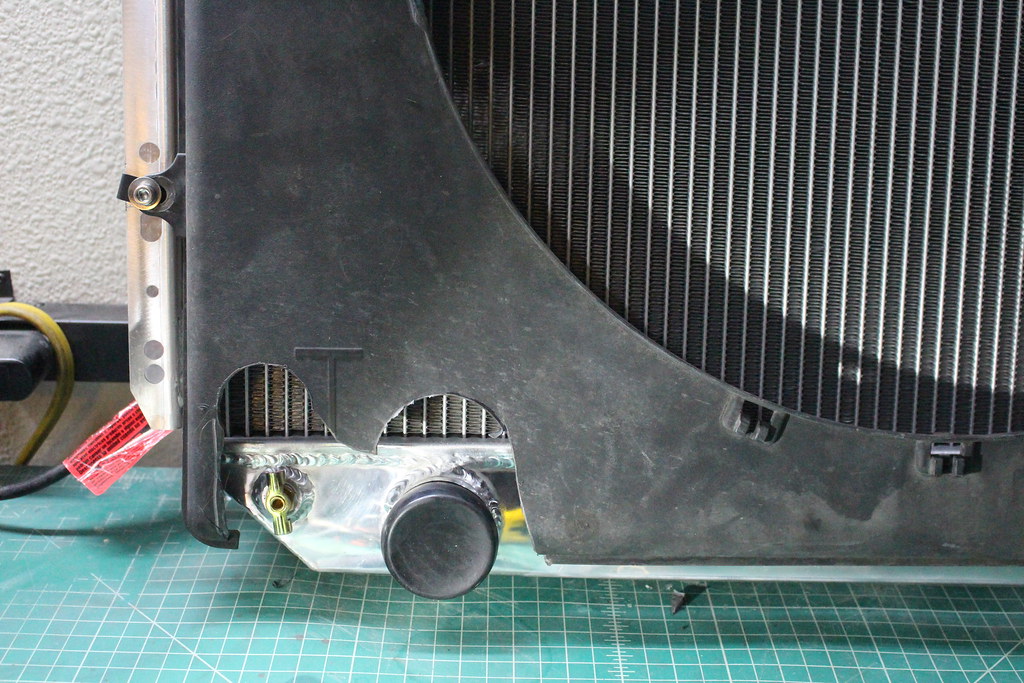
Now the radiator can be slid in place and bolted up. New hardware was used since there are no captive nuts.
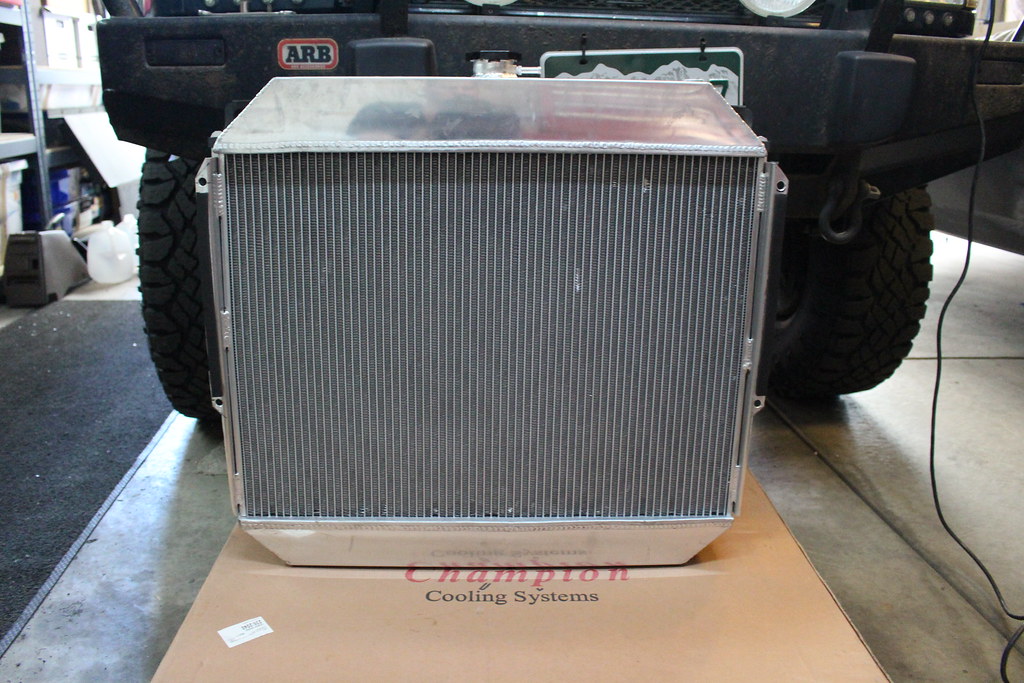
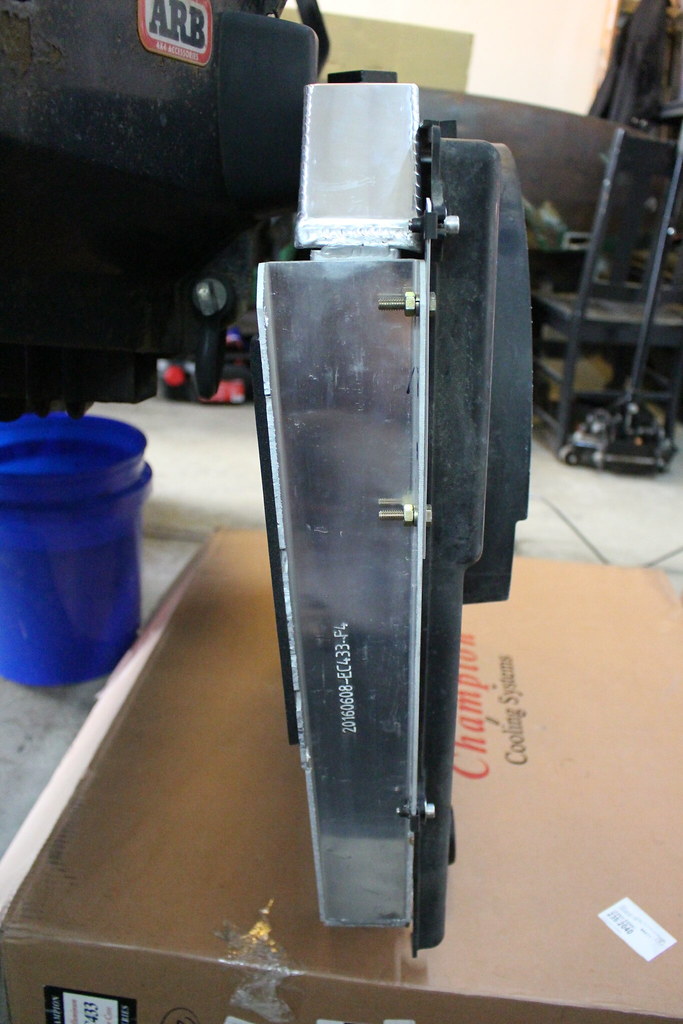
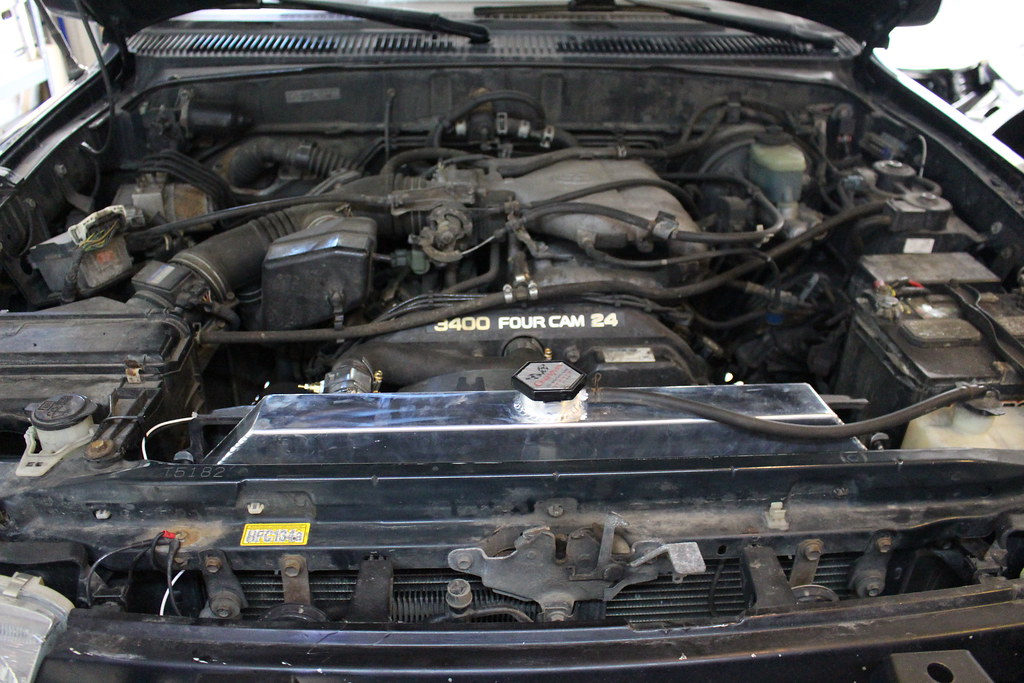
Next, I added the coupler and tubing joiner/sensor bung. The stock lower radiator hose was used on the upper location after being cut down to size. The lower used a coupler, joiner, and the Dayco 81031 Flex hose. I hate using the flex hose, so I need to find a better solution.
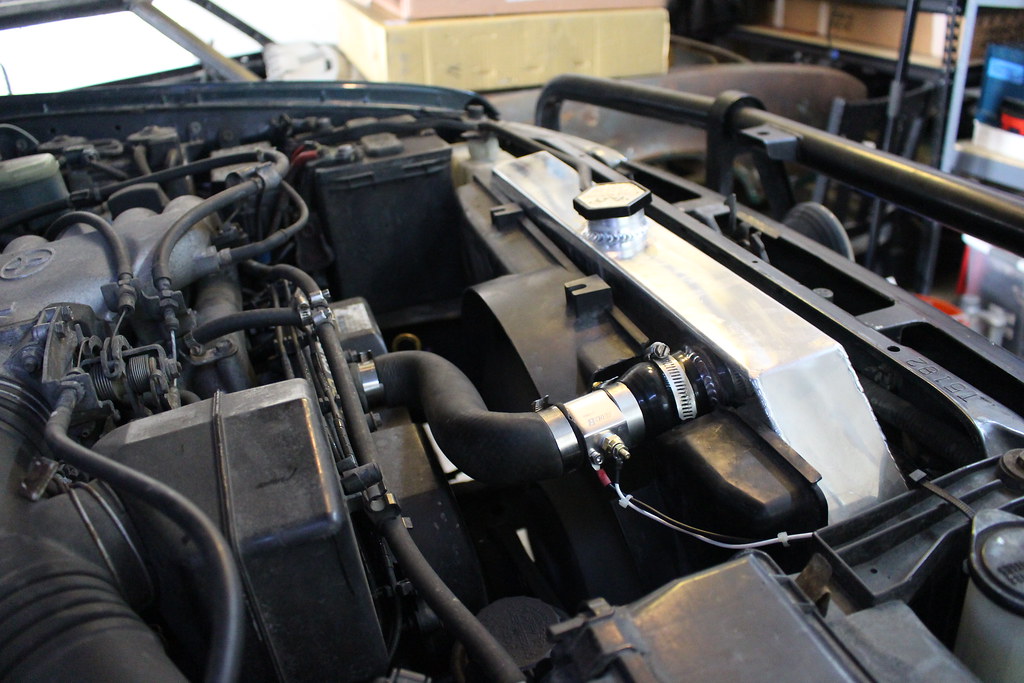
Then I filled up the radiator with Toyota Red/distilled water and wired up the coolant sensor.
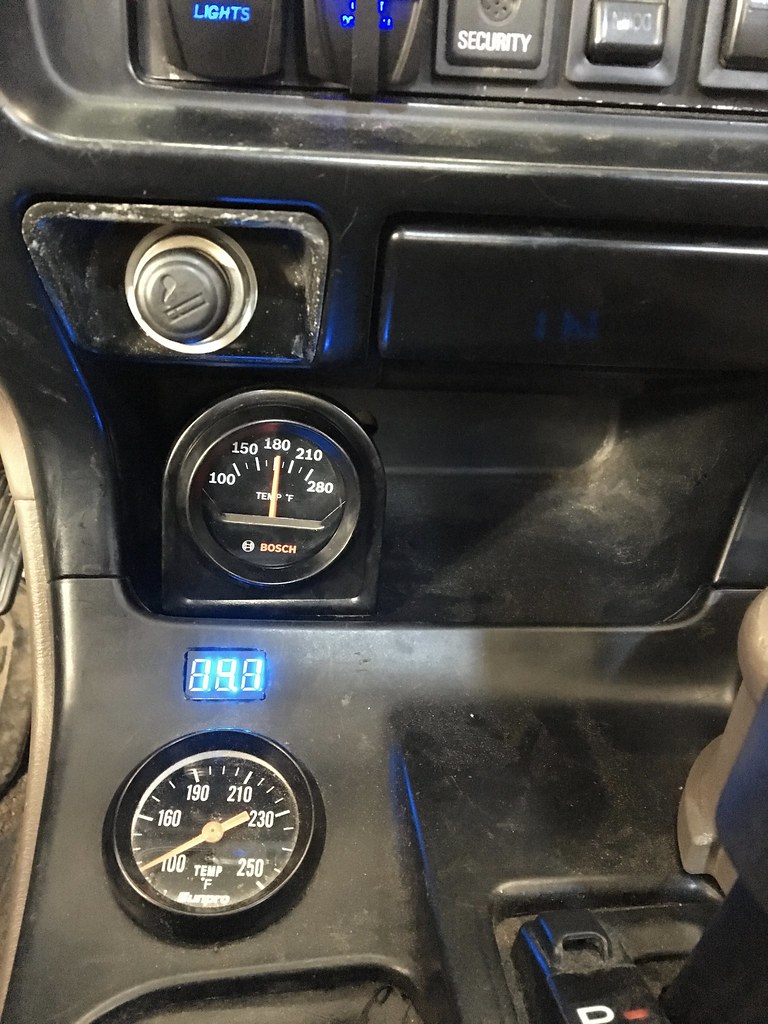
On the same day I wrapped up the install, my wife and I took the 2.5 hour trip up to Copper Mountain to volunteer at the Special Olympics Ski/Snowboard competition. Man, was that a nerve racking trip, 5200ft to 10,000ft! The whole drive I was watching that temp gauge like a hawk, but not once did we get over 210*F!
Normal day-to-day driving the temp is staying around 190*F. So far, I absolutely love this upgrade! Now I have the peace of mind where ever our travels take us.
After searching high and low for a radiator with the correct core size, inlet/outlet location, mounting style, and thickness I found a suitable upgrade…
The Champion All-Aluminum Radiator. P/N: EC433
The EC433 is a 2-row replacement for the 1968-79 Ford F-Series 2WD and 1978-79 Bronco 2WD. There is a larger (thicker) 3-row CC433 that would probably work as well, but the EC is more than enough for the 3.4L. It also has a trans cooler just like our OEM, but I didn't use it as I bypassed mine to an external cooler.
As of writing this the EC433 is $175.99 at JEGS, but I got it for $160.95 shipped with their “Lowest Price Guarantee”. This is not the the out-the-door price for this mod though. There are a few more things you’ll have to buy.
Some specs to compare on the EC433 vs a stock replacement:
Core size:
EC433: 19-1/4”(H) x 25-3/4” (W) x 1-3/4” (T)
Stock: 22-5/8” (H) x 25-1/8” (W) x 1” (T)
So yes, the frontal surface area is smaller on the EC433, but the fluid capacity is much larger...
Volumes (not really since the core isn't completely full of fluid):
EC433: ~867.5in^3 (not counting the larger tanks)
Stock: ~586.45in^3 (not counting the smaller tanks)
Here's how I installed it…
Parts:
1- Champion EC433
1- 2” to 1-3/8” reducer coupler hose
1- 1-3/4” to 1-3/8” reducer coupler hose
1- 1-3/8 tubing joiner
1- 1-3/8 tubing joiner with sensor bung
1- Temp gauge
1- Stock lower radiator hose (modified for upper fitment)
1- Dayco 81031 1-1/4 Flex hose (still looking for a better solution than this for the lower hose)
4- Clip-on nuts (I bought them at my local ACE with some 1/4-20 bolts for the fan shroud)
4- 1/4-20 bolts
4- M8 bolts and nuts
Foam tape
Hose clamps
The aluminum radiator mounts will need to be cut for it to fit between the frame rails.
The best way I found to mark the locations was to remove the steel mounts from the stock radiator and push them into the new radiator. This is only for marking the vertical locations since the width is incorrect. I didn’t re-use these mounts. Note in the picture below, the top shroud bolts will need an additional support bracket.
After laying the shroud on the new radiator to check the placement, I marked, drilled, and installed the clip-on nuts for the lower mounts. These clips/holes are 14-3/4" (H) x 27-1/8" (W).
I had some aluminum stock laying around, so I used that as a bracket for the top shroud bolts, but you could use the off-cuts from a future step. Pictures of these are below after I cut the mounts.
Once the shroud bolted up, I used the same process to align, mark, and drill the holes for the mounting bolts to the core support. These mounting holes are 10-7/8" (H) x 27-1/4" (W). The new holes are the ones closest to the core in the below picture.
Then I cut the excess material off the brackets.
The brackets also had to be cut flush at the bottom to fit between the frame rails.
I didn't like that the aluminum would be in contact with the steel core support (even though its painted), so I added some foam tape between the two. (Also shown are the upper shroud brackets)
You can see the radiator shroud will need to be cut up to accommodate the inlet and outlets. I ruined this shroud by experimenting with mounting locations, but I have another that I'll be installing shortly.
Now the radiator can be slid in place and bolted up. New hardware was used since there are no captive nuts.
Next, I added the coupler and tubing joiner/sensor bung. The stock lower radiator hose was used on the upper location after being cut down to size. The lower used a coupler, joiner, and the Dayco 81031 Flex hose. I hate using the flex hose, so I need to find a better solution.
Then I filled up the radiator with Toyota Red/distilled water and wired up the coolant sensor.
On the same day I wrapped up the install, my wife and I took the 2.5 hour trip up to Copper Mountain to volunteer at the Special Olympics Ski/Snowboard competition. Man, was that a nerve racking trip, 5200ft to 10,000ft! The whole drive I was watching that temp gauge like a hawk, but not once did we get over 210*F!
Normal day-to-day driving the temp is staying around 190*F. So far, I absolutely love this upgrade! Now I have the peace of mind where ever our travels take us.
Last edited: