I thought I would update this since I just finished with mine. I first attempted to go the easy route and use white plasti dip. It came out looking like crap. The dip on the chrome came off easier than the dip on the dimples behind the front logo. It was also almost impossible in the space between the top of the logo. I spent a lot of time trying to clean it up but in the end I removed the top half of the front grill and the whole back hatch cover.
I also didn’t like how much the plasti dip was so far off from the Toyota Super White.
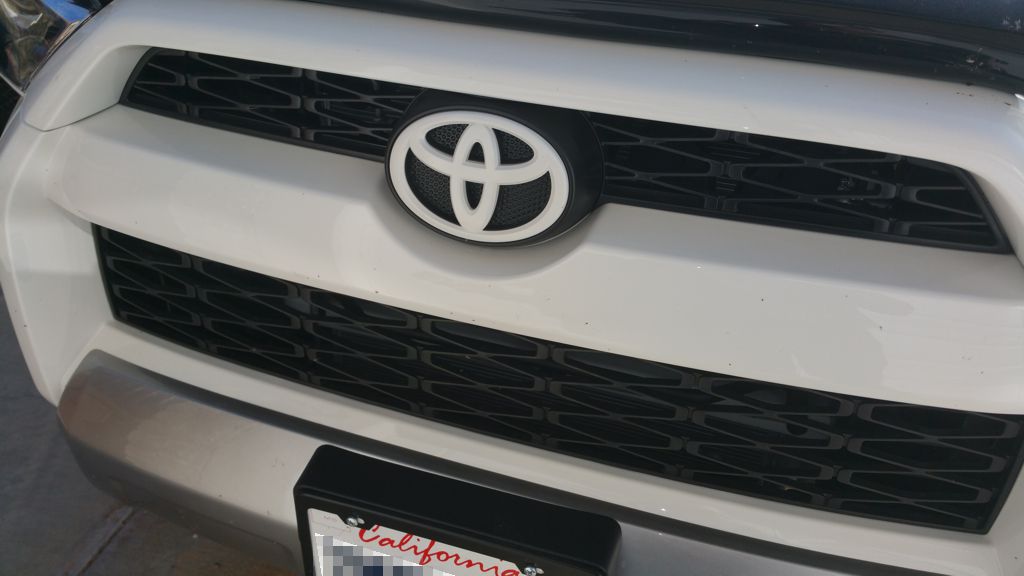
The front grill isn’t hard to remove at all. It’s all push clips that are very easy to remove. There is a 10mm bolt and a few Phillips screws as well. The only hard part is the four push down clips to separate the top from the bottom grill. One clip was too tight to push down with my fingers but a large screwdriver fixed that.
Once you have the top half removed it’s easy to remove the Toyota emblem and clean up the dimpled backing.
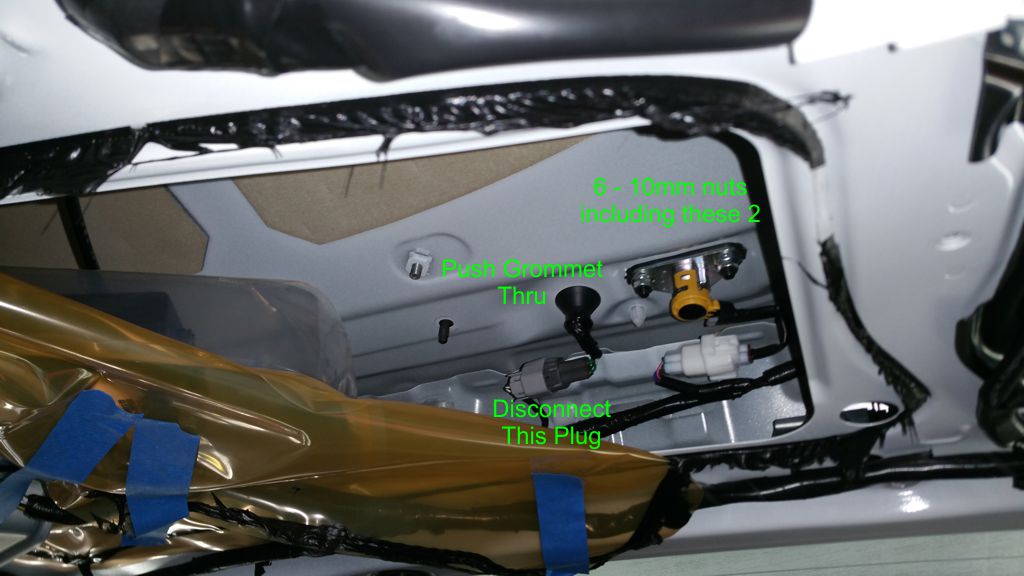
For the back hatch cover you start by removing the two rear door lights. Pry them out from the driver’s side and unplug. Then remove the 4” square access cover and pry out the small cover for the pull down handle. Remove the 10mm bolt holding the pull down handle. Then pry off the rear door inner panel from the bottom to the top. Pull back the yellow plastic as far as possible to gain access to the rear hatch assembly. I taped it out of the way. There are 6 10mm nuts to remove and 5 plastic push in clamps. 4 can be pushed out with pliers and one in the center of the Toyota emblem that needs some force from outside but will eventually give way.
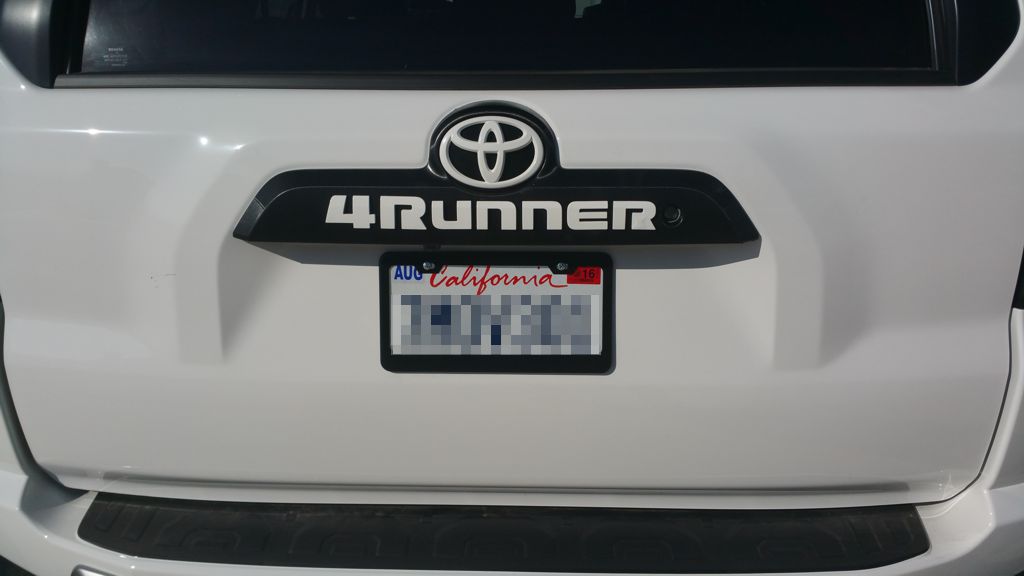
All the letters on the hatch cover and the emblem are stuck on with sticky tape. I very lightly used a combo of a heat gun and metal pry bars for panel removal to pop off the letters and emblem. Once off I carefully removed all that remained on the letters and emblem by hand. On the hatch cover I used lacquer thinner and goof off. This did remove the paint that is on the plastic. This ruined the look of it so I had to decide between paint or vinyl.
Since there is brushed metal on my dash I decided to go with it. I was influenced by Snooperstyle’s carbon fiber wrap. The one difference is the brushed metal vinyl shows every imperfection. On my first try is clearly showed where every trace of glue was left behind. I pulled it off and wet sanded the back of the hatch cover and tried again. I overheated a couple places with my heat gun and could still see places where I thought I had it pretty well sanded but the vinyl showed otherwise.
For my third attempt I took my time to sand it very well. I cleaned it with denatured alcohol and was very careful not to pull to hard or to overheat they vinyl. It finally came out to my expectation.
For all the chrome, I took a 5 gallon bucket with 2” of water in it into the house and took my time with 320 grit wet/dry sand paper and made sure every edge of every part was scuffed up enough to take the primer and paint. I did this while watching TV so it would not seem so bad.
After every part looked good I primed with Krylon Auto primer then used Plasticote color matching paint. I gave all enough coats from different angles to look great.
I gave the paint time to dry well then used blue paint tape to make a bottom guide. Using a google reference I also made 90* side markings. I cut a length to ¼” for spacing. I cut the double side tape to fit inside the letters after my first try to cut it at the edges failed bad. I started at the last R and worked my way back. I moved the spacer between setting each letter.
In the end I am very pleased at how it came out.
My next thing to do will cover the silver bumper covers with matching 3M black brushed metal vinyl to match the hatch cover.