Apohl17's Iceberg Build Thread

apohl17

New member
I hereby dedicate this thread to my second 3rd gen 4runner, the "Iceberg"

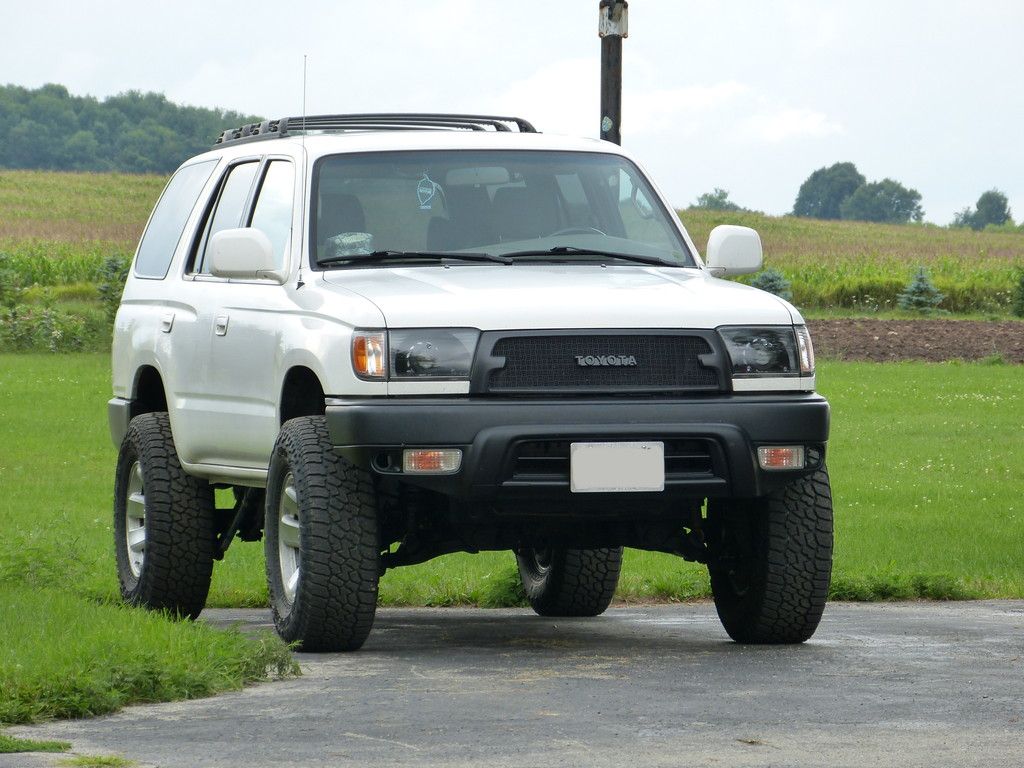
It's a 2000 Natural White 4runner SR5 w/ 211k on the bulletproof 3.4l V6 and a 4-speed auto transmission. 4.10:1 gearing.

Seeing the opportunity to get myself an extra 100k miles, I picked this up nearly two months ago to replace my bone stock '00 Sunfire Red Pearl with over 315k on the clock. Still would trust it to drive across the country, but that's another story in itself!

UPDATE: Sold to [MENTION=423705]Ponce11[/MENTION]

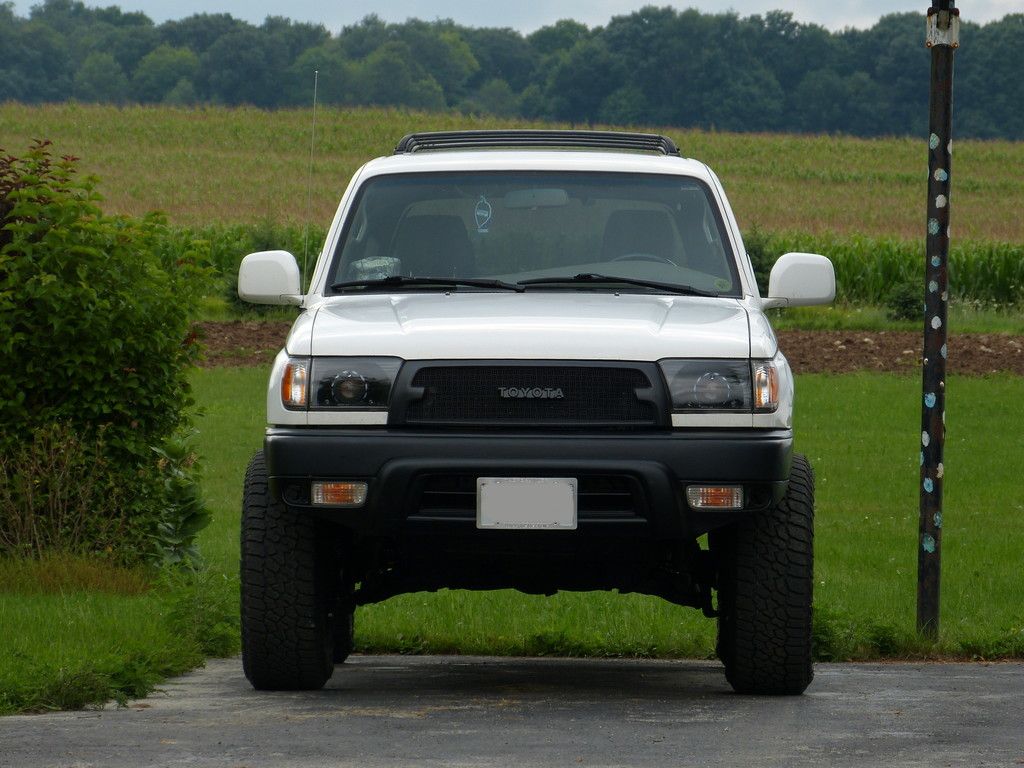
Pics we all came to see...
The Iceberg on the 9th of January, 2019!
6cb53aed5044e35f658a51c96a416d9a.jpg


And for kicks, a stock pic, when purchased:
f301c5e23b61b2c2c3925b1fd63bab88.jpg


UPGRADES & MODIFICATIONS

Suspension:
Front:
2.5” Lift
-Fabtech 0-3” Adjustable Coilovers
-OEM LCA,UCA’s (for now)
-Energy Suspension Poly Sway Bar/ End Link Bushings
-Proforged Extended Sway Bar End Links (2nd gen rear)

Rear:
3" lift
-OME 890 Coils (thanks [MENTION=101559]3rdgenfan[/MENTION])
-Bilstein 5100 Shocks w/ Prothane Hourglass bushings– Tundra 24-100144
-Proforged Extended Sway Bar End Links (3rd gen front)

Wheels & Tires:

-265/75/16 Falken Wildpeak A/T3W Standard Load
-OEM Split 3 Spoke 16” Alloy Rims (dipped)
-1.25” 6x5.5 Heavy Duty Parts Adapter/Spacers

Engine & Performance Upgrades:
-K&N CAI w/ AEM cone filter
-Flowmaster 40 Series Exhaust

Undercarriage / Drive Train Upgrades:
-Custom 2” Panhard Lift Bracket (inspired by [MENTION=28464]eimkeith[/MENTION])
-Custom E-Brake Cable Lift Bracket
-Energy Suspension Polyurethane Steering Rack Bushings
-Angled rear brake line bracket for slack at full droop

Electrical/Lighting Modifications:

-Morimoto D2S Mini 4.0 Projector Retrofit w/ Switchback Halos as DRL/Turn Signals
-Extreme X6S Slim 38" Dual LED Light Bar - (thanks to [MENTION=90695]Billy_R[/MENTION])
-Backup Camera Switch (to use it outside of being in Reverse)
-CREE 3" Amber Fogs on factory wiring Want...Some Fogs? Writeup
-Eagle Eyes Black/Clear LED Tails
-LED turn signals w/ CF13 flasher relay
-DRL Disable
-UV Blue LED Dash/Climate
-LED Map, Dome, and Hatch light panels
-Upgraded Battery
-LED Reverse Lights, Corner Markers, Plate Lights, etc.

Interior/Audio Upgrades:

-Sound Ordnance B-8PTD Compact Powered Sub
-Polk Audio DB5601 Front 6.5" Speakers
-Kenwood DDX9902S Double Din 7" Screen HU w/ Backup Camera and Android Auto
-Scanguage II w/ custom dash mount
-Coverking Saddleblanket Seat Covers
-Vent Mount Cell holder

Exterior Upgrades:
-4xInnovations Front Winch Bumper - custom painted w/ Chicago shackles
-Custom built front diff skid plate
-Custom Roof Rack (made by [MENTION=211665]zimp132[/MENTION])
-Blacked Out Painted Bumpers and Plastic Valences
-Fat Lip Bumper Corner Trim

-Custom Satoshi Grille w/ 80’s Toyota Emblem (late year grille style) HOW TO THREAD
-Metra Fixed Antenna (cheap Taco whip mod)
-Chrome Fender Flare Removal
-Painted Upgraded Curt Receiver Hitch
-Michelin Cyclone Wipers

I have to give so much credit to this site (and a few specific members which I will point out soon) for helping me get the "Berg" to where it is now... :tea:

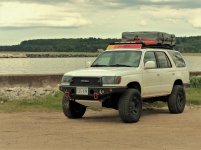
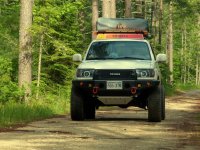
It has come a LOOOOOOONG way in two month's time! From a rust-ridden, unused sleeper to this beast of a machine. Future plans are MORE armor and accessories for an overland rig.
 

Attachments
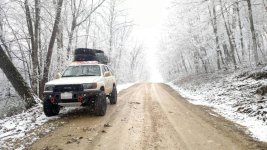
  • 47e71c66244270a452759b5d3d99090e.jpg
    47e71c66244270a452759b5d3d99090e.jpg
    143.1 KB · Views: 1,112
  • UPT4R5.jpg
    UPT4R5.jpg
    137.2 KB · Views: 984
  • UP5.jpg
    UP5.jpg
    140.4 KB · Views: 1,088
Last edited:
Register to hide this ad
Looks clean. You said it was rust ridden, how bad?
Well, there were two big issues with it when I bought it. The first being a collection of exterior rust pockets (10-15) on the body varying from 1/4" to 1" in diameter. (Doesn't help that the natural white is a single stage paint w/ no clear coat). I ground those down to bare, bondo/glazed them flush, and repainted- no problem there.

The second, simply put, was the lovely rust rot in the rear passenger frame next to the muffler. I've seen it before, but this one specifically had, well, about a 20" long gaping hole spreading from the frame down almost through the LCA bracket. It wasn't fully separated though, so that's a plus! A couple night's worth of fab work and welding plate armor later, it's treated, as strong (if not stronger) than stock, and the whole underside is coated in rust converter.

Being in Wisconsin where the plows spread more salt then they push snow, I had a lot of vehicles I have seen to compare to, so this task didn't scare me as much as it probably would others. I'll post some pics later on.
 
Well, there were two big issues with it when I bought it. The first being a collection of exterior rust pockets (10-15) on the body varying from 1/4" to 1" in diameter. (Doesn't help that the natural white is a single stage paint w/ no clear coat). I ground those down to bare, bondo/glazed them flush, and repainted- no problem there.

The second, simply put, was the lovely rust rot in the rear passenger frame next to the muffler. I've seen it before, but this one specifically had, well, about a 20" long gaping hole spreading from the frame down almost through the LCA bracket. It wasn't fully separated though, so that's a plus! A couple night's worth of fab work and welding plate armor later, it's treated, as strong (if not stronger) than stock, and the whole underside is coated in rust converter.

Being in Wisconsin where the plows spread more salt then they push snow, I had a lot of vehicles I have seen to compare to, so this task didn't scare me as much as it probably would others. I'll post some pics later on.
MY brother lives in Madison, he says the winters are brutal. Now that you have the rust repairs done...a hard core preventative regiment will keep it from rusting again.
I'm in a salt belt too in MA. I keep everything underneath covered in RP like a glazed donut, works great. I got a Salt Life sticker on my rig for a war badge.
1fb9adfd8f364497c9339845fdaaffb1.jpg


Sent from my SM-N920V using Tapatalk
 
MY brother lives in Madison, he says the winters are brutal. Now that you have the rust repairs done...a hard core preventative regiment will keep it from rusting again.
I'm in a salt belt too in MA. I keep everything underneath covered in RP like a glazed donut, works great. I got a Salt Life sticker on my rig for a war badge.

Sent from my SM-N920V using Tapatalk
Right on. I think brutal is an understatement... Haha
I plan on yearly touching up the frame since I have access to a sweet two post hydraulic lift... makes it real easy when you can walk under the truck.

I hear it's almost as bad out towards the East Coast- never looked at that decal with that meaning! Awesome. Thanks for the support and input.
 
Last edited:
I figured I'd start a separate thread with details and way more pics of how I did this, as this is a common problem in the rust belt. Anyways, here are some pics of before and after, and one of a primed surface so you can see the extent of the new material.

All MIG welds and 3/16 cold roll plate , slow and low voltage (100/19) for good penetration without burning through.

Ask away!
da91ec00123d73a813921820851de714.jpg
ba6f905d53b934b263b5343a2c449789.jpg
1bdec95b881784d6f70910ed33b1d1b7.jpg
3a43059f1e9b2ac0a318cd2d6648de44.jpg
 
Last edited:
That's some awesome progress in two months! That rust looks so scary! Glad you were able to save the frame.
 
Right on! Thanks. Safety is a big concern, especially because this rig will be hitting the highway a decent amount this fall, but the rest of the frame is in very solid shape yet. With this patch, I'm not worried in the least. I hate seeing 3rd Gens get scrapped due to frame rust...
 
I figured I'd start a separate thread with details and way more pics of how I did this, as this is a common problem in the rust belt. Anyways, here are some pics of before and after, and one of a primed surface so you can see the extent of the new material.

All MIG welds and 3/16 cold roll plate , slow and low voltage (100/19) for good penetration without burning through.

Sent from my XT1254 using Tapatalk
Wow, jeeze, that was bad, I don't think I've seen one that bad before. Good job on the repair and kudos on saving it from the scrap heap. I bought a parts rig with a bad frame, it has multiple patches and other areas rotting thru, beyond repair. Good that your problem area was isolated.
 
Wow, jeeze, that was bad, I don't think I've seen one that bad before. Good job on the repair and kudos on saving it from the scrap heap. I bought a parts rig with a bad frame, it has multiple patches and other areas rotting thru, beyond repair. Good that your problem area was isolated.
Thanks man. If it would have been neglected for a few more years, I may have not been able to make as solid of repairs. The parent metal for all my welds was still 90% to full thickness.

For comparison, this is a picture of a (claimed) Toyota dealer fix to this problem. I met up with the owner of an azure blue pearl beauty and he had this done or 1500 bucks...

Next picture shows how she sat for a week or so as I ordered parts/figured out what I wanted to do with it. I decided on my own blend of a satoshi grille, bumper trim for uniqueness and tire clearance for 1.25" adapters, and an Hid retrofit.
c7ac641b9d8bc5cb227b8711c7758b7d.jpg
6970d53e3eafe41120b1b20aa596db87.jpg


Sent from my XT1254 using Tapatalk
 
For the next week or so, I replaced the broken mirror with an oem, did some body and paint work to get rid of the rust spots, and removed the broken power antenna for a fixed mast from Advanced (direct replacement for a 96-02 taco) for a grand total of $12. Can't beat that.

I also started cutting the grille. I'm going to save all my grille pics for another thread so I can go into it in detail.
b5caa59633d442f049b55ae7643aaaa0.jpg
51d44908c44bea0ee216fd6b9a086201.jpg
7642e0db417a9fdaeda225102c3a99dd.jpg
b570ad8b2cd8de7aa033fe19685c688c.jpg
885e7bc474e9716ef9f8ba486985032d.jpg
bbae7c4260c65f4648e262d20fd0143d.jpg
b3bd4d71b63831b817222b76fda4c60f.jpg


Sent from my XT1254 using Tapatalk
 
Once I started getting my rear end parts in, I removed the previous exhaust (first pic), which was garbage (necked down to an inch and a half, welds were iffy) and had my brother reroute a new I let and outlet section into a Flowmaster 40 I picked up for $40. Next step was torching out the old shocks and removing springs with the axle droop method (no spring compressor) and throwing bilstein 5100s and ome 890 progressive coils in.

Since I was working on a two post hydraulic car lift, I was at full droop, and did not like how tight my rear brake line was after that, so I simply tweaked the upper bracket to give myself some slack over buying a new section of longer brake line. I didn't need much! I also built a parking brake line bracket to lift it up and keep it loose.

Also seen are 3rd Gen front proforged sway bar end links to bring it back to a more level state.

This lift, especially seeing the effect at full droop, really pushed my axle over to the side, so I knew a panhard correction was something I wanted to do...
250320810b257ee92c595c605764a28e.jpg
af987e1f6bf1bfe68bb3df7982a2986f.jpg
9d0fc486d73f6e82cbe1678e4658da2b.jpg
e734927b56a1772ca19c872d6ed9f1b2.jpg
8b5cbb4b2de60fbd913659c57426819d.jpg
817ac748a5ca6890a5dc8f30eb6c8754.jpg
8073a05b1458895fb7ac441a6601c0bd.jpg
53f91af3bec6eca51af2fcb423d0b534.jpg
ad9bf4f15f499203435fecbdc776b64c.jpg


Sent from my XT1254 using Tapatalk
 
Last edited:
So, after reading up about the whole pck/ drop or/and lift bracket debate, I wanted to simply due a 2" lift on the axle side and leave the option for a drop bracket for another day. I was this close to ordering one of Eimkeith's bracket sets, as that would have been the easiest, but the delivery date kinda pushed me away, so I decided to make my own. I used two separate pieces to make mine because I had a hard time sourcing the right piece of square stock. See below for pics. Used the lower bolt as alignment, then welded each side individually. I didn't paint it because i knew I was going to coat the whole frame/read end once I was getting closer to being done.

Right around this time, a few or four weeks in, I also had the grille done (finally)!
376499b18b9315ba405d43de9d89ffcc.jpg
46c9c2aad6f0ae3d76101b6cd114ef3e.jpg
26241d26729f4727096d04450c07e2b9.jpg
0447a063b3a7eb0d6351477da62ed929.jpg
42b9539ecad2fbd9f2a4127da93e0531.jpg
25d0fa00f3dfcd7eee7691e51b4919b1.jpg


Sent from my XT1254 using Tapatalk
 
Moving on. I power washed all the flake rust off the bumpers parts, hitch, and panels, and extracted the plethora of broken bolts that riddled the mounts after removal. I then ran a tap thrught all the holes to open the threads back up. I started etching the chrome and painting the bumpers in the meantime.

I finally got around to installing the fabtech coilovers from 3rdgenfan. I got them at a very fair price, as I purchased them more for the lift, not neccesary the valving. (I do find out later that they are actually pretty nice, just on the stiffer side). These are still leagues above a spacer lift on the PO's KYB struts...

So my plan was to replace LBJ, ITRE, OTRE, steering rack bushings, end links, sway bar bushings, and obviously the suspension.

I got the LBJ's installed smoothly (without an extractor or puller, may I add) and starting getting off my slopped tie rods. Well, it turned out that I found holes in both my steering rack boots, and of course all the local parts stores were sold out of them, so I had to wait on finishing up the front end all at once.

I also fixed a known exhaust leak by the rear 02 sensor. Local NAPA recommended this epoxy putty, looks nice and hopefully will last a while too.
9e344892b545399aa5317f4d49fc1350.jpg
0c7d648b476346f97a202307b3173898.jpg
cc724c87d0a0c3f419d35434db83a11c.jpg
357611ff05e7af6ed018dd86e9f008af.jpg
1fc3e030bb6f037f6b139e35650bf700.jpg
e67515153b8d1d10c7b4736b9f877e26.jpg
123ed3f93f65fcda82aa0ea02c03d76f.jpg
bc3b8a3f7c7ad4d39e83d5ee9c2311c9.jpg


Sent from my XT1254 using Tapatalk
 
Next week: continued to coat the bumper panels. You'll note that it's a high gloss--I purposely went with a protective thickly costed automotive enamel for durability over multiple layers of primer. As the pics continue, you'll see what it looked like after simply hitting it over the entire surface with some clean maroon scotchbrite to dull it down once it dried and almost fully cured.

I started my headlight retrofit by separating the glass from the reflector with a high gun and even heating. I didn't really want to stick it in the oven for cleanliness sake, but I was ready to if the heat gun didn't work. It did.

My boots finally came in and I got to wrap up the front end. I went with beck/arnley for the OTREs, energy suspension for the sway bar and end link bushings, and proforged for the rest (ITREs, 2nd Gen rear end links).

I didn't feel the need for upper ball joints as I likely will go with new SPC UCA's or similar in the near future. I am very happy for now, but sometime I would like to get my extra 2 degrees of caster back!
506d9cf858335945f2b3c9375c8a7cee.jpg
2862a0528e70e3d1fdfb9f78ac5ede56.jpg
d227727d85a79b4ac333e38f606ab9f5.jpg
bb4b14203ac08d06e405c3f82e1534e0.jpg
f6ef72774fac8ba7423f98791f479ac0.jpg
6654d7e7b8efd7ea4076c13431f9bfc8.jpg
c0341f83fbb2335a83cb821ca889c02a.jpg
253a7785fc8a20c7fc9a1c8eaf9c4219.jpg
10a981d28aac89a31d91de0ae824c509.jpg


Sent from my XT1254 using Tapatalk
 
Moving on. The next few days were spent half in the shop, painting and undercoating the plastic bumper valences as well as undercoating the frame, and half inside, fabbing and painting the retrofits. I will be starting a new thread with more pics of how I built and customized these!

I got them put together, installed on the vehicle, and got them rotationally aligned. Probably the single most beneficial exterior upgrade - what a huge difference they made. Meanwhile, my Falken wildpeak arrived. Went with 265/75/16s for a meaty tire, while keeping the gas mileage up compared to 33's or even 35's.

Figured out that I wanted extended lug nuts for the front as I was only getting about 5 full turns of engagement. New ones got more than 10-wayyy better.

Installed the wheels, hammered the pinch welds for clearance right away, and got it on its own legs! Drove it out to compare it to the trusty red one with 315k on her. Night and day.

Fast forwarding a few more days, got the bumpers, grille, lights, all installed and sitting pretty. Wiring in the halos was fun. Hooked it to my corner lights circuit so I had a switch on the dash (first notch lights) as well as my turn signals for the switchback function. Soldered my connections so I never have to worry about it again.

2a13da9d85343c56c9b27998439750eb.jpg
01a91d69b34378a8924fea2fc1048386.jpg
80dc3418e8cb3f90815e17aa4bfdf8d2.jpg
94a2a51d77f57158615f7437a897d27c.jpg
5a618f86cec32d4005e96b57b1376b89.jpg
e5b4f51f51f2b6e22119c961ee7e5a29.jpg
e3a69350dfb39726425a1bbd7287a748.jpg
75bafd4188ee2d598808cd4b3475bfee.jpg


Sent from my XT1254 using Tapatalk
 
Last edited:
Next task was internal. Replace the stock single DIN head uunit with something a little nicer and decided to run a backup camera. Replaced the stock tails with eagle eyes while I was at it. Routing the wires through the hatch was oh, so joyful, plus, I wired in a bypass switch for the camera to turn on at any time. I had to use a couple of diodes to keep my reverse lights from turning on when I flipped the switch (located between the two 12v ports). Awesome.

Did just rust converting and paint up on the front end because the surface rust was bugging me. Much cleaner now.

Last week I drove it into the alignment shop, found out that my makeshift alignment was actually pretty dang close, and he got it into great spec (except for only about 1 degree of caster, which I expected.)

Since then, I degreased and cleaned the engine bay, cleaned MAF and throttle body intake, and have been slowly polishing the single stage natural white exterior.

I have yet to paint the rims but am waiting a bit to verify they don't need rebalancing. I'll be throwing on a custom skid plate this weekend hopefully as well as installing cover king seat covers.

That's about it for now, enjoy the multitude of pictures and please, comment your thoughts, concerns, anything!

You guys helped me get this to where it is now, and I only hope I can repay the favor by providing insight to others as well.

To be continued...
6424fbe4290e1261295849f368c13e60.jpg
927ee885441cdc38b7c796ea739a93fe.jpg
62e9589c166e9e8be30afc06292c27c4.jpg
f0c8e36b49635c26c6f35e61cea21a57.jpg
a6c732375c0f25471b00ee8ed7fe28c5.jpg
250b1d807570c88c94dfb2647ea39ec1.jpg
ff27876189be84764a85d836fdd34d7a.jpg
d334ddceeb418b3c24a4ef24310ea1a6.jpg


Sent from my XT1254 using Tapatalk
 

Members online

Forum statistics

Threads
278,307
Messages
3,554,049
Members
248,016
Latest member
Advally Service

Trending content

Back
Top