2TH4IST's, Forrest's adventures and things.

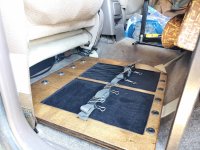
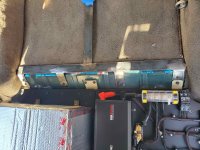
Well today I tackled the rear cargo sound deadening install. And my hands are toast. Love having arthritis sigh. It went well, let the mats soak in the sun while I took everything apart making them nice and bendable. Started on the wheel wells, then did the floor. Man all those humps and bumps was a pita. But its done and is nice. I don't really care for the blue color. Added 3m aluminum tape to help seal the seams up.

Then decided to fix a f-up I did (didn't think about the issues it would cause). About 6 years ago, I sprayed self expanding foam in the body vent in the left rear quarter panel. To prevent water getting in in deep water. Well today I decided to dig it out. What a massive pita! Luckily the foam didn't stick to the plastic and was moderately easy to remove, used a bendy grabber to get the small vent openings cleaned out.

Also measured all the rear cargo area and measured with the spare on the left side and measured for the fridge too. Everything will fit with room to spare. I have a 30" wide mattress that will fit perfectly. Now to draw up some plans and calculate how much lumber I need to buy. Also my 3/8 6061-t6 aluminum plates came in, I'll use those for the caliper brackets.
 
Started cutting all the wood for the drawer/sleep platform this week. Also went out and got the metal for the mounting of the platform and the water tank and electrical panel. Also scored the exact sized piece of metal I needed for my gas tank swin out for the bumper. Was going to work on it more today, but it's so damn humid now and I don't want to mess with wood when it's this humid. So next week the build will continue.
 
[MENTION=117128]cblock406[/MENTION] thanks! I do like the way it's turning out! I don't take many pics when I'm on the trail. But I'm working on getting better at that lol.

Got an idea for the fridge and front sleep plank support that should be pretty sweet. Won't need to get any metal as I have what I need I found a few years ago.
 
Thanks again!

Yesterday started the platform build, well screwing and gluing the stuff together. Got some of the pocket screw holes drilled out. It came together nicely. Only had one mess up, cost me my front half of the sleep platform so had to get another sheet of 3/4 errrrrr 11/16 plywood.

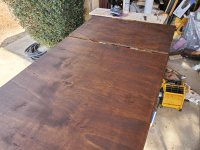
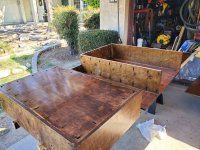
Also going to stain/seal it with the color of American walnut in satin finish. Should be nice! Beige carpet for the platform with abs plastic for where the tire is going. Not feeling to hot today plus it's really humid again so, rest day it is!

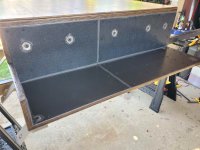
The back of the platform is where I'll mount the water filter, pump and accumulator.
 
So scrapping all this wood. It sucks but learned my lesson. I measured everything to be 3/4 thick, when it actually is 11/16. So think tolerance stacking. Would explain all the fitment issues. Luckily my friend is a carpenter, and (I'm really thankful to him!) Is going to get me 2 sheets of legit true thickness American made plywood at his cost. He has a big shop and fancy machines and he will even cut everything for me to make sure everything is square. I think it's maple ply or walnut ply. I don't remember.

It's a lesson learned, won't buy ply from home depot again lol. So this is setting me back a couple of days. But gives me time to weld up the electrical and water mounting brackets. As well as milling out the battery tray slots and the air compressor mount. Hopefully I can make good progress.
 
Sorry for updating this so late lol. But got all the new wood cut by my friend. Took a week off of work so I could make some serious progress on the 4runner. Got all mounting brackets fabbed up and painted. Still working on the drawer/sleep system this week. But taking my time and making sure everything is perfect. Also picked up a brad nailer, man that helped a ton to keep the wood in place. Also picked up some legit wood clamps, which help too.

The second I left my friends shop, my brake booster failed. That was a white knuckle drive home for sure. So was going to get an aftermarket booster but lots and lots of land cruiser (lc80) folks said heck no to aftermarket due to failure in less the a year. So bit the bullet and bought an oem booster. Got it in this last Monday, man the braked are so much better now. That booster must have been going out for a while.

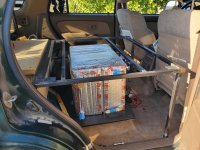
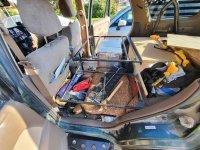
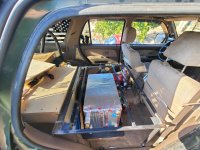
Anyways, unfortunately I chose to get work done then take tons of pics. But I got some pics I'll post up. The plywood is so much better then the stuff I got before. 13 plys. Spaced the pocket screws a bit better and made some new bracing for the drawer. The water tank and electrical panel is phenomenal. Absolutely solid, but I do need to clerance the holes a bit for final assembly.

Also made and finished the battery tray and air compressor mount with and extra mount for a 2.5 or 5 gallon water jug. So a total water capacity of either 12g, 14.5g, or 17g.

The spare fits perfectly on the driver's side now, with a solid eye mount and some rollbar clamps. Just got to finish all the little details out on that.

I still have all the car side wiring to do still. As well as the on board air compressor system too. But those will be a bit later. Also want to add a awning as well but a bit later.

Tomorrow will bring hopefully the final work on the main platform body. Then the fridge mount and the extended sleep platform will be next. Once all the wood work is done it will be time for stain and seal. Going with matte American walnut.

Oh also replace the water covers with some carbon fiber, because +10 hp.

That void between the platform and the water/electric panel I'll cover with some carpeting.
 
Today, my arms are wet noodles from all the sanding I did today. But the main drawer system is sanded and ready to get stained. My compressors air hose blew out and I got a good hit on my left arm. I'll have to wait to stain it until the air hose arrives. Also will be upgrading my oil pressure and trans temp gauges soon. They are gloshift and are acting strange/funky. Went with speed hut and got them customized. They look great. Also got a hand throttle, so I can set rpm's when I'm using either the air compressor or wench. Getting darn close now.

Kind of want to take a break from all this wood work and work on the electronic parking brakes. But alas I'll push on with the platform progress. Tomorrow will be the metal for the extended platform and fridge mount.

Oh yes, I was told the ply wood was good stuff, turns out is absolute crap. I've had to do delaminating repair and the veneer is so fragile if you sneeze it will peel off. I'm quite pissed off about it. If I was not this far along, I'd rebuild this thing a 3rd time. Sigh. It is what it is. All that white stuff you see on the wood is wood filler.
 
Got some more work done today. But only for a short while as it's cooking hot today, well for the rest of this week.

Got the metal cut for the back of the platform, drilled, and the wood nuts glued in place. Now I can start to build the framing for the sleep extension and fridge. Also cut the platform extension. So overall, it's 70 inches long and 32 inches wide. Perfect. Wrapped it up before it got any hotter. Test fit the water filter, pump, accumulator and uv filter. It will all fit.

I tried staining the battery tray/mount. It turned out like absolute crap, thankfully it was just the bottom, so after is dried, I sanded it off and will be trying a different stain. Oil based this time, in mission brown.
 
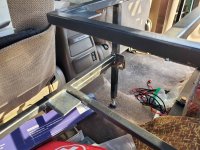
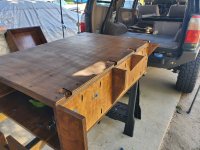
Well today I tackled the framing for the extended sleep platform and the fridge mount. Got it all done, just need to add an extra hinge on the sleep side to stiffen it up a bit. Absolutely hate welding 16 gauge steel with flux core, but it's all I have now while saving for a better welder.

All the adjustable feet work perfectly, and it bolts together in the middle so I can remove it in pieces.

Also got the battery tray stained. All the issues I had with the stain was due to water based stain/poly. I'm now using a beautiful oil based stain called honey by minwax. It's nice! Next week I'll start staining the whole thing, though I need to make the filler panel for the gap over the wheel well. The battery tray and air compressor tray are not in yet as I don't want to damage them while I'm working on the framing.

So close I can taste it now lol.
 

Attachments

  • 20260921_171125.jpeg
    20260921_171125.jpeg
    870.8 KB · Views: 21
  • 20260921_171150 (3).jpeg
    20260921_171150 (3).jpeg
    989.8 KB · Views: 20
  • 20260921_171133 (3).jpeg
    20260921_171133 (3).jpeg
    882.1 KB · Views: 24
  • 20260921_171201 (2).jpeg
    20260921_171201 (2).jpeg
    925.9 KB · Views: 21
Today I started staining all the wood. It came out great! Tomorrow will be polyurethane time. Have to do it in stages, as I still need to build the filler panel for the right side and it's supports. I can't reach all the way into the drawer body as it's to deep. So I'll glue and screw it after I poly it and install the slides. I'll have to router the top a bit as I made it a bit to wide and long. But that's easy. Also got the magnets mounted on the fridge and extended platform. After it's installed I'll figure out the strap mounts for the fridge. All in all good progress today.
 

Attachments

  • 20260929_155443.jpeg
    20260929_155443.jpeg
    978.2 KB · Views: 12
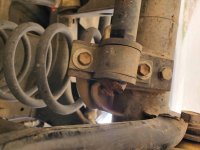
More work done today. Also found that I snapped my addco rear swaybar! 1 inch solid swaybar! Right at the bend on the pass side. Wondered why it felt a bit different driving around. Lol. Hopefully they will warranty it.

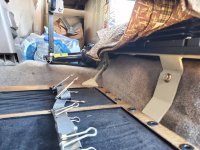
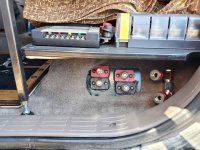
Got what needed to be coated in poly, coated today. While that was drying I installed the battery and solar bulkhead things, also got the air pass through installed too. Then I opened up the mounting holes on the water/electrical tray. Then mounted it for the final time, then installed the battery mount. Of course I vacuumed the floor before the install. Tomorrow will be more work!
 

Attachments

  • 20260930_171453.jpeg
    20260930_171453.jpeg
    330.2 KB · Views: 18
  • 20260930_114501.jpeg
    20260930_114501.jpeg
    1,018.1 KB · Views: 18
  • 20260930_161110.jpeg
    20260930_161110.jpeg
    940.2 KB · Views: 16
  • 20260930_161134.jpeg
    20260930_161134.jpeg
    669.8 KB · Views: 16
  • 20260930_161128 (2).jpeg
    20260930_161128 (2).jpeg
    910.8 KB · Views: 18
  • 20260930_161143 (2).jpeg
    20260930_161143 (2).jpeg
    905.3 KB · Views: 20
Dang this looks really good. I've been brainstorming a way to use the seat mount bolt holes to secure my sleeping platform. Very helpful to have these reference photos.
 
Thanks posty! Hope it helps you out!

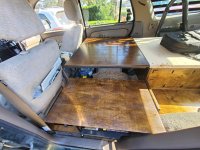
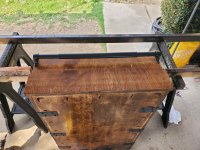
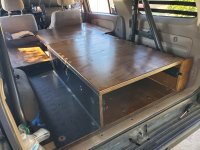
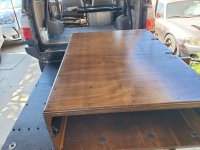
Well it's finally fully assembled. I can't say done as I have the carpet to put on and drawer liner stuff to install. It's been to long to be honest. Working on this for so long has allowed me to think, and thinking is dangerous. I'll finish it for sure. Soon I hope. What's left with out to much detail:
Carpet/drawer liner
Air compressor mount
Wiring
Solar panel install
A bunch of felt tape to prevent rattles/wear
Plumbing water stuff

This week finished staining everything and poly coated, made the filler panel, covered the tire area with abs plastic, added the braces and handle for the drawer, installed the spare tire mounts on the roll bar. If the springs can't handle the weight, I have a set of dobinson's c59-210v's to install, right now I have the lc80 springs the sonoran steel recommends.

All I can say is I hope I can use this before gas is gone lol. Also got the broken swaybar shipped back, they are covering it under warranty, well at least summit racing is lol. That was a pita to box up. New one should be shipped the 12th. The oem one is back in for now.
 

Attachments

  • 20261005_152325 (2).jpeg
    20261005_152325 (2).jpeg
    919 KB · Views: 8
  • 20261006_133229 (2).jpeg
    20261006_133229 (2).jpeg
    914.1 KB · Views: 8
  • 20261006_140616 (2).jpeg
    20261006_140616 (2).jpeg
    579.7 KB · Views: 8
  • 20261006_133239 (2).jpeg
    20261006_133239 (2).jpeg
    708.9 KB · Views: 7
  • 20261005_133505 (2).jpeg
    20261005_133505 (2).jpeg
    681.2 KB · Views: 9

Members online

No members online now.

Forum statistics

Threads
278,390
Messages
3,554,627
Members
248,086
Latest member
delislerebecca

Trending content

Back
Top