Arb Bull Bar Help

cowanrg

New member
I got my ARB Bull Bar last week and was installing it this weekend and had a few questions. First, what the heck are you supposed to do with the plastic wheel well pieces? The instructions don't mention it at all. Are you just supposed to remove them, cut them, etc?

(I searched for 2 hours and couldn't find anything, so if there's already a good thread, I couldn't find it :shrug: )

Also, every picture I've seen of the bull bar for this model year has covers or 'stone gaurds' underneath on the corners. Mine doesn't have any and the manual doesn't mention them. I have the center stone tray, but not the sides. Are these not included, because I can't see them as optional accessories.

Here's an album of where I'm at right now. I just need to know what to do with those plastic pieces.

arb installation - Imgur
 
Register to hide this ad
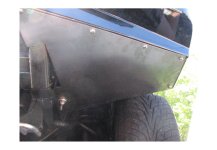
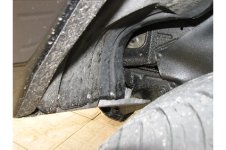
Here's my solution to both. Was planning on posting these at some point might as well be here! Covered both sides underneath & gave a place to attach inner fender liner.
 

Attachments

  • arb cover t4r.jpg
    arb cover t4r.jpg
    92.9 KB · Views: 472
  • inner fender.jpg
    inner fender.jpg
    42.9 KB · Views: 397
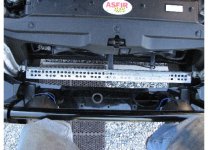
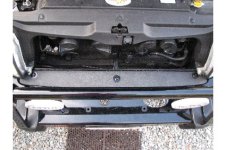
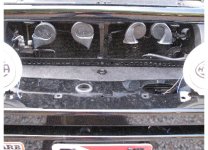
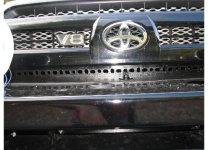
....And my solution for the gap between the ARB & grill to provide radiator protection.

Had the galvanized angle steel hanging around but you can get similar at your local Lowe's etc. Brushed on bedliner. Attached it to the 3 factory bumper supports (had to flex the outboard ones a little to line up holes, no problem though). Painted black & bought a sheet of ABS plastic & cut to fit space between ARB & the steel. The last picture is taken with the hood closed but with a flash to see it. It's set back about 2" or so from the front of the grill so it really isn't visible. Provides mer peace of mind for foreign objects & still allows airflow.
 

Attachments

  • Rad protection 1.jpg
    Rad protection 1.jpg
    82.4 KB · Views: 403
  • Rad protection 2.jpg
    Rad protection 2.jpg
    51.7 KB · Views: 381
  • Rad protection 3.jpg
    Rad protection 3.jpg
    85 KB · Views: 377
  • Rad protection 4.jpg
    Rad protection 4.jpg
    68.5 KB · Views: 419
For the sheet metal underneath, I had some sheet SS hanging around. I made a template out of cardboard & used the body mount bolt (bought an extra metric nut, 2 stainless washers & a rubber grommet for the hole) to make a template. Just reversed the template for the other side. I then bent up a tab on the back to allow me to attach the cut fender liner. I did have to make an adjustment to clear the turning wheel so the back section actually has two bends at slightly different angles. If needed I can get a different picture of the back. I then drilled & tapped the underside lip of the bumper for the other 5 machine screws.
 
Dang, that seems like more work than I want to do right now. I'm just having trouble finished off the basic install.

Did anyone else have trouble with their turn signals? Mine are blinking fast like a bulb is out/missing. The instructions were very vague (for every step it seems). There were three wires on the harness for the lights, and 2 2-pin connectors for the factory. I have it hooked up, but there's a floating black wire on the ARB light.

So, it's all installed, but here's where I'm at. 1) the turn signal blinks too fast 2) cutting the bumper trim piece was BS, it looks bad and doesn't cover the hole properly 3) the fender pieces look crappy, even when cut right, 4) I can't see how to get the stone guard connected to the original skid plate and 5) the control box is hard to mount, but that's because my wires are just a bit too short

overall, I'm not very thrilled with the fit and finish (and instructions) of this bull bar. I've spend 2 days now on it and it's MOSTLY together and looks decent, but it could be so much better, and I still have a few things I need to fix. Any ideas on the blinkers or the stone guard?
 
Last edited:
This is what i had done on my taco

Not a hundred percent it would work but this is what i did in the like on step 12 it shows to zip tie it up to the support and its been a couple years now and still holding.
http://store.arbusa.com/Assets/PDF/3423030i.pdf

Hope you figure it out cause ill be in the same boat when i get one for my 4runner :D
 
Cowanrg, for 2) that's why I did the angle iron/ABS plastic; didn't want to cut up the bumper cover.

As for the lights, there are two in the ARB; the leads for both should be connected together so both come on at the same time. So 1st make sure both are lit. I played with mine a little. You need X amount of draw otherwise you get the fast flash. I think between 18-21 watts total for both the bulbs should be fine. I'd have to check later to confirm the wattage on the bulbs I have.
 
For the sheet metal underneath, I had some sheet SS hanging around. I made a template out of cardboard & used the body mount bolt (bought an extra metric nut, 2 stainless washers & a rubber grommet for the hole) to make a template. Just reversed the template for the other side. I then bent up a tab on the back to allow me to attach the cut fender liner. I did have to make an adjustment to clear the turning wheel so the back section actually has two bends at slightly different angles. If needed I can get a different picture of the back. I then drilled & tapped the underside lip of the bumper for the other 5 machine screws.

Cowanrg, for 2) that's why I did the angle iron/ABS plastic; didn't want to cut up the bumper cover.

As for the lights, there are two in the ARB; the leads for both should be connected together so both come on at the same time. So 1st make sure both are lit. I played with mine a little. You need X amount of draw otherwise you get the fast flash. I think between 18-21 watts total for both the bulbs should be fine. I'd have to check later to confirm the wattage on the bulbs I have.

Yeah, I think I might do the ABS in addition to the cut bumper. I have access to ABS and a laser cutter, so I can roughly cut out the shape and then use a bandsaw to finish it off. For $1500, I shouldn't have to do that, but whatever.

Ah, OK, that makes more sense with the lights. They had 3 wires coming off of it, so common ground, and then a signal wire for each light. I guess I just hook both signal wires up to the power, and it should work. I can test that out easily enough. They had you replace one of the bulbs with a lower wattage, so that's probably why. Did yours have 3 wires or just 2?

Any idea on the rock tray or whatever? I can see how it connects to the ARB, but the OEM skid plate isn't flat, yet the end of the ARB plate is, so tightening it up would just bend the metal all up.
 
Lights: yes common ground & connected other leads together. Mine had the bulb switched at the factory.
Sorry can't help you with the rock tray. I have skids & it is sandwiched nicely by the skid which uses the same bolt holes.
Wanna buy my aluminum Asfir skids? ;]
 
Lights: yes common ground & connected other leads together. Mine had the bulb switched at the factory.
Sorry can't help you with the rock tray. I have skids & it is sandwiched nicely by the skid which uses the same bolt holes.
Wanna buy my aluminum Asfir skids? ;]

Hah, I'll pass on the skids :-)

I'll see if I can figure out the rock tray thing. it looks OK without it, but it wouldn't hurt to have for protection of the radiator. I'll mess with the lights tonight and see if I can get them working. Thanks for the help!
 

Members online

No members online now.

Forum statistics

Threads
278,310
Messages
3,554,078
Members
248,016
Latest member
Advally Service

Trending content

Back
Top