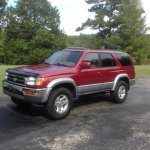
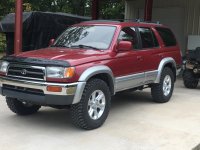
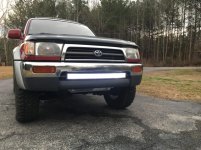
Been gone a while but I'm back, 96 limited build thread.

Link12

New member
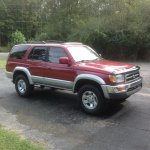
So a few years ago I started building a 2001 4Runner. I put the Toytec ultimate lift on it as well as new wheels and tires. Drove it three times and had to sell it because some property I wanted came up for sale. Now I am all done with renovations and moved in my new place so I found me another 3rd gen to start on. It's a 1996 4x4 Limited with all original paint and absolutely zero rust anywhere. The best part also is it has the rear diff lock. I does have some of the normal issues such as rear axle seals and valve covers leaking like crazy.
 

Attachments
  • IMG_0224.jpg
    IMG_0224.jpg
    137.7 KB · Views: 553
Last edited:
Register to hide this ad
Welcome back.

Quick question though... did you recently update your signature, and if not can you explain the context of bologna?
 
Quote from the movie Tropic Thunder.

As much as I love stupid comedies, I've never seen it. Seems like yours was at least the second reference I've missed about it this week after Joe Rogan mentioned it on his podcast.

Anyway, great looking rig you got there. You should name it "boomerang" or "boomer" because you basically threw away your 4Runner, hit your target, and now you're back.
 
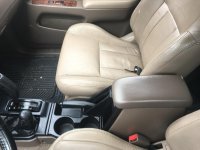
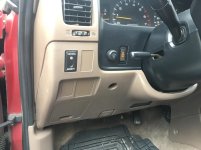
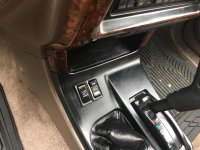
Center console upgrade

Swapped in a new center console out of a 2001. Relocated the switches to the shifter trim and it turned out great.
 

Attachments

  • IMG_4960.jpg
    IMG_4960.jpg
    122 KB · Views: 418
  • IMG_4959.jpg
    IMG_4959.jpg
    125.4 KB · Views: 391
  • IMG_4961.jpg
    IMG_4961.jpg
    133 KB · Views: 388
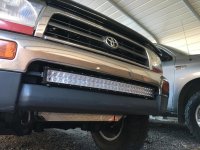
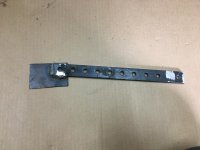
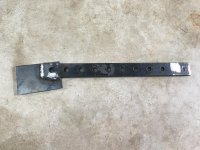
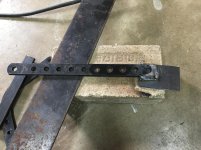
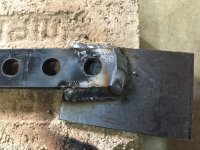
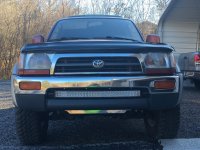
Started mocking up for my light bar install today. I've got the bracket I have to build figured out but not welded together yet.
 

Attachments

  • IMG_4996.jpg
    IMG_4996.jpg
    134.7 KB · Views: 307
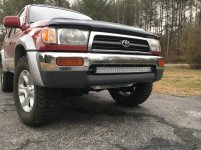
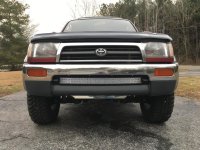
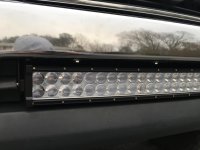
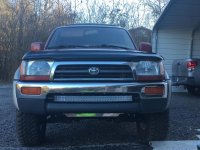
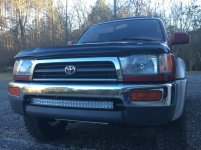
Thanks guys^. Built the brackets and got it mounted. It turned out very solid. It bolts to the 4 factory holes that the 96 to 98 bumpers have. I will have to take it back apart to paint the brackets another warmer day.
 

Attachments

  • IMG_5010.jpg
    IMG_5010.jpg
    139.2 KB · Views: 255
  • IMG_5011.jpg
    IMG_5011.jpg
    136.6 KB · Views: 249
  • IMG_5012.jpg
    IMG_5012.jpg
    136.3 KB · Views: 259
  • IMG_5013.jpg
    IMG_5013.jpg
    138 KB · Views: 268
  • IMG_5015.jpg
    IMG_5015.jpg
    139.4 KB · Views: 245
  • IMG_5018.jpg
    IMG_5018.jpg
    137.9 KB · Views: 258
  • IMG_5020.jpg
    IMG_5020.jpg
    128.2 KB · Views: 247
  • IMG_5017.jpg
    IMG_5017.jpg
    139.3 KB · Views: 260
Welcome back! I am new to this also and have compiled a list of orders. I love the placement of the LED Bar, exactly where mine will be going! The 2001 Center console looks amazing....
 
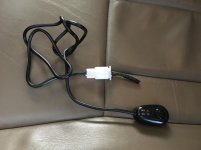
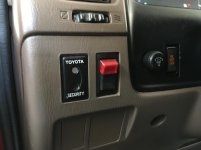
Thanks^. The on/off switch it comes with has a red light for off and a green light for when the light is on. Well, the red light stays on all the time 24/7 when the light is off and I really don't like that at all. So swapped it out with a Cole Hersee switch that fits in a factory slot.
 

Attachments

  • IMG_5028.jpg
    IMG_5028.jpg
    138.5 KB · Views: 172
  • IMG_5026.jpg
    IMG_5026.jpg
    125.3 KB · Views: 182
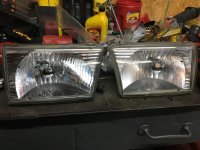
Headlights arrived

Found a set of headlights from a 2000 on eBay for $75 shipped. They arrived today.
 

Attachments

  • IMG_5040.jpg
    IMG_5040.jpg
    133.4 KB · Views: 155
Headlight upgrade done.
 

Attachments

  • IMG_5045.jpg
    IMG_5045.jpg
    137.4 KB · Views: 142
  • IMG_5047.jpg
    IMG_5047.jpg
    137.9 KB · Views: 144
  • IMG_5049.jpg
    IMG_5049.jpg
    138.4 KB · Views: 144
Valve cover gaskets done with all toyota parts weekend before last.

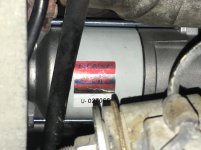
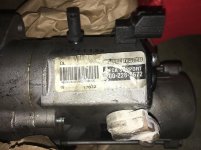
Replaced the starter today with a Denso Reman and it is working great. $125 shipped on rock auto. Looks like the old one is a cheap reman. Anyone recognize where it might be from? Just curious because it doesn’t look very old and is already messing up. Not sure if it’s worth fooling with shipping it back to rock auto for the core. Wasn’t no where near as hard to swap out as some threads I read on here were making it out to be. Took me about a hour total. I took it out over the frame through the wheel well. All you have to do is take off the two bolts holding the metal brake line in place and remove the top half of the auto dipstick and it comes right out.
 

Attachments

  • D6572436-F8EC-4161-9C84-6B65BC084AE4.jpg
    D6572436-F8EC-4161-9C84-6B65BC084AE4.jpg
    124 KB · Views: 110
  • 763038DD-6543-4136-B22D-D8E5D78DBA98.jpg
    763038DD-6543-4136-B22D-D8E5D78DBA98.jpg
    137.4 KB · Views: 121

Members online

Forum statistics

Threads
278,310
Messages
3,554,078
Members
248,016
Latest member
Advally Service

Trending content

Back
Top