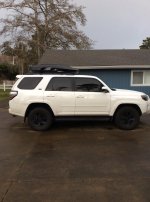
Body Side Molding

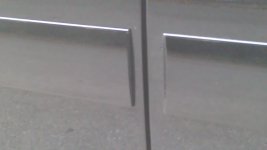
Has anyone else had a problem the molding coming off in hot weather? Mine moved and got ruined when it rubbed together when a door was opened. I was very careful in the installation so I'm confident it was put on properly.

Wondered if anyone else had this problem.

I think you installed them too close to the edges of the doors (and to each other) that's why they rubbed together. when I installed mine I left about 1/4 inch space on the front door and 1/2 inch on the rear. I dont think the heat had anything to do with it...I do car customizing for living ...
 

Attachments

  • bsm.jpg
    bsm.jpg
    132.8 KB · Views: 2,547
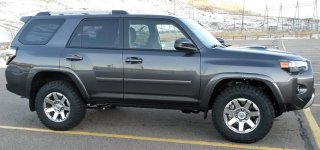
I'm thinking about putting some side molding on my black SR5 and came across this old thread. Can anyone comment on the legitimacy of Beaverstripes.com? I would like to take a look at the "Chromeline" side molding that they have for the 10-11 4Runner, but if it ends up looking tacky or cheap, I would like to return it. I see nothing on their website regarding returns, so I figured I would see if anyone here knows.

Anyone else seen any chrome side molding that looks quality for the T4R?
 
Got my body side molding for $129. Takes about 10 minutes per side to install. Strike your line with some type of tape. I used plain old masking tape. Wipe area with alcohol swabs to clean off any thing that may be on the paint. Peel tape off the back of the molding, aline and press. Done! Why pay $250 to $350 for someone to put on.
 
Barry, is yours the "chrome inlay" side molding? Or the solid paint side molding? If you have a black 4R, I would love to see pictures with it.

Where did you find yours for $129?
 
Has anyone tried installing the Lexus GX460 side molding? It looks like an identical door, but the molding may be too low to actually overt the door dings.
 
Body side molding

Had trouble bringing up the site by URL. Type Body Side Molding 2011 4Runner into google and it will pop up. If yours is a 2010, just change the year. It was on sale when I got it. I think it was normally $145. Perfect match.
 
:thanks:

Got mine on Friday -- perfect color match. They came in a 5' cotton "sock" inside a cardboard tube, with everything needed for the install. After measuring no less than 6 times, and then verifying my measurements 2-3 more, I peeled, placed and stuck them on. Drop dead good looking.
:party:

One thing I did that the instructions did not call for... Using 2" painters tape (blue) I placed a strip just below the installation tape line. This gave me an outline for application of the bonding agent exactly where the 3M tape would make contact (and nowhere else). After applying the agent (on both sides of the T4R) I removed these "templates" and proceeded with installation. Easy job and (IMHO) well worth the time and investment.
:thumb3::thumb3:
 
Thought I’d resurrect this thread since it helped in me my decision to install body-side moldings on my 4Runner. I bought mine at bodysidemoldings.com. They are manufactured by Dawn Enterprises, Inc., which I believe are the same as the ones in this thread.

I do have a couple of installation tips for anyone thinking about these:

  • The instructions call for you to first clean the area with the supplied alcohol pads, and then apply a thin cost of “Pro-Bond Adhesive Promotor”. They mention to be careful, because “Pro-Bond could dull the paint surface.” I didn’t like the sound of that, especially if I were to later decide to remove the moldings. So, I instead cleaned the surface well with commercial paint prep/wax and grease remover that I got from a body shop supplier. Then I heated the area with a hair dryer just before installing the moldings. They’ve adhered just fine and show no signs of loosening.

  • For installation, the instructions say to first peel back 12” of the red liner [covering the adhesive], “removing the rest of the liner as you install.” The red liner is placed over the adhesive in sections, with a piece of tape connecting each section (supposedly to make it so that you can pull the entire liner off as you go). Well, the connecting tape usually detached and didn’t pull off the adjacent section of the liner, resulting in me having to pick at it to get all the liner pieces to come off. This could have been really tough to do if I’d already had the molding partially stuck on (the moldings are rigid).

  • Before pulling any liner off, I taped the moldings onto the sides just where I wanted them, and then taped small wood blocks underneath, like someone else on the Forum had suggested. That way, I could completely remove the red liner first, and then position the moldings on the blocks and press each one on all at once. They came out perfectly straight this way.

  • Finally, I lined mine up with the lower crease on the doors (with the top of the moldings being 8” above this crease) as called for in the instructions. The lower crease is not parallel with the upper crease on the doors (the distance between them varies by about 7/8”). If I had it to do again, I may try to split this difference, although I’d tape them on first to see how that’d look.
 

Attachments

  • Moldings.jpg
    Moldings.jpg
    121.8 KB · Views: 2,028
Did mine today. I had to wait until the weather warmed up above freezing, which warmed up the garage into the 60's.
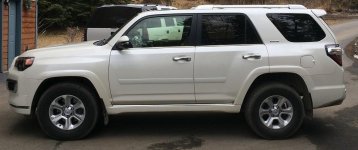
Everything worked well, but the Blizzard Pearl paint is not a perfect match. Usually pearl looks different on metal versus plastic anyway. These are the Sport Wing / Dawn ones.

All of the comments on installation helped a lot. The two big things are measuring multiple times and prepping the surface.

I will add two more helpful hints.

1. Use a Dry Erase pen to line up your positioning tape. I made six measurements each side, and applied the painters tape along all six dots, then wiped the dots off.
It says to measure 8 inches up from the crease, but the crease is rounded, so you have to pick what you think is the top of the crease and be consistent.
That's why I made more than two dots. I went 1/2 inch in from the middle door edge on both pieces.

2. When you are ready to put on the moulding, tape the top edge to the truck. Then it will swing up to remove the 3M tape and stay in place. Like having an extra set of hands to hold it in position.

 

Attachments

  • moulding final.jpg
    moulding final.jpg
    60.1 KB · Views: 1,238
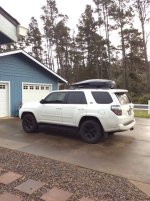
I installed mine around this time last year still holding up strong with no issues.....my Passenger side is slightly higher than the driver side ehhhh who cares lol
 

Attachments

  • C0DAADDF-A6AE-4D15-8E1B-C92F201EEDB5.jpg
    C0DAADDF-A6AE-4D15-8E1B-C92F201EEDB5.jpg
    139.9 KB · Views: 1,027
  • 83CED6C4-C3EC-4B8C-B30B-4BDAD49BF158.jpg
    83CED6C4-C3EC-4B8C-B30B-4BDAD49BF158.jpg
    134.9 KB · Views: 1,252

Members online

No members online now.

Forum statistics

Threads
278,309
Messages
3,554,068
Members
248,016
Latest member
Advally Service

Trending content

Back
Top