BrianSD_42
New member
I recently painted my factory 5 Stars with Duplicolor Wheel Paint.
This is how I did it. Pictures below.
Buy ~ $55 Paint:
* Green Self Etching Primer x 3 cans ($8 each) | http://www.amazon.com/Dupli-Color-DAP1690-General-Purpose-Self-Etching/dp/B002984MU0/
* Wheel Paint - Graphite x 3-4 cans ($5 each) | http://www.amazon.com/Dupli-Color-HWP102-Graphite-Performance-coating/dp/B000B6AF26/
* Wheel Paint - Clear Coat x 1-2 cans ($6 each) | http://www.amazon.com/Dupli-Color-HWP103-Clear-Performance-Wheel/dp/B000B6AF2G/
PREPARATION
Buy and wear a Paint Respirator (BC paint contains carcinogens / CANCER) :
Link to 3M Paint Respirator ($30) ----> http://www.homedepot.com/p/3M-Tekk-...Multi-Purpose-Respirator-62023HA1-A/202080144
** Note that a dust mask is not the same thing and will NOT protect you very well.
Scroll down and read TheDurk's posted comment. Great stuff!
DO ONLY TWO WHEELS AT A TIME.
Allot about 2-3 hours of time for taking two wheels from cleaned to clear coat complete. I say only do two wheels at a time because if you try to do 4 then it is too many to juggle at once and also it takes too long between paint coats. Better to complete two wheels using this method then set them aside and repeat the process below for the remaining two wheels.
STEPS TO PROPERLY PAINT YOUR WHEELS
0. Do each step per wheel (of the two wheels) before moving to next step.
1. Clean wheels with soap and water using 3M scratch pad (purple). This will scuff up the surface of your existing finish
2. Let dry 30 mins or just dry up the water with paper towels.
3. Put on plastic gloves. Take a shop rag and lightly douse it with Turpintine. Wring out any excess. Now VERY quickly (don't linger in one spot for even a second) wipe the wheels down with this rag. This will remove any finger grease, paper towel threads or other residue.
4. PRIMER STAGE ---- Two light coats, 10 mins apart.
5. Let sit 30 mins before adding paint stage (per primer instructions)
6. PAINT STAGE - Two light coats, 10 mins apart, then final medium / wet coat (be careful not to get a run)
7. Let sit 30 mins (minimum per wheel) but neither wheel more than an hour before moving to next stage.
8. CLEAR COAT STAGE - 1-2 light coats only 10 mins apart OR 1 thick wet coat (this is what I did)
9. Let sit for 5 days. It will be dry to the touch in 1-2 hours but will take several days to fully harden.
Other Notes:
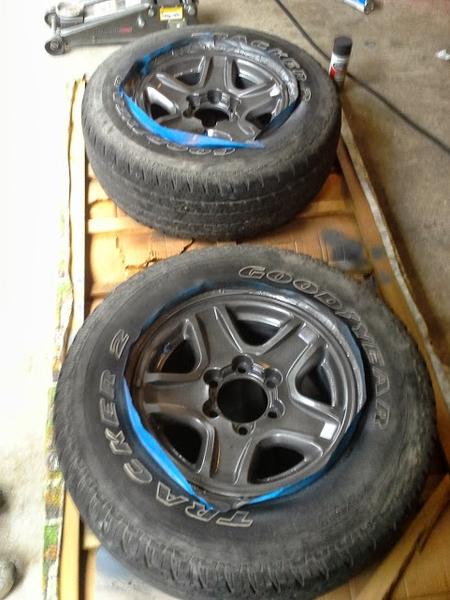
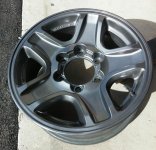
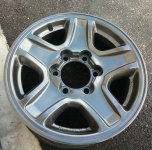
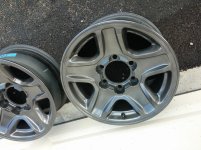
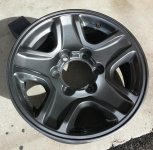
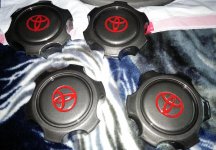
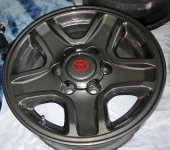
* It was difficult to capture the "true look" of these wheels by taking a picture outside in the sun using my phone camera. The 4th picture is closest to how they look to the human eye. IMO they are a bit darker than pictures 1&2 but either way they are a pretty cool metallic gunmetal like color and the finish from the clear turned out great.
* Once you paint and it dries for more than 2 hours you cannot redo the wheel for 5 days. It clearly states on the back of the can that if you mess up, you will need to wait the 5 days for the "paint layers to truly cure" before lightly sanding and respraying. Good news is that if you mess up you will not need to re-primer, just wait the 5 days then lightly scuff up the surface and paint over it.
* I removed the wheels before painting, this was more of a convenience as I had bought another awesome set of wheels which I will soon be selling. Because of this the wheel had no tires.
* Only do two wheels in a time period of 1-2 hours for the entire process. Then start on next set or if you are like me wait a few days because the first two were a lot of work.
* Let the wheels cure MORE than 5 days before mounting. I let mine cure 4 days and that was at about 70+ F indoors with about 3 hours a day out in the sun. When they were mounted the balancing machine and tire guys did scuff the edges a bit because the paint frankly was still soft despite looking cured. Its not a huge deal as I don't believe anyone can tell unless you are < 2 feet away from the wheel. But if I had to do it again I would let them cure indoors for like 2-3 days then 7 days outside 24x7.
Wheels - October 2014, San Diego, CA

:typing:
This is how I did it. Pictures below.
Buy ~ $55 Paint:
* Green Self Etching Primer x 3 cans ($8 each) | http://www.amazon.com/Dupli-Color-DAP1690-General-Purpose-Self-Etching/dp/B002984MU0/
* Wheel Paint - Graphite x 3-4 cans ($5 each) | http://www.amazon.com/Dupli-Color-HWP102-Graphite-Performance-coating/dp/B000B6AF26/
* Wheel Paint - Clear Coat x 1-2 cans ($6 each) | http://www.amazon.com/Dupli-Color-HWP103-Clear-Performance-Wheel/dp/B000B6AF2G/
PREPARATION
Buy and wear a Paint Respirator (BC paint contains carcinogens / CANCER) :
Link to 3M Paint Respirator ($30) ----> http://www.homedepot.com/p/3M-Tekk-...Multi-Purpose-Respirator-62023HA1-A/202080144
** Note that a dust mask is not the same thing and will NOT protect you very well.
Scroll down and read TheDurk's posted comment. Great stuff!
DO ONLY TWO WHEELS AT A TIME.
Allot about 2-3 hours of time for taking two wheels from cleaned to clear coat complete. I say only do two wheels at a time because if you try to do 4 then it is too many to juggle at once and also it takes too long between paint coats. Better to complete two wheels using this method then set them aside and repeat the process below for the remaining two wheels.
STEPS TO PROPERLY PAINT YOUR WHEELS
0. Do each step per wheel (of the two wheels) before moving to next step.
1. Clean wheels with soap and water using 3M scratch pad (purple). This will scuff up the surface of your existing finish
2. Let dry 30 mins or just dry up the water with paper towels.
3. Put on plastic gloves. Take a shop rag and lightly douse it with Turpintine. Wring out any excess. Now VERY quickly (don't linger in one spot for even a second) wipe the wheels down with this rag. This will remove any finger grease, paper towel threads or other residue.
4. PRIMER STAGE ---- Two light coats, 10 mins apart.
5. Let sit 30 mins before adding paint stage (per primer instructions)
6. PAINT STAGE - Two light coats, 10 mins apart, then final medium / wet coat (be careful not to get a run)
7. Let sit 30 mins (minimum per wheel) but neither wheel more than an hour before moving to next stage.
8. CLEAR COAT STAGE - 1-2 light coats only 10 mins apart OR 1 thick wet coat (this is what I did)
9. Let sit for 5 days. It will be dry to the touch in 1-2 hours but will take several days to fully harden.
Other Notes:
* It was difficult to capture the "true look" of these wheels by taking a picture outside in the sun using my phone camera. The 4th picture is closest to how they look to the human eye. IMO they are a bit darker than pictures 1&2 but either way they are a pretty cool metallic gunmetal like color and the finish from the clear turned out great.
* Once you paint and it dries for more than 2 hours you cannot redo the wheel for 5 days. It clearly states on the back of the can that if you mess up, you will need to wait the 5 days for the "paint layers to truly cure" before lightly sanding and respraying. Good news is that if you mess up you will not need to re-primer, just wait the 5 days then lightly scuff up the surface and paint over it.
* I removed the wheels before painting, this was more of a convenience as I had bought another awesome set of wheels which I will soon be selling. Because of this the wheel had no tires.
* Only do two wheels in a time period of 1-2 hours for the entire process. Then start on next set or if you are like me wait a few days because the first two were a lot of work.
* Let the wheels cure MORE than 5 days before mounting. I let mine cure 4 days and that was at about 70+ F indoors with about 3 hours a day out in the sun. When they were mounted the balancing machine and tire guys did scuff the edges a bit because the paint frankly was still soft despite looking cured. Its not a huge deal as I don't believe anyone can tell unless you are < 2 feet away from the wheel. But if I had to do it again I would let them cure indoors for like 2-3 days then 7 days outside 24x7.
Wheels - October 2014, San Diego, CA
:typing:
Attachments
Last edited:




 looks good glad to see someone taking the time and doing it properly. Only difference between yours and mine is that I used a gun to shoot the clear.