
You are using an out of date browser. It may not display this or other websites correctly.
You should upgrade or use an alternative browser.
You should upgrade or use an alternative browser.
BrianSD_42 Photo Journal Build Maintenance Thread
- Thread starter BrianSD_42
- Start date

BrianSD_42
New member
lift type and cost
***** Lift Kit thoughts *****
My lift is a Sonoran Steel (SS) 1.2 w/ Bilstiens in the front. I bought the lift in mid 2007 and have experienced very little to no SAG. I believe that Steve sells the 1.2 kit for ~ $1279.
I bought this semi-expensive lift because I did not know anything about lifts, he includes all parts and instructions, provides help support in that you can call him, and has a good reputation. He also impressed me over the phone because he knows the weight spring ratings of the different springs on the market as well as which ones will work with our trucks weight for a coil kit.
I was also quoted for $2500 at Off Road Warehouse in San Diego and they didn't have any pictures of 4Runners. I decided to get a kit off of the web and install it myself and a buddy.
If you do go this route I recommend you upgrade to the adjustable shocks.
Here is the SS website:
1996-2000 - System 1.2 - $1,279.00 : Sonoran Steel, Sonoran Steel Custom Metal Fabrication L.L.C. Custom Toyota Truck Parts
:bat:
***** Lift Kit thoughts *****
My lift is a Sonoran Steel (SS) 1.2 w/ Bilstiens in the front. I bought the lift in mid 2007 and have experienced very little to no SAG. I believe that Steve sells the 1.2 kit for ~ $1279.
I bought this semi-expensive lift because I did not know anything about lifts, he includes all parts and instructions, provides help support in that you can call him, and has a good reputation. He also impressed me over the phone because he knows the weight spring ratings of the different springs on the market as well as which ones will work with our trucks weight for a coil kit.
I was also quoted for $2500 at Off Road Warehouse in San Diego and they didn't have any pictures of 4Runners. I decided to get a kit off of the web and install it myself and a buddy.
If you do go this route I recommend you upgrade to the adjustable shocks.
Here is the SS website:
1996-2000 - System 1.2 - $1,279.00 : Sonoran Steel, Sonoran Steel Custom Metal Fabrication L.L.C. Custom Toyota Truck Parts
:bat:
BrianSD_42
New member
**********************************
New Front Struts
**********************************
I replaced my Tokiko with adjustable Bilstien. Now my SS 1.2 kit will be able to handle the extra weight from the new bumper and front skid plate.
Bilstien

***********************************
ARB Bumper
***********************************
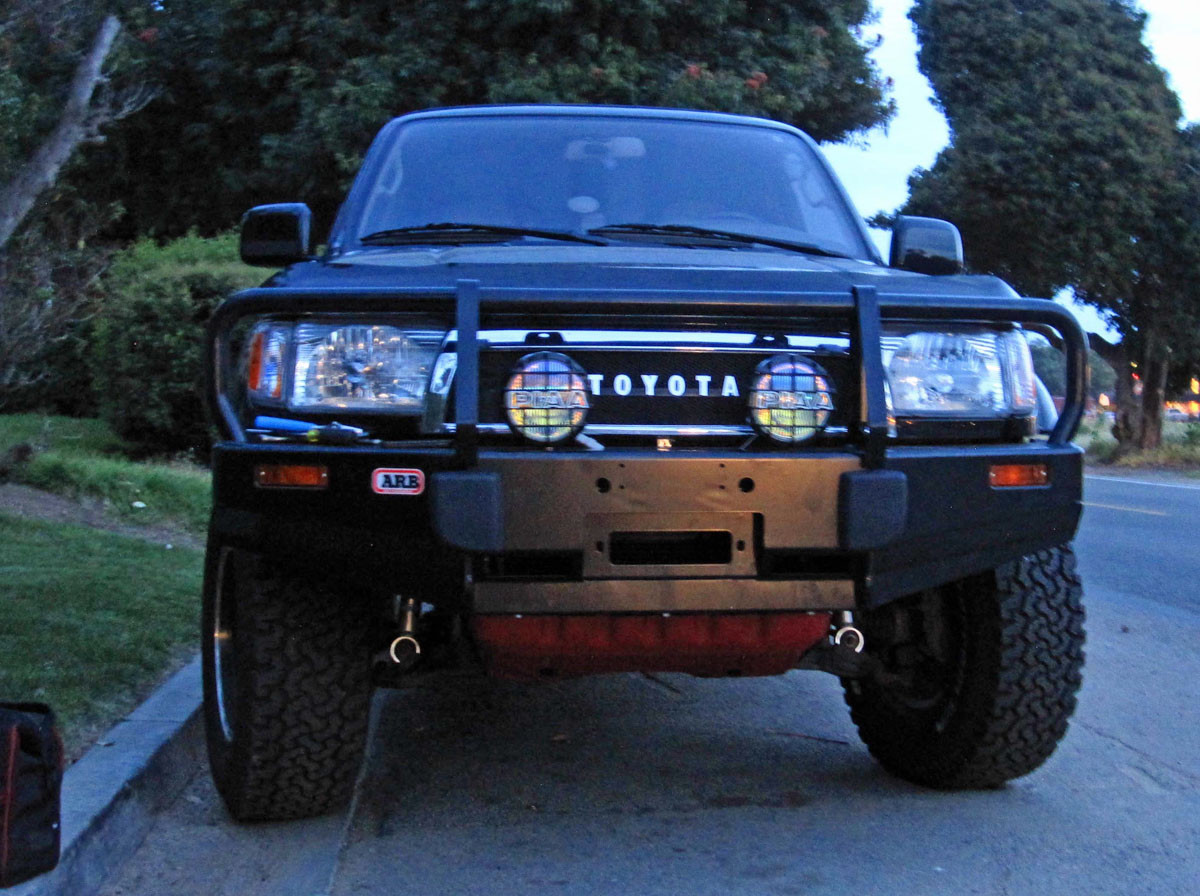
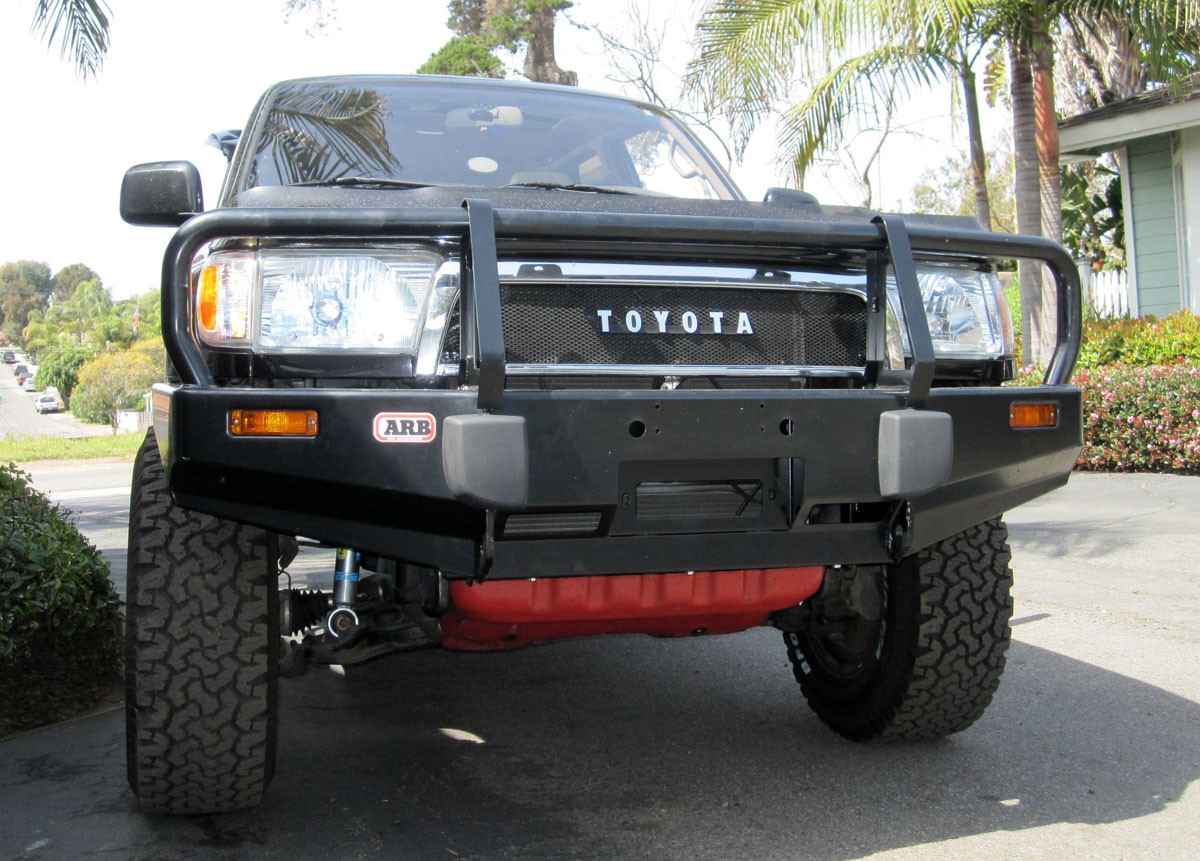
Installed my new ARB. This is where my whole tax return went for 2010!
ARB @ Night


***********************************
BudBuilt Front Skid Plate
***********************************
Installed my new BudBuilt front skid. I ordered it in PowderCoated RED.
FACTORY SKID
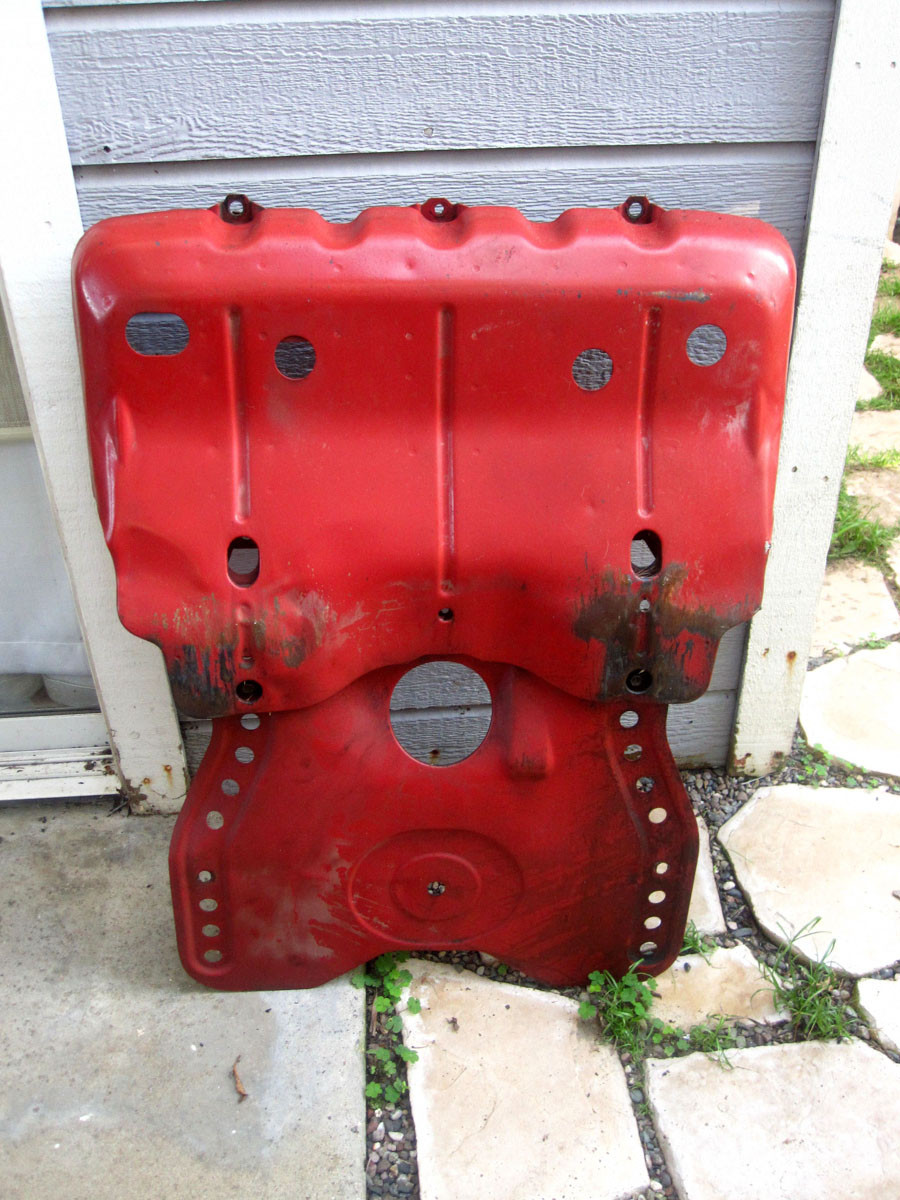
BudBuilt front skid plate
This thing is HUGE!

:bat:
New Front Struts
**********************************
I replaced my Tokiko with adjustable Bilstien. Now my SS 1.2 kit will be able to handle the extra weight from the new bumper and front skid plate.
Bilstien
***********************************
ARB Bumper
***********************************
Installed my new ARB. This is where my whole tax return went for 2010!
ARB @ Night
***********************************
BudBuilt Front Skid Plate
***********************************
Installed my new BudBuilt front skid. I ordered it in PowderCoated RED.
FACTORY SKID
BudBuilt front skid plate
This thing is HUGE!
:bat:
Last edited:

BrianSD_42
New member
:hello:
Decided to take some glamor shots
Future updates:
* stereo upgrade
* wheel spacers
* new wheels (again)
* massive DIY trim and bumper painting
***********************************
--- Pictures ---
***********************************
SmittyBilt | Amazon ($18)
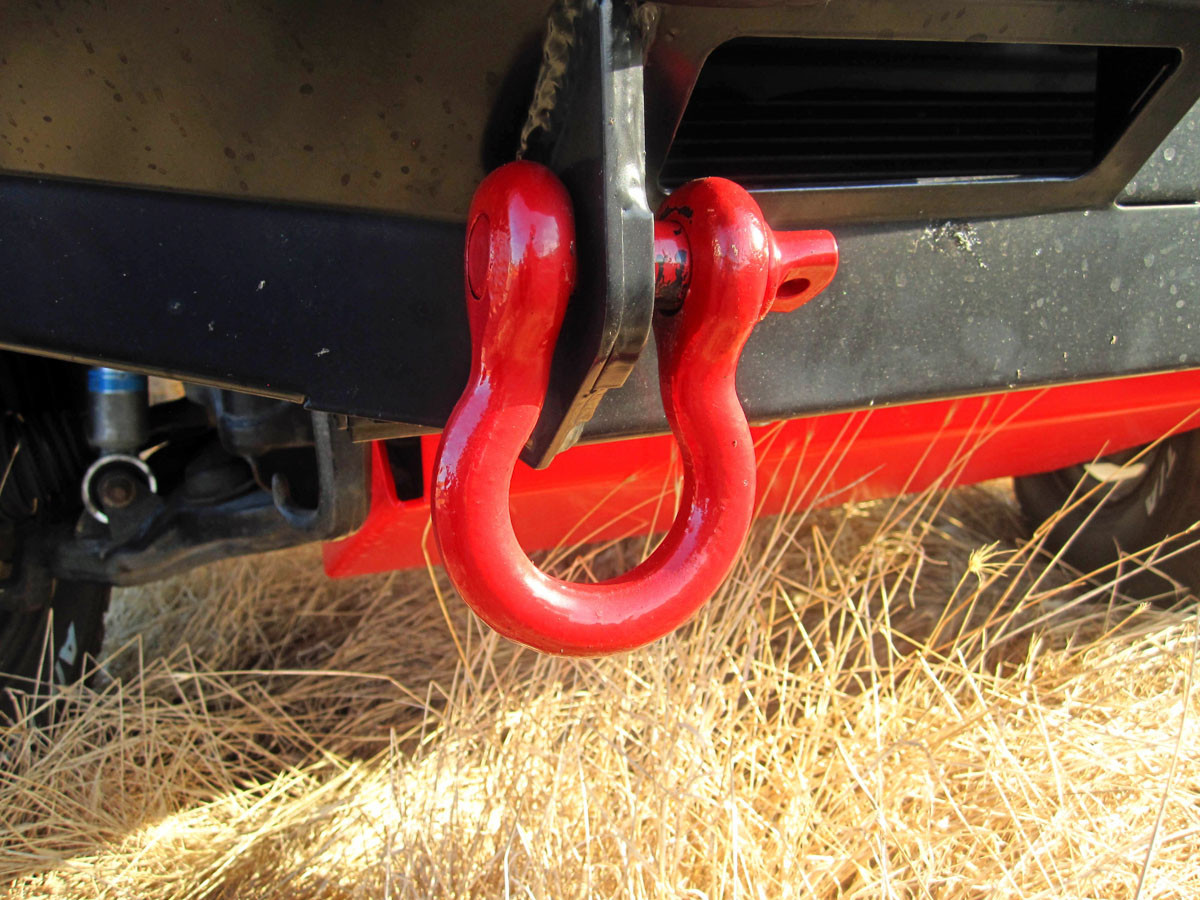
ARB with BudBuilt Installed
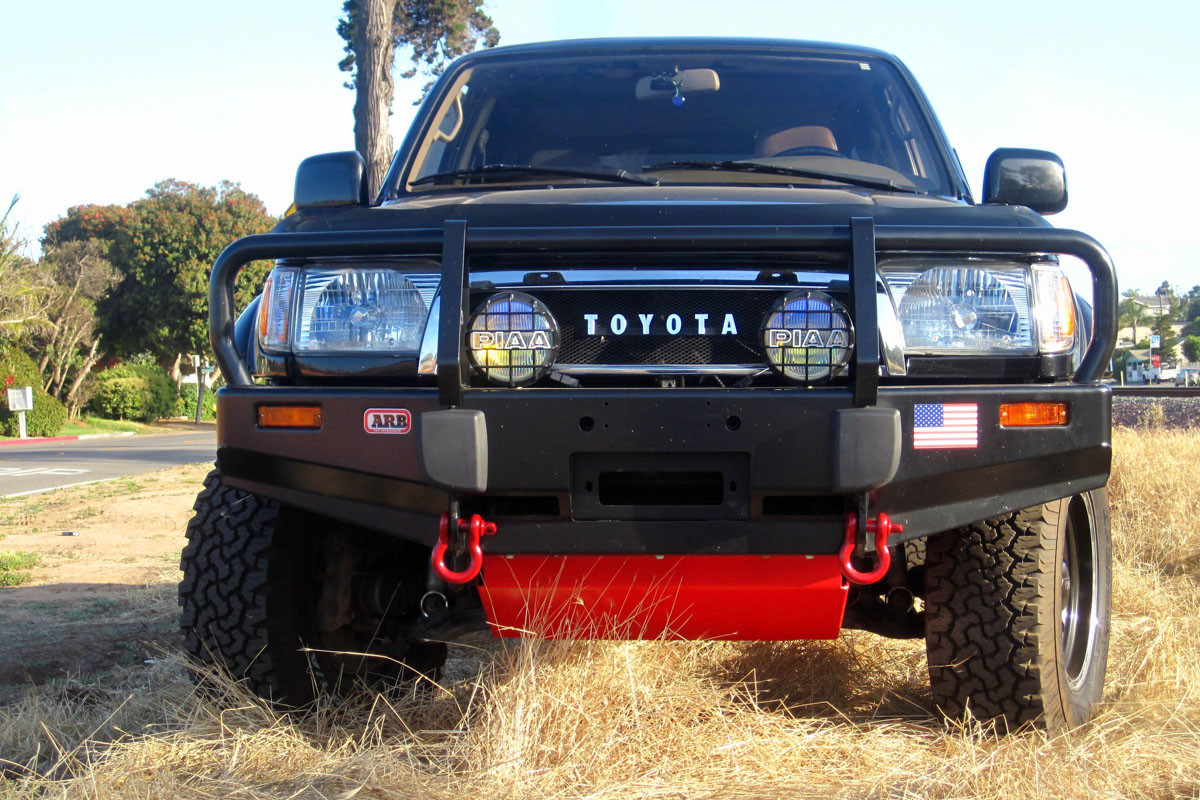
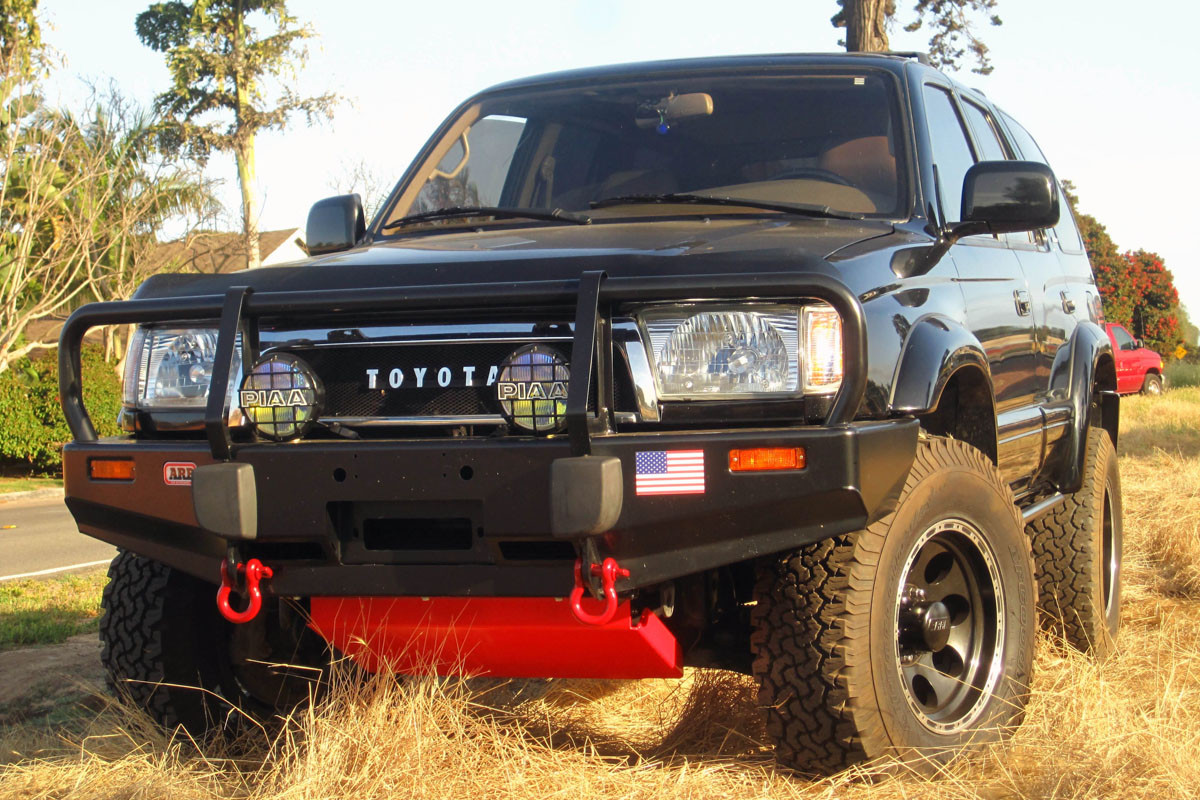
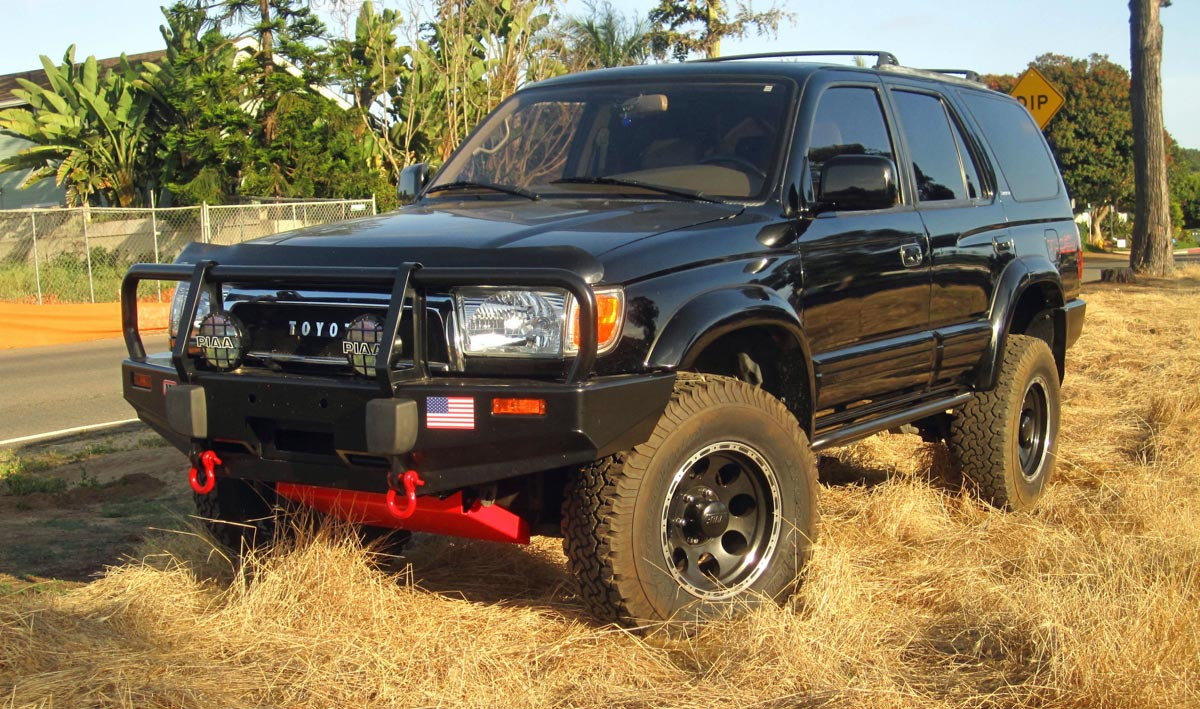
Decided to take some glamor shots
Future updates:
* stereo upgrade
* wheel spacers
* new wheels (again)
* massive DIY trim and bumper painting
***********************************
--- Pictures ---
***********************************
SmittyBilt | Amazon ($18)
ARB with BudBuilt Installed
Last edited:

fightman80
New member
The truck is looking great man! Great work! Congrats on the new purchase of the Camry too!
derekabraham
New member
I like your truck! 
On your ARB bumper, I'm assuming the two orange lights on the side replace the turn signals right? I've always assumed they did but never really knew for sure...I know it's a silly question.
Also, where did you get it and what kind of deal did you get on it?
I'm going to have to go into The Truck Shop soon and see about them making me some sliders. Hope you don't mind if I copy you a little.
I think I might want a small kick out on mine though!
On your ARB bumper, I'm assuming the two orange lights on the side replace the turn signals right? I've always assumed they did but never really knew for sure...I know it's a silly question.
Also, where did you get it and what kind of deal did you get on it?
I'm going to have to go into The Truck Shop soon and see about them making me some sliders. Hope you don't mind if I copy you a little.
I think I might want a small kick out on mine though!
BrianSD_42
New member
I like your truck!
On your ARB bumper, I'm assuming the two orange lights on the side replace the turn signals right? I've always assumed they did but never really knew for sure...I know it's a silly question.
Also, where did you get it and what kind of deal did you get on it?
thanks man.
yes, I had my sliders fabbed at the truck shop. I probably should have gotten a little more kick to protect the rear fenders. James guys did great work with the fab and welding.
I will post a link to the site where I bought my arb. I think it was $720 + $80 shipping. If you are willing to order 1 month ahead I know Off Road Warehouse in SD can get it for you with no shipping cost and a total of $820 I think. The only catch is that you have to wait for their next bulk shipment from ARB which is every 4-6 months.
let me know if you want to go off road some time. they are planning a trip this weekend. it is being talked about in the SoCal section under main page - 4Runner clubs - SoCal - Aug meet / Trip. I cant go because of work.
Last edited:
derekabraham
New member
Sounds good, I'd rather not to have to wait that long for a bumper after I order it though. The anticipation would kill me.
A trail run sounds good.
A trail run sounds good.
BrianSD_42
New member
:hello:
**************************************************
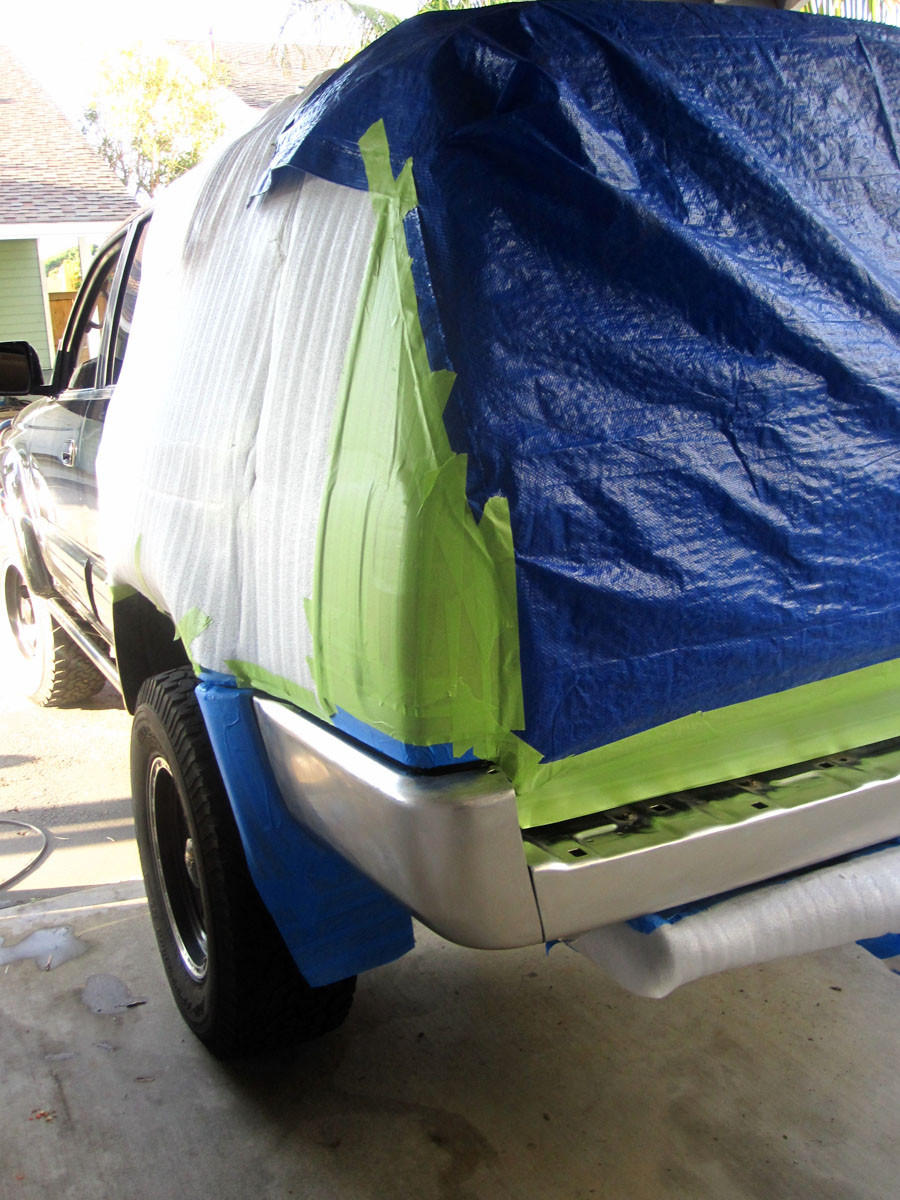
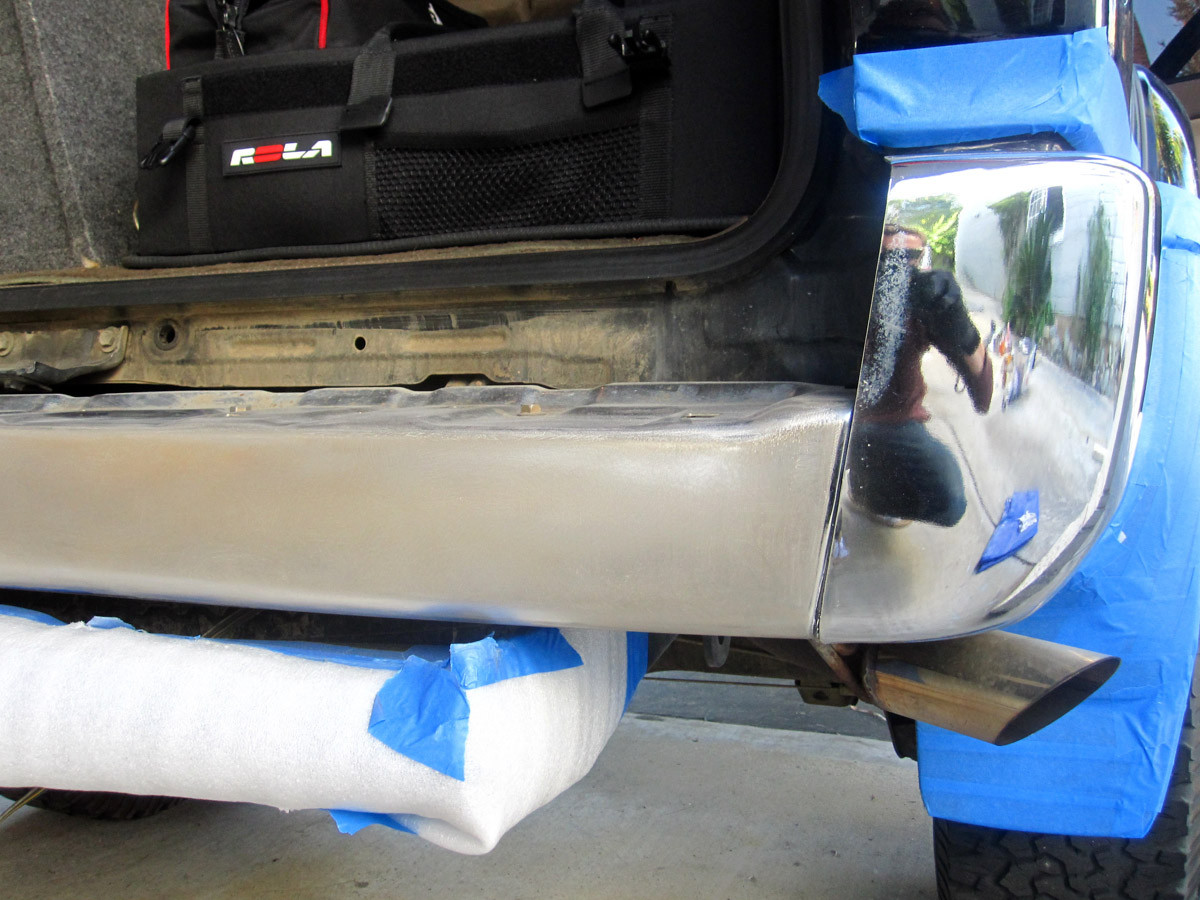
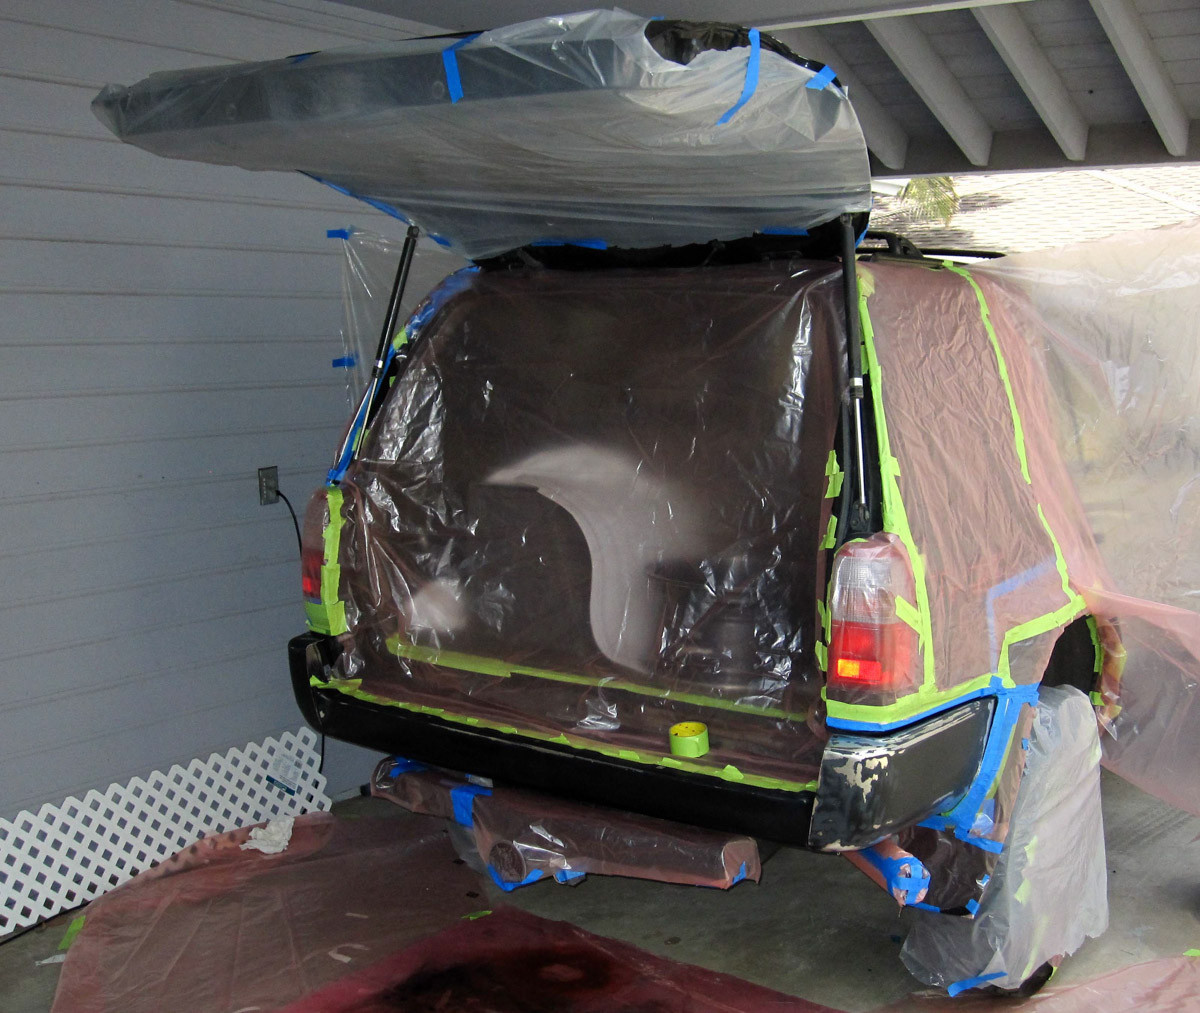
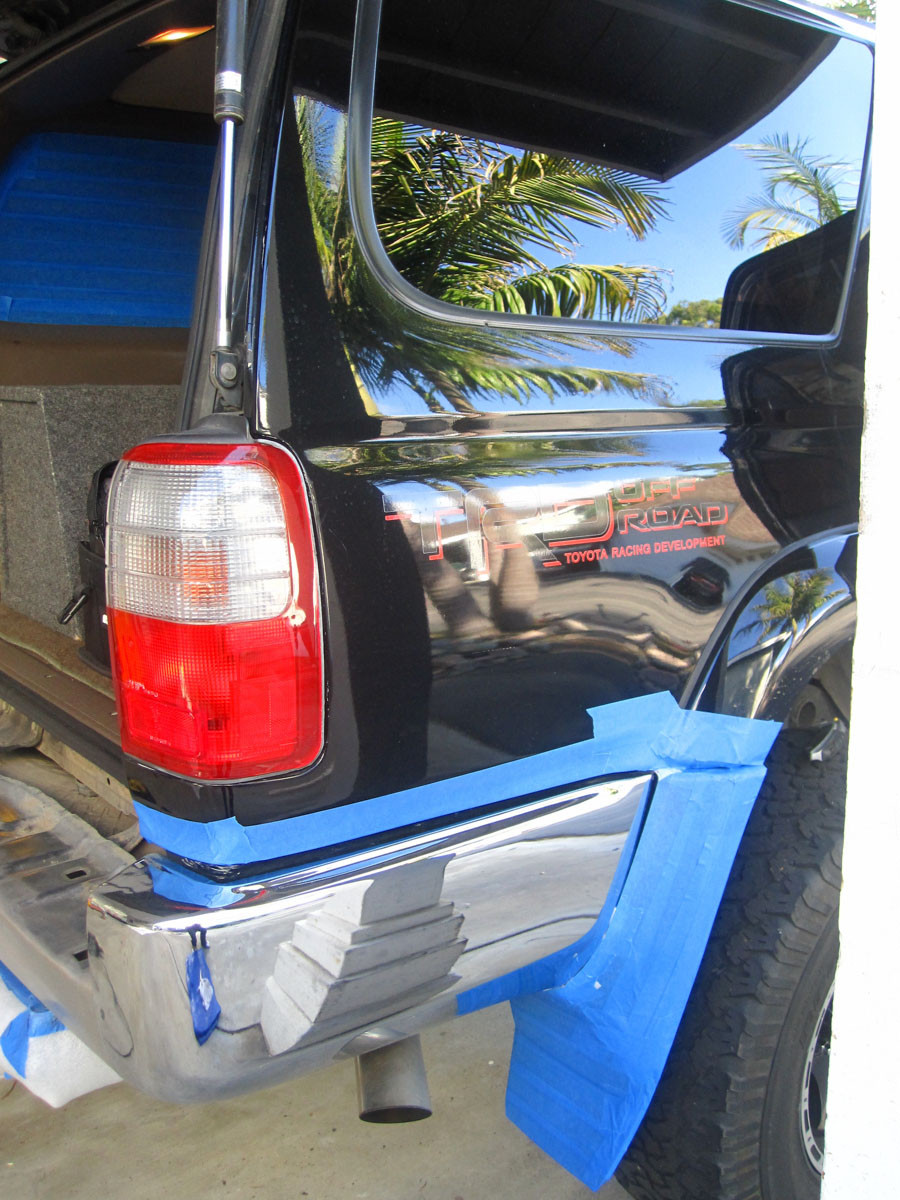
Rear Bumper DIY Paint Job (Brian's way)
**************************************************
olice:
EDIT: This might not be the best way. I now think that if you want to do it right you should at least remove the bumper so that you can sand the whole thing. My bumper is now peeling at the edges and I think this is because I didn't sand down and paint the parts of it that are out of reach. I will probably redo it in next six month and most likely, I will remove it and then take it to go get powder-coated. I don't presently have a garage to paint in so a proper paint job is out of the question.
So I decided to paint my rear bumper Semi-Gloss Black. I am taking these pictures from a thread I started on this same job. This post has additional information and is more clearly presented.
You can find the link to that thread here:
http://www.toyota-4runner.org/3rd-gen-t4rs/93873-best-method-paint-bumper-you-might-doing-wrong.html
I decided to paint the bumper with it on the truck. This is the best way in my opinion. The only catch is that you need to be parked in a garage or somewhere without any wind.
:rant:: Looking back, painting it on the truck might have been more trouble than it was worth. For one thing you are not able to sand and paint the entire surface, therefore you risk flaking over time.
I think there are pretty big downsides to trying to paint-match the body or adding a clear coat on top of you final coat. Mainly the fact that bumpers will inevitably get scratched up and it is much easier to touch up the type of simple automotive semi-gloss that I used and also matches the power-coated black of most professional bumper (ARB).
Do NOT use RUSTOLIUM! It was not designed for automotive use. If you want paint that will not fade then use automotive spray paint.
Get the Right Paint! (automotive)
TCP Global Paints - SEM Automotive Paint
SEM Specialty Paint Products
If you want GLOSS-Black then I strongly suggest SEM 39063 TRIM PAINT ($14 per can)
Item Detail
SEM Self Etching Primer (SEM 39673) $15 per can
Item Detail
SEM Bumper Coater ( I did not use)
Gloss-Black is SEM 39083, see above link for many colors
** This paint is specifically for bumpers, it is designed to be flexible. I don't intend for my bumper to do much flexing but if I get cracks I will use it next time.
Item Detail
Be sure to wear protection!
* Chrome is not something you want in your lungs. While Chrome dust is not listed as a carcinogenic, many other chemicals containing Chromium are Carcinogens.
* Solvent based paint contains CARCINOGENS, including Helovalent Chromium which is a known carcinogenic. => Buy a quality respirator and wear it when sanding and painting.
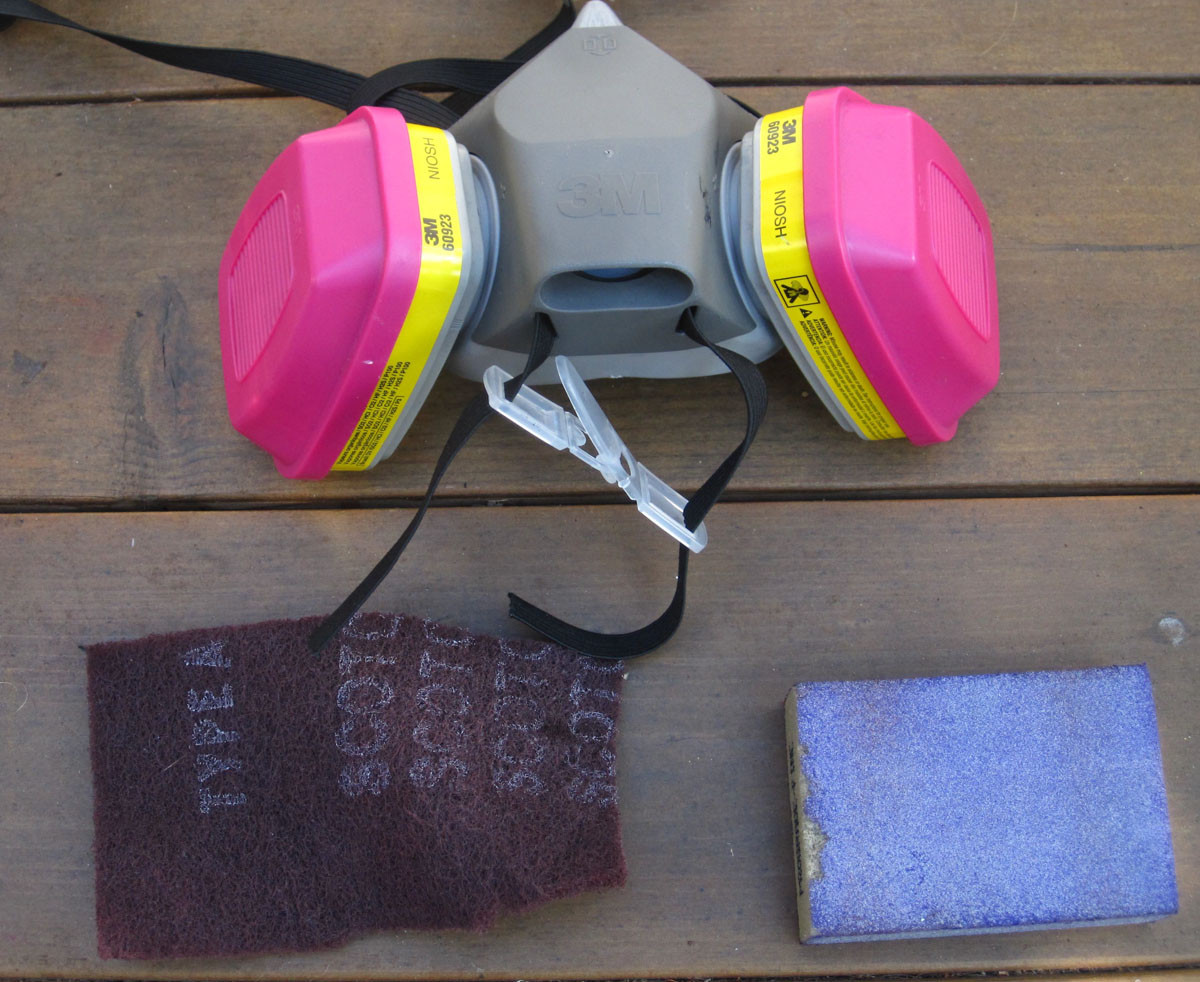
* Do not confuse a dust-mask with a respirator. A dust mask will not protect you from fumes and carcinogens.
3M safety mask ($35 @ Home Depot)
Professional Multi-Purpose Respirator-62023HA1-A at The Home Depot
********************************
Steps (be sure to read the back of the can)
********************************
pre-job:
1. Buy safety mask
2. Buy paint - I suggest automotive paint, specifically NOT Rustolium from Home Depot
3. Tape off the area, you want tape off all parts of your truck including the sides; use a large 3 mil drop cloth, cutting as necessary.
Job:
1. Put on your protective mask
2. Sand down the chrome with 80 grit or similar grit sandpaper
3. Wipe down the sanded bumper with soap and water, allow to dry
4. Spray Primer #1 "Self-Etching Pre-Primer for Aluminum and Steel"
[wait 5 min]
4B. Spray 2nd coat of Primer #1
[wait 30 min]
5. Spray Primer #2 "Top Level Primer"
[wait 5 min]
5B. Spray 2nd coat of Primer #2
Optional:
* Wait 2 hours then lightly wet sand the High Build / Top Level primer with a 3M pad
* Wash with soft soap and water
* Rinse thoroughly and let dry
[wait 45 min]
6. Spray 1st coat of Automotive Paint
[wait 10 min]
7. Spray 2nd coat of Automotive Paint
[option 3rd coat, probably good idea]
Do not clear coat (if desired) for at least 3 hours.
*****************************
PICTURES
*****************************
The paint used in pictures is SEM 61023, SEMI-GLOSS Black ($4 per can)
I prefer the two tone look with a flat black or semi-gloss black against the factory black body. I chose semi-gloss black in order to match my ARB front bumper and my wheels. In my experience semi-gloss paint won't fade as fast as flat black.
1.
2.
3.
4.
5.
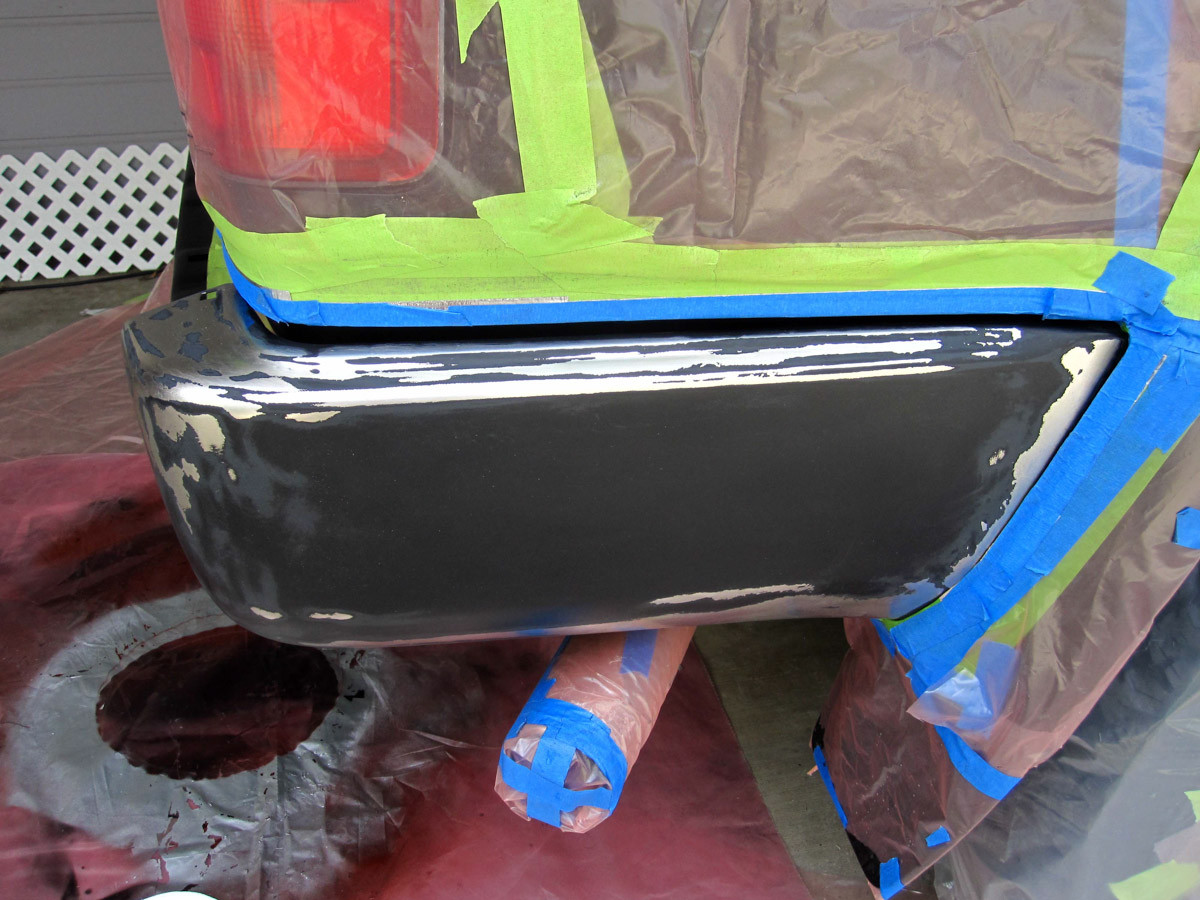
6.
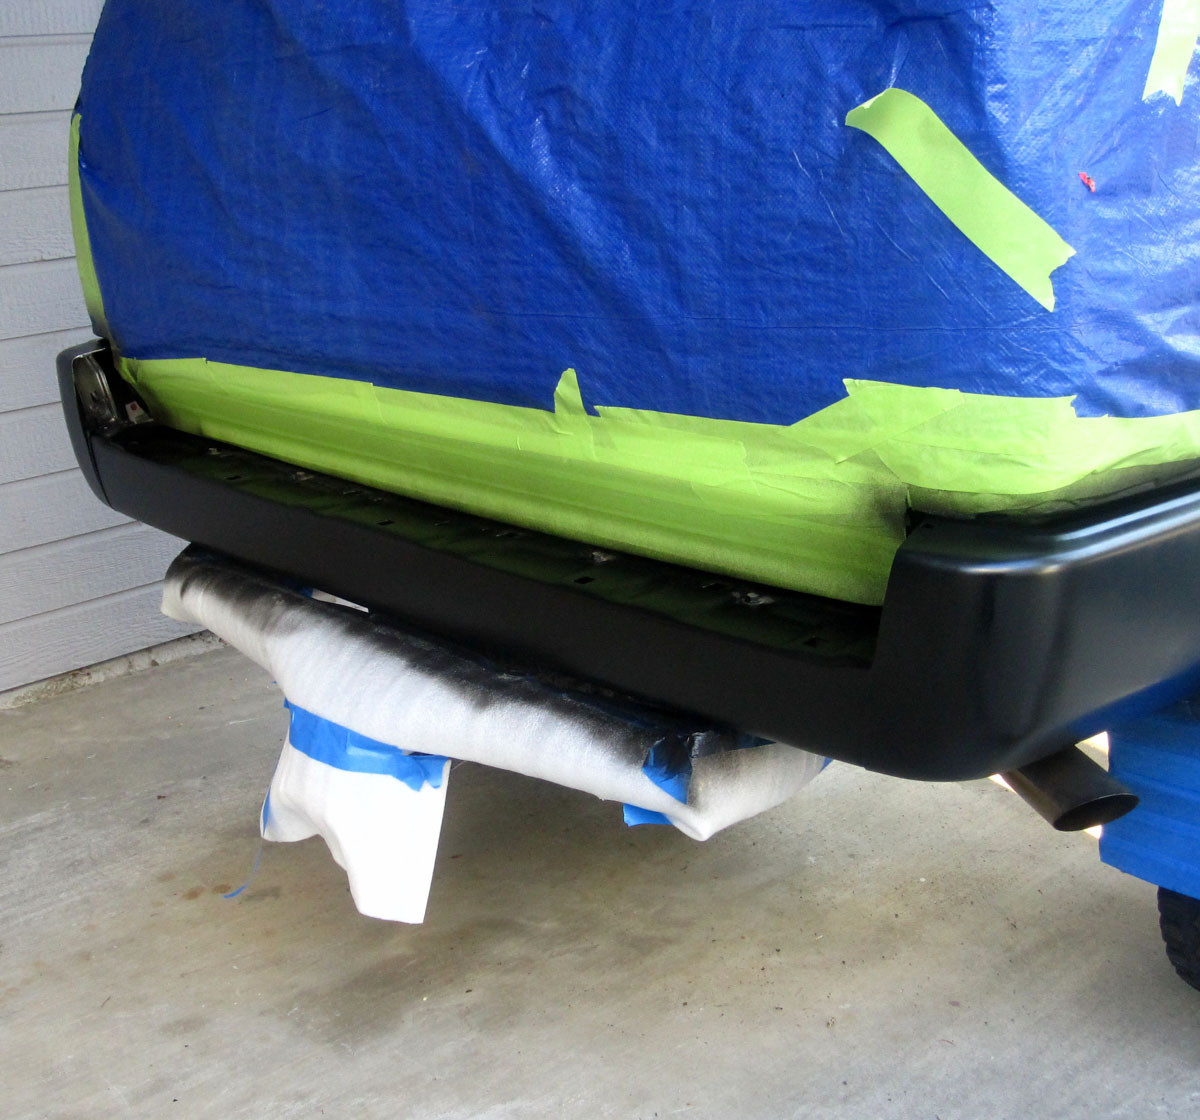
7.
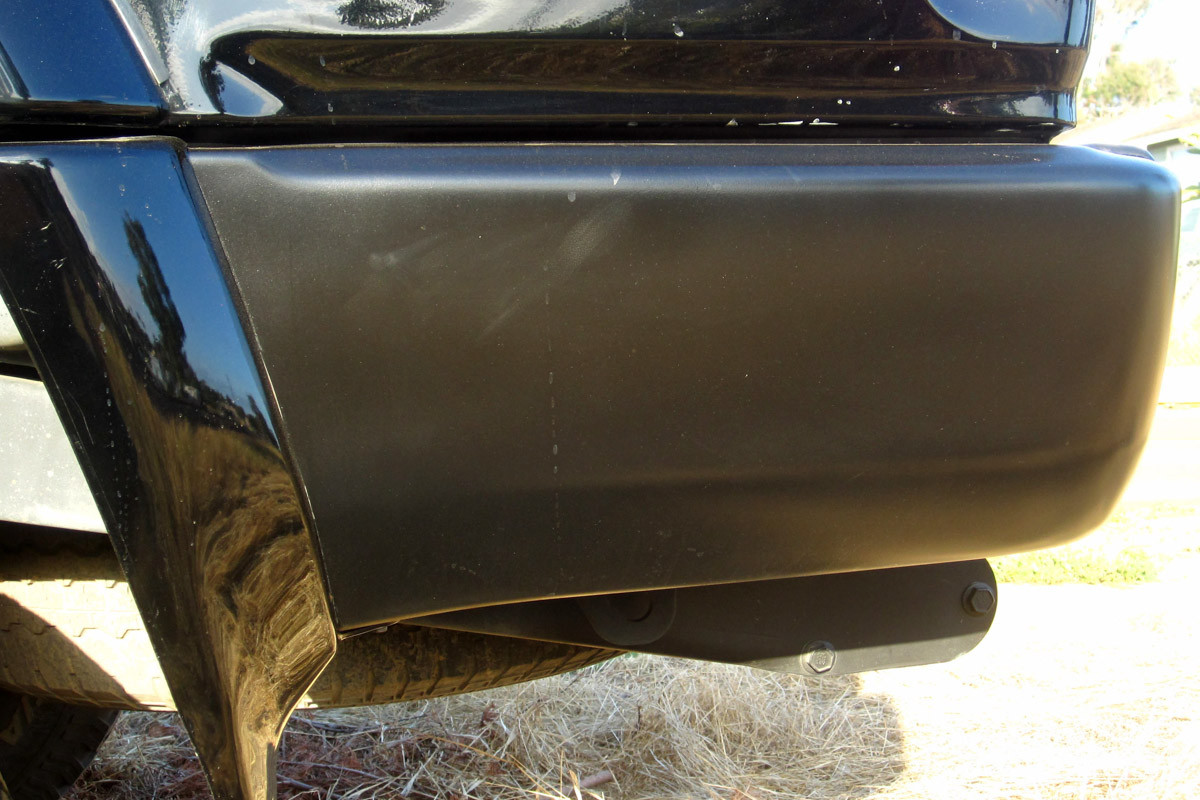
8.
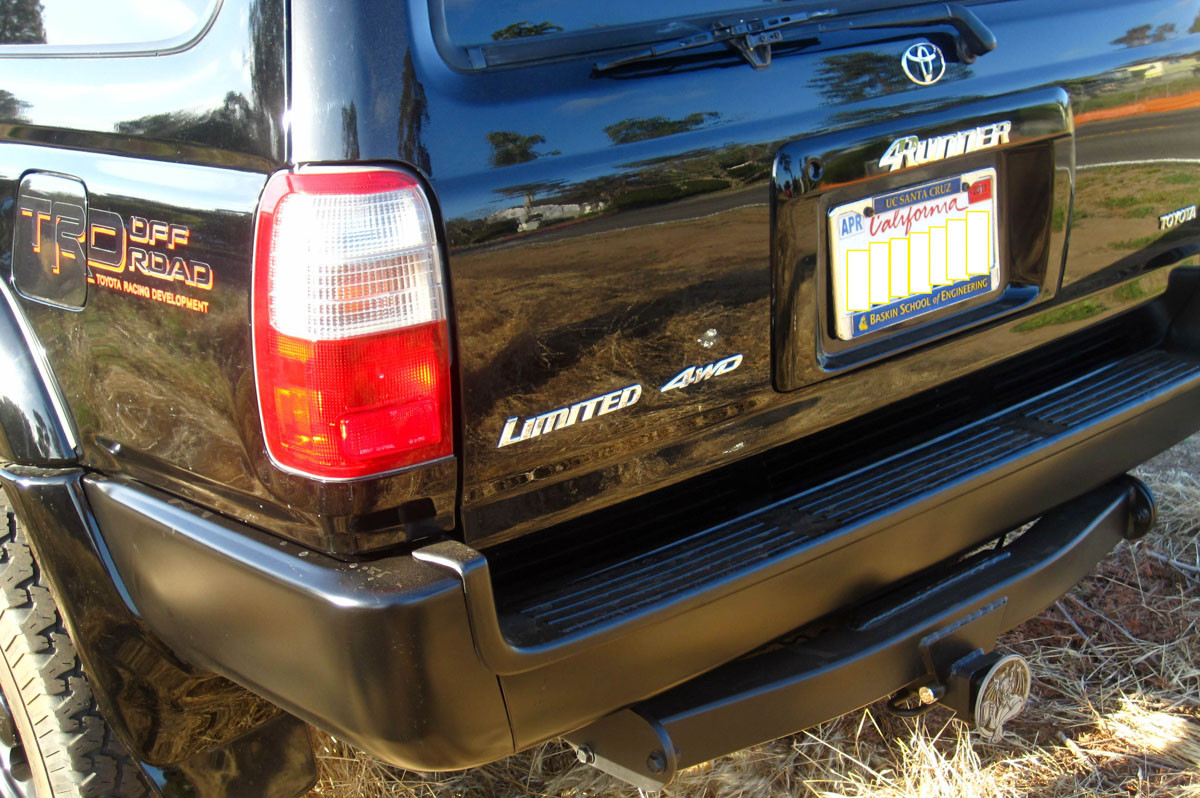
9.
:bat:
Upcoming mods:
* New wheels (painted 5 stars)
* New rear tires
* 1.25" Wheel spacers
* Stereo replaced
* Document full sound system install
* Dual battery setup
* Big Three Wire Mod
* Replace all dash lights from green to white (most are out anyways)
* Tool carrier
* Projectors (sometime in 2011)
**************************************************
Rear Bumper DIY Paint Job (Brian's way)
**************************************************
olice:EDIT: This might not be the best way. I now think that if you want to do it right you should at least remove the bumper so that you can sand the whole thing. My bumper is now peeling at the edges and I think this is because I didn't sand down and paint the parts of it that are out of reach. I will probably redo it in next six month and most likely, I will remove it and then take it to go get powder-coated. I don't presently have a garage to paint in so a proper paint job is out of the question.
So I decided to paint my rear bumper Semi-Gloss Black. I am taking these pictures from a thread I started on this same job. This post has additional information and is more clearly presented.
You can find the link to that thread here:
http://www.toyota-4runner.org/3rd-gen-t4rs/93873-best-method-paint-bumper-you-might-doing-wrong.html
I decided to paint the bumper with it on the truck. This is the best way in my opinion. The only catch is that you need to be parked in a garage or somewhere without any wind.
:rant:: Looking back, painting it on the truck might have been more trouble than it was worth. For one thing you are not able to sand and paint the entire surface, therefore you risk flaking over time.
I think there are pretty big downsides to trying to paint-match the body or adding a clear coat on top of you final coat. Mainly the fact that bumpers will inevitably get scratched up and it is much easier to touch up the type of simple automotive semi-gloss that I used and also matches the power-coated black of most professional bumper (ARB).
Do NOT use RUSTOLIUM! It was not designed for automotive use. If you want paint that will not fade then use automotive spray paint.
Get the Right Paint! (automotive)
TCP Global Paints - SEM Automotive Paint
SEM Specialty Paint Products
If you want GLOSS-Black then I strongly suggest SEM 39063 TRIM PAINT ($14 per can)
Item Detail
SEM Self Etching Primer (SEM 39673) $15 per can
Item Detail
SEM Bumper Coater ( I did not use)
Gloss-Black is SEM 39083, see above link for many colors
** This paint is specifically for bumpers, it is designed to be flexible. I don't intend for my bumper to do much flexing but if I get cracks I will use it next time.
Item Detail
Be sure to wear protection!
* Chrome is not something you want in your lungs. While Chrome dust is not listed as a carcinogenic, many other chemicals containing Chromium are Carcinogens.
* Solvent based paint contains CARCINOGENS, including Helovalent Chromium which is a known carcinogenic. => Buy a quality respirator and wear it when sanding and painting.
* Do not confuse a dust-mask with a respirator. A dust mask will not protect you from fumes and carcinogens.
3M safety mask ($35 @ Home Depot)
Professional Multi-Purpose Respirator-62023HA1-A at The Home Depot
********************************
Steps (be sure to read the back of the can)
********************************
pre-job:
1. Buy safety mask
2. Buy paint - I suggest automotive paint, specifically NOT Rustolium from Home Depot
3. Tape off the area, you want tape off all parts of your truck including the sides; use a large 3 mil drop cloth, cutting as necessary.
Job:
1. Put on your protective mask
2. Sand down the chrome with 80 grit or similar grit sandpaper
3. Wipe down the sanded bumper with soap and water, allow to dry
4. Spray Primer #1 "Self-Etching Pre-Primer for Aluminum and Steel"
[wait 5 min]
4B. Spray 2nd coat of Primer #1
[wait 30 min]
5. Spray Primer #2 "Top Level Primer"
[wait 5 min]
5B. Spray 2nd coat of Primer #2
Optional:
* Wait 2 hours then lightly wet sand the High Build / Top Level primer with a 3M pad
* Wash with soft soap and water
* Rinse thoroughly and let dry
[wait 45 min]
6. Spray 1st coat of Automotive Paint
[wait 10 min]
7. Spray 2nd coat of Automotive Paint
[option 3rd coat, probably good idea]
Do not clear coat (if desired) for at least 3 hours.
*****************************
PICTURES
*****************************
The paint used in pictures is SEM 61023, SEMI-GLOSS Black ($4 per can)
I prefer the two tone look with a flat black or semi-gloss black against the factory black body. I chose semi-gloss black in order to match my ARB front bumper and my wheels. In my experience semi-gloss paint won't fade as fast as flat black.
1.
2.
3.
4.
5.
6.
7.
8.
9.
:bat:
Upcoming mods:
* New wheels (painted 5 stars)
* New rear tires
* 1.25" Wheel spacers
* Stereo replaced
* Document full sound system install
* Dual battery setup
* Big Three Wire Mod
* Replace all dash lights from green to white (most are out anyways)
* Tool carrier
* Projectors (sometime in 2011)
Last edited:
BrianSD_42
New member
:wow:
******************************
Picked these up today
******************************
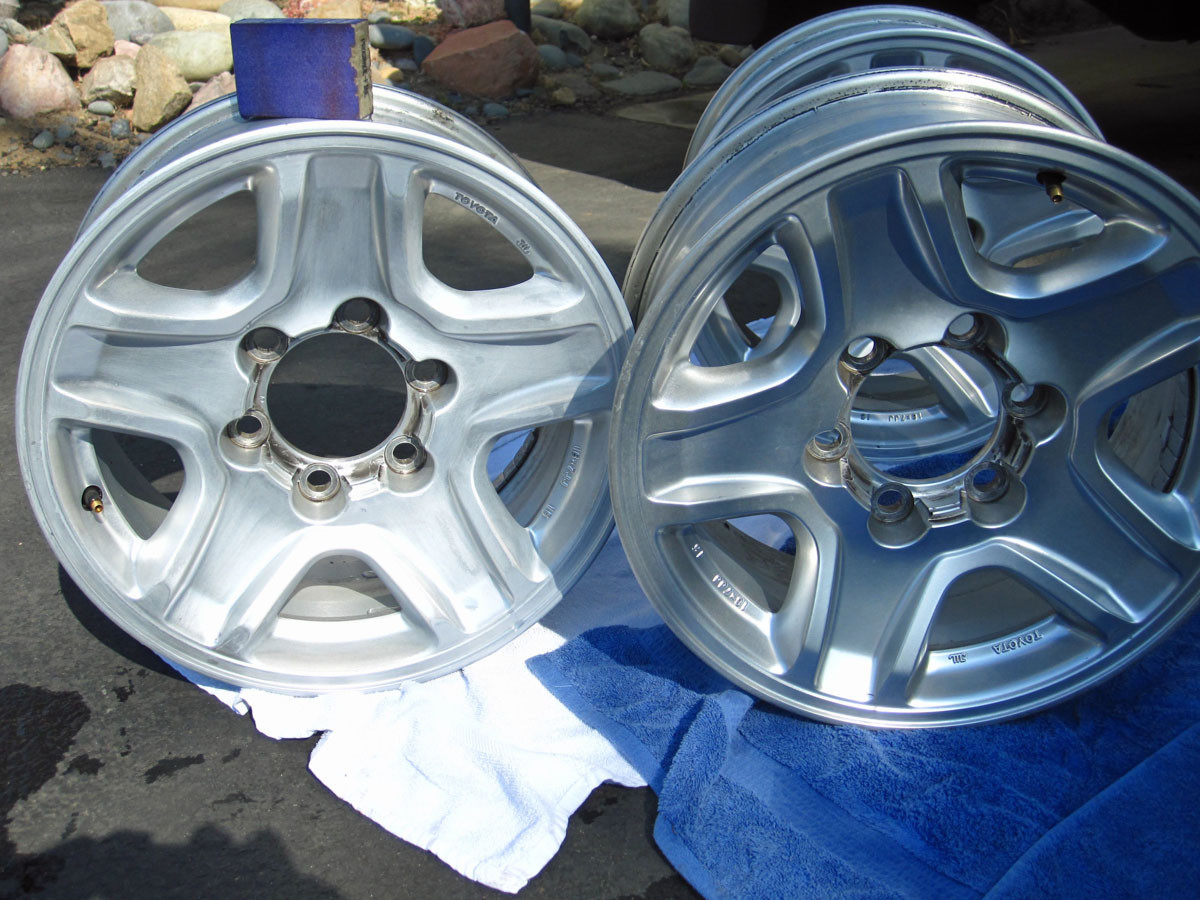
Toyota 5-Star 16x7 Wheels
I plan on painting them and if there are any complications then I will get them powder-coated.
Cost: $300 on CL
:bat:
******************************
Picked these up today
******************************
Toyota 5-Star 16x7 Wheels
I plan on painting them and if there are any complications then I will get them powder-coated.
Cost: $300 on CL
:bat:
Last edited:

Champ1415
New member
hey just wanted to say the build looks great and i check it often. I painted my bumper not even a week before you. mine looks like **** half because i did it outside in the wind and the other half because i didnt take my time. Next time for sure i plan on doing the same as you. mine wont look nearly as good due to my runner being desert dune.
BrianSD_42
New member
I painted my bumper not even a week before you. mine looks like **** half because i did it outside in the wind and the other half because i didnt take my time.
If I do mine again, I will take it off the truck and paint it or powder-coat it. I painted mine on the truck and although there are some advantages, they don't outweigh the fact that you won't be able to give it a full coat without removing it. Right now, after only 3 months I am starting to see small chips where the primer has flaked off

BrianSD_42
New member
I just bought a full DASH lighting replacement kit from Autolumination.com, I hope to install it next week.
:snacker:
:snacker:
BrianSD_42
New member
********************************
FACTORY TUNDRA EXHAUST TIP
********************************
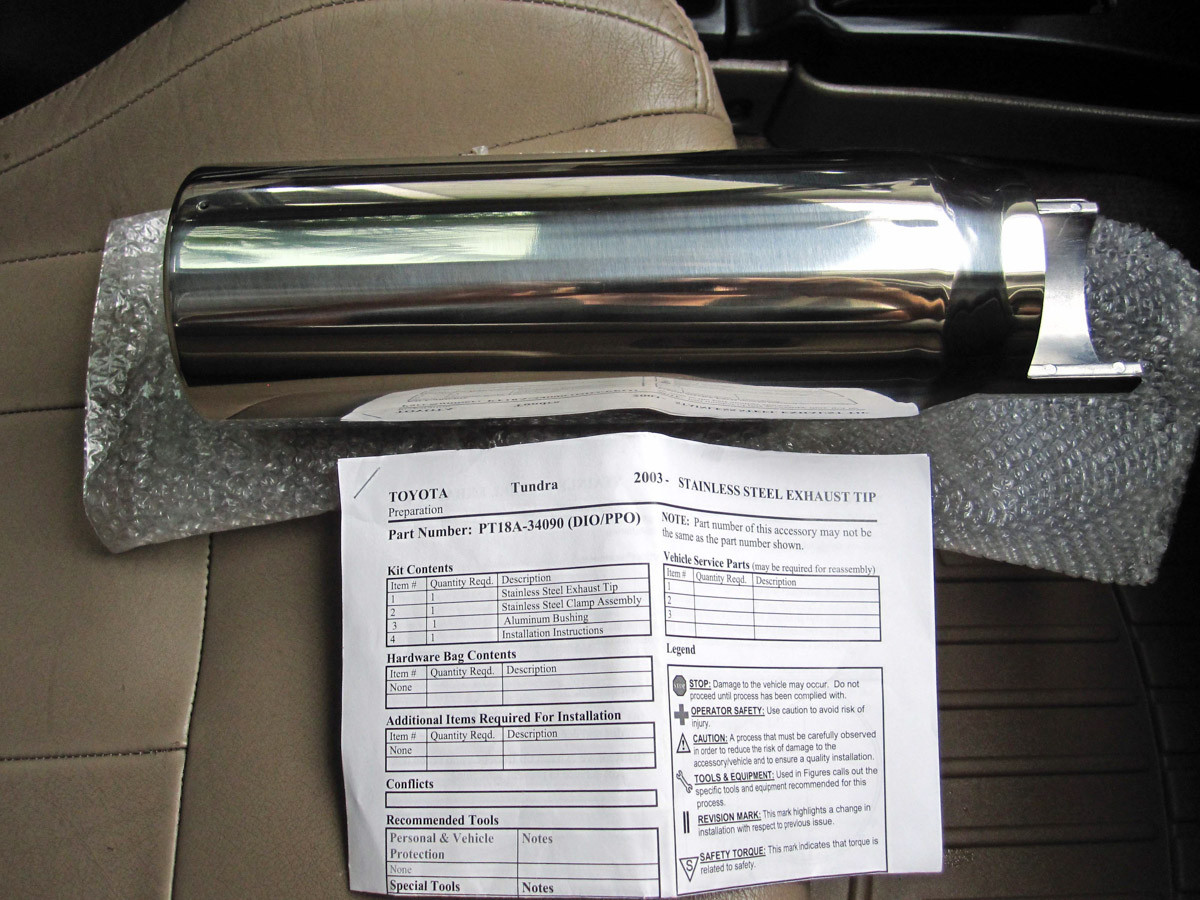
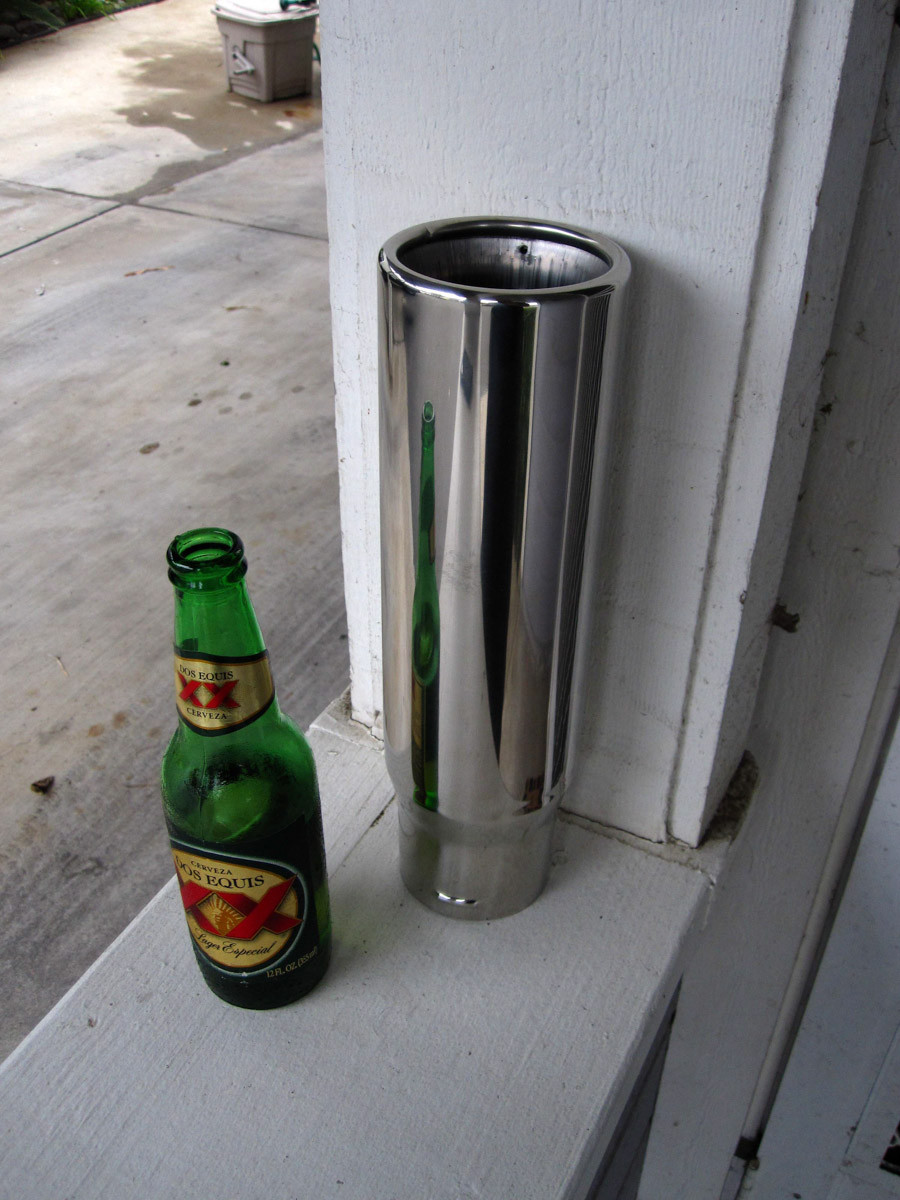
When I was browsing Toyota.com the other day I noticed an accessory for the Tundra "TRD Exhaust Tip" part #PT18A-34090
I ended up buying it from the dealer for $72. I am surprised more people are not running one on their rigs. I plan on having it installed next week. I already have a great exhaust installed but no tip. This should look pretty nice. I will post pics once I get it installed.
********************************
Optima Yellow Top
********************************
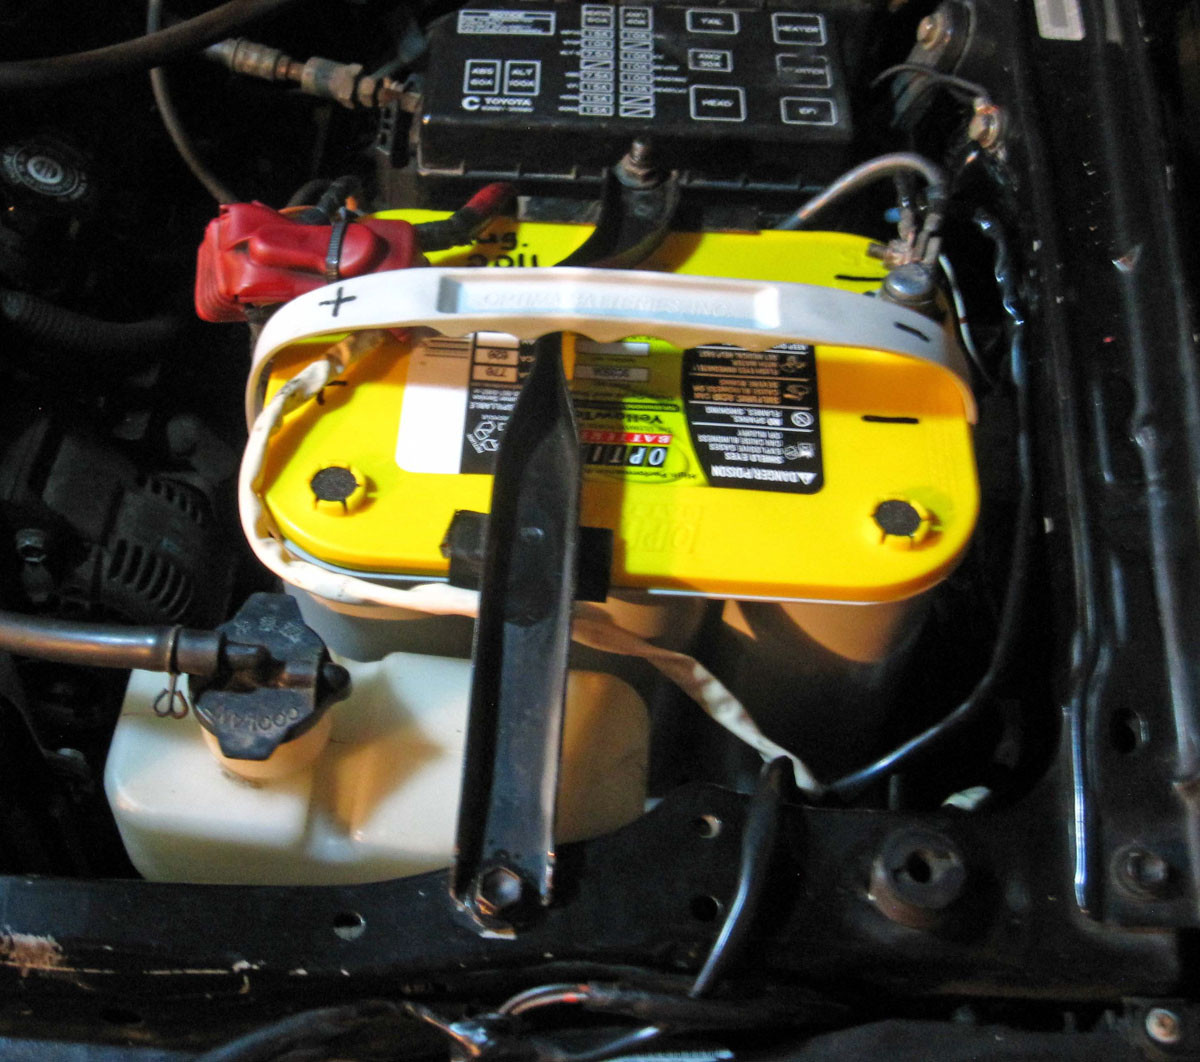
I spent about 3 hours cleaning the battery area out, wiping down the cables, bundling the cables and then installing the new Optima Yellow Top. It was a real acid covered mess before I cleaned the area (no pic though). Part of the problem was that all my aftermarket device power cables were tangle in one giant mess. I have after-market cables ran for Hella loud horns, stereo amp, stereo deck, and PIAA fog lights.
The reason I switched to the Yellow-Top is because my 18 month old Red Top has been failing lately. The Yellow-Top cost me $130 on Amazon.com. I plan on taking the Red-Top back to Kragens for a replacement then starting the dual battery setup. I also may end up upgrading the alternator. I have gone through 3 batteries in 4 years.
Here is the new Yellow-Top installed:
Coming soon:
* new wheels
* new stereo installed
* exhaust tip installed
* dual battery setup
* DASH lighting overhaul
:bat:
.
FACTORY TUNDRA EXHAUST TIP
********************************
When I was browsing Toyota.com the other day I noticed an accessory for the Tundra "TRD Exhaust Tip" part #PT18A-34090
I ended up buying it from the dealer for $72. I am surprised more people are not running one on their rigs. I plan on having it installed next week. I already have a great exhaust installed but no tip. This should look pretty nice. I will post pics once I get it installed.
********************************
Optima Yellow Top
********************************
I spent about 3 hours cleaning the battery area out, wiping down the cables, bundling the cables and then installing the new Optima Yellow Top. It was a real acid covered mess before I cleaned the area (no pic though). Part of the problem was that all my aftermarket device power cables were tangle in one giant mess. I have after-market cables ran for Hella loud horns, stereo amp, stereo deck, and PIAA fog lights.
The reason I switched to the Yellow-Top is because my 18 month old Red Top has been failing lately. The Yellow-Top cost me $130 on Amazon.com. I plan on taking the Red-Top back to Kragens for a replacement then starting the dual battery setup. I also may end up upgrading the alternator. I have gone through 3 batteries in 4 years.
Here is the new Yellow-Top installed:
Coming soon:
* new wheels
* new stereo installed
* exhaust tip installed
* dual battery setup
* DASH lighting overhaul
:bat:
.
Last edited:
BrianSD_42
New member
*******************************************************
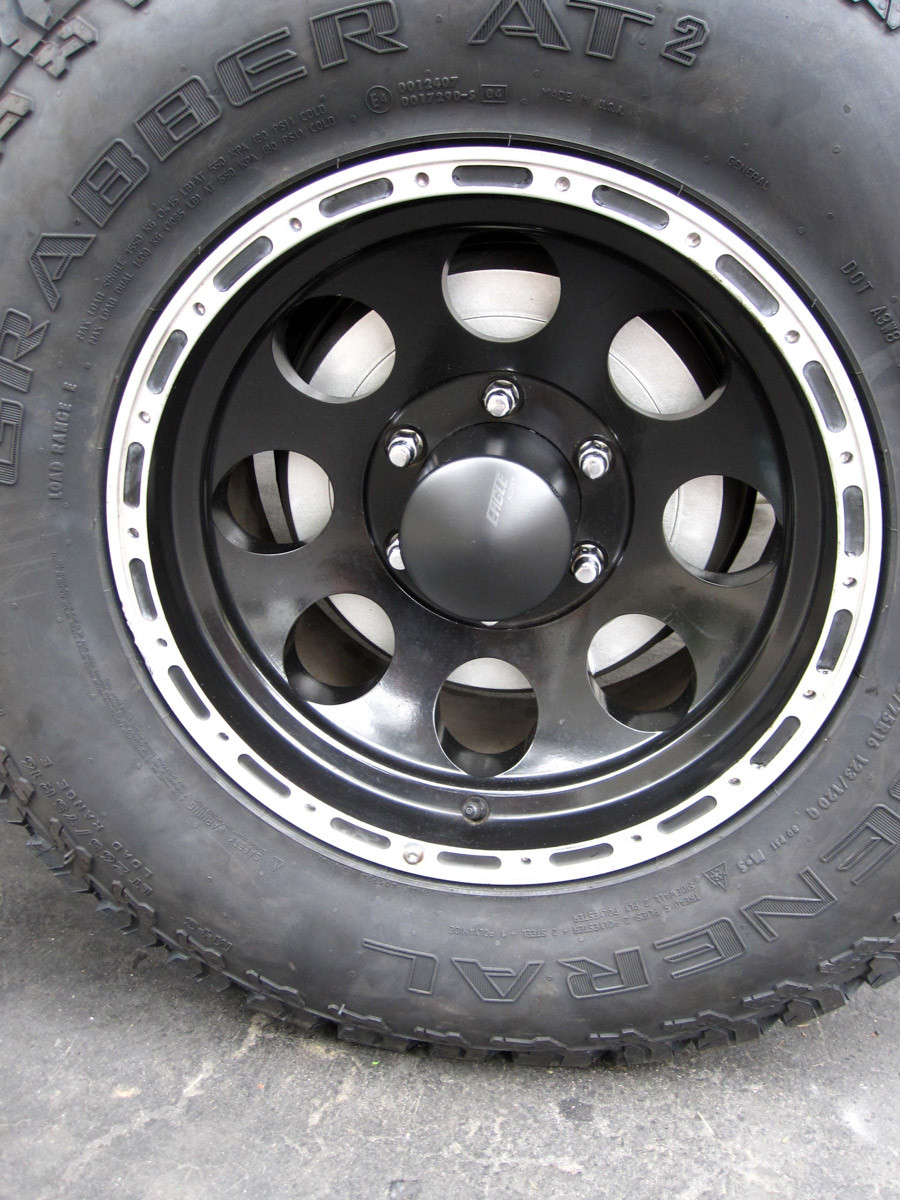
New Rear Tires: Grabber AT^2
*******************************************************
About 2.5 years ago my front tires were worn away inconsistently due to a lack of rotations and a failing ball joint that I didn't notice. Once I realized the effect on my tires I went and had the ball joints changed. I had never heard of them failing before and it is kind of a good thing I didn't rotate properly or I might not have caught the LBJ in time.
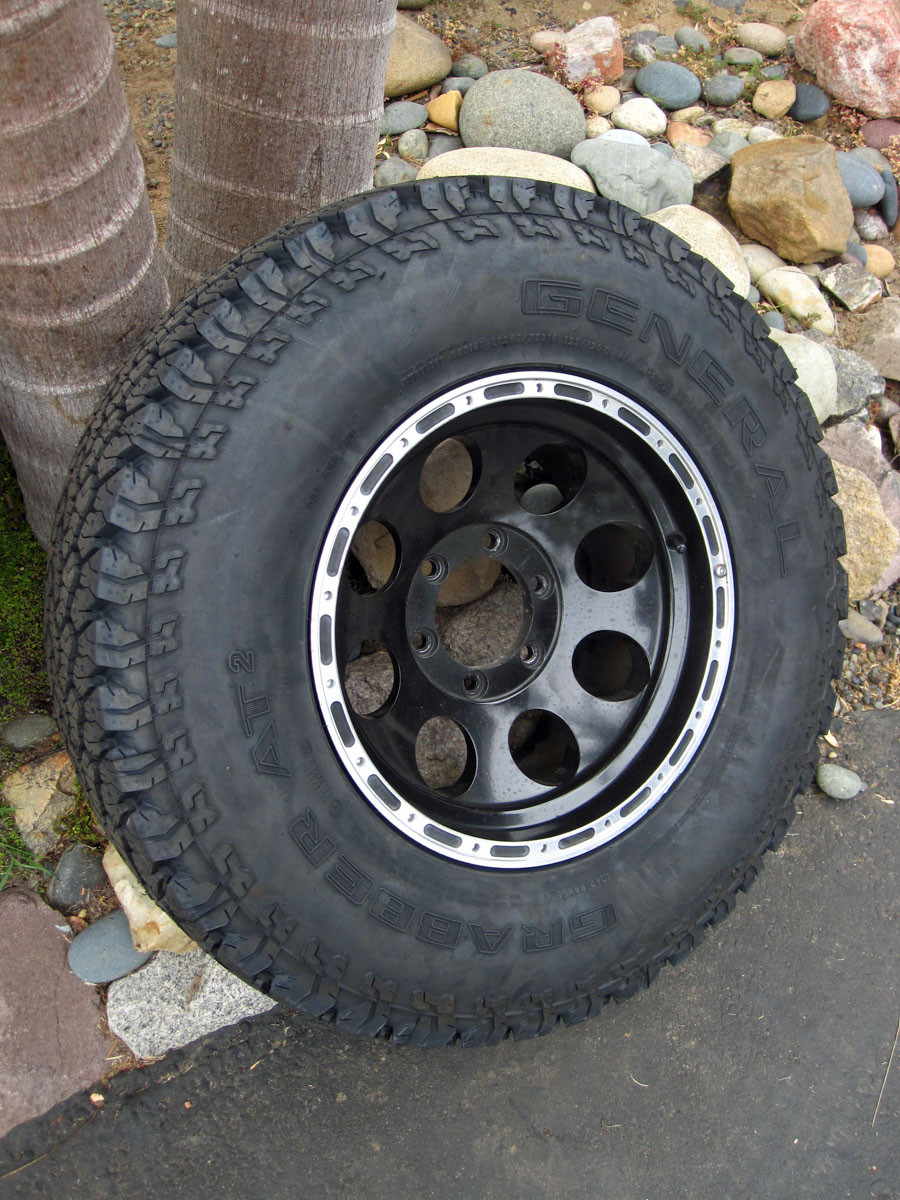
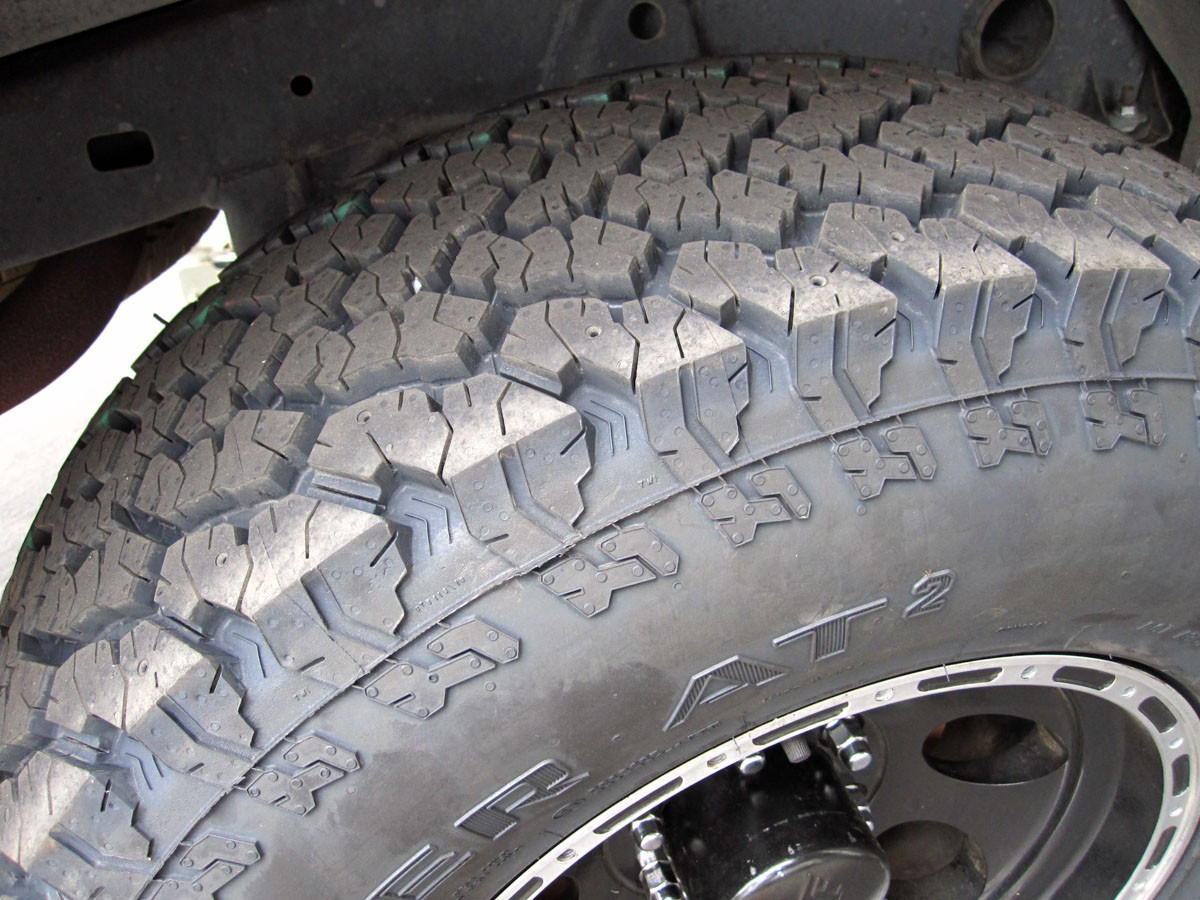
Because of the tire issues i waited for the front two to wear down and then replaced them. It is now time to replace the other two and I decided to go with a cheaper BFG alternative that is becoming popular. These Grabbers were about $155 vs. $190 for the BFG AT.
The new setup:
Front - Grabber 265x75xR16 ~ 31.4"
Rear - BFG 265x70xR16 ~ 31"
Grabber AT^2 - 265x75xR16 ~ 31.4" Tire
:bat:
.
New Rear Tires: Grabber AT^2
*******************************************************
About 2.5 years ago my front tires were worn away inconsistently due to a lack of rotations and a failing ball joint that I didn't notice. Once I realized the effect on my tires I went and had the ball joints changed. I had never heard of them failing before and it is kind of a good thing I didn't rotate properly or I might not have caught the LBJ in time.
Because of the tire issues i waited for the front two to wear down and then replaced them. It is now time to replace the other two and I decided to go with a cheaper BFG alternative that is becoming popular. These Grabbers were about $155 vs. $190 for the BFG AT.
The new setup:
Front - Grabber 265x75xR16 ~ 31.4"
Rear - BFG 265x70xR16 ~ 31"
Grabber AT^2 - 265x75xR16 ~ 31.4" Tire
:bat:
.
Last edited:
BrianSD_42
New member
************************************************
Brake Drum Painting (From rust to silver)
************************************************
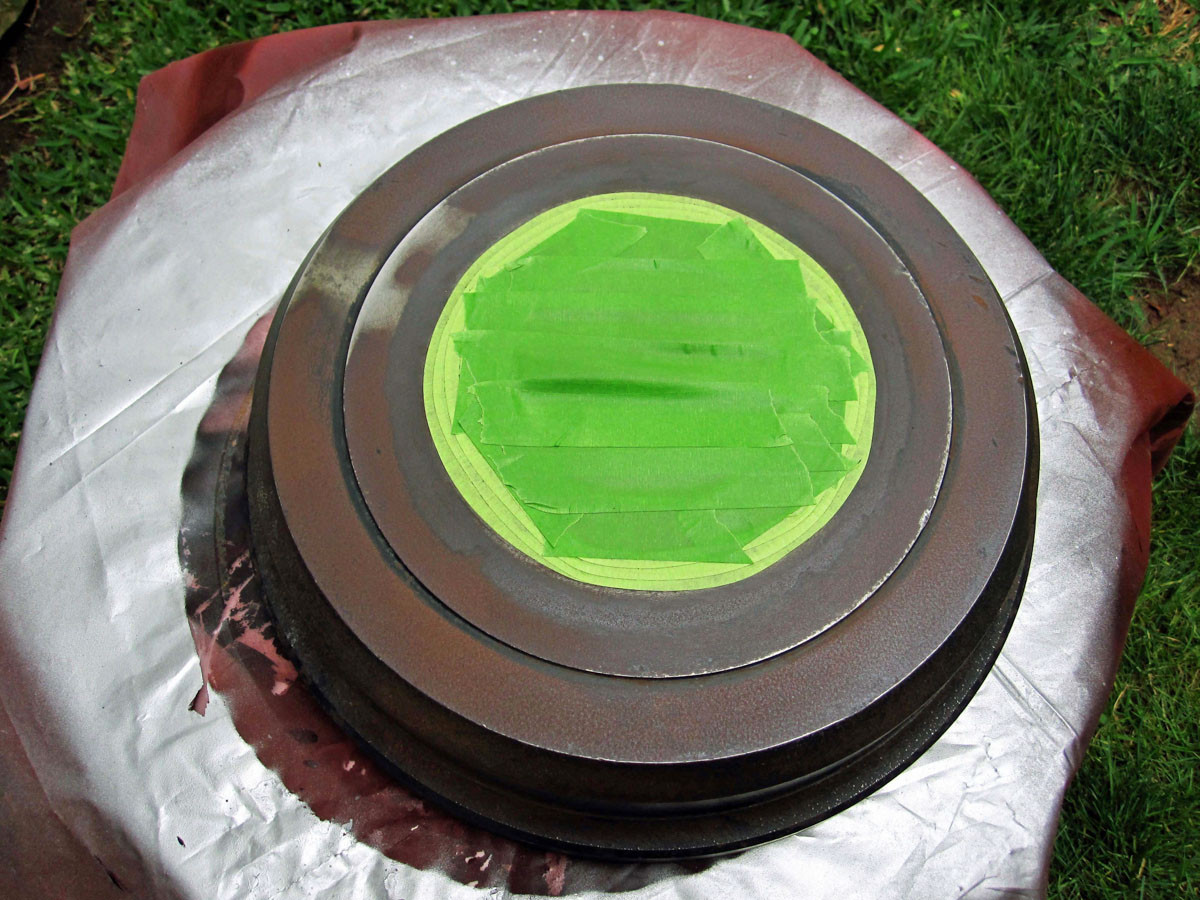
Hope everyone's Sunday is going well. I decided today would be a good day to refinish the rear brake drums. They look pretty sh$tty right now since they are covered in rust and I want to paint them before I have my new 5-star wheels mounted on Monday.
Here are some pics of the job.
Before
After Sanding it Down with 3M Tough Grit Sanding Sponge
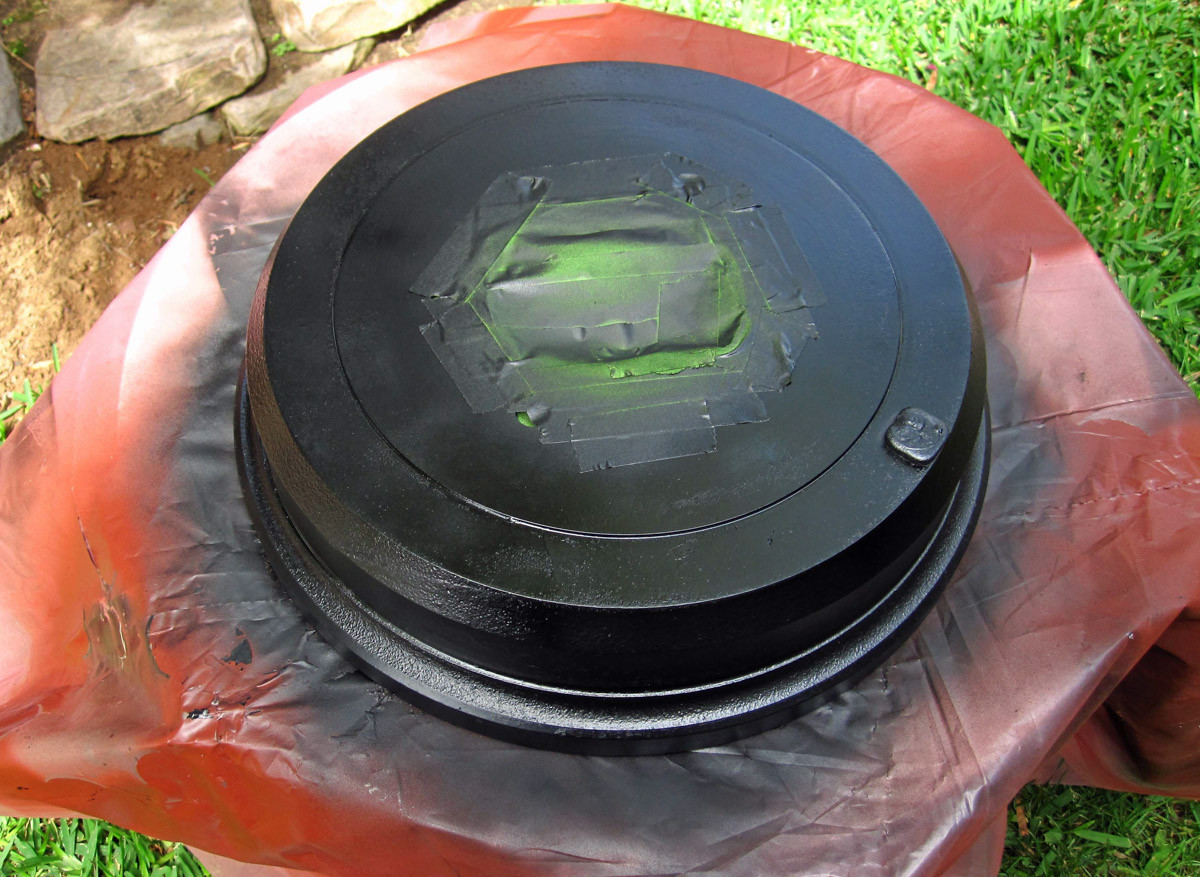
First Coat of Primer
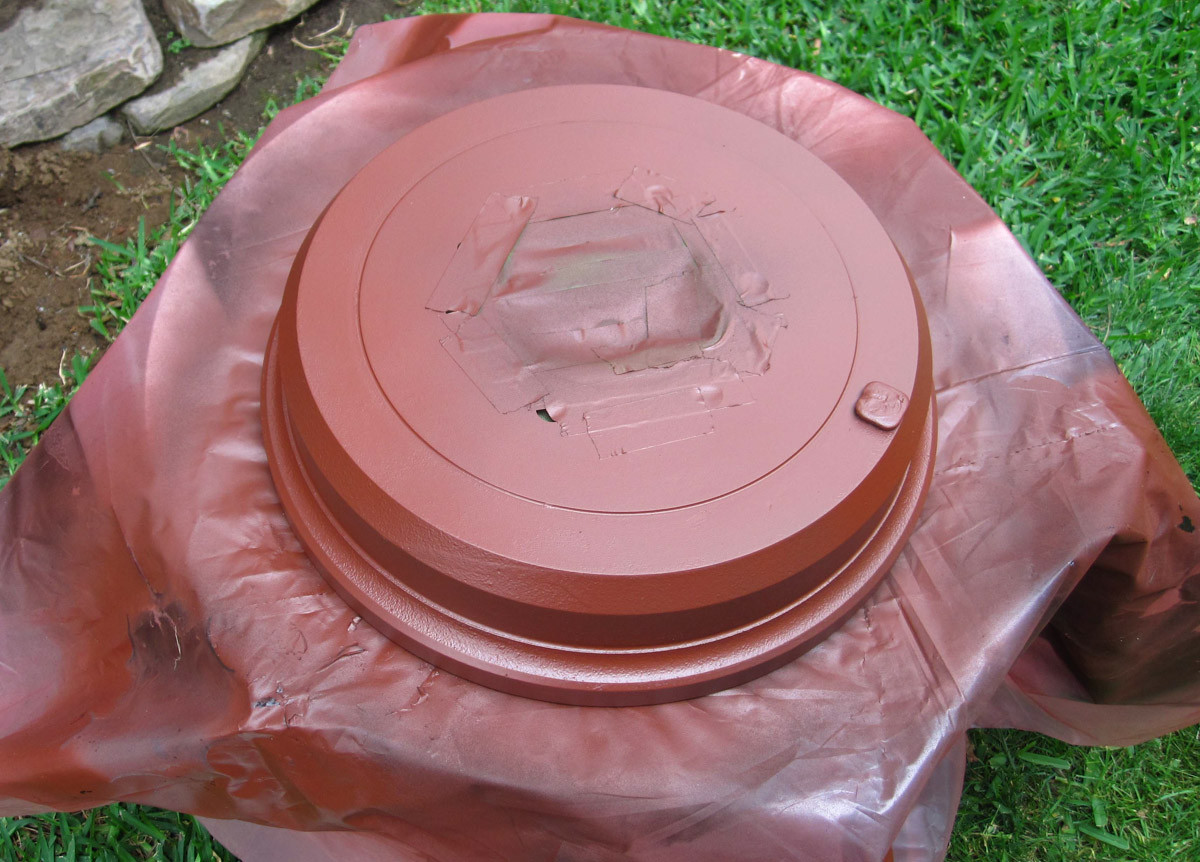
SEM XRP Silver, 2nd Coat
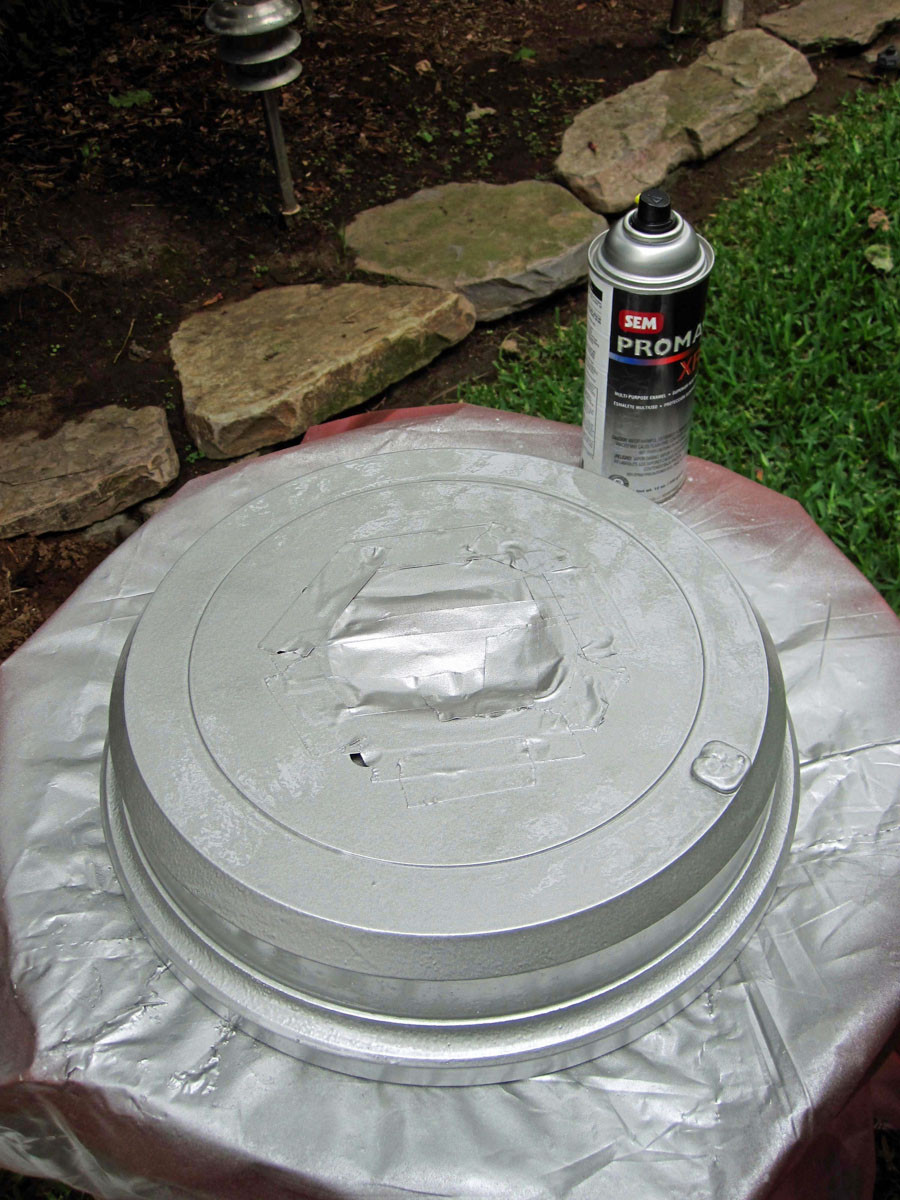
Mounted on the truck
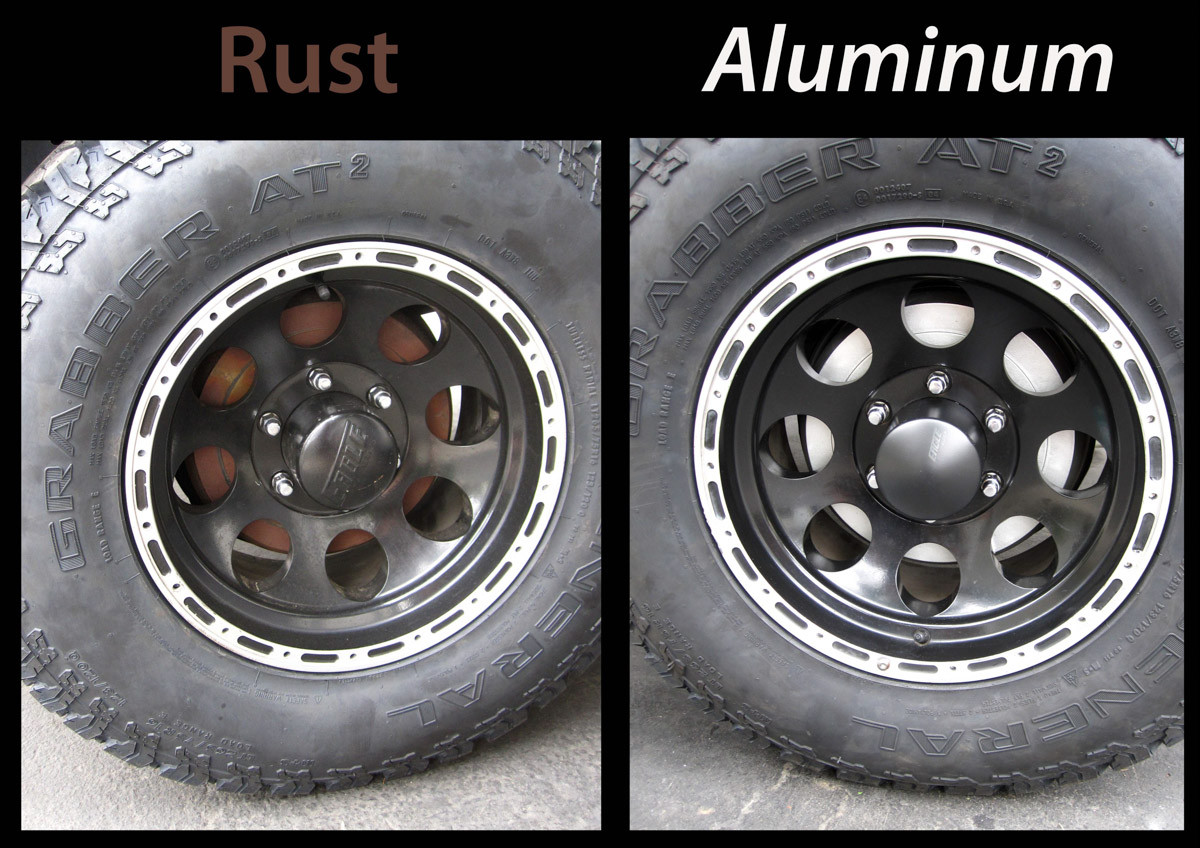
FINAL COMPARISON SHOTS
:bat:
Brake Drum Painting (From rust to silver)
************************************************
Hope everyone's Sunday is going well. I decided today would be a good day to refinish the rear brake drums. They look pretty sh$tty right now since they are covered in rust and I want to paint them before I have my new 5-star wheels mounted on Monday.
Here are some pics of the job.
Before
After Sanding it Down with 3M Tough Grit Sanding Sponge
First Coat of Primer
SEM XRP Silver, 2nd Coat
Mounted on the truck
FINAL COMPARISON SHOTS
:bat:
Last edited:

catalina34
New member
Very nice work. Also, I grew up in Encinitas/Leucadia and recognize exactly where many of these photos were taken. I used to go to the donut shop in one of your photos for post surf breakfast and coffee. I also had a friend when I was in middle school that lived in the Log Cabin Motel (red buildings across the tracks in your photo) with his prostitute/druggie mom. I miss living there so bad, I hope you realize what an amazing area you live in.
BrianSD_42
New member
fightman80
The truck is looking great man! Great work! Congrats on the new purchase of the Camry too!
Thanks man! I am trying to make the most out of the good summer weather.
derekabraham
I'm going to have to go into The Truck Shop soon and see about them making me some sliders. Hope you don't mind if I copy you a little.
I think I might want a small kick out on mine though!
You should definitely get a small kick out in the rear for extra protection.
Champ1415
hey just wanted to say the build looks great and i check it often.
.......
Mine wont look nearly as good due to my runner being desert dune.
Thanks for the compliment
I am sure your truck will look great, just give it some tender loving care (hand wax it often) and you will be fine.
catalina34
Very nice work. Also, I grew up in Encinitas/Leucadia and recognize exactly where many of these photos were taken.
......
I miss living there so bad, I hope you realize what an amazing area you live in.
It is really great here
I moved here because I needed to find a place to live between San Diego and Orange County due to my job. I found a place on CL with 2 roommates and it is really great. Rent is not bad, I live in a house and have my own bath in a 10x10 room for $800 a month + I am ~ 1/4 mile to the beach cliffs. I haven't really started surfing yet but I hope to soon.Your comment about how nice it is made me want to head 2 blocks over to the beach but it is cloudy today so I would rather work on my truck.
:surfer:
Last edited:
catalina34
New member
Yeah, man you are in walking/bike distance to Beacon's and Grandview. They are both great reefs to learn to surf.
Similar threads
- Replies
- 9
- Views
- 26K

- Replies
- 2
- Views
- 11K
- Replies
- 10
- Views
- 2K


- Replies
- 2
- Views
- 3K


