Building, Driving and Adventuring the MTN4RNR

Based on your Instagram, I was beginning to think you didn't have a day job with all your spontaneous trips! Lol. Rig looking great man!

Gotta make money to spend it!
HgRCL6irM8unm.gif


But really, thank you!
 
Just sat down and read the whole thread from start to finish, drank a whole pot of coffee (Peet's, Major Dickinson's blend). And subscribed.
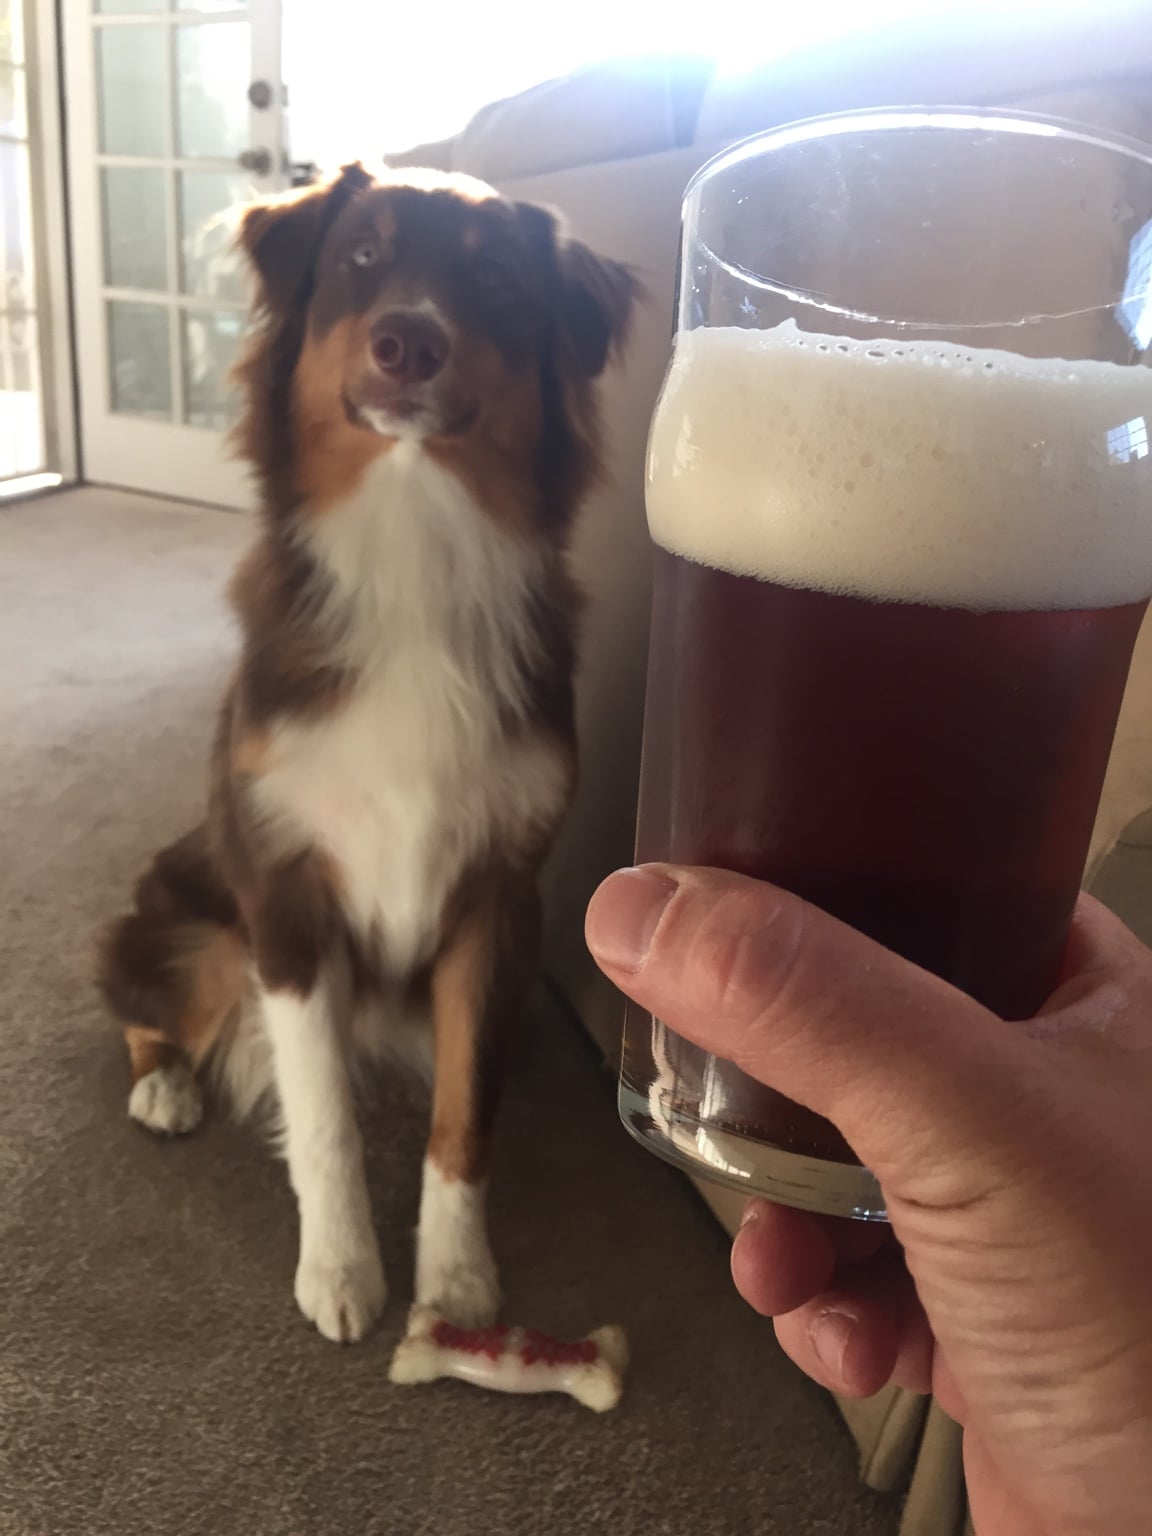
Because Dog, Coffee and Beers.
 
Great thread!!! Keep up the hard work! Lol
Love the rig, nice work!

Thanks guys, I appreciate the feedback :whoo:

Just sat down and read the whole thread from start to finish, drank a whole pot of coffee (Peet's, Major Dickinson's blend). And subscribed.
Because Dog, Coffee and Beers.

Nothing like a good POT of coffee to get the day going, HA! Glad you enjoyed it, and look forward to a lot more dog, coffee, and beer in the future!
 
ARB Compressor Preview

Installed my single ARB air compressor this week, on the new Slee Off-Road compressor bracket. I have a full install coming soon, but I need to go through photos and do the standard write-up, so stay tuned for that. For now, here's a photo of the installed compressor and bracket! Happy weekend!

1CDCC0CF-3FAA-4B01-B9F1-E972E5F7D2A4_zpsghdnkpb0.jpg~original
 
Installed my single ARB air compressor this week, on the new Slee Off-Road compressor bracket. I have a full install coming soon, but I need to go through photos and do the standard write-up, so stay tuned for that. For now, here's a photo of the installed compressor and bracket! Happy weekend!

1CDCC0CF-3FAA-4B01-B9F1-E972E5F7D2A4_zpsghdnkpb0.jpg~original

I'll be interested to see the write up. I'm trying to decide if I go with a single or dual ARB compressor, and then the mounting set up.
 
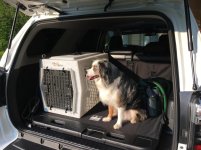
Yo! Just got my kennel today and this thing is indeed "ruff and tough". Very well built. I installed and secured it like you showed and its not going anywhere. I will attach some pics of Zeus, the mini Aussie haha. Drink of choice : Ballast Point Big Eye IPA
 

Attachments

  • image.jpg
    image.jpg
    133.5 KB · Views: 5,281
Disregard this post. I just read your reply in the air compressor thread. That answered my questions! Looks good, I'm looking forward to seeing the write up!

Sent from my XT1254 using Tapatalk
 
Last edited:
Yo! Just got my kennel today and this thing is indeed "ruff and tough". Very well built. I installed and secured it like you showed and its not going anywhere. I will attach some pics of Zeus, the mini Aussie haha. Drink of choice : Ballast Point Big Eye IPA


Aussies forever!
8fc970916c527a78b965b0f7ae4d8fee.jpg

Oh, and 4Runners... And beer... And stuff.
 
I'll be interested to see the write up. I'm trying to decide if I go with a single or dual ARB compressor, and then the mounting set up.

I should be able to get to this tonight, bear with me, these things take time :banana:

Single is perfectly adequate for airing up tires at the end of a trip, which is what this will be used for. If you want to use air tools or be able to use a nozzle to blow things off, you might want the dual. My single can take my 275/70R17 from 18psi to 40psi is just about 2 minutes, I tested it this weekend! I would have liked the ability to blow the dust off of the rear bumper when I arrive at my campsites, but I can add a small tank down the line if I want to. For now, I am perfectly content with this choice, but time will tell.
 
Yo! Just got my kennel today and this thing is indeed "ruff and tough". Very well built. I installed and secured it like you showed and its not going anywhere. I will attach some pics of Zeus, the mini Aussie haha. Drink of choice : Ballast Point Big Eye IPA

Awesome, looks great! I really enjoy the two we have, and haven't looked back! It's great for the pup to have her space in the 4R regardless of how much crap we pack in there. Good call on the brew, sir :cheers:

Aussies forever!
Oh, and 4Runners... And beer... And stuff.

Ha! This gave me a good laugh. Cattle dogs are awesome. And so is beer.... And so are 4Runners....
 
Front Runner 45L water tank

I installed a Front Runner 45L water tank this weekend. Going on longer trips, sometimes in areas where water is less available lead me to wanting to have a reservoir system in the truck. Usually it's me, my girlfriend and dog on these camping trips. If we were less restrictive on water, I figure we use 1-2 gallons per person, per day including cooking/washing dishes. So this tank should last us 3-6 days depending on our usage. Plus dog uses roughly 0.5 gal/day. It might be a bit overkill, but I would rather have more water than not, and I hated buying the gallon containers from the store every time we headed out. I should get many years of use out of this tank, and it can also be mounted to a roof rack later down the road and used for a makeshift shower. I made a wood platform to sit on the driver's rear seat back which is almost always down anyways to let air flow through the dog's crate in the back. I attached it with paracord and an ez-cam to lock it in. This is a first attempt, and like everything else I do, I will see how it works and improve from there. The hose will be routed to the rear with a valve/quick release at the tank and a valve at the end. This way I can remove it without pulling the whole hose out. Anyways, here it is in all of it's glory.


11EC8D11-F748-400E-AD54-D00106574180_zpssbfy5tax.jpg~original


Updated photos:

1/2" Ball valve connected to the tank
091E831B-0350-4772-B49D-4B23D35A745D_zpsgqq1lmsh.jpg~original


Small, plastic ball valve at the hose end
050C52C4-F206-4EB2-9EF7-69FF7D89B79A_zpso6urkajt.jpg~original


Hose secured
669BE641-E44E-4162-BE01-B567CC8B4A8D_zpsuvp3tcxo.jpg~original


Platform attachment, front
78AD99A8-1B28-467A-AF0B-B7F2F62FC2D2_zpsx7wmruez.jpg~original


Platform attachment, rear
51883BA1-6CDE-44A6-B98E-578533D98F17_zpsjlrxu0zm.jpg~original


Now I need a second one on the passenger side, solely for beer storage...​
 
Last edited:
ARB compressor install

One of the things that I learned early on when it comes to driving off the beaten path, is that air pressure is king. Too much, and you'll lost teeth. Too little and you'll lose a bead or be so squirrely that you'll never feel comfortable. And there are different pressures for different environments and road conditions. Having the ability to adjust tire pressures on the go is a big advantage when you are driving on the highway to the trail, then offroad, then back on the road between segments, then back off..... You get my point. Airing down is easy, you can use your key, a nail, or an ARB Deflator which will cut down your air down time dramatically. Well, if you go down, at some point you'll need to come back up. This need drove me to purchasing a single ARB 12v High Performance Compressor (CKMA12r) with the new mounting bracket from Slee Offroad. Lets get to it.​

Parts used:
- ARB 12v High Performance Compressor, and wiring harness (CKMA12r)
- Mounting bracket from Slee Offroad
- ARB pump up kit
- OEM style compressor switch from Slee Offroad
- Mini-blade Add-a-fuse
- Scotch Extreme Fasterners
- Waterproof butt connectors
- Shrink wrap
- Heat gun
- Dielectric grease
- Teflon tape
- Enough zip ties to hold it all together
- Crux Fermentation - Half Hitch Imperial Mosaic IPA (currently my favorite IPA)

DSC09525_zpspibs7bik.jpg~original


Install:
Here is the new location for the compressor, between the fuse block and the brake master cylinder.
DSC09526_zpsk5kwjshk.jpg~original


I mocked in the bracket to move the compressor around to see where I wanted it positioned, as the single can be positioned on the left or the right of the bracket. I chose this mount because I wanted to keep the passenger side of the engine compartment free for possible battery upgrades later on down the road. The hidden beauty of this mount, is that when used with the single ARB unit, there is plenty of room for a Blue Sea/Bussmann fuse box or a Switch-Pros unit. Basically you get a 2 for 1, something I will explore later on. This mount will also work with the dual ARB compressor, but it is centered and has only one mounting position.

DSC09534_zps0oq8z3yv.jpg~original


I then prepped the compressor using the supplied fittings from the ARB pump up kit. The “diverter” is screwed into the master cylinder of the ARB unit, and then the pressure switch and chuck can be arranged however you need to suit your application. I wrapped the male ends in Teflon tape to prevent air leaks and installed them on the unit. (you’ll see them installed in later photos)

DSC09538_zps9smyckr0.jpg~original


I then mounted the compressor onto the bracket using the ARB supplied hardware. This was the position that I thought I wanted it mounted, but as you’ll see in a bit, there is a complication!

DSC09540_zpss6oi0mju.jpg~original


I bolted the mounting bracket and the compressor into the engine bay using Slee’s easy to follow instructions and hardware. Two bolts in the fender sheet metal using factory unused threaded holes, and two on the wheel well sheet metal again using unused factory threaded holes.

DSC09543_zpsogksmy5g.jpg~original

DSC09546_zpsgmhztoyl.jpg~original


This was my original orientation, with the compressor angled, so that when the hose was connected it cleared and didn’t rub the paint on the front quarter panel.

DSC09551_zpsz5oux9lg.jpg~original


The problem arose when i went to close the hood, and the gas strut came in contact with the air chuck. Having noticed this, I put things on pause and really thought about the placement. One thing I failed to notice, mounting closer to the edge is more convenient, but it will limit my access to the firewall for feeding through future electrical lines. With the clearance issue, and the access issue, I reoriented and decided that mounting far left would be the better overall placement. So, I unbolted everything and installed again. Better now than later on down the road though. Here is where things ended up.

DSC09603_zpsztqtj8dw.jpg~original


Much better.

Wiring. Once the hardware was installed I connected the wiring harness to the compressor and routed the wiring loom under the bracket. I ran the 40A Max fuse and the associated wiring behind the fuse block and to the battery. I attached the provided battery terminals, and then used the 3M fasteners to attach the fuse and the relay to the inner fender, above the fuse block. (note: the below photos shows the wiring hooked up, this was taken after I was finished installing. DO NOT hook up the wiring to the battery at this point, unless you like electrocuting things or yourself)

DSC09601_zpsfvwzodo7.jpg~original


I then ran the other end of the wiring harness into the cab via the firewall (which I have gotten much better at doing). The compressor bracket didn’t interfere with being able to access the firewall port, so I am glad I thought of it when I did! ARB supplies a wiring harness intended for running a main switch, and the associated front/rear air lockers, as this compressor is used in locker applications as well. I could have wired it without the additional harness, but this gives me options down the road, and it isn’t sacrificing too much space in the interim. On the left is the wire loop fed through the firewall, and the right is the 3-way wiring harness which I will connect the “main switch” wires to the OEM style switch as shown.

DSC09591_zpsscxp7bts.jpg~original

Switch black to harness black. Switch green to harness red/yellow. Switch blue/yellow to harness blue/white (this would normally be tied in with the dimmer to illuminate the switch at night when not turned on, but I elected not to do this because I don’t feel it’s needed). Switch red to harness red.
DSC09594_zpskttblha4.jpg~original


The red/yellow harness wire is the 12v supply for the switch, so I connected it to an add-a-fuse and connected that to an unused, switched fuse spot. This way, the compressor can only come on with the car running, which is what you want anyways to keep your volts up while the compressor is running.

DSC09598_zpsodh69bzd.jpg~original


[Note: the add-a-fuse in the lower slot is for the amber markers on the S8 light bar]
DSC09599_zpspxrkicyt.jpg~original


Then, bundle the wires in whatever way you prefer and stash them under the dash and secure them in whatever way you prefer. I used zip ties because they’re like duct tape, but less sticky, and more convenient. And duct tape fixes everything.

And you’re done! Here are some completed photos.

DSC09607_zpsinofjnxp.jpg~original

IMG_7186_zpsnvehwlhg.jpg~original


Impressions:
The compressor has plenty of grunt to fill my tires with it’s +/-3CFM flow rate and 30 min duty cycle. I performed a test when installed. At a few hundred feet above sea level, it can inflate my 275/70R17 Cooper ST Maxx’s from 18psi to 40psi in 2 minutes. Pretty impressive for a small unit. I am sure that at altitude the time will increase, but it just means I get to stay in the mountains that much longer. One thing worth noting is that without a tank, this unit is too small to power an air nozzle for blowing off the bumper or engine bay or whatever. With the dual you can do it, but I don’t think it’s a huge sacrifice for the money and space saved. If I want that capability, I can install an air tank later down the road. For my needs this unit will work great.

More to come….​
 
Last edited:
Awesome info and great write-up as always. Thanks for breaking down all of the electrical/wiring details!

:cheers:


Oh, and I introduced myself to the Half-Hitch on a road trip from Seattle back to the bay area. Delicious!

Crux = :beer::reddance:
 
All that and still no upgrade to your ground clearance game.

It's on the list, and getting closer to the top. I have an event I am hosting in the fall, the proceeds of which will be going towards an upgrade. For now, I am getting around just fine and still getting good use out of the rig (and the stock skid plates, LOL).
 
Awesome info and great write-up as always. Thanks for breaking down all of the electrical/wiring details!

Oh, and I introduced myself to the Half-Hitch on a road trip from Seattle back to the bay area. Delicious!

Crux = :beer::reddance:

No problem! Without this forum, some of my mods wouldn't be possible, so I like to give back when I can. And yes, beer is good. Crux is very good...
 

Members online

Forum statistics

Threads
278,316
Messages
3,554,111
Members
248,016
Latest member
Advally Service

Trending content

Back
Top