Greetings folks,
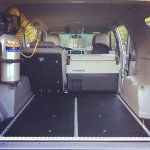
Since I often look to gather inspiration for my projects from others, I though i would share my recently completed cargo area "build".
Project goals:
-full length sleeping area for one
-proper fridge storage
-more tie downs
-cost less than some of the mass produced options out there
-still let me toss big things in the back (no permanent drawers)
-easier to clean and more durable than the carpet
-minimal weight gain
-easy to remove the front section if need full rear seats
-stock tie downs must be available still, to allow a clean installation of the factory cargo carpet, there by "hiding" the rear floor.
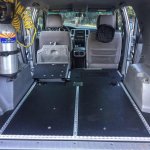
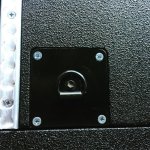
The new "floor" was baltic birch plywood (9 ply i think) with a layer of fiberglass added on the bottom, and the rear most section attaches to all factory tie downs, plus 5 additional tie downs that were added at formed locations in the floor. Sound deadening material was added to the floor before final installation as well
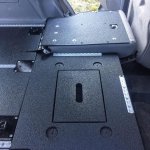
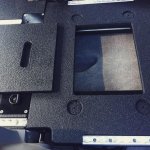
The section where the larger part of the rear seat was removed is comprised of a another wood floor, with steel frame built underneath. That steel frame attaches to all the seat/seat belt mounting points, plus two additional fasteners. The center section of this is removable to allow access to the void that was created by elevating the frame to make it level with the rear floor. The circles that are cutout of this section are to locate my dometic fridge.
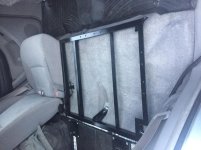
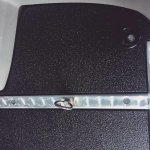
I used L track tie down track and finished the wood with a spray on bed liner. I also fabricated an aluminum seat back panel for the remaining rear seat which was bolted to the seat back after I installed metric threaded inserts in the seat.
This was all done in my garage and for less than $300 in material cost. So far it's working well, but only time and experience will determine how effective it really is.
Since I often look to gather inspiration for my projects from others, I though i would share my recently completed cargo area "build".
Project goals:
-full length sleeping area for one
-proper fridge storage
-more tie downs
-cost less than some of the mass produced options out there
-still let me toss big things in the back (no permanent drawers)
-easier to clean and more durable than the carpet
-minimal weight gain
-easy to remove the front section if need full rear seats
-stock tie downs must be available still, to allow a clean installation of the factory cargo carpet, there by "hiding" the rear floor.
The new "floor" was baltic birch plywood (9 ply i think) with a layer of fiberglass added on the bottom, and the rear most section attaches to all factory tie downs, plus 5 additional tie downs that were added at formed locations in the floor. Sound deadening material was added to the floor before final installation as well
The section where the larger part of the rear seat was removed is comprised of a another wood floor, with steel frame built underneath. That steel frame attaches to all the seat/seat belt mounting points, plus two additional fasteners. The center section of this is removable to allow access to the void that was created by elevating the frame to make it level with the rear floor. The circles that are cutout of this section are to locate my dometic fridge.
I used L track tie down track and finished the wood with a spray on bed liner. I also fabricated an aluminum seat back panel for the remaining rear seat which was bolted to the seat back after I installed metric threaded inserts in the seat.
This was all done in my garage and for less than $300 in material cost. So far it's working well, but only time and experience will determine how effective it really is.
Attachments
-
 23D33DA2-BAAC-4D51-B70A-DDB13F877818.jpg135.4 KB · Views: 3,936
 -
 8046E40E-5337-4616-A38B-04A41E3BB224.jpg140.2 KB · Views: 2,963
 -
 58450868029__66BDB3C0-0E33-4E5E-947B-F1FE18CFBDD2.jpg135.7 KB · Views: 3,068
 -
 C6403B9F-FC2B-4A3C-BE21-100DF0D7A258.jpg133.8 KB · Views: 2,972
 -
 DB92D4BA-ACDC-4BE0-A1C5-44A2206854A9.jpg136.8 KB · Views: 2,924
 -
 F190C19D-738D-4135-8490-5AA3FCEF7B86.jpg136.7 KB · Views: 3,015