Cargo Drawer Build

cbelisle

Member
I've gotten some questions abut this, and I wanted to document the process, although I don't have pictures of most steps.
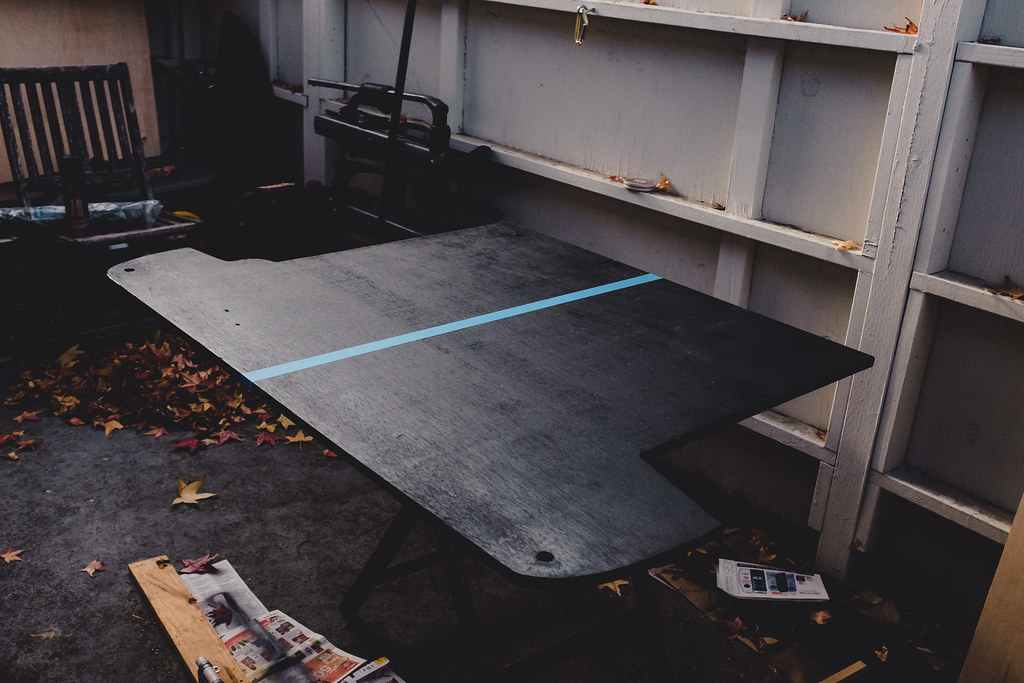
Started off with a base. Lots of cardboard templates. I used 3/4" ply.
37840394282_59283f9a6d_b.jpg


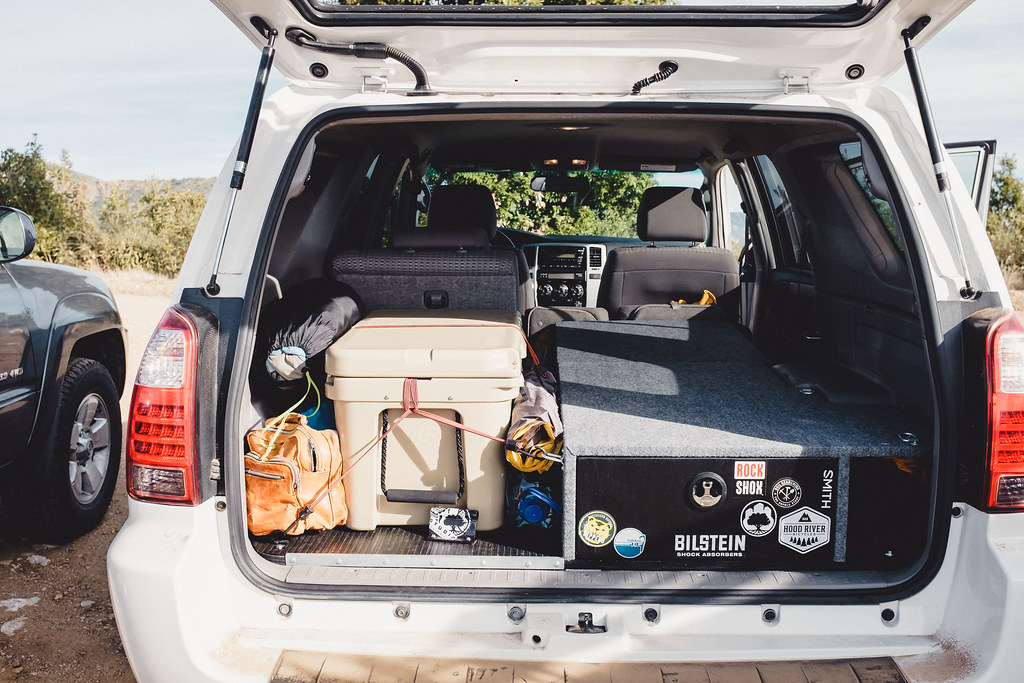
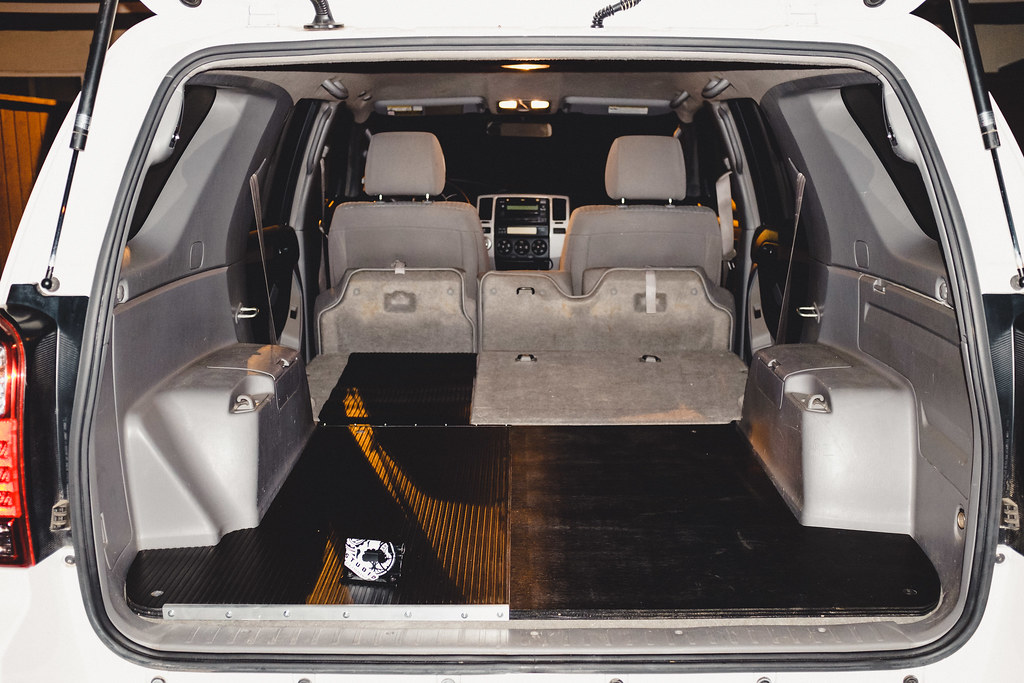
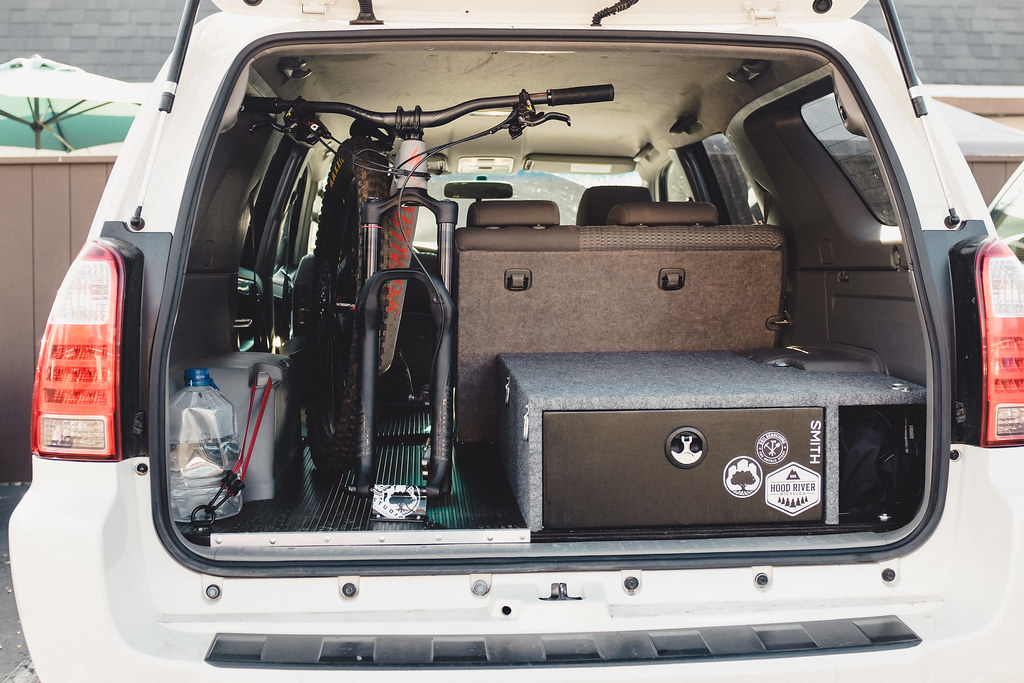
Half of the area is for bike storage or other things such as a cooler.
37823072786_438ff78736_b.jpg


This is what I got from version one. It was a basic drawer that worked. Nothing special. The drawer housing is good, but the drawer itself was a bit flimsy.
38606877122_a44fb50b37_b.jpg


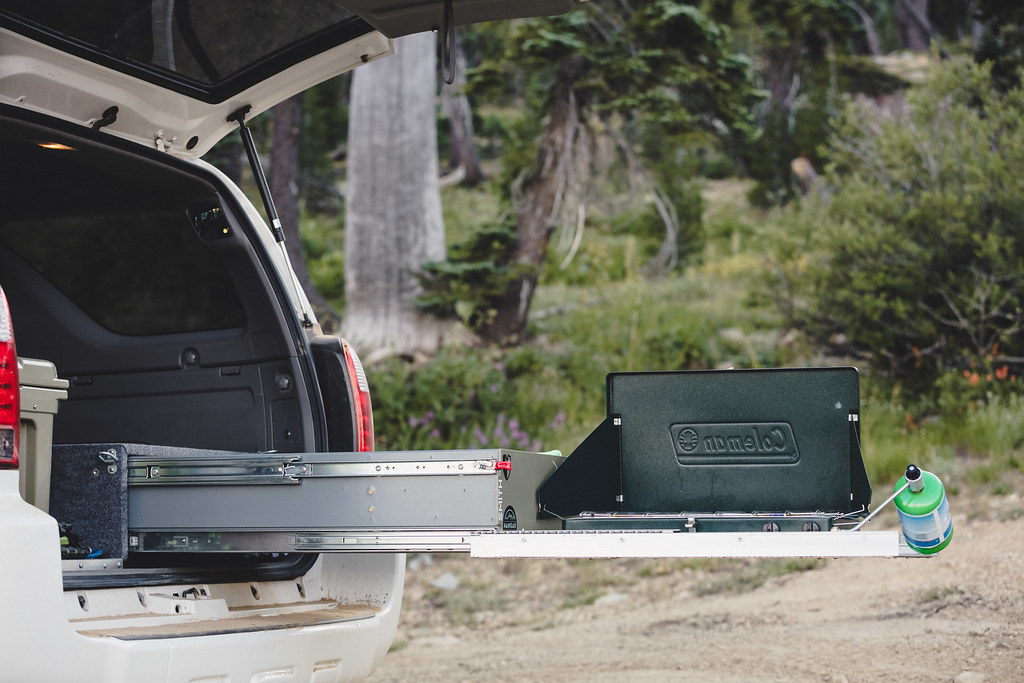
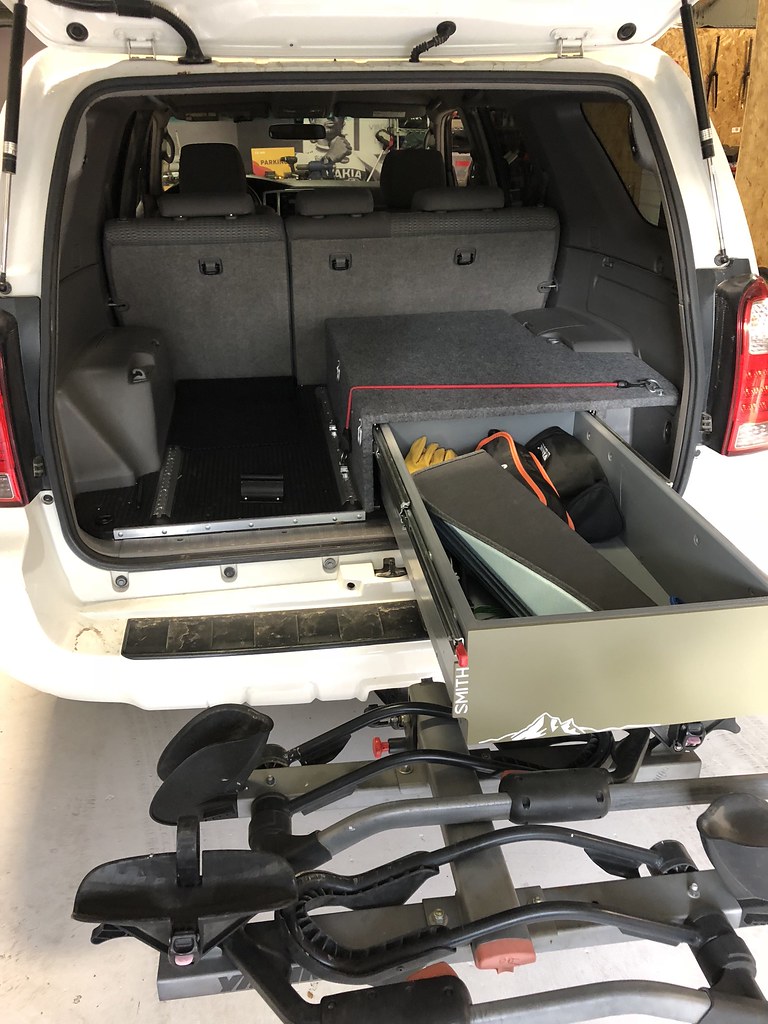
After using the version one setup for a while, I saw some places for improvement, especially after I saw my buddies setup with a pullout stove. So, back the the drawing board. I liked the base plate, and the cubby size, so it was just a matter of remaking the drawer. I also wanted a way to hold the stove.
42714203485_a17ecc913a_b.jpg

Here you can see the new drawer. Pretty basic. I used 3/4" ply for the bottom, front, and back. The sides are 1/2" ply, with an additional piece of 1/4" ply laminated to the top half. The reason for this is to create enough room on the sides towards the bottom for the stove platform.
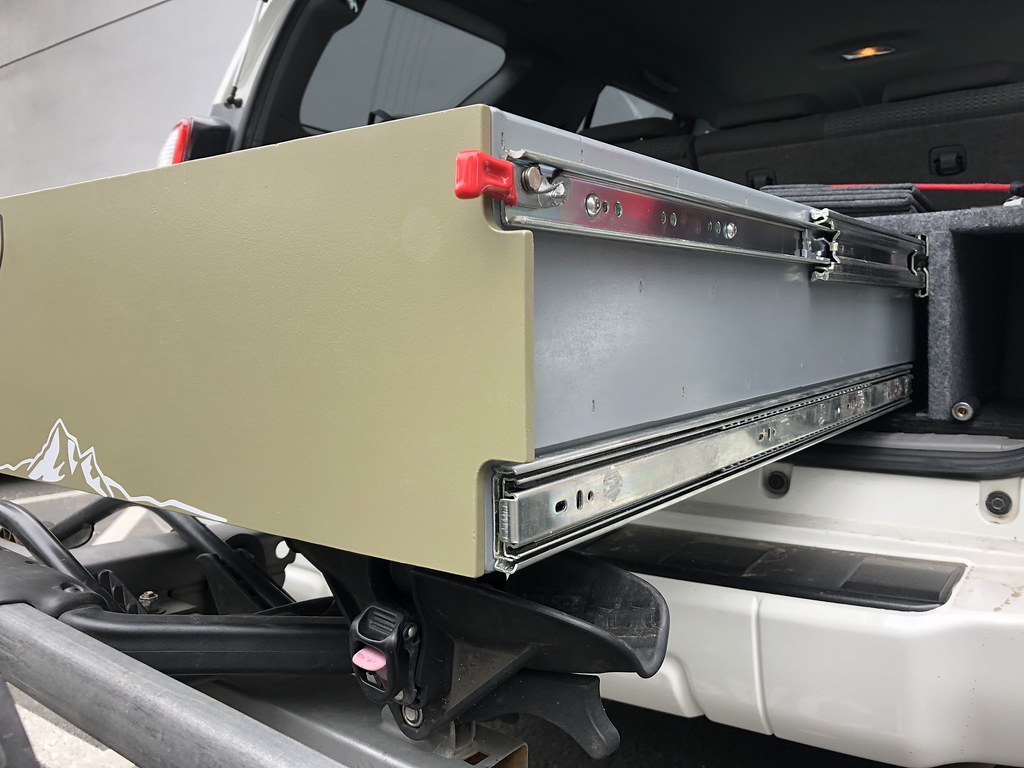
29748234048_06c090b584_b.jpg

I got heavy duty slides that lock in both open and closed position. This is another thing I learned from version one when I parked on a hill. You can also see the stove platform sides, and why I needed the extra clearance.
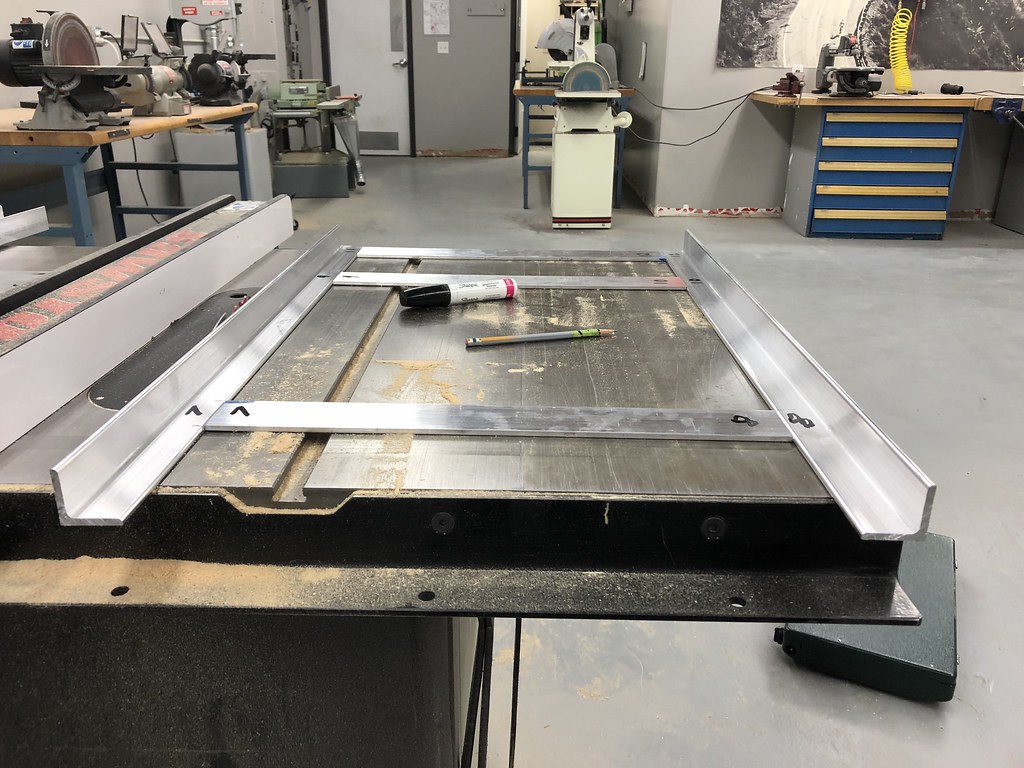
41810155290_3cd1f7cde1_b.jpg


Stove platform

29748234448_95a8555e1b_b.jpg


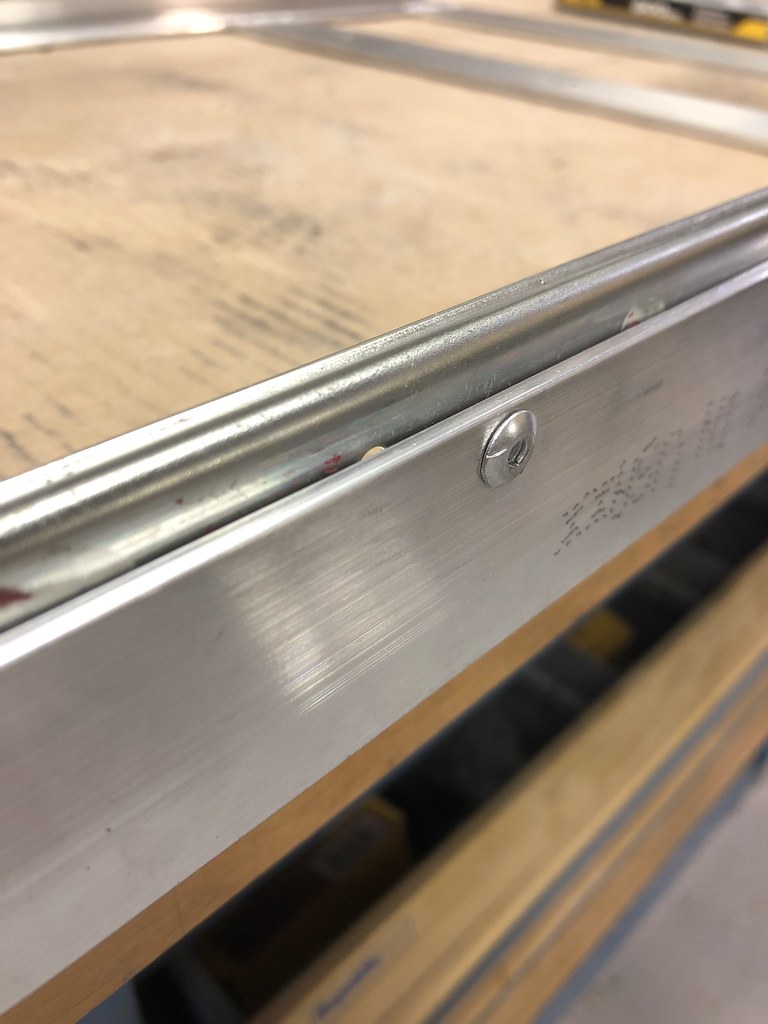
Rivets to attach the slides to the platform
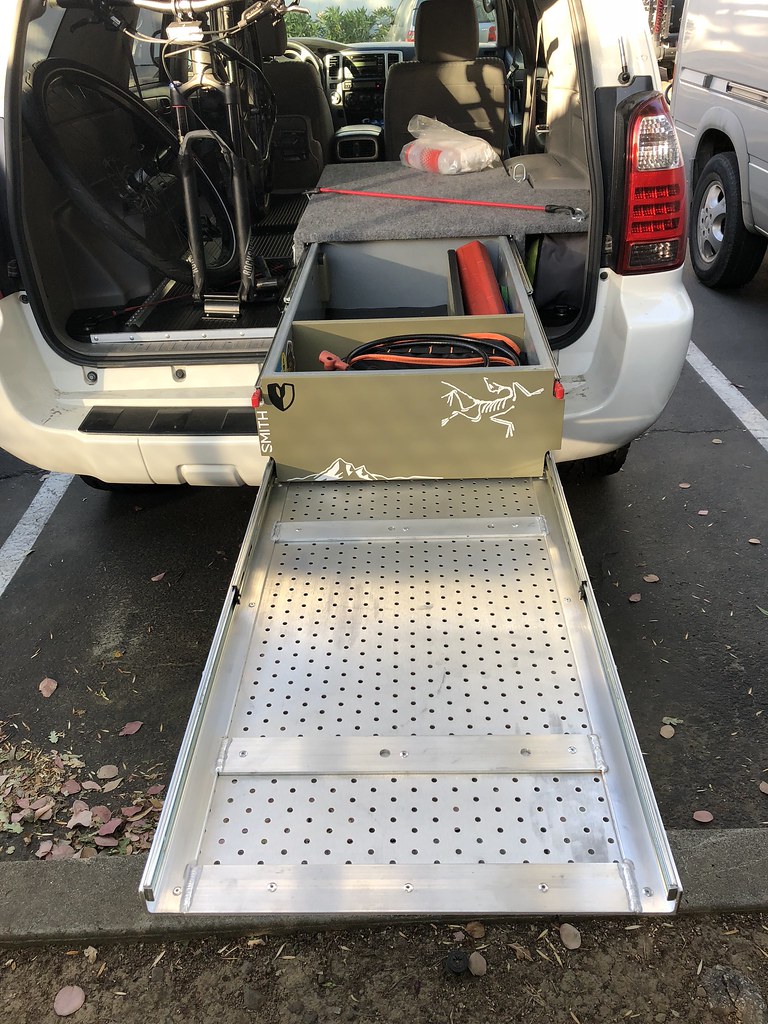
41810152070_7377acd342_b.jpg


All mounted up

29748234588_3a2761b995_b.jpg


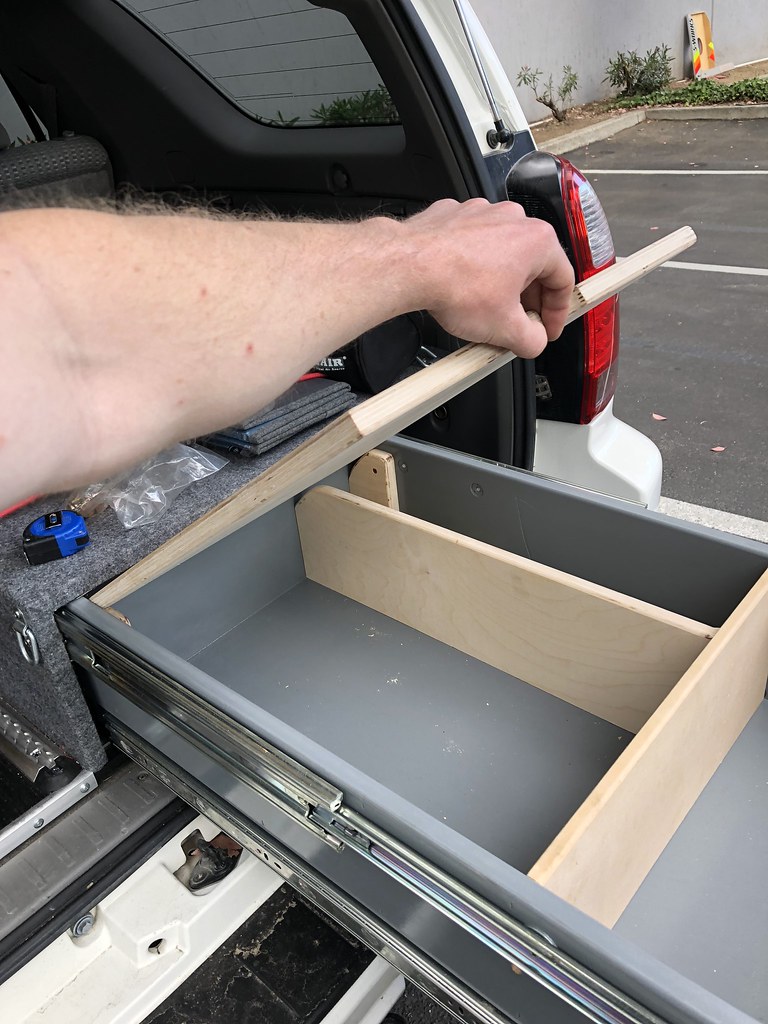
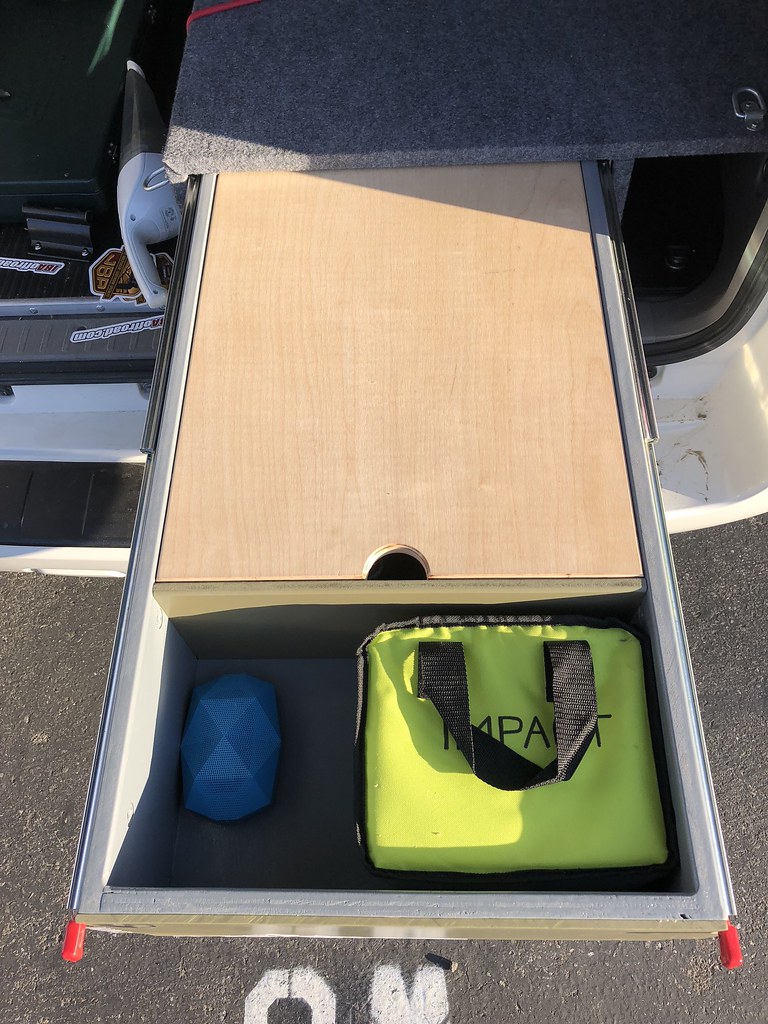
Mocking up the storage inside the drawer
41810152710_54ba35292c_b.jpg


And a top lid that acts as a counter-space for dinner prep

43618181201_3fbf342bd6_b.jpg


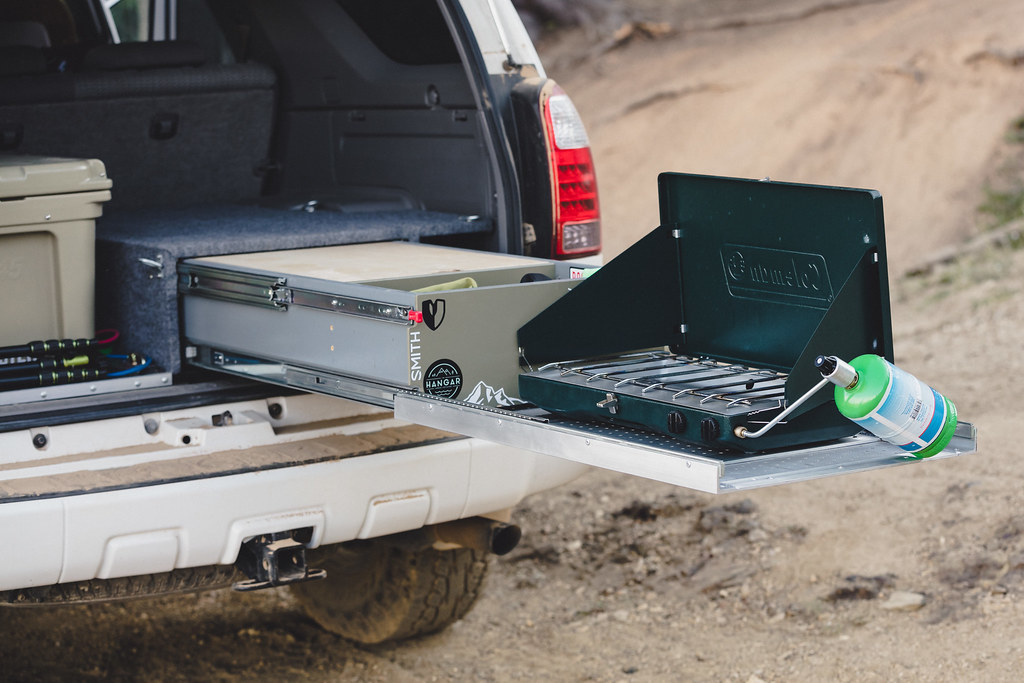
And lastly a couple spring loaded pins that lock the platform open and closed
43618174141_6226984b7c_b.jpg


And the finished product!

43618175641_14e2c4b754_b.jpg


Very happy with the final product!
 
Register to hide this ad
This setup looks familiar... are you friends with my buddy David Wang? Looks nice regardless and that is a nice looking workshop to be able to do fab work out of
 
Wow!! A+ for craftsmanship! Look Solid and Sick!! The functionality and purpose is phenomenal. :cheers: you're definitely and artist! :artist2:
 
DUDE. This is exactly what I need. I already built a base plate so this would be easy to add. Do you have the drawer dimensions anywhere? I have an ARB where your bike goes and I've been wanting to add a simple drawer on the passenger side that I can store my tools in and cook on. Great work!
 
This setup looks familiar... are you friends with my buddy David Wang? Looks nice regardless and that is a nice looking workshop to be able to do fab work out of

Thanks! Yeah, I'm lucky enough to have access to my works shop every once and a while. Yup, David is a good buddy of mine, and we have very similar setups.

DUDE. This is exactly what I need. I already built a base plate so this would be easy to add. Do you have the drawer dimensions anywhere? I have an ARB where your bike goes and I've been wanting to add a simple drawer on the passenger side that I can store my tools in and cook on. Great work!

Thanks! I don't have exact dimensions in front of me, but it's basically half and half for drawer to cargo space. I used 32" slides for both the drawer and stove platform.
 
Thanks! Yeah, I'm lucky enough to have access to my works shop every once and a while. Yup, David is a good buddy of mine, and we have very similar setups.


Thanks! I don't have exact dimensions in front of me, but it's basically half and half for drawer to cargo space. I used 32" slides for both the drawer and stove platform.

Couple of questions (Apologies. This is more or less exactly how I'm trying to build out my cargo area):

1) I think I did some measurements before and got 24"W x 40"L. That sound close to about right? Did you use Birch ply?

2) Where did you nab the slides from?

3) What are you using to secure it down? Can't see any tie downs

4) Any other pics of the sleeping platform?
 
Couple of questions (Apologies. This is more or less exactly how I'm trying to build out my cargo area):

1) I think I did some measurements before and got 24"W x 40"L. That sound close to about right? Did you use Birch ply?

2) Where did you nab the slides from?

3) What are you using to secure it down? Can't see any tie downs

4) Any other pics of the sleeping platform?

1. Yeah, that sounds about right, and yes, I think it was birch.
2. I used these
3. There are 4 tie-down points in the factory cargo area w/ d-rings. I pulled those out and got longer bolts.
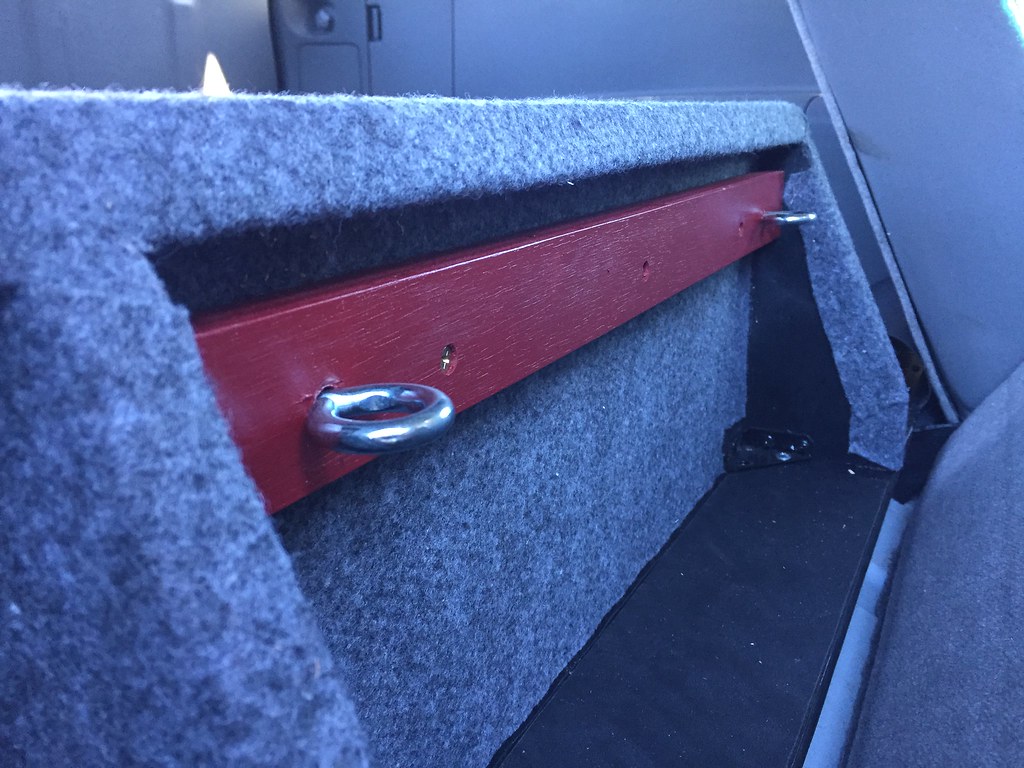
4. Here is the sleeping platform. It's a removable leaf that extends forward. in the front, it's supported by 1.5" dowels that go down to the floor.
38274493784_caa8a5c16c_b.jpg

38035894845_38e0b2fd8c_b.jpg

39318329691_af5d8c87bc_b.jpg

The leaf has a lip that slides in and rests on top of the red piece of wood, and then is held secure by turnbuckles - so when tightened, it gets pulled into the back of the drawer box, making it very secure. I also have a platform that extends over to the other side so my wife and I can both sleep in there, but lately we've just been using a tent if it's the two of us so we have more space.

hope this helps
 
Sorry, should have been more clear. How are you securing the drawer to the plate? It looks like it is just resting in there. I did the same with my cargo plate and extended the bolts in all 4 corners. This was a mockup at the time, but fridge lives on driver side now.

w1hbMWF.png


GYnvyKb.jpg
 
Last edited:
Sorry, should have been more clear. How are you securing the drawer to the plate? It looks like it is just resting in there. I did the same with my cargo plate and extended the bolts in all 4 corners. This was a mockup at the time, but fridge lives on driver side now.

Oh, it's just glued and screwed from the bottom. Makes it real fun trying to get out... but it fits, kind of.
 
Not that the price matters in current times but do you remember the total cost in this? This is exactly what i've been looking to do with bike storage and sleeping.
 
Not that the price matters in current times but do you remember the total cost in this? This is exactly what i've been looking to do with bike storage and sleeping.

hey, I don't have an exact price but I'd guess around $300-$400. The locking drawer slides were the most expensive part - maybe $150. I used mid-priced plywood and then an order of aluminum and bolts/tee nuts from Mcmaster.
 
hey, I don't have an exact price but I'd guess around $300-$400. The locking drawer slides were the most expensive part - maybe $150. I used mid-priced plywood and then an order of aluminum and bolts/tee nuts from Mcmaster.

thanks. Did you (or anyone for that matter) remove the final carpeting/sound deadening layer or leave it in?


-I see in your IG you just got the superlite RTT? The shop isn't far from my summer job, was going to check it out and possibly pick one up. How do you like it?
 
Last edited:
thanks. Did you (or anyone for that matter) remove the final carpeting/sound deadening layer or leave it in?


-I see in your IG you just got the superlite RTT? The shop isn't far from my summer job, was going to check it out and possibly pick one up. How do you like it?

I removed the padding under the carpet because it wasn't letting the platform sit flush. I added in some sound deadening material instead and put the carpet back on top.

Yeah, the tent is rad, highly recommend it! And they are a great company.
 

Members online

Forum statistics

Threads
278,307
Messages
3,554,056
Members
248,016
Latest member
Advally Service

Trending content

Back
Top