

Myrunr2010
New member
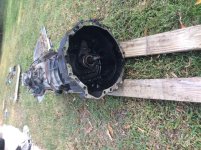
First off, I want to say (and I know its been said plenty of times before), this job is pretty time consuming, and can be a pain in the butt! The mechanics of the job itself are not difficult, but trying to maneuver the transmission out of and back into the vehicle proved to be pretty difficult. I wanted to do a write up because the only write ups I could find were kind of old and had broken links. Hopefully this helps some folks out!
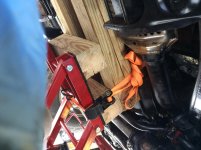
The first time I did this job, I used a motorcycle jack, thinking it would be sufficient. From a stability standpoint it was a good call, however, it couldn’t be lifted high enough to actually contact the transmission, so I had to build a little jig out of 4x4’s I had laying around. If you are planning to tackle this job, I would highly highly recommend buying a transmission jack. It made this job much much more manageable the 2nd time around. Harbor freight sells them for 100 bucks, or if you live in the Hampton roads area of Virginia you could likely borrow mine, or I might be willing to lend a hand.
My ghetto jack assembly I used the first go around.
I used the FSM as a guide on removal (pg 751 of the pdf version). It was pretty nice to have laying around, there are plenty of copies of it out there on the web to look at if you need to. The only thing I have to note, is you do not need to drain your transmission fluid. I did not drain my motor oil and I did the rear main seal while I was in there with no issues as well.
I have now pulled the transmission and clutch 3 times in the last 4 months (rear main seal issues), and this is what I’ve come up with to work best for me.
I started under the rig with the drive shafts and cross member first. Make sure you match-mark the drive shafts before removal, otherwise you may be unbalanced when you reinstall and could cause some vibrations (or so im told). The bolts/nuts for the drive shafts are 14mm. Some of the bolts needed to be removed with an open end wrench, others you can get with a socket as long as you have a few extensions on the ratchet. The second time I did this I had purchased those nice new ratcheting open end wrenches, they were great.
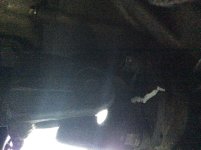
Next thing you will want to remove is the aft cross member (just forward of the gas tank). The first time I did the job I didn’t realize that it had to come out until I had the transmission disconnected and was coming down. It is held in place with a 14mm bolt. You will need an open end wrench on this guy to hold the other side of the bolt/nut closest to the gas tank.
I went ahead and loosened all the bolts on the cross member supporting the transmission, and removed the ones that actually bolt to the transmission. I didn’t want to have a hard time disconnecting the cross member once the transmission was unbolted from the motor, so I broke everything loose in preparation. The first time I did this I unbolted the cross member from the bracket that connects to the transmission, this was pointless, absolutely no need to. All the bolts for this are also a 14mm.
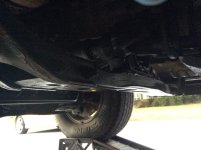
On the driver’s side of the transmission you will need to disconnect the slave cylinder as well as the two attachments for the hydraulic line. These are 12mm bolts. Before doing this I would recommend putting your transmission in neutral if it isn’t already. I say this because I have the tendency when I get in my rig to push the clutch and check if it’s in neutral, which will end up pushing the piston all the way out of the slave cylinder (ask me how I know!).
Up is to the left.
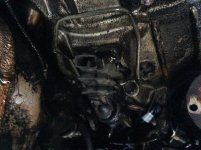
The passenger’s side has a bracket connected to the exhaust and the starter which must be removed. The starter just has two bolts, they are 14mm bolts. We left the starter to rest on the suspension components until the transmission was moved out. The bracket that needs to be removed is attached to the exhaust, undo that bolt and pull the bracket out. This bracket was broken on my rig. We ended up (before install) grinding the attachment ear off of the exhaust to provide a little more installation space. I’m not certain how we got the transmission out with it there, because it sure didn’t want to go back in even without it.
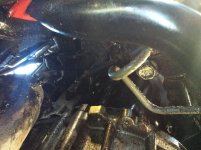
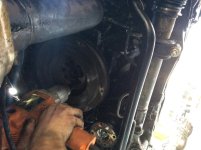
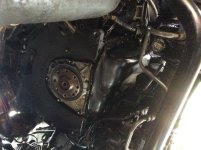
The front of the bell housing has a “rear end plate” which, from what I can see, just serves to keep extra road grime and whatnot from getting into the housing. It is attached using 4 small 12mm bolts. If you don’t have ratcheting open end wrenches then I feel sorry for you, this was miserable without them.
Once all that is done you can start the joy of unbolting the transmission. All 6 bolts are 17mm. To get the very top one I used a universal, two longer extensions and one short extension. I held the socket on the bolt from the passengers side and ran the extensions up the drivers side. Once I had the socket on and a little pressure I could take my right hand off the socket and put some torque on the ratchet. We removed this bolt all the way, along with the other two short bolts. We then loosened and removed the remaining bolts (three long ones, all low hanging fruit in comparison).
Note, this photo is looking from the rear to the front.
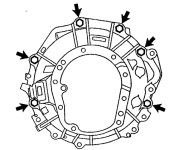
Once they were loose I went ahead and raised the transmission jack up to the transmission and put weight on it (taking weight off the cross member). And removed the cross member the rest of the way.
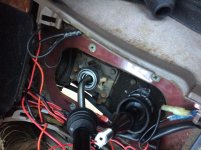
This step can really be done at any time, no reason it needs to be done after everything else. But you gotta removed the shifters at some point. I replaced the seats with new Marlin Crawler HD seats. Once you remove the shifter boots and the rubber/metal dust boot, you will see where the shifters actually attach to the tranny. Pull the rubber boots up out of the way. The transmission shifter requires you to push down and rotate counter clockwise to remove. Once you have done that the shifter should pull right out. I recommend leaving the transmission in neutral.
Removal of the transfer case shifter is much the same as removal of the transmission shifter, however, it is held in place with a snap ring in lieu of a push and turn type mechanism. Remove the snap ring and pull up. My transfer case seat was all sorts of destroyed. Additionally, I yelled more trying to get this dumb snap ring back in than any other part of the job, lol.
The first time I did this job, I used a motorcycle jack, thinking it would be sufficient. From a stability standpoint it was a good call, however, it couldn’t be lifted high enough to actually contact the transmission, so I had to build a little jig out of 4x4’s I had laying around. If you are planning to tackle this job, I would highly highly recommend buying a transmission jack. It made this job much much more manageable the 2nd time around. Harbor freight sells them for 100 bucks, or if you live in the Hampton roads area of Virginia you could likely borrow mine, or I might be willing to lend a hand.
My ghetto jack assembly I used the first go around.
I used the FSM as a guide on removal (pg 751 of the pdf version). It was pretty nice to have laying around, there are plenty of copies of it out there on the web to look at if you need to. The only thing I have to note, is you do not need to drain your transmission fluid. I did not drain my motor oil and I did the rear main seal while I was in there with no issues as well.
I have now pulled the transmission and clutch 3 times in the last 4 months (rear main seal issues), and this is what I’ve come up with to work best for me.
I started under the rig with the drive shafts and cross member first. Make sure you match-mark the drive shafts before removal, otherwise you may be unbalanced when you reinstall and could cause some vibrations (or so im told). The bolts/nuts for the drive shafts are 14mm. Some of the bolts needed to be removed with an open end wrench, others you can get with a socket as long as you have a few extensions on the ratchet. The second time I did this I had purchased those nice new ratcheting open end wrenches, they were great.
Next thing you will want to remove is the aft cross member (just forward of the gas tank). The first time I did the job I didn’t realize that it had to come out until I had the transmission disconnected and was coming down. It is held in place with a 14mm bolt. You will need an open end wrench on this guy to hold the other side of the bolt/nut closest to the gas tank.
I went ahead and loosened all the bolts on the cross member supporting the transmission, and removed the ones that actually bolt to the transmission. I didn’t want to have a hard time disconnecting the cross member once the transmission was unbolted from the motor, so I broke everything loose in preparation. The first time I did this I unbolted the cross member from the bracket that connects to the transmission, this was pointless, absolutely no need to. All the bolts for this are also a 14mm.
On the driver’s side of the transmission you will need to disconnect the slave cylinder as well as the two attachments for the hydraulic line. These are 12mm bolts. Before doing this I would recommend putting your transmission in neutral if it isn’t already. I say this because I have the tendency when I get in my rig to push the clutch and check if it’s in neutral, which will end up pushing the piston all the way out of the slave cylinder (ask me how I know!).
Up is to the left.
The passenger’s side has a bracket connected to the exhaust and the starter which must be removed. The starter just has two bolts, they are 14mm bolts. We left the starter to rest on the suspension components until the transmission was moved out. The bracket that needs to be removed is attached to the exhaust, undo that bolt and pull the bracket out. This bracket was broken on my rig. We ended up (before install) grinding the attachment ear off of the exhaust to provide a little more installation space. I’m not certain how we got the transmission out with it there, because it sure didn’t want to go back in even without it.
The front of the bell housing has a “rear end plate” which, from what I can see, just serves to keep extra road grime and whatnot from getting into the housing. It is attached using 4 small 12mm bolts. If you don’t have ratcheting open end wrenches then I feel sorry for you, this was miserable without them.
Once all that is done you can start the joy of unbolting the transmission. All 6 bolts are 17mm. To get the very top one I used a universal, two longer extensions and one short extension. I held the socket on the bolt from the passengers side and ran the extensions up the drivers side. Once I had the socket on and a little pressure I could take my right hand off the socket and put some torque on the ratchet. We removed this bolt all the way, along with the other two short bolts. We then loosened and removed the remaining bolts (three long ones, all low hanging fruit in comparison).
Note, this photo is looking from the rear to the front.
Once they were loose I went ahead and raised the transmission jack up to the transmission and put weight on it (taking weight off the cross member). And removed the cross member the rest of the way.
This step can really be done at any time, no reason it needs to be done after everything else. But you gotta removed the shifters at some point. I replaced the seats with new Marlin Crawler HD seats. Once you remove the shifter boots and the rubber/metal dust boot, you will see where the shifters actually attach to the tranny. Pull the rubber boots up out of the way. The transmission shifter requires you to push down and rotate counter clockwise to remove. Once you have done that the shifter should pull right out. I recommend leaving the transmission in neutral.
Removal of the transfer case shifter is much the same as removal of the transmission shifter, however, it is held in place with a snap ring in lieu of a push and turn type mechanism. Remove the snap ring and pull up. My transfer case seat was all sorts of destroyed. Additionally, I yelled more trying to get this dumb snap ring back in than any other part of the job, lol.
Attachments







Last edited:
 arty:
arty:







