Cytronus 2016 4Runner Trail Premium Build Thread (Pic Heavy)

Long overdue Mods & Trips update

Well, it's been a while since I've posted so here's an update on the rig, mods and trips.

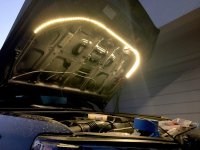
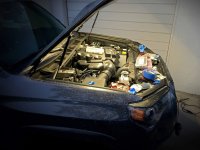
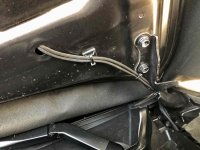
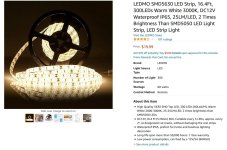
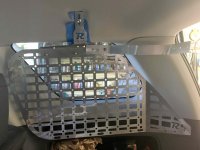
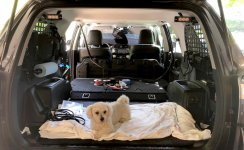
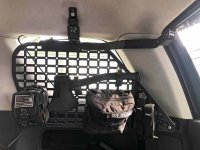
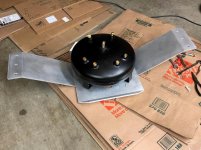
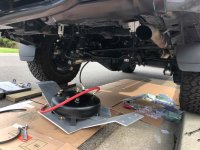
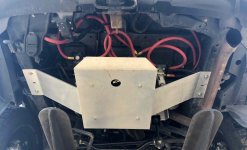
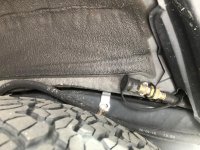
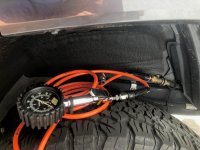
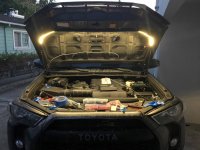
Starting with the mods, a lot has been done including: Underhood LED lighting, a custom built air tank system in the spare tire cubby area with skid plate and air quick connects in both rear wheel wells, Prinsu full length non-drill rack installed with KC Flex 40 light bar, USR blacked out tail lights by DEPO, Rago MSP rear window load out and much more.
 

Attachments

  • IMG_4913web.jpg
    IMG_4913web.jpg
    134.4 KB · Views: 247
  • IMG_4914web.jpg
    IMG_4914web.jpg
    128.9 KB · Views: 251
  • IMG_4915web.jpg
    IMG_4915web.jpg
    130.3 KB · Views: 239
  • LED2web.jpg
    LED2web.jpg
    137.2 KB · Views: 244
  • LEDMO_SMD5630_WarmWhite_16.4ft.jpg
    LEDMO_SMD5630_WarmWhite_16.4ft.jpg
    132.3 KB · Views: 244
  • Hama_vehicle_switch2017.jpg
    Hama_vehicle_switch2017.jpg
    45 KB · Views: 230
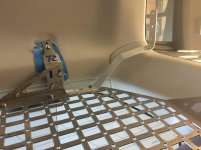
Rago MSP - customized!

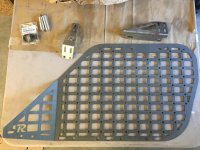
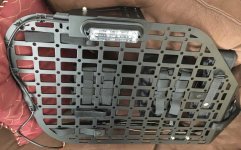
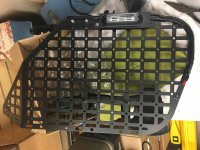
I picked up a set of Rago MSPs for a significant discount since they weren't painted, which is exactly what I wanted since I was planning on doing some customization to them. :) ...you know me!
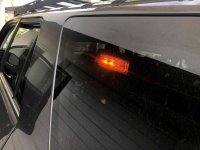
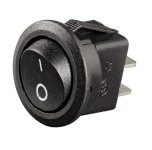
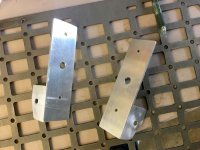
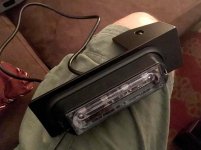
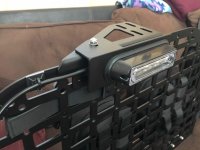
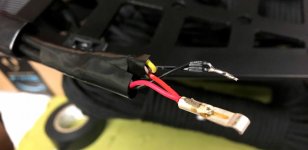
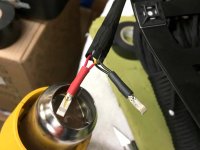
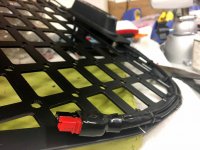
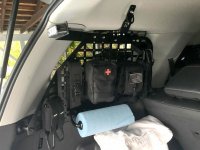
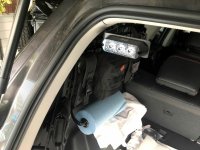
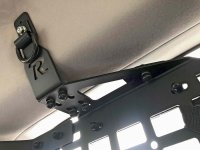
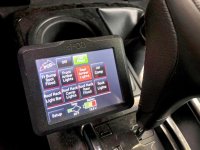
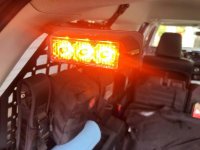
I fab'd up some brackets for a set of the same amber LEDs I'm running behind my front grille, to provide side visibility and also made a pair of metal arms for LEDs facing rearward. The wiring for all 4 LED lights come together via simple anderson plugs and merge into a single red and black wire that run to the sPOD SE in the engine bay with a single button control to turn on and off.

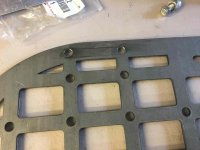
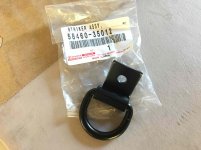
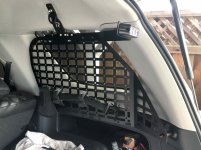
After all the customization, I had them powder coated along with all the new brackets and hardware to really black them out. Also added a couple of Toyota OEM tie down hooks to the roof mounts - part # 58460-35012. A final touch was applying black rubber caps over all the nuts and studs for an ultra clean look and also prevents fabric snags and tears since there are some sharp edges there.

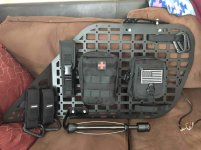
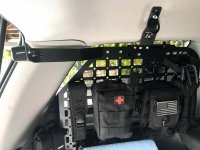
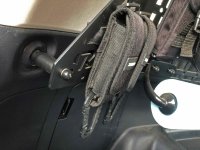
I then added molle pouches for things I'd want to grab regularly and quickly from the back window - flat tire repair kit, first aid, flash lights, knife, axe, shop towels, gloves, etc. I was careful not to block the entire rear passenger side window as I still want to see out of that window when backing out and parallel parking. I use the MSPs a ton and absolutely love them. A must have mod.
 

Attachments

  • IMG_5309web.jpg
    IMG_5309web.jpg
    129.4 KB · Views: 223
  • IMG_5331web.jpg
    IMG_5331web.jpg
    131.6 KB · Views: 221
  • IMG_5332web.jpg
    IMG_5332web.jpg
    130.7 KB · Views: 223
  • IMG_5335web.jpg
    IMG_5335web.jpg
    129.2 KB · Views: 219
  • IMG_5336web.jpg
    IMG_5336web.jpg
    129.6 KB · Views: 221
  • IMG_5540web.jpg
    IMG_5540web.jpg
    140 KB · Views: 223
  • IMG_5552web.jpg
    IMG_5552web.jpg
    130 KB · Views: 223
  • IMG_5551edit.jpg
    IMG_5551edit.jpg
    136.9 KB · Views: 215
Last edited:
Rago MSP con't

Rago MSP with custom amber emergency lights side and rearward facing. These have been amazing for backing out of my driveway, parking lots and when pulled over on the road shoulder at night.
 

Attachments

  • IMG_5548web.jpg
    IMG_5548web.jpg
    133.1 KB · Views: 218
  • IMG_5590web.jpg
    IMG_5590web.jpg
    139.2 KB · Views: 218
  • IMG_5591web.jpg
    IMG_5591web.jpg
    133.6 KB · Views: 220
  • IMG_5592web.jpg
    IMG_5592web.jpg
    123.4 KB · Views: 216
  • IMG_5593web.jpg
    IMG_5593web.jpg
    130.5 KB · Views: 211
  • IMG_5311web.jpg
    IMG_5311web.jpg
    131.4 KB · Views: 220
  • IMG_5634web.jpg
    IMG_5634web.jpg
    126.8 KB · Views: 209
  • IMG_5631web.jpg
    IMG_5631web.jpg
    131.9 KB · Views: 210
Rago MSP con't again

the whole set up
 

Attachments

  • IMG_5633web.jpg
    IMG_5633web.jpg
    130.4 KB · Views: 217
  • IMG_5632web.jpg
    IMG_5632web.jpg
    128.1 KB · Views: 197
  • IMG_8017web.jpg
    IMG_8017web.jpg
    137.6 KB · Views: 217
Rago MSPs con't

the side LEDs aren't very bright during the day due to the window tint but they are still visible. They're perfect for night time however. I made the brackets to position the lens of the lights a mm or two from the window so there would be no light reflection into the cargo area. I didn't want it to be noticeable at all and that's exactly how it turned out. I ran the LED wiring from the passenger side under the rear seat and then through the driver side rear seat back tilt slit and under the floor door jam plastic moldings forward through the firewall.
 

Attachments

  • rago1web.jpg
    rago1web.jpg
    131.5 KB · Views: 188
  • Rago2web.jpg
    Rago2web.jpg
    125.2 KB · Views: 193
  • Rago3web.jpg
    Rago3web.jpg
    135.1 KB · Views: 190
  • Rago5web.jpg
    Rago5web.jpg
    135.6 KB · Views: 185
  • Rago6web.jpg
    Rago6web.jpg
    128.7 KB · Views: 188
  • Rago7web.jpg
    Rago7web.jpg
    122.9 KB · Views: 187
Mod Stages updated, in progress and futures

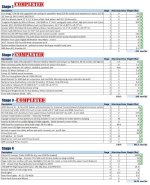
Note the new weight in pounds. I've been meticulous about tracking added weight for a couple main reasons - 1) to keep within GVWR to ensure safe handling and braking and 2) to understand the impact of weight on fuel economy. The trailer isn't really a mod but it has gotten some mod attention as well. ;)
 

Attachments

  • Stageupdate_Apr2021.jpg
    Stageupdate_Apr2021.jpg
    142.3 KB · Views: 294
Last edited:
Crazy Air Tank System for running pneumatic impact tools

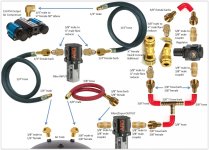
I had this crazy idea that it would be cool to build an air system off of the twin ARB air compressor with a compressed air tank positioned where the stock spare tire cubby is. The idea was to be able to run air tools long enough to quickly get a wheel off, a stuck nut or bolt on the trail or have enough air in the tank to fill a flat tire in the event the air compressor encountered a failure, which actually happened recently when my sPOD air circuit channel burnt out.

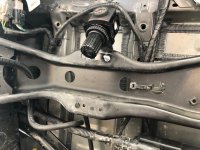
I built this system with a 4 gallon steel pancake air tank all w/ 1/4" NPT, 2 quick connects - one in each rear wheel to easily fill tires from either side, a 1/4" aluminum skid plate mounting into existing frame bolt holes, air/moisture filters and a pressure regulator to dial down the air pressure from the ARB compressor's output of 150 psi to 80-90 psi to run pneumatic tools.

For anyone that's ever thought about something like this, here's what I can say about the system, now that I've had it in for about 3 years - it's heavy and underutilized to warrant the MPG hit. At some point, I will either have a
larger custom aluminum tank made or remove the tank & skid and then simply run an air line from the ARB compressor toward the rear to a 1/4" NPT T joint, running 2 split lines to the current rear wheel well quick connects.

If a custom 8-10 gallon capacity aluminum pancake air tank could be made that would fit snuggly into that spare tire cubby, then I'd say a system like this might be worth it. There are those times on trail when something serious breaks, like a CV, where you or a friend really wants or needs to have a pneumatic impact wrench.
 

Attachments

  • Air System Plumbing Diagram.jpg
    Air System Plumbing Diagram.jpg
    128.9 KB · Views: 293
  • regulator.jpg
    regulator.jpg
    134.1 KB · Views: 278
  • preinstall1.jpg
    preinstall1.jpg
    135.7 KB · Views: 277
  • IMG_8127web.jpg
    IMG_8127web.jpg
    135.9 KB · Views: 269
  • IMG_8574web.jpg
    IMG_8574web.jpg
    128.8 KB · Views: 282
  • sideview.jpg
    sideview.jpg
    132.8 KB · Views: 274
  • aircap1.jpg
    aircap1.jpg
    138.9 KB · Views: 278
  • air cap 3.jpg
    air cap 3.jpg
    131.3 KB · Views: 287
Last edited:

Members online

No members online now.

Forum statistics

Threads
278,316
Messages
3,554,120
Members
248,016
Latest member
Advally Service

Trending content

Back
Top