Dirtbike250x's Build Thread

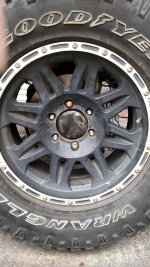
I couldn't wait for the first snow fall after the new tires, I couldn't have been happier with the difference. But I didn't have much to compare to, since the first year had the very wore street tires with 90k on them.

Impressive - what kind of tires will make 90K miles?

And is this the only forum on the net where the average mileage is some 200K and people still want to know that?

:thumb3:
 
Impressive - what kind of tires will make 90K miles?

And is this the only forum on the net where the average mileage is some 200K and people still want to know that?

:thumb3:

They were a dunlop model not completely sure of the model as you can imagine are long gone... Thanks for checking in on the build!
 
So how about a thread revival?

My truck is still ticking along just as it always had, however quite a few things have changed on this rig and I just haven't gotten around to keep this updated.

Why not restart it now!

So since the last update I believe the next mod I made was the 231mm Tundra brake upgrade.

I had always been interested in doing this upgrade as brake upgrades with bigger heavy tires just seems right. It was until I found the perfect time to do the swap was when one of my original calipers froze a piston actually causing a drag on the rotor and a pull on the road.

It was either rebuild what I had or upgrade...I went with the latter.

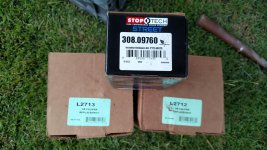
First up parts...
IMG_20160730_183900825.jpg

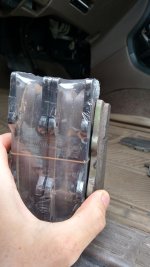
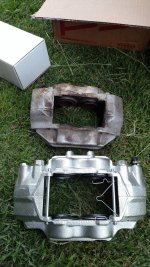
The calipers are from rockauto and I got some stop-tech pads paired with a set of centric blank disks all fitment for a 2005 Tundra. I also threw in some steel braided brake lines since I was going to be bleeding the system anyway.

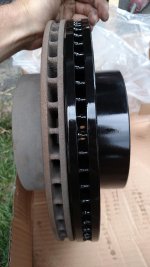
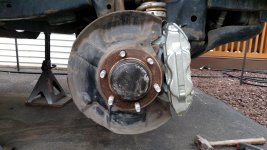
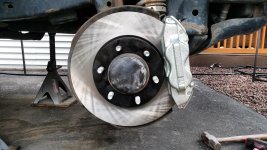
We all like comparison pictures....
IMG_20160730_162501530.jpg
IMG_20160730_162259165.jpg
IMG_20160728_171001760_HDR.jpg

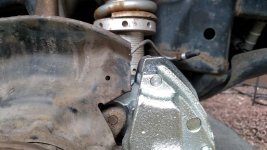
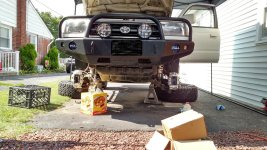
Install was pretty straight forward only requiring some modification to the stock dust shield both top and bottom to make room for the larger caliper.

IMG_20160730_161950880.jpg
IMG_20160730_161931259.jpg

Once I had clearance it was time to do the final install.

IMG_20160730_163001206.jpg
 

Attachments

  • IMG_20160730_183900825.jpg
    IMG_20160730_183900825.jpg
    137.9 KB · Views: 314
  • IMG_20160730_162501530.jpg
    IMG_20160730_162501530.jpg
    140 KB · Views: 295
  • IMG_20160730_161950880.jpg
    IMG_20160730_161950880.jpg
    137.5 KB · Views: 293
  • IMG_20160730_161931259.jpg
    IMG_20160730_161931259.jpg
    140.3 KB · Views: 298
  • IMG_20160730_162259165.jpg
    IMG_20160730_162259165.jpg
    130.1 KB · Views: 303
  • IMG_20160728_171001760_HDR.jpg
    IMG_20160728_171001760_HDR.jpg
    132 KB · Views: 296
  • IMG_20160730_163001206.jpg
    IMG_20160730_163001206.jpg
    143.8 KB · Views: 298
  • IMG_20160730_163509161.jpg
    IMG_20160730_163509161.jpg
    143.4 KB · Views: 274
Once I could confirm fitment behind my wheels, all that was left was to bleed the system.

IMG_20160731_153244684_HDR.jpg

Overall I am happy with the outcome, is it night and day difference? No..But it is enough to feel more confident in my braking power and heat dissipation, a big deal as the truck gets heavier and finds it way down long down hills.

Any questions about the install, feel free to ask.


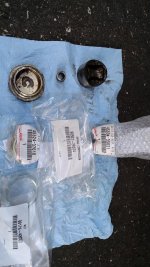
The next upgrade was an attempt to fix some of the steering slop I have generated in the front end. I went with the steering rack guide bushing swap. Being my truck is a 96, I have the old style roller type bushing. Though through my research I have found the later models used a solid bushing type (less to wear out). So with some part numbers and the local parts counter, I had the parts and all installed in a couple hours.

IMG_20160804_154804553.jpg

I unfortunately did not notice much improvement in my steering doing this swap, I may have bigger things wore out in the front causing this...but we'll see.
 

Attachments

  • IMG_20160731_153244684_HDR.jpg
    IMG_20160731_153244684_HDR.jpg
    145.4 KB · Views: 313
  • IMG_20160804_154804553.jpg
    IMG_20160804_154804553.jpg
    140.3 KB · Views: 319
Next up was a lighting upgrade...

The PIAA lights I had been running on the truck were nothing but problems for me. I do not know if I got a bad set or they were simply bad build quality back when I got them. Anyway, it was time to modernize the look and brightness of the truck and go the LED route.

While I am not a fan of the LED light bar fad going around on every possible truck on the road...They do throw impressive light and far.

So it was time to ditch the halogen bulbs for LEDs.
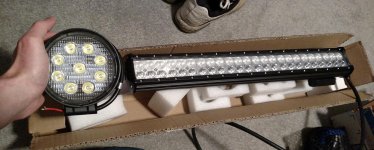
IMG_20170406_192036173.jpg

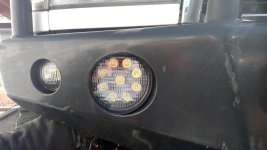
What I have here is first a 23" Light bar from SuperbrightLEDs.com under their titan series. To replace the fog lights, I went a much more economical route and went for 4 inch 27w Tuff LEDs off amazon.

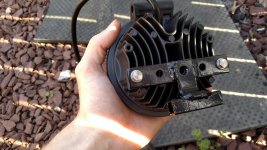
The first issue cam with mounting the fog lights in place. While it is a 4 inch hole for a 4 inch light. The PIAa 510s are 4 inchs light with their cage, much smaller without. The stock mounting method was not going to work...
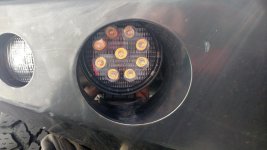
IMG_20170408_153659472.jpg

Fortunately the heat sink cam pre tapped for other mounting options. So with some scrap metal and my welder I fabricated up a simple mount...
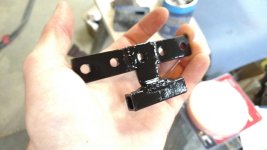
IMG_20170408_192301266.jpg

IMG_20170412_171611554.jpg

IMG_20170408_153716452.jpg

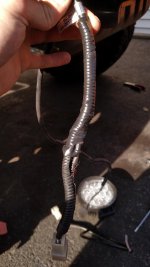
So with the mounting problem out of the way. It was time to wire it. Being that I already have the PIAA wiring harness and relay in place (these lights do not need a relay) I figured I tap into that to keep it simple. So with a cut of the PIAA wire and connection to the new lights. They simply plug right into my harness.
IMG_20170412_172157149.jpg

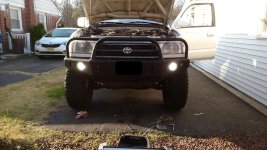
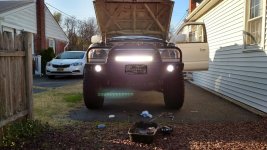
Then it was time for final installation
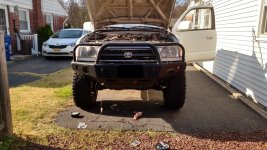
IMG_20170412_170739680_HDR.jpg

And they work! :guitar3:
IMG_20170412_175958227.jpg
 

Attachments

  • IMG_20170406_192036173.jpg
    IMG_20170406_192036173.jpg
    140 KB · Views: 289
  • IMG_20170408_153659472.jpg
    IMG_20170408_153659472.jpg
    135.2 KB · Views: 292
  • IMG_20170408_192301266.jpg
    IMG_20170408_192301266.jpg
    123.1 KB · Views: 282
  • IMG_20170412_171611554.jpg
    IMG_20170412_171611554.jpg
    139.1 KB · Views: 264
  • IMG_20170408_153716452.jpg
    IMG_20170408_153716452.jpg
    135.6 KB · Views: 285
  • IMG_20170412_172157149.jpg
    IMG_20170412_172157149.jpg
    130 KB · Views: 257
  • IMG_20170412_170739680_HDR.jpg
    IMG_20170412_170739680_HDR.jpg
    146.4 KB · Views: 266
  • IMG_20170412_175958227.jpg
    IMG_20170412_175958227.jpg
    139.9 KB · Views: 274
Next up the LED Light bar.

This was a similar task for the wiring and reusing the plug.

Also with the Light Bar it gave me the option to use a track system for foot mounts allowing me to use the pre drilled holes in my bumper.

IMG_20170412_181430394_HDR.jpg

And it is that easy two bolts and plugs right in!

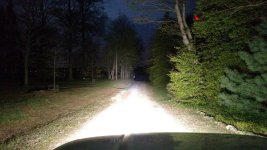
And a quick night shot example :thumb3:

IMG_20170415_201315947.jpg
 

Attachments

  • IMG_20170412_181430394_HDR.jpg
    IMG_20170412_181430394_HDR.jpg
    142.7 KB · Views: 294
  • IMG_20170415_201315947.jpg
    IMG_20170415_201315947.jpg
    139.2 KB · Views: 278

Members online

Forum statistics

Threads
278,315
Messages
3,554,104
Members
248,016
Latest member
Advally Service

Trending content

Back
Top