Dirtbike250x's Build Thread

Thank you very much for the kind words, I hope it does indeed help out future exhaust seekers.

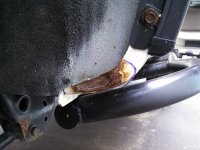
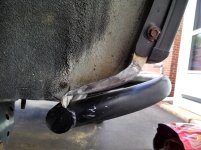
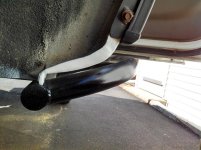
That hanger wraps around the flange for the cat pipe and front pipe. Some time ago it broke in half as you might be able to see a rigged edge to the bottom. I felt as though I could fix it :high5: So I slotted the broken hanger which retained the normal bottom half and finished off the wrap around with a very long hose clamp.

I kept it loose, slide it into place and tighten the bolt to squeeze down on the cat pipe flange. No, it's not as pretty as the a non rusted one that is in one piece, but I feel it provides the support the pipe needs.

Sounds like a solid fix. My dad removed whatever was left of the one on mine and tossed it. I'm just going to buy the new piece from the dealer (~$35). I'll try some exhaust paint on it to see if it will extend the new part's life.

I forgot if I asked but where in NJ are you at? I'm by the GWB.
 
Sounds like a solid fix. My dad removed whatever was left of the one on mine and tossed it. I'm just going to buy the new piece from the dealer (~$35). I'll try some exhaust paint on it to see if it will extend the new part's life.

I forgot if I asked but where in NJ are you at? I'm by the GWB.

That works too, I'm not sure how long the hose clamp fix will last, but ehh I'll leave it under there for as long as possible

Ah wow didn't notice you were from Jersey too. I'm down in south Jersey, which means the closest trails are Wharton which aren't all that great.
 
This is what the exhaust on my girlfriend's '02 Civic looks like. Such a pain being a small car, can't get a sawzall up in there, nor can I drop the rest of the exhaust. I need to replace the length of pipe from between the manifold and muffler since she has a bad cat. But since the Sawzall won't fit where I need it, and the fact that the only blade the school has is bad doesn't help me at all, so I need to take the plasma to it. Any idea how to get that flange off where it bolts up to the exhaust? The whole thing is pretty well rotted, ripped away part of it when I tried unbolting it, don't want to tear up the muffler side of the flange too much.
 
This is what the exhaust on my girlfriend's '02 Civic looks like. Such a pain being a small car, can't get a sawzall up in there, nor can I drop the rest of the exhaust. I need to replace the length of pipe from between the manifold and muffler since she has a bad cat. But since the Sawzall won't fit where I need it, and the fact that the only blade the school has is bad doesn't help me at all, so I need to take the plasma to it. Any idea how to get that flange off where it bolts up to the exhaust? The whole thing is pretty well rotted, ripped away part of it when I tried unbolting it, don't want to tear up the muffler side of the flange too much.

So it seems you will need an angle grinder with a cut-off wheel, like what I used. I cut the bolt head off on the exhaust side, leaving the cat-side (the part I'm going to keep) untouched. Once the head was completely cut off, and it was down to the threaded part, a small tug down on the exhaust front pipe, the flange separated leaving the cat flange unharmed. Then I took a sanding wheel and scotch-brite pad to clean the cat flange in-order for a good seal with the new exhaust gasket and piping. Hopefully that makes sense.

I would stay away from the plasma cutter unless you can not get an angle grinder. As long as there is no structural loss from the rust, then you should be ok.
 
Thank you very much for the help! I was scared to use the plasma anyways, knowing how easily that can go bad if I were to mess up. I do have access to a cutoff wheel, so I will be trying that hopefully Tuesday. I'll let you know how it goes.
 
So more updates for my Runner :pop2:

Recently I had some weekend time to take care of a few projects which aren't all that exciting such as a Radiator Flush, and an oil change. However, a mod was fit in with this routine maintenance work.

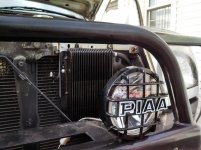
That mod being the B&M Transmission cooler (70264 yes the big one). Along with a Glow Shift Trans Temp gauge.

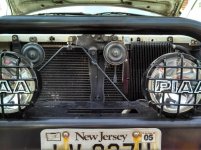
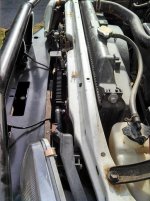
I decided to mount my cooler without using those little zip ties they offer to use to tie it up to the A/C condenser (as a note: I would recommend doing the same if you have the time to work out a method to mount) It took some time, but for sure the hardest part of the install was just making space for the cooler. I choose the drive side to mount simply because there was more room over there with more readily available mounting points. It was not ideal because it requires more transmission hose, but it works. (Another note: if you go to your parts store for transmission hose be 100% sure it is for transmission use, not fuel use like what they tried to give me)

IMG_20140419_170833_021.jpg

The only thing I had to modify was the horn location which I just used the bolt that holds the hood latch to the body, simple fix.

IMG_20140419_174021_772.jpg

IMG_20140419_170859_898.jpg

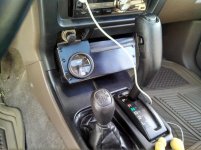
I do not however have pictures of the gauge just yet. But just to give a description, I used some aluminum and bent it up into a gauge mount to fit in the cubby hole next to, and under the ash tray in the 96 model. The gauge is from Glow Shift, a manufacturer I have not heard much about, but so far it is working great and looks even better. I will have pictures of my gauge contraption soon. My temps are right around the 110-120 range on normal driving with 130 and a max of 140 under slower "city" type driving.
 

Attachments

  • IMG_20140419_170833_021.jpg
    IMG_20140419_170833_021.jpg
    67.9 KB · Views: 850
  • IMG_20140419_174021_772.jpg
    IMG_20140419_174021_772.jpg
    80.3 KB · Views: 867
  • IMG_20140419_170859_898.jpg
    IMG_20140419_170859_898.jpg
    69.8 KB · Views: 839
I never updated with pictures of the temp gauge I installed, and finally have the time to do so, so here we go.

With a little more time with the gauge and cooler and the temperature slowly rising outside, I am staying consistent at roughly 110 for normal driving. The max I have reached was a long uphill section of road heading to Rausch Creek ORP which reached 170. Nothing to worry about imo.

Sorry about the glare
IMG_20140518_125745_675.jpg
 

Attachments

  • IMG_20140518_125745_675.jpg
    IMG_20140518_125745_675.jpg
    59.5 KB · Views: 778
looks killer! Any reason why you fabbed up a mount instead of just sticking it infront of the 4wd selector like most do?
 
looks killer! Any reason why you fabbed up a mount instead of just sticking it infront of the 4wd selector like most do?

Thanks a lot. The primary reason for mounting it as I did was between two things. I have seen others mount gauges there, but the spot does not provide a flat surface, and would then be off center since there is no enough room it seemed for the gauge if i drilled into the center. Next was the angle, laying it in place pointing straight up didn't work for me. Would need to move to see the gauge. How I have it mounted is a spot on angle to see when in the driving position. Plus it is different, and there's room to mount another gauge in the future at the same angle.
 
Thanks a lot. The primary reason for mounting it as I did was between two things. I have seen others mount gauges there, but the spot does not provide a flat surface, and would then be off center since there is no enough room it seemed for the gauge if i drilled into the center. Next was the angle, laying it in place pointing straight up didn't work for me. Would need to move to see the gauge. How I have it mounted is a spot on angle to see when in the driving position. Plus it is different, and there's room to mount another gauge in the future at the same angle.

good to know! I always wondered about the angle issue.
 
Another small mod, but important (to me).

On the passenger side inner fender was the spot of my only serious rust issue, it was difficult to look at on such a solid truck. So since I have a welder, I thought I'd see what I could do.

I have no body work experience, and have never even welded sheet metal before, but I thought it can't look any worse than the rust.

So I started with marking out the section that was going to be removed, and proceeded to make a template out of paper and transfer it to a piece of steel from my scrap yard of steel. I settled on using an oil pan off a Cummings diesel. Yes I have a metal that once worked with a Dodge.

IMG_20140503_131556_445.jpg

Once the metal was removed, and the metal was fitted into place, I proceeded to tack it up and smooth it out.

IMG_20140503_155842_829.jpg

Once I was happy enough with the shape I threw some primer and painted it up.

IMG_20140503_163012_591.jpg
No the white does not match, but with a few miles on it now the debris hides the imperfection until I can match it.

Overall I am happy with my first attempt to fix the body, not perfect but whole let better than walking by a rusty spot each time.
 

Attachments

  • IMG_20140503_131556_445.jpg
    IMG_20140503_131556_445.jpg
    66.3 KB · Views: 9,581
  • IMG_20140503_155842_829.jpg
    IMG_20140503_155842_829.jpg
    70.2 KB · Views: 727
  • IMG_20140503_163012_591.jpg
    IMG_20140503_163012_591.jpg
    64.5 KB · Views: 713
Last edited:
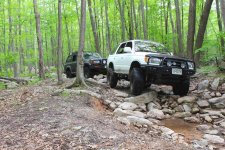
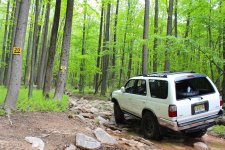
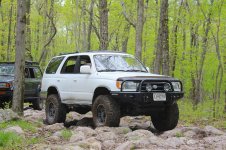
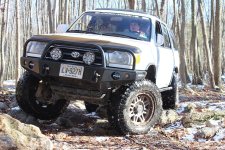
This post will just be a few pictures from last trail trip.

10274277_10202580241081840_2573397473649668630_n.jpg


10298952_10202580237121741_5008956534217361437_n.jpg


10352880_10202580233321646_4730913022513398229_n.jpg
 

Attachments

  • 10274277_10202580241081840_2573397473649668630_n.jpg
    10274277_10202580241081840_2573397473649668630_n.jpg
    143.9 KB · Views: 704
  • 10298952_10202580237121741_5008956534217361437_n.jpg
    10298952_10202580237121741_5008956534217361437_n.jpg
    141.9 KB · Views: 699
  • 10352880_10202580233321646_4730913022513398229_n.jpg
    10352880_10202580233321646_4730913022513398229_n.jpg
    138.2 KB · Views: 702
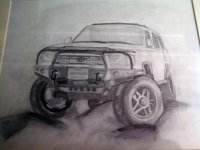
I had my truck turned into art

From this...

Rausch 12-28-13 - 2523.jpg

To this....

IMG_20140718_095930_875edit.jpg
 

Attachments

  • IMG_20140718_095930_875edit.jpg
    IMG_20140718_095930_875edit.jpg
    57.1 KB · Views: 678
  • Rausch 12-28-13 - 2523.jpg
    Rausch 12-28-13 - 2523.jpg
    130 KB · Views: 656
[MENTION=45676]dirtbike250x[/MENTION] i may have asked you this.. what county are you in. i'm in south east monmouth county. i need to get out soon.
 
[MENTION=45676]dirtbike250x[/MENTION] i may have asked you this.. what county are you in. i'm in south east monmouth county. i need to get out soon.

I don't think you have, I am a little further south in Burlington County. You're probably the closest member to me. Not to many modified 4Runners around here.
 
Nice runner dude! I enjoyed reading through your build, there are lots of little things that you hand crafted I thought were pretty cool. Also your cargo box with sub and rear tire carrier is one of the best integration ive seen. I was thinking about doing something similar but not sure about the mount since I still would like to sleep in my car from time to time. Anyway nice work/build you have one badass 4runner
 
Nice runner dude! I enjoyed reading through your build, there are lots of little things that you hand crafted I thought were pretty cool. Also your cargo box with sub and rear tire carrier is one of the best integration ive seen. I was thinking about doing something similar but not sure about the mount since I still would like to sleep in my car from time to time. Anyway nice work/build you have one badass 4runner

Thanks you for the kind words! I appreciate it. The Sub box/Tire mount is a great combo for wheeling trips and driving around town, but it does severely cut down on cargo area. I can however fit a 6 person tent plus a base layer tarp on either side of the tire so that's how I manage the sleeping situation.

The box tire mount is very easily removable by removing the hinge pins and disconnecting the speaker wires (maybe a 10 min job) if it ever came down to it. Thanks Again!
 

Members online

Forum statistics

Threads
278,316
Messages
3,554,111
Members
248,016
Latest member
Advally Service

Trending content

Back
Top