DIY: Rear shocks and Sway Bar Links

46runner

Member
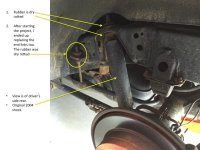
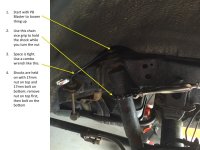
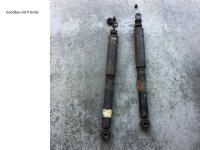
About 136K miles with original shocks/struts. Finally had some time to do this project. I like doing these projects but by no means am I qualified (that's my disclaimer). I made some assumptions as you'll see in the comments below. Hope this helps others who might want to tackle this project.

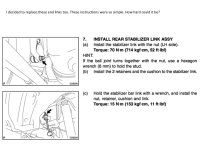
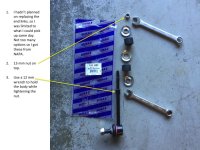
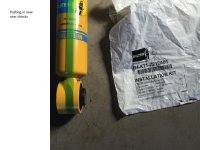
Bilstein 4600 Series Shocks Rear Part Number: 24-186049, from 4wheelparts.com. I got the front struts too but the rears took longer than expected, so the fronts will have to wait for another day. I also got the Energy Suspension Poly 8.5136G 17mm rear sway bar bushings from 4wheelparts. But it turns out I need 21mm, not 17mm, so these will have to be replaced later.
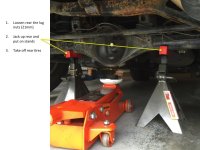
Slide01.jpg

Slide02.jpg

Slide03.jpg

Slide04.jpg

Slide05.jpg

Slide06.jpg

Slide07.jpg

Slide08.jpg

I hit my picture limit so this will be continued below.
 

Attachments

  • Slide01.jpg
    Slide01.jpg
    84.9 KB · Views: 3,837
  • Slide02.jpg
    Slide02.jpg
    92.7 KB · Views: 3,979
  • Slide03.jpg
    Slide03.jpg
    96.8 KB · Views: 4,192
  • Slide04.jpg
    Slide04.jpg
    97.7 KB · Views: 3,991
  • Slide05.jpg
    Slide05.jpg
    129.2 KB · Views: 3,846
  • Slide06.jpg
    Slide06.jpg
    117.9 KB · Views: 3,843
  • Slide07.jpg
    Slide07.jpg
    119.7 KB · Views: 3,752
  • Slide08.jpg
    Slide08.jpg
    62.8 KB · Views: 5,985
Last edited:
Register to hide this ad
DIY Shocks and End Links continued...

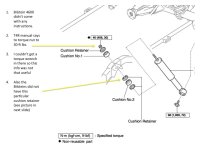
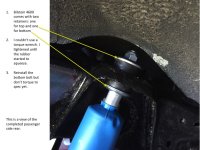
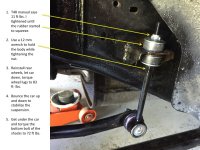
Since I couldn't get a torque wrench in there, I tightened until the rubber started to squeeze.
Also, there were only two retainers. The OEM shock had three.

Slide09.jpg

Slide10.jpg

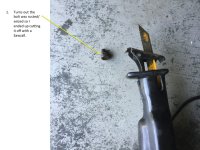
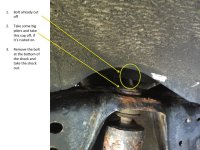
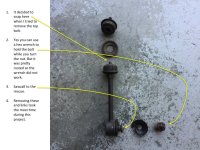
These were a PITA to get off:
Slide11.jpg

Slide12.jpg

Slide13.jpg
 

Attachments

  • Slide09.jpg
    Slide09.jpg
    111.4 KB · Views: 3,784
  • Slide10.jpg
    Slide10.jpg
    79.4 KB · Views: 3,837
  • Slide11.jpg
    Slide11.jpg
    135.7 KB · Views: 3,912
  • Slide12.jpg
    Slide12.jpg
    123.6 KB · Views: 3,831
  • Slide13.jpg
    Slide13.jpg
    122.3 KB · Views: 5,622
Last edited:
Just got done installing 5100s in the rear today and I had to cut off the shocks too. There isn't a whole lot of room to install the new nut on top so I just tightened them down until I had some threads showing on top and the bushing started to squeeze.
 
I installed 4600's and I squeezed the rubber a bit more than you have in your picture.

I didn't have a crow's foot available during the install to use a torque wrench so I just went off how much the OEM shock bushing was compressed.
 
I don't have anything constructive to add other than to say that this is the best, most detailed writeup that I've seen in a long time. Thank you.
 
fdbyrne is right. This is a very well done post with good pics and explanations. As a non-mechanic I rely on good posts and pics to keep me on the right path.
 
Hey drunner97 and strathcona. Did your shock also come with just two discs, to sandwich the two rubber pieces? I'm asking because the OEM shock had three of these metal discs. Thanks.
 
Hey drunner97 and strathcona. Did your shock also come with just two discs, to sandwich the two rubber pieces? I'm asking because the OEM shock had three of these metal discs. Thanks.

One washer for the bottom, and one for the top.
 
While I didn't really need this guide, this is still an amazing guide I wish I had the first time. Same with your front install. Both are some of the best I've seen.
 

Members online

Forum statistics

Threads
278,316
Messages
3,554,120
Members
248,016
Latest member
Advally Service

Trending content

Back
Top