

War Sprout
New member
DIY: Replacing Alternator 3rd gen V6
What you will need:
new or remanufactured alternator
12mm Deep socket
14mm, and 10mm sockets
Di-electric grease
band-aids
gloves
electrical cleaner
Notice: While you have the alternator out, its a great time to replace the 4ga wires from the battery to alternator and the battery to engine ground.
Also, the adjuster bolt may be seized, so be ready to make a run to the hardware store for a replacement.
Because this was my first time replacing this part, it took me a little over an hour, from start to finish. If I was to do it again, it would probably take me about 15 minutes. The vehicle used in the demonstration is my 1997 limited 4x4. So let's get started!
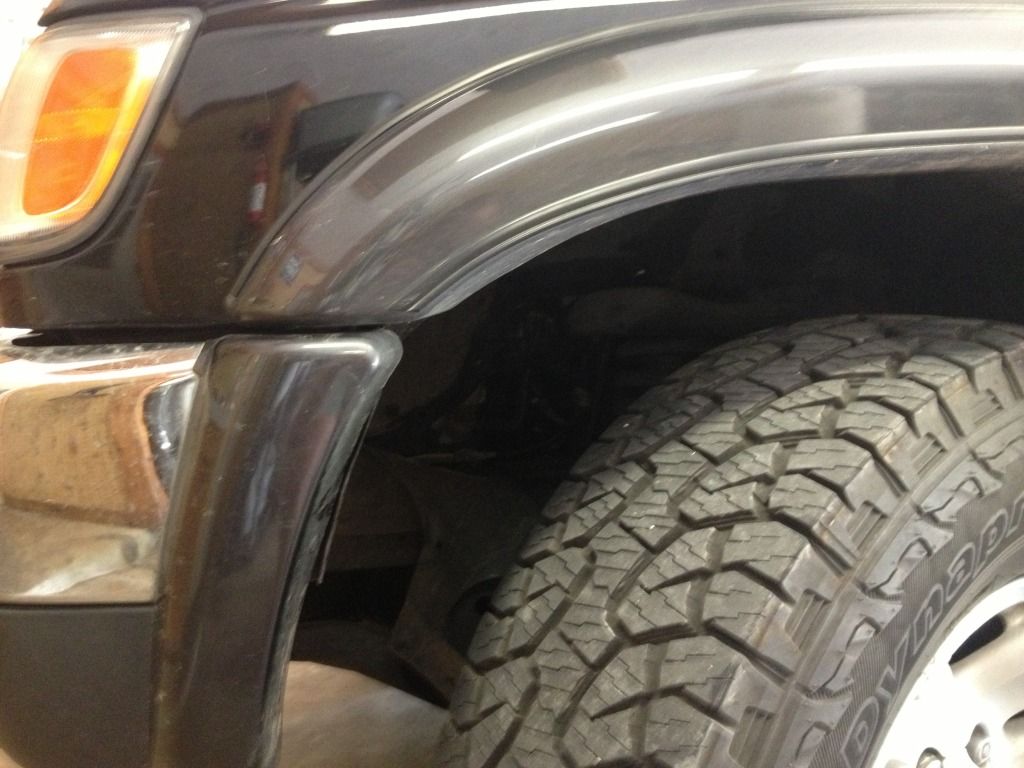
First, whenever you park your car to replace this part, it is important to turn the steering wheel ALL THE WAY to the left. Like this:
Next, open up your hood and disconnect the negative battery terminal.
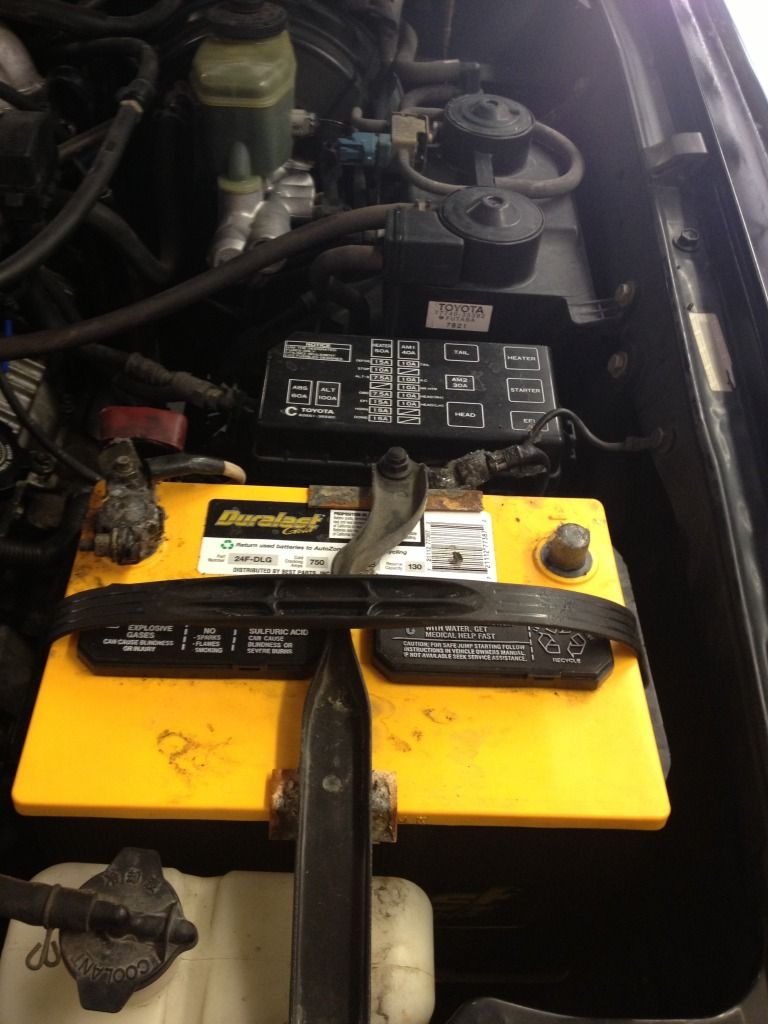
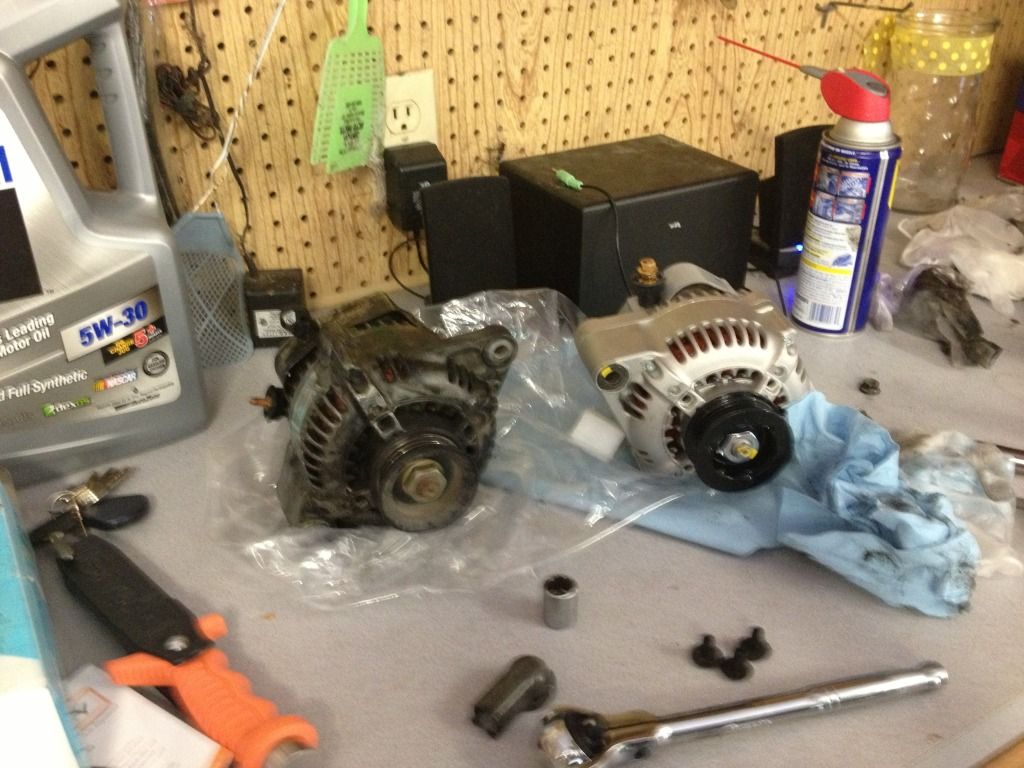
This is the beast you will be removing. The alternator is located on the front left side of the engine block, (reference you sitting in the vehicle facing forward) next to the dipstick, and is connected to a drive belt. Another way to describe it's location would be 4 inches down from the engine oil cap on the V6. Mine has crud all over it because of my leaky valve cover.
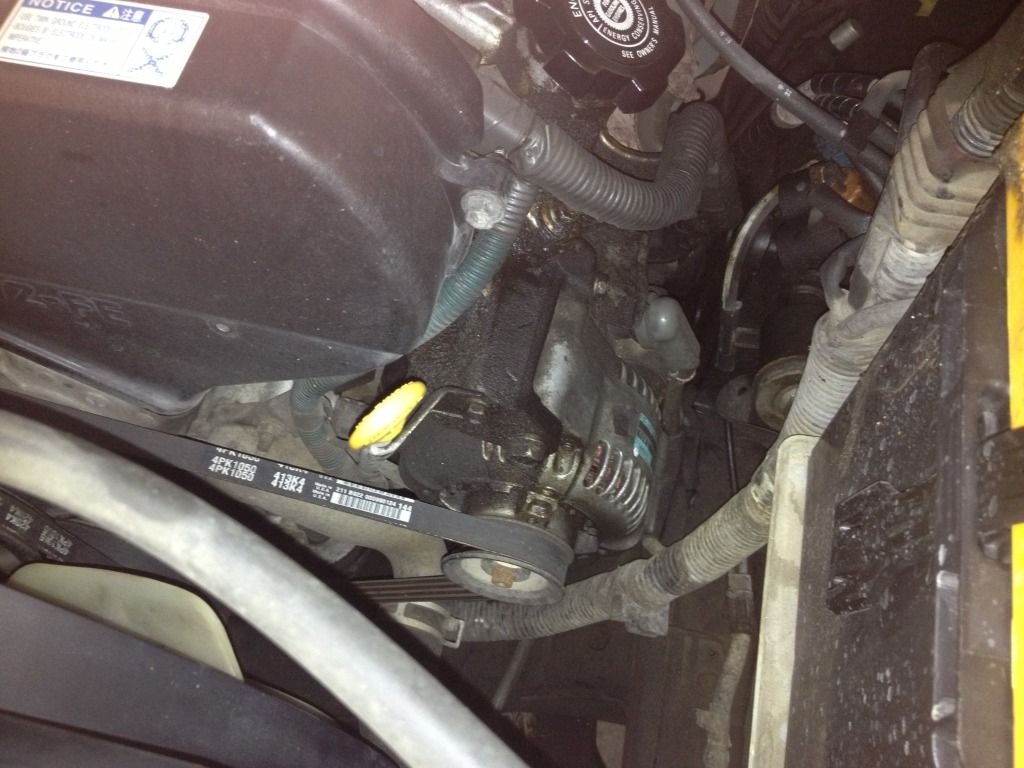
And this is what I replaced it with
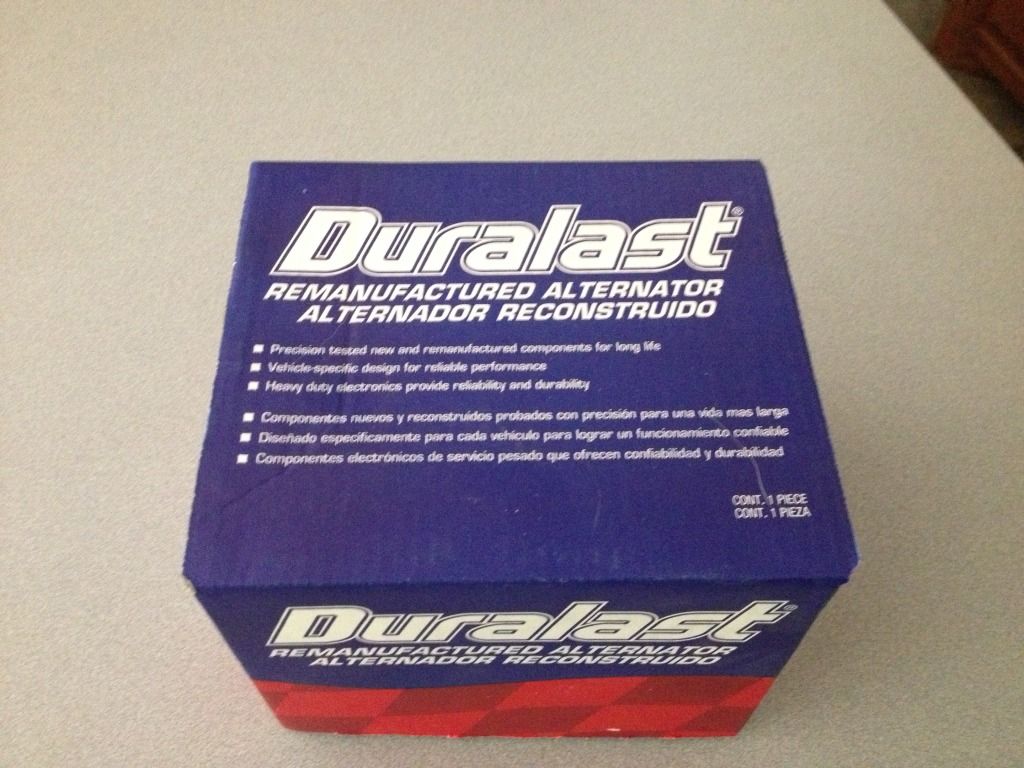
It's probably not necessary, but for the new alternator I put di-electric grease in the plug for the connector here.
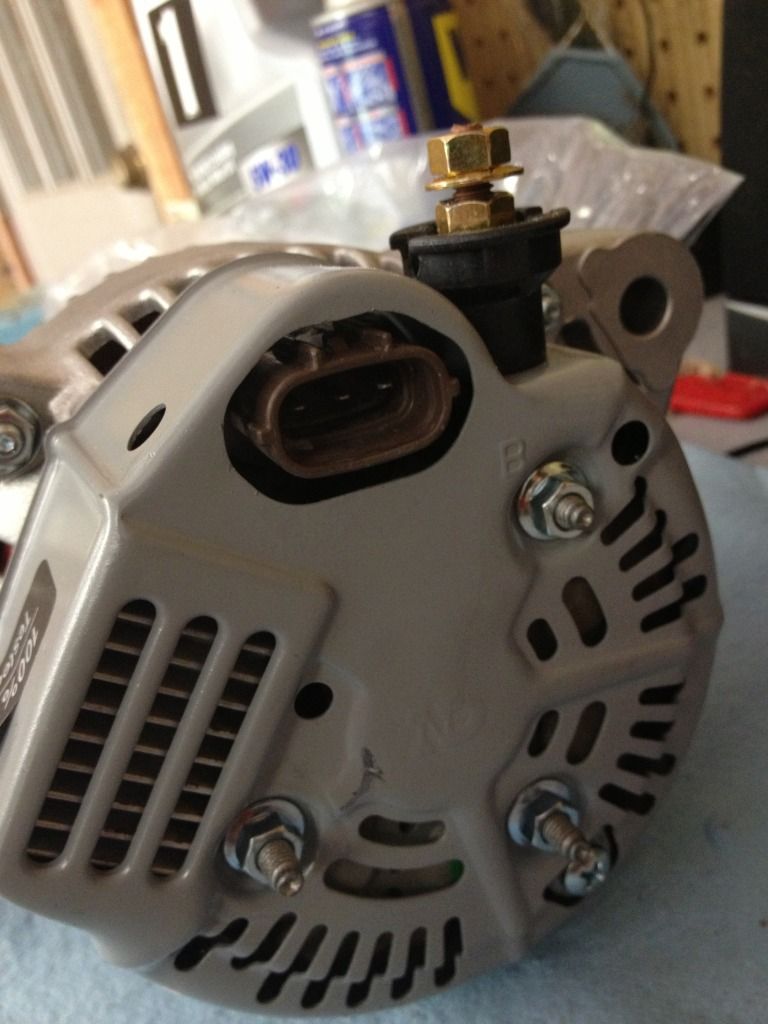
There are 2 methods you can use to give you enough space to remove the alternator. It has been suggested that removing the battery and the battery tray works just as well, if not better. Do what you think is best, and what works for you. For this write-up, I went through the fender lining.
When turning your steering wheel to the left, it allows you to gain access to an area of the fender lining that can be removed. Because the alternator is on the left side of the vehicle, you will need to remove these grommets under the left, front fender.
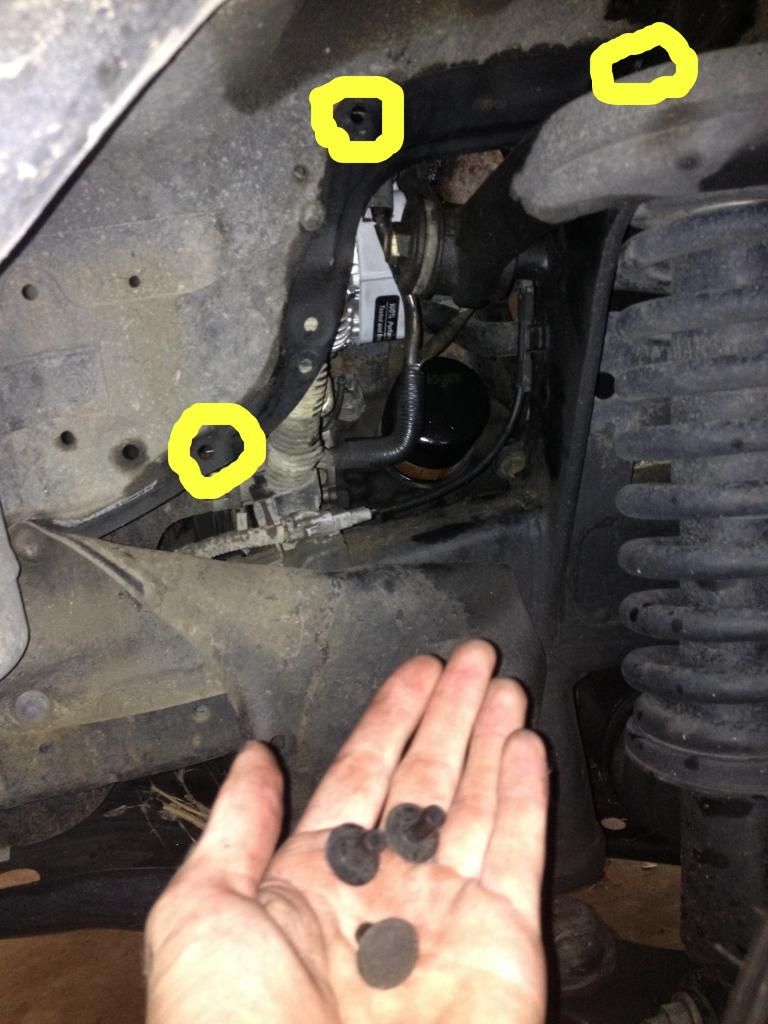
After removing these grommets, you should be able to gain access to the connector plug on the back of the alternator shown here. Push in on the clip, and pull out. Some people have reported problems removing this connector due to build up, so it might be best to spray some electrical cleaner on the connector before attempting this. The connector is shown below:
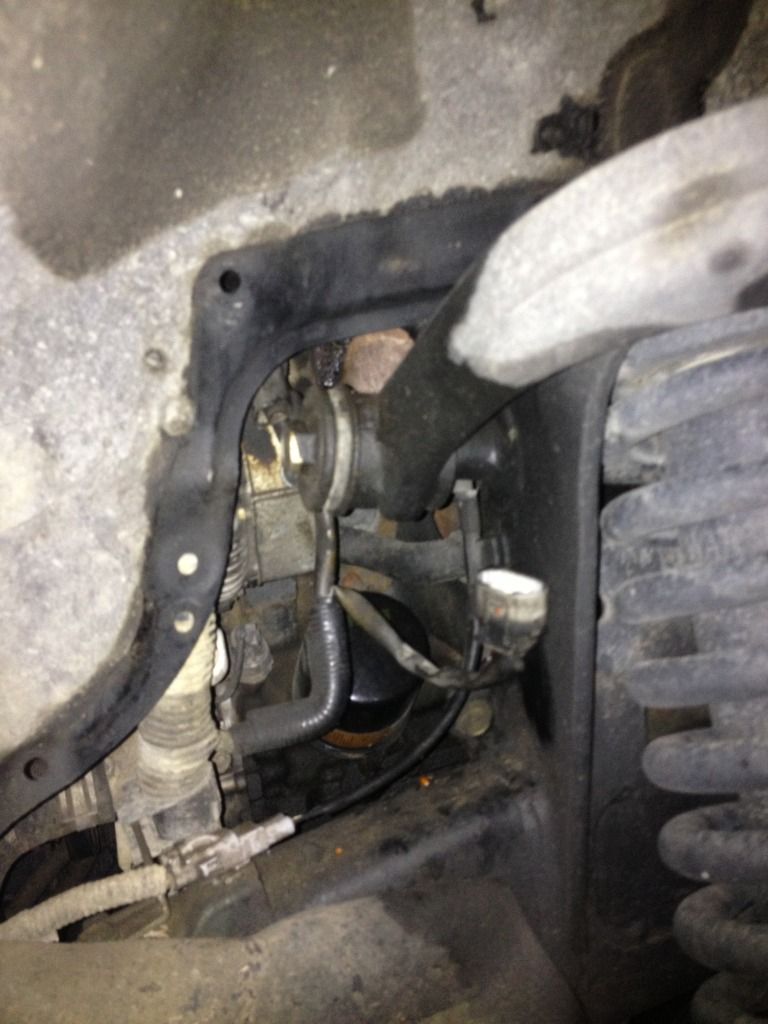
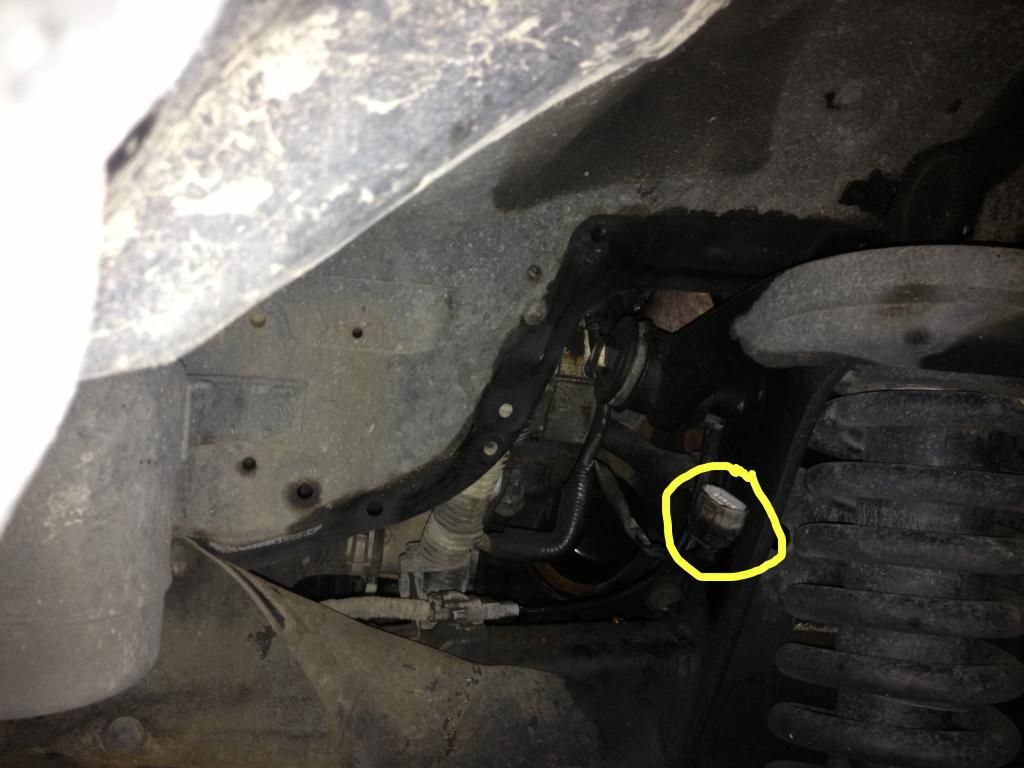
Back up top, remove the plastic cap covering the alternator wire, shown here. Unscrew the fastener and disconnect the wire.
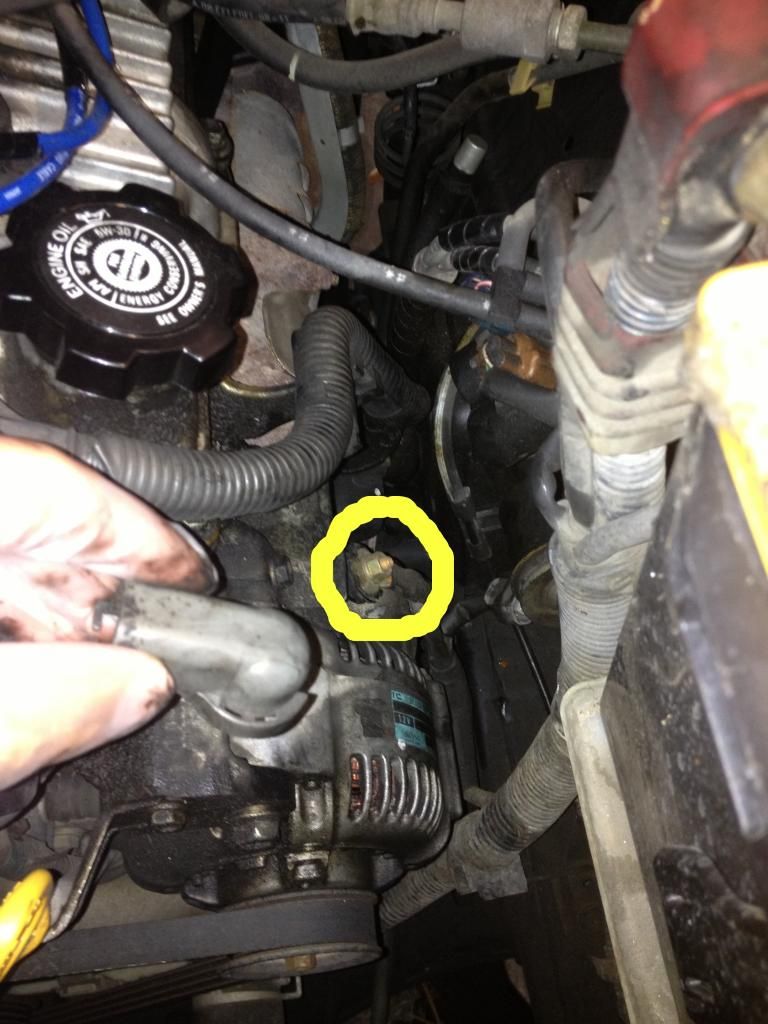
Now you must loosen the alternator's tension to remove the drive belt that cranks it. This tension can be released by loosening two fasteners until you can slip off the drive belt. Access fastener #1 from the left fender lining.
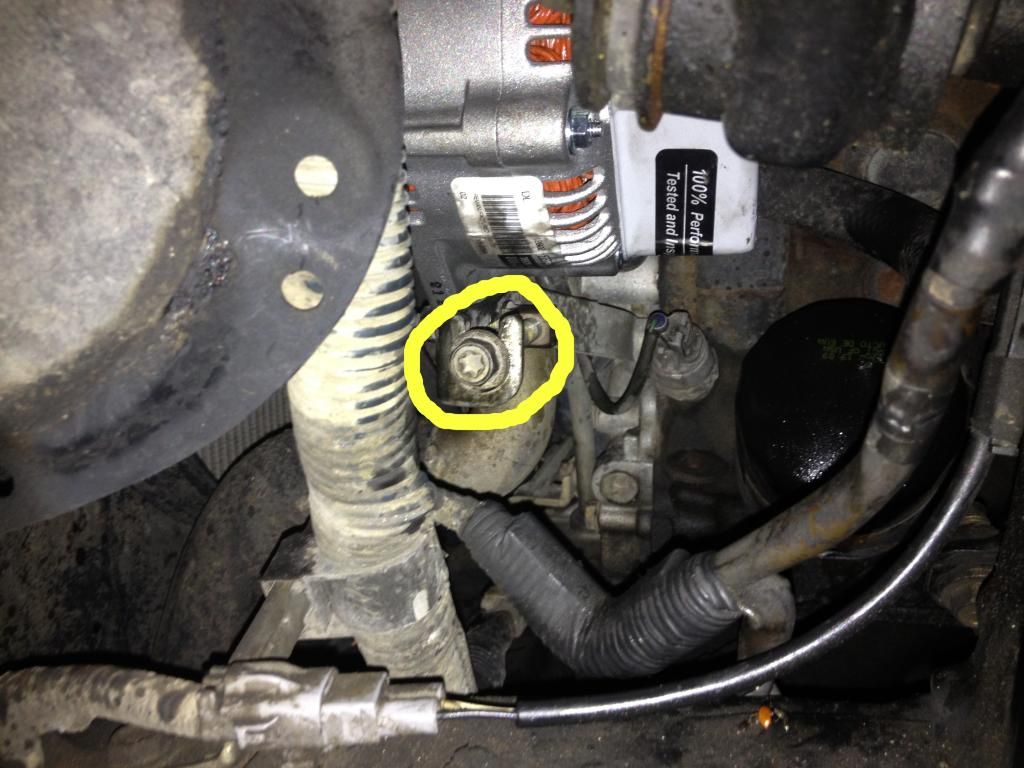
Next, loosen fastener #2, located under the drive belt pulley. First photo is for reference:

Second photo is the fastener itself:

Once these are removed, the bracket connecting the alternator to the fasteners should come right out. You will need this for the new alternator, so just set it aside for now.
After removing the fasteners and the bracket, the drive belt should just slip off, and the alternator should be held on only by the top pivot bolt, shown here:
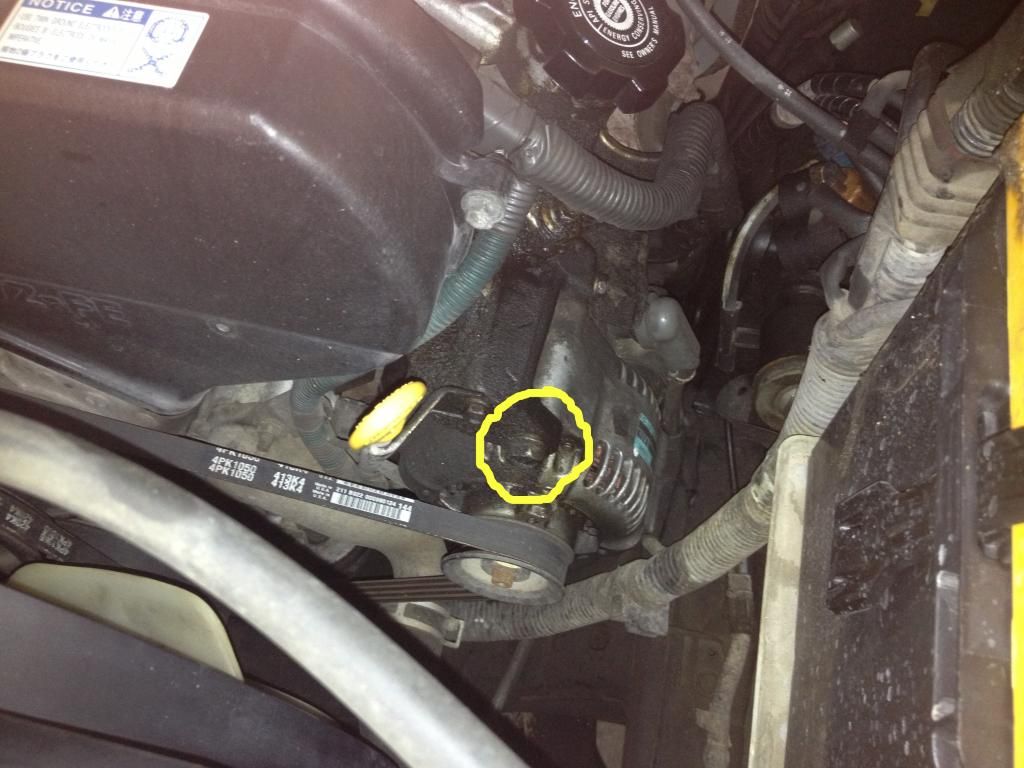
This is where I needed the band-aids. This sucker felt like it was glued in (on my vehicle at least), so be careful removing it! This requires a 14mm.
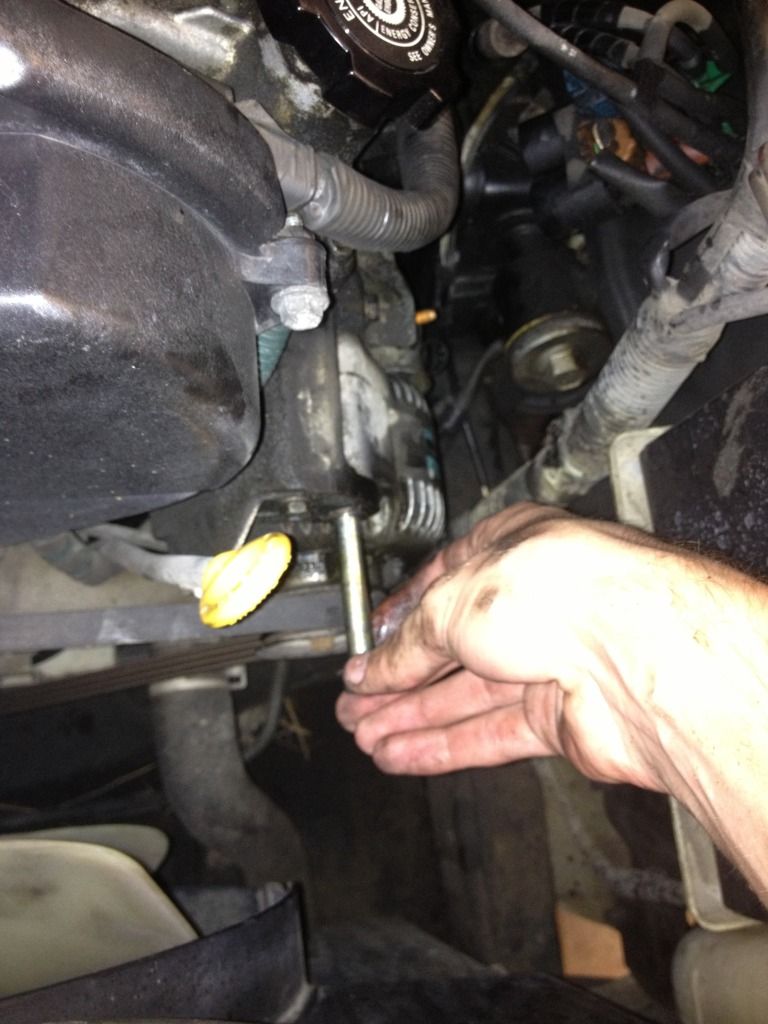
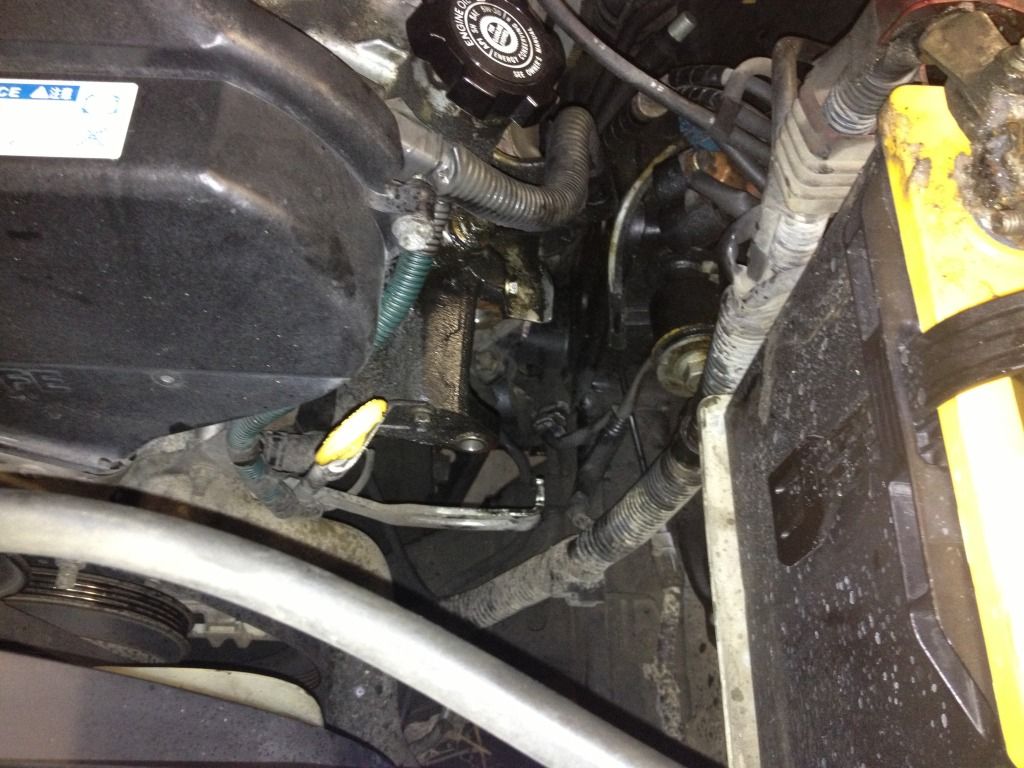
After removing the connector, wire, 2 fasteners with the bracket, the drive belt, and the top pivot bolt, the unit should come right out. However, I had issues from the build up, so use electrical cleaner here if you have to. Carefully but firmly remove it by pushing down until it breaks free, bring it underneath the metal that was holding it in place, and maneuver it until you can get it out through the space in between the engine bay, battery, and radiator.
OUT:
OLD vs. NEW
Installation of the new alternator is in the reverse order of disassembly. (See post #3 below)
What you will need:
new or remanufactured alternator
12mm Deep socket
14mm, and 10mm sockets
Di-electric grease
band-aids
gloves
electrical cleaner
Notice: While you have the alternator out, its a great time to replace the 4ga wires from the battery to alternator and the battery to engine ground.
Also, the adjuster bolt may be seized, so be ready to make a run to the hardware store for a replacement.
Because this was my first time replacing this part, it took me a little over an hour, from start to finish. If I was to do it again, it would probably take me about 15 minutes. The vehicle used in the demonstration is my 1997 limited 4x4. So let's get started!
First, whenever you park your car to replace this part, it is important to turn the steering wheel ALL THE WAY to the left. Like this:
Next, open up your hood and disconnect the negative battery terminal.
This is the beast you will be removing. The alternator is located on the front left side of the engine block, (reference you sitting in the vehicle facing forward) next to the dipstick, and is connected to a drive belt. Another way to describe it's location would be 4 inches down from the engine oil cap on the V6. Mine has crud all over it because of my leaky valve cover.
And this is what I replaced it with
It's probably not necessary, but for the new alternator I put di-electric grease in the plug for the connector here.
There are 2 methods you can use to give you enough space to remove the alternator. It has been suggested that removing the battery and the battery tray works just as well, if not better. Do what you think is best, and what works for you. For this write-up, I went through the fender lining.
When turning your steering wheel to the left, it allows you to gain access to an area of the fender lining that can be removed. Because the alternator is on the left side of the vehicle, you will need to remove these grommets under the left, front fender.
After removing these grommets, you should be able to gain access to the connector plug on the back of the alternator shown here. Push in on the clip, and pull out. Some people have reported problems removing this connector due to build up, so it might be best to spray some electrical cleaner on the connector before attempting this. The connector is shown below:
Back up top, remove the plastic cap covering the alternator wire, shown here. Unscrew the fastener and disconnect the wire.
Now you must loosen the alternator's tension to remove the drive belt that cranks it. This tension can be released by loosening two fasteners until you can slip off the drive belt. Access fastener #1 from the left fender lining.
Next, loosen fastener #2, located under the drive belt pulley. First photo is for reference:
Second photo is the fastener itself:
Once these are removed, the bracket connecting the alternator to the fasteners should come right out. You will need this for the new alternator, so just set it aside for now.
After removing the fasteners and the bracket, the drive belt should just slip off, and the alternator should be held on only by the top pivot bolt, shown here:
This is where I needed the band-aids. This sucker felt like it was glued in (on my vehicle at least), so be careful removing it! This requires a 14mm.
After removing the connector, wire, 2 fasteners with the bracket, the drive belt, and the top pivot bolt, the unit should come right out. However, I had issues from the build up, so use electrical cleaner here if you have to. Carefully but firmly remove it by pushing down until it breaks free, bring it underneath the metal that was holding it in place, and maneuver it until you can get it out through the space in between the engine bay, battery, and radiator.
OUT:
OLD vs. NEW
Installation of the new alternator is in the reverse order of disassembly. (See post #3 below)
Last edited:


