
Doc's Cavalry Blue TRD Pro Trips and Mods

docsnavely

New member
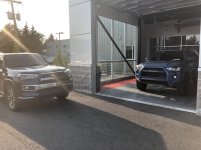
Hi all. Here's a new thread I'll be using to keep track of everything I've done to my new Cavalry Blue TRD Pro. It doesn't have a name yet so for now, it'll just be "the runner." I'll take suggestions from anyone. The kids want it to be the THICCRunner. I'm hesitant...

I traded in a 2015 Limited for this truck. I loved my RoadRunner so much, but at the end of the day, I wanted something more prepared for offroading than she was kitted out for. Here's some of her story.

http://www.toyota-4runner.org/5th-gen-t4rs/203610-docs-roadrunner-trip-mod-thread.html

I never got around to doing much with the Limited due to time constraints with work / family / school. That will be different with this new 4Runner. I've got lots of ideas thanks to the creativity of this forum. I just completed the first mod and wanted to share with everyone, hence the new thread.

I hope you enjoy.

Modifications

Permanent RAM Mount phone mount

Rexing V1LG Dual Dash Cam Install

3M Ceramic Tinting

AJT Design Key Replacement

Rear Emblem PlastiDip

AVS In-Channel Vent Visor

Interior LED swap

Trips

Tahuya State Forest ORV Trail/ Elfendahl Pass

Camping - Westport / Blackberry Campground
 

Attachments
  • IMG_0890.jpg
    IMG_0890.jpg
    133.3 KB · Views: 3,446
Last edited:
Register to hide this ad
Permanent RAM Mount phone mount

I'm on the road quite a bit for work and have never been happy with my phone mounting options. I have never wanted to take up an empty cup holder, and I do not want suction mounts, AC clips or sandbags on my dash. I have had a number of attempts over the last decade (since the first iPhone came out in '07) and have never been completely satisfied.

I have always used the RAM X-grip. I'm actually still using the same X-grip 10 years later, but always on different mounting solutions. The first method was by posting the X-grip on the 18" RAM pod secured to the front left bolt of the passenger seat. https://www.rammount.com/part/RAM-B-316-1-238U

This is what it looked like in my 2010 Prius III (I loved that car. It had a solar panel roof)
x5Glcvd.jpg


I moved that same set up to the Prius C when we bought it, and then to the Limited 4Runner when we bought it in 2015. By that point it was quite wobbly and the road vibration was just annoying. I needed a better solution.

I tried a proclip after reading multiple people here having success. I chose the center console one. https://www.proclipusa.com/product/834492-proclip-console-mount

Again I installed it while using the X-grip as the phone holster. I always have otterboxes or wallet cases so the X-grip is ideal for me. After a year or so, it just wasn't cutting it. Once again I started looking for options. I like the Expedition Essentials mount (https://expeditionessentials.com/products/toyota-4-runner-5th-gen-powered-accessory-mount-pre-order) but don't like that it covers the clock. There's a mod I'm planing on doing thanks to @Old Red.

So, onto the mod for this evening. A RAM mount installed into the trim of the head unit.

I removed the trim panels and followed the instructions found in multiple threads in this forum to get the head unit out. I contemplated drilling into the trim while still in the vehicle but I wanted to play it safe and see for myself how it would work. I first marked the holes for the 1" RAM mount ball with a sharpie before removing the head unit from the vehicle. I then lined it back up and verified it all once out of the vehicle.

koPcV5v.jpg


I drilled small pilot holes going as slow as I could and with no pressure applied. Even with the drill triggered at the slowest possible speed, it went through like a hot knife through butter. Do not rush this. After drilled out, I secured it using a handheld screwdriver. The trim isn't 100% flush with the ball mount so you need to be careful not to over-tighten your screws or you may strip your holes or worse, crack the trim.

KiF9uLL.jpg


After that, I went back out to the truck and got my USB cable set up. I have a 3m USB to lightning cable for my iPhone. I always plug in my phone to the truck's USB for a couple of reasons.

- The sound is better than bluetooth. Not that it matters now that I no longer have the JBL premium sound system, but still, no worries about losing connection.

- I use WAZE for daily navigation even when I really don't need to. It can be helpful even on my drive to work in case there is an accident or a closure. Since it is my nav and my music, I like keeping the phone plugged in. Yes, I know the factory USB doesn't have much power, but it's enough to not let the phone drain.

HmwAc1v.jpg


I then just closed it all up and decided instead of pulling the cable up by the steering column and risking the chance of it breaking free and wrapping my pedals or the column, I just let it be wedged between the head unit trim and the dash panel. It isn't crimped and looks pretty stealth without the need to drill a hole or use a punch out.

3t36DlT.jpg


And the finished product... It sits recessed enough where it doesn't interfere with the wiper stalk or the steering wheel. It has just enough room to be adjusted up down and about half an inch left or right.

rC4odor.jpg


And here is the part list from Amazon.

RAM Mounts RAM-B-238 RAM 2.43" x 1.31" Diamond Base with 1" Ball

Ram Mount Composite Short Double Socket Arm for 1-Inch Ball Bases

RAM Mount Universal X-Grip IV Large Phone/Phablet Holder with 1-Inch Ball
 
couple of quick questions, if you don't mind:

I'm interested in maybe doing this -- I already have most of the RAM parts you used. But I'm curious about the screws you used to attach the ball mount to the head unit trim - were they the screws that came with the RAM mount?

It seems to me that's pretty thin plastic, and screwing into it with what are essentially a couple of wood screws (the ones that came with my RAM gear), well I just wonder about how secure everything would be with this kind of connection. Would it be feasible to use nuts and bolts with relatively large washers on the inside of the panel to help stabilize everything?

With your install, how solid is the phone while you're driving? Does it take a lot of vibration mounted this way?

Thanks in advance!
 
I'm really interested in how you ran the lightning cable. You tucked it behind the trim at the top where the RAM mount is, but how does it egress from behind the trim down where the USB port is?
 
I'm interested in maybe doing this -- I already have most of the RAM parts you used. But I'm curious about the screws you used to attach the ball mount to the head unit trim - were they the screws that came with the RAM mount?


It seems to me that's pretty thin plastic, and screwing into it with what are essentially a couple of wood screws (the ones that came with my RAM gear), well I just wonder about how secure everything would be with this kind of connection. Would it be feasible to use nuts and bolts with relatively large washers on the inside of the panel to help stabilize everything?


With your install, how solid is the phone while you're driving? Does it take a lot of vibration mounted this way?


Thanks in advance!

I did use the wood screws that originally came with the ball. In all honesty they are deep enough to do the trick without gouging the AC outlet or mechanism. I was thinking the same thing as you, but to use a nut and washer inside the trim, it would need to be a small (maybe 1/8” thick) nut. Not saying it can’t be done, it’ll just need to be done carefully by someone with smaller fingers than me. That will be the way to go for me if these screws back out or become stripped for some reason.

It is rock solid stable. No wobble or wiggle. Granted, I didn’t test it out on a long drive yesterday when I was done, but I made sure to hit every pothole, manhole cover and storm drain possible and nary a flinch. It really feels like it is a part of the vehicle now. No vibration at all.


I'm really interested in how you ran the lightning cable. You tucked it behind the trim at the top where the RAM mount is, but how does it egress from behind the trim down where the USB port is?


It comes out between the AC control panel and the “what the hell do I do with this console.” It is plugged into the usb and I left about 2” of a loop before it enters in behind the bottom of the AC controls. If you look closely in the last pic and zoom in, you might be able to see it.

I did it this way so when we’re on trips, The kids can plug their phones in to listen to their music, or for when I mount an iPad for nav, I can use that ISB as well if I do choose. Plus if something else is using the USB for the truck, I left enough length at that end so I can plug a cigarette lighter charger in and use that to charge my phone with the same cable I ran.


Sent from my iPhone using Tapatalk
 
Rexing V1LG Dual Dash Cam Install

My wife purchased this dash cam for me on Prime Day as an "investment" for our new 4Runner before it arrived from the port. After the camera came in and I did a bit more research, I added on a 64gig class 10 micro SD card and the Rexing hard wire kit.

5xy0vBo.jpg


Let's get started...

Cleaned the windshield and sized up the placement. I peeled the backing off one side of the two sided tape and stuck it to the bracket. I then installed the bracket, peeled the other side of the tape and stuck it all onto the windshield making sure not to catch the pattern of the "third visor" dots in the camera's field of view.

OXsbBZa.jpg


Once that was done it was time to fish the power wire down to the internal fuse box. I started at the camera so I wouldn't have any excess cabling sitting in my face while driving.

YDH6s8U.jpg


MGqBFpX.jpg


I looked all over the forum and couldn't find if anyone had identified which empty fuse circuits were live or only on as an accessory with ignition. As such, I pulled out my multimeter and went to town. I should have done a public service and identified them all, but I didn't think about it at the time.

I want it to be on with ignition for right now (so I picked the circuit circled below) but will move it to a continuous circuit once I get a dual battery setup or an AGM with a solar panel.

KQ75ope.jpg


VCUjtLh.jpg


IOhOO8P.jpg


IT'S ALIIIIIIIVE!

lLCV3TT.jpg


Now it's time to run the rear camera line...

ZeYENtN.jpg


nTKymEE.jpg


9Uqv50S.jpg


The next issue we have is how to secure the rear camera. It is intended to be secured with two sided tape, but how do we do that with a rear window that opens frequently with good weather or onto a felt headliner? We don't, that's how. I saw someone else online solve this problem with a piece of plastic but my wife came up with a better idea...

k5SkMpl.jpg


This is the driver's side center button at the rear of the headliner. You can use any one you wish.

0ZqRFxX.jpg


Measure twice...

iaUKnsM.jpg


Cut once. Don't use a dremel unless you want to melt plastic. After messing up one side of the faceplate, a hacksaw produced the desired outcome. I did drill out the hole a little bit to fit the button better. I didn't take a picture since everyone knows how to use a drill.

YP592mq.jpg


Mjj0CP5.jpg


Last thing to do is wrap up the excess cabling and tuck it away into the D pillar. Plenty of room in there! Keep that in mind if you need a secret spot. :lock1:

OtFxrgh.jpg


Parts List

Rexing V1LG Dual Channel Car Dash Cam FHD 1080p

Rexing Hardwire Kit for Rexing V1LG Dash Cameras

Sandisk Ultra 64GB Micro SDXC UHS-I Card with Adapter


As always, let me know if you have any questions. Thanks for reading.
 
Last edited:
New Shades

Today we had 24% 3M Ceramic Tint installed on the front windows and an appropriate level to the rear to match as close as possible taking into account the stained glass from the factory.

It's difficult to see the true shade of this since the before picture was taken this morning when it was hazy/smoky out and the after pic was in direct sunlight.

BEFORE
R91vzyC.jpg


AFTER
VUWWVdw.jpg
 
Absolutely love the Cavalry Blue. I had ceramic tint installed in mine too by my buddy who owns a tint shop. The difference in heat transfer between the ceramic and standard tint is unbelievable. Totally worth the money, IMO.
 
Agreed. I will pay the premium for ceramic every time. There is essentially little to no radiant heat compared to regular tinting.
 
Trip to Elfendahl Pass

Went on a spontaneous trip to the Tahuya State Forest's ORV Trails. I was planning on washing and waxing her for the first time today, but decided she needed to be dirtier than she was before I broke out the detailing equipment.

It really isn't an ORV park, but more of a bunch of semi-maintained trails managed by the Washington DNR. Had a blast taking the 4Runner on her first off road adventure. Scared the crap out of my wife, earned some pinstripes, and scuffed up the gas tank plate pretty good. I was previously thinking sliders would come first, but now I'm considering full skid plates...

lLwxujg.jpg


7lAtT8H.jpg


And then she got a bath and her first waxing. Used a new foam cannon with our pressure sprayer. Worked really well!

Foam Cannon Adjustable With 1/4" Quick Connector Foam Blaster for Pressure Washer Gun Car Pressure Washer


0K1Ckgw.jpg


p4TG5PZ.jpg


And the scuffed up gas tank plate. I say it is scuffed because that sounds much better than scratched and dented...

ZdXL6Ub.jpg
 
AJT Design Key Replacement

A couple weeks ago I changed out one of my keys using the kit from AJT design. I should have done a bit more review prior to purchasing. This is my first physical, non-fob key in about 8 years. I was expecting the teardown from old key to new to be similar to a prius fob teardown. I was definitely wrong.

The video on the AJT website for a 4Runner key change out is helpful, but only if you watch it in advance in full prior to starting. He even recommends searching youtube for other videos that are more helpful. I would just do that first.

The only word of caution I have is to protect the transceiver chip as much as possible. Mine was sunk in the body of the key with a ton of glue. The chip itself is quite fragile and feels like graphite. It is an awkward shape so if you are worried you took a chunk off a corner of it, you likely didn't, that's just the shape.

As for assembly, it is very easy once you have the chip and metal key out.

Also, I made the mistake of ordering from Amazon instead of from the guy directly. If I would do it over again, I would order direct from him so I could get the red screws in lieu of black.

Anyway... pics:

BwyTxbX.jpg


Ffc6Wtg.jpg


EAy6sOl.jpg
 
Last edited:
Rear Emblem PlastiDip

I did my first plastidip. I feel it went well. It ended up very coarse after 6 coats so I can't wipe down the gaps between letter well unless I want a lot of lint or paper towel dust on the letters. I used a number of videos on YouTube to lead the way as well as the multiple posts on here.

The only thing I would do differently would be to put a small piece of tape in the gaps of the Toyota emblem so I have something to pull on to break the plastidip seal.

2hxSdUW.jpg


WmN3csF.jpg
 
Camping - Westport / Blackberry Campground

Last weekend I took the wife, kids, and new 4Runner for their first camping trip of their lives. Despite the kids' past complaining and general teen angst about sleeping outside and not showering for a day, they loved it and wouldn't quit asking when we can go out again.

First night was at Twin Harbors State Park in Westport, WA.

weG0sJ1.jpg


7XNtPka.jpg


oZojjTD.jpg


Second night was at Blackberry Campground, a Forestry Service campground in the Siuslaw National Forest in Tidewater, OR.

ibWzZBQ.jpg


And on the way home, we had to make a stop at Voodoo Doughnut. It's a mandatory stop.

aOFJaJs.jpg
 
AVS In-Channel Vent Visor "Install"

Rainy season is upon us. We've had unseasonably beautiful weather, but the rains are a comin' next week so I thought I'd go ahead and install these while it's still dry out.

Due to my work and school schedules, I don't have time for anything but the simplest of "modifications." These visors fit that category.

The set installed is the second set I've received. The first set that came from Amazon had very poor QC. There wasn't enough plastic trimmed to fit the window sills properly, and the tape was put on by someone who suffers from Parkinson's and is partially blind. Needless to say, the replacement set was perfect.

mdPLW3h.jpg


tNuYxo6.jpg


Amazon: Auto Ventshade 194242 In-Channel Ventvisor Side Window Deflector, 4-Piece Set for 2010-2018 Toyota 4Runner
$53.79 with Prime
 
Interior LED swap

Back at it with a cheap.... very cheap modification that took less than an hour to perform.

I purchased a 10 pack of 194 LED bulbs and a 4 pack of 3175 LED bulbs from Amazon for a whopping $20. I watched the youtube video from TRD Jon for inspiration and guidance on how to best pull the lights without ripping up my headliner. He also recommended the bulbs which on initial run look much better than the halogens and for a third of what I was planning on paying for a kit from one of those online auto bulb stores.

Here's the before and afters with links to the bulbs down below.

OEM halogen and LED 194 bulbs (nice because they are dual polarity which means they work no matter which side is up):
0HK3cga.jpg


Map, hatch, and dome lights BEFORE:
4rtGCnM.jpg


Hatch lights and dome AFTER:
wvZxNiD.jpg


Map, hatch, and dome lights AFTER:
EOzbYMT.jpg


Driver's door BEFORE:
EP2tSQm.jpg


Driver's door AFTER:
5XTJF3i.jpg


I lied. I didn't just do the interiors. Since I forgot to take pics of the vanity lights, I took pics of the license plate light swap.

Plate lights BEFORE:
37z3Sxy.jpg


Plate lights HALF:
3S7S873.jpg


Plate lights AFTER:
QqBO9HS.jpg


License Plate

Doc thanks for this build thread. What bulbs did you use for the license plate lights...Yorkim or Oxilam.
 
Doc....for the dashcam setup, would I need to purchase (2) of the "Rexing Hardwire Kits" ? Or will just the one be for both cams (front & back)! Thanks for the help and for documenting the build! I own a Cav Blue as well...

Edit: Nevermind! Just figured it out...the rear cam plugs into the front cam. I was thinking it was a separate run to the fuse box.
 
Last edited:

Members online

Forum statistics

Threads
278,309
Messages
3,554,071
Members
248,016
Latest member
Advally Service

Trending content

Back
Top