Driver Door Replacement

Sarki

Member
Getting ready to swap out my driver’s door assembly. Did a fly & drive when I bought my 4TR last year.
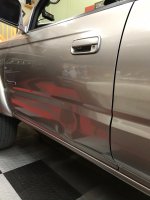
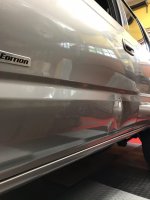
Some really considerate individual hit the door while parked at a rest stop on way back home, no sorry, no note, just a nice dented door.
Anyway....found replacement door in same color w/original paint.
Getting ready to swap it out and wondering about compatibility issues regarding power locks & key fob, etc.
Intending to transfer door handle assembly with lock cylinder from original door to replacement door. Any additional parts I need to transfer from original door to replacement door in order to have smooth transition with remote key fob and power accessories.
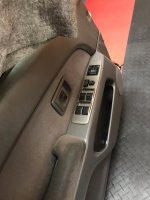
Replacement door came w/master power control switch for windows, locks & mirrors.
Seems straight forward but if anyone has any helpful tips much appreciated.
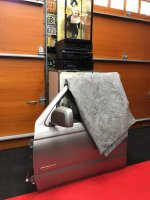
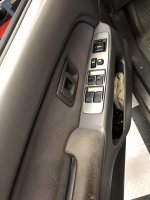
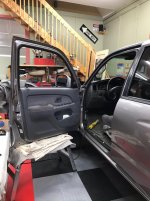
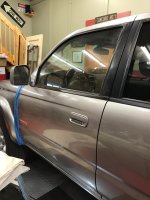
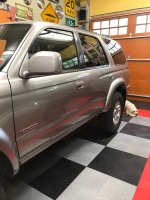
Original and replacement doors pictured below:
 

Attachments

  • 3472F27D-C3FE-44E6-9C05-E8B61C08D444.jpg
    3472F27D-C3FE-44E6-9C05-E8B61C08D444.jpg
    121.2 KB · Views: 2,848
  • 7BC280D7-C673-41FB-9BD1-E6C32405EE14.jpg
    7BC280D7-C673-41FB-9BD1-E6C32405EE14.jpg
    120.1 KB · Views: 2,681
  • 4170F7BF-775B-424B-AD65-913DCEA92D82.jpg
    4170F7BF-775B-424B-AD65-913DCEA92D82.jpg
    133.3 KB · Views: 2,675
  • F9B7A00E-2EC6-4316-A1D1-39B509AECD7D.jpg
    F9B7A00E-2EC6-4316-A1D1-39B509AECD7D.jpg
    130.3 KB · Views: 2,688
  • 97FB3CE9-1ED4-4C6E-8148-A7E0D3754703.jpg
    97FB3CE9-1ED4-4C6E-8148-A7E0D3754703.jpg
    130.2 KB · Views: 2,711
Register to hide this ad
Getting ready to swap it out and wondering about compatibility issues regarding power locks & key fob, etc.
Intending to transfer door handle assembly with lock cylinder from original door to replacement door. Any additional parts I need to transfer from original door to replacement door in order to have smooth transition with remote key fob and power accessories.
Replacement door came w/master power control switch for windows, locks & mirrors.
Seems straight forward but if anyone has any helpful tips much appreciated.
Original and replacement doors pictured below:

I don't think you will have to swap any of the wiring, I'm guessing the doors are the same year based on it being a sport edition? But to get the lock cylinder you will have to pull the interior panels and cut the adhesive for the plastic moisture barrier anyways. So I'd get the lock cylinders swapped (I can't remember if the window has to be up or down to get to the bolts...), mount the new door on the truck and re-connect the wiring harness to test everything before putting the panels back on.

When I swapped my driver door it was helpful to have a second set of hands to hold onto the door and something just tall enough to fit under the bottom side of the door to have it rest on while unbolting the hinges.
 
Last edited:
I'm guessing the doors are the same year based on it being a sport edition? But to get the lock cylinder you will have to pull the interior panels and cut the adhesive for the plastic moisture barrier anyways. So I'd get the lock cylinders swapped (I can't remember if the window has to be up or down to get to the bolts...), mount the new door on the truck and re-connect the wiring harness to test everything before putting the panels back on.

When I swapped my driver door it was helpful to have a second set of hands to hold onto the door and something just tall enough to fit under the bottom side of the door to have it rest on while unbolting the hinges.

Yes, replacement door is from same year (2002) and exact same Sport package so everything is identical.
Unfortunately i’ll be doing this solo but I get your point about an extra set of hands as that door assembly is heavy. I’ll rig up something to help support the weight.
Going to install the outside handle assembly w/lock cylinder from original door to the replacement door so no issues with the key.
I don’t want any issues with the remote key fob as far as the auto locks.
Anything i’m overlooking or all good as far as key fob by swapping out the outside handle assembly?
 
[MENTION=118429]Sarki[/MENTION] . I wouldn't even try to swap a door myself. It really best to have 2 people as soon as you get the hinge bolts started in. You can do it yourself. So it doesn't take too long but makes the job so much easier. :)

Sent from my SM-J337V using Tapatalk
 
what about window down and a rope from upper frame up to rafters of garage to hang door on to take weight
 
what about window down and a rope from upper frame up to rafters of garage to hang door on to take weight
Better then nothing but it's a 5 min job per door with 2 people. Might take quite a while with only one.

Sent from my SM-J337V using Tapatalk
 
Better then nothing but it's a 5 min job per door with 2 people. Might take quite a while with only one.

Sent from my SM-J337V using Tapatalk

Thinking i’ll rig something up with hi-lift floor jack to support the weight as I align the hinges and door check and start to draw in a couple of hinge bolts.
Looks like need to remove inside lower hinge pillar trim panel to access connections for wire harnesses to door.
Probably more likely to enlist help from the dog rather than the wife!
 
Plug and play, nothing to worry about besides the lock cylinder. It's fairly straightforward to do. I've done it myself plenty of times. Helps to take the front fender off to get the bolts in and out without marring either one.

Sent from my JSN-L23 using Tapatalk
 
Thinking i’ll rig something up with hi-lift floor jack to support the weight as I align the hinges and door check and start to draw in a couple of hinge bolts.
Looks like need to remove inside lower hinge pillar trim panel to access connections for wire harnesses to door.
Probably more likely to enlist help from the dog rather than the wife!

Lay a bunch of masking tape on the edges of the fender/door to prevent damage. Take everything you can out of the door before bolting it up. The bare shell weighs like 20lbs, then all the other crap makes it 50lbs.
 
Thinking i’ll rig something up with hi-lift floor jack to support the weight as I align the hinges and door check and start to draw in a couple of hinge bolts.

Looks like need to remove inside lower hinge pillar trim panel to access connections for wire harnesses to door.

Probably more likely to enlist help from the dog rather than the wife!
Bummer. It's a shame I had my dad help me when I swapped 4 doors. Excellent idea to get some tape and foam on those fenders to keep from scratching them. One of those section cup jack stands with some safety straps. Would do it too. Just don't know where you rent one. :(

You mostly see the windshield folks use them..:)

Sent from my SM-J337V using Tapatalk
 
Lay a bunch of masking tape on the edges of the fender/door to prevent damage. Take everything you can out of the door before bolting it up. The bare shell weighs like 20lbs, then all the other crap makes it 50lbs.

Great minds think alike......went out this morning and picked up a roll of 2” wide blue painters tape after reading response from [MENTION=90352]UnderFire[/MENTION].
I have 2 floor jacks so hoping to support the weight with them.
 
Mission accomplished.
Realized my portable work platform courtesy of Northern Tool was the perfect height with a couple of drop clothes used for padding to support the door as unbolted the old and bolted up the new.
Was easier to detach the door from the hinge rather than the hinge from the pillar.
Swapped over the lock cylinder from old door to replacement and all is working well.
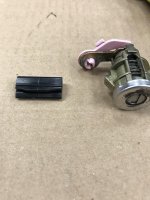
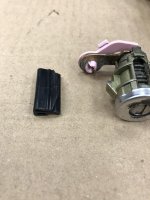
The black clip in the last few pictures dropped from behind the trim panel when I removed the panel from the old door and same thing happened when removed panel from replacement door.
Where the hell does that clip go and what is it’s function.

Thanks to those who provided suggestions.
The list continues:
*Valve cover gaskets
*LBJ with inner & outer tie rod ends
*Rear axle bearing, seals and new backing plates for the brakes
 

Attachments

  • CBFA6C82-B9C1-42FE-AEEF-93D82DE3AD38.jpg
    CBFA6C82-B9C1-42FE-AEEF-93D82DE3AD38.jpg
    132.3 KB · Views: 2,849
  • 5AC18975-357B-4774-8E92-99473511EA8C.jpg
    5AC18975-357B-4774-8E92-99473511EA8C.jpg
    126.6 KB · Views: 2,596
  • B218BB6F-4F28-4C04-A24A-56747E94FABE.jpg
    B218BB6F-4F28-4C04-A24A-56747E94FABE.jpg
    132.6 KB · Views: 2,558
  • A82F0ACC-0B68-448C-AD54-C3FDF3FE361C.jpg
    A82F0ACC-0B68-448C-AD54-C3FDF3FE361C.jpg
    131.2 KB · Views: 2,524
  • 07CFAC68-B694-4782-BD57-752FB1F09959.jpg
    07CFAC68-B694-4782-BD57-752FB1F09959.jpg
    130.4 KB · Views: 2,518
Last edited:
Looking good. Hopefully you scrubbed that arm rest/handle before you re-installed it. They clean up pretty easily...

If the tie rods are tight, no need to replace them (not a safety issue like the LBJ). Also, if you think there is any chance you need a new steering rack, the OEM one comes with new ITR's, and makes it a good deal compared to questionable aftermarket options.

-Charlie
 
Looking good. Hopefully you scrubbed that arm rest/handle before you re-installed it. They clean up pretty easily...

If the tie rods are tight, no need to replace them (not a safety issue like the LBJ). Also, if you think there is any chance you need a new steering rack, the OEM one comes with new ITR's, and makes it a good deal compared to questionable aftermarket options.

-Charlie
Would love to know what your process was for scrubbing the armrest fabric as I have tried on both doors with no success. Maybe the fabric/material on the Sport package is more difficult to clean than others but please share any suggestions.

Steering rack seems ok but there is minimal play in the front end so thought tie rod ends may help.

LBJ’s were replaced under recall at 60K but now have 180K so figured it was due for another set. I see they have the plastic protectors on them so thinking that means the lower torque numbers when I replace the LBJ as well as the 4 bolts each side......correct?
 
Would love to know what your process was for scrubbing the armrest fabric as I have tried on both doors with no success. Maybe the fabric/material on the Sport package is more difficult to clean than others but please share any suggestions.
The 01/02 fabric is a bit more delicate looking/feeling than the earlier stuff... I just took the whole thing off, got it wet, sprayed with simple green and scrubbed with a fingernail brush, rinse well, and let it dry. You can do a similar process with the seat belt if it is retracting slowly (just make sure it fully dries before you let it retract back into the reel).

You can't do that with much else on the interior since it doesn't come out so easily (then again, I did launder my front seat covers after removing them...).

-Charlie
 
What’s the trick to getting the door longed up just right? My passenger door seems to be miss aligned a bit. It could just be the latch though because when closed the gap that I notice the most is on that end. It looks like you just didn’t shut the door good enough but it will not close anymore and the latch and lock both engage
 
The 01/02 fabric is a bit more delicate looking/feeling than the earlier stuff... I just took the whole thing off, got it wet, sprayed with simple green and scrubbed with a fingernail brush, rinse well, and let it dry. You can do a similar process with the seat belt if it is retracting slowly (just make sure it fully dries before you let it retract back into the reel).

You can't do that with much else on the interior since it doesn't come out so easily (then again, I did launder my front seat covers after removing them...).

-Charlie

Thanks for the tip Charlie. Will give it a shot tomorrow and see how it works out.
Seat belt is slow to retract, same as my T100. Will also give that a try and advise on results.
 
What’s the trick to getting the door longed up just right? My passenger door seems to be miss aligned a bit. It could just be the latch though because when closed the gap that I notice the most is on that end. It looks like you just didn’t shut the door good enough but it will not close anymore and the latch and lock both engage

If there’s any adjustment it would be in the lock or striker as there was no adjustment in the hinge where it mounts to the door.
 
Did this about a month ago- it’s not too bad. I actually had to completely swap the wiring harnesses because they were from different years and didn’t match up, but everything including the locks work. The lock is actually pretty easy, I used this video and it was really helpful: https://www.youtube.com/watch?v=XcujVZB7k60&feature=youtu.be
Just be careful with the plastic clips they seem to get softer and break easier when they’re old.
 
The 01/02 fabric is a bit more delicate looking/feeling than the earlier stuff... I just took the whole thing off, got it wet, sprayed with simple green and scrubbed with a fingernail brush, rinse well, and let it dry. You can do a similar process with the seat belt if it is retracting slowly (just make sure it fully dries before you let it retract back into the reel).

You can't do that with much else on the interior since it doesn't come out so easily (then again, I did launder my front seat covers after removing them...).

-Charlie
Hey Charlie thanks for the tips on cleaning that armrest.
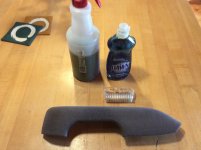
Took your advice, removed the cushion assembly and worked it with fingernail brush, warm water, Simple Green and Dawn dish soap.
Blotted it dry with clean white terry cloth towel and repeated 2X. Set it in the sun for couple hours for final dry.
Came out great, thanks again!
 

Attachments

  • F93718FF-A2E5-4857-A503-F3F1AAE436A6.jpg
    F93718FF-A2E5-4857-A503-F3F1AAE436A6.jpg
    125.9 KB · Views: 530

Members online

Forum statistics

Threads
278,304
Messages
3,554,041
Members
248,016
Latest member
Advally Service

Trending content

Back
Top