Dual Battery Build Thread

I started this thread to chronicle the dual battery system we’re currently putting together. It’s being installed in a ’17 Toyota 4Runner but can easily be adapted to just about any vehicle.
I’ve got some experience in wiring lights and building fuse/relay panels, but for this project I’ve asked for help from a company that specializes in designing and installing dual battery systems. They’re helping with the more technical aspects to make certain everything does what it’s supposed to do, all the parts are compatible with one another, and it performs safely and efficiently.

To begin I’ll list what our needs and wants are from our system.

• Simplicity in design and function. This will reduce the chance of component/part failure and make field repairs simpler.
• Must not jeopardize the starter battery’s charge. We often do solo vehicle trips into very remote places so having juice to start the engine in the morning is paramount. However, the second battery needs to have the capability to perform an emergency jump start via jumper cables in an emergency.
• Posses the most current technology. We don’t want to invest in a system that’s already out of date, obsolete, or will be soon. It also needs to work best and most efficient with our vehicles charging system. Many of the older systems don’t work well with our “smart” alternator.
• Our power needs are fairly typical; a fridge, some low amp LED works lights, and the ability to quickly charge camera batteries. We’ll remain using the starter battery to power auxiliary running lights and the winch.
• The ability to easily add a solar panel to supplement the charging when the engine isn’t running. This we’ll likely be adding at a later date. When we do, we’d like to be able to simply plug the panel in with no need for additional components.

All the pieces of the puzzle have been chosen and placed on order. As things progress I’ll be posting pictures, explaining the reasons why we chose the parts we did, basic specifications, and of course how everything goes together. When it’s all over and done with I’ll be producing a video detailing the actual nuts and bolts of the install.

This is going to be a fun project! Merri and I hope you come along for the ride.

 

Attachments

  • OB_thumbnail_small.jpg
    OB_thumbnail_small.jpg
    74.1 KB · Views: 2,057
Register to hide this ad
What started us down this path to dual batteries was the inconvenience of buying ice for the cooler almost every day. Forever our trips have been partially routed and planned according to where we could buy ice. We would often times drive many, many miles out of our way in order to keep our food from spoiling and our beer cold.
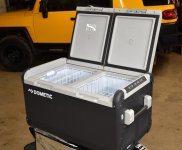
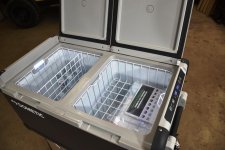
Last fall we finally broke down and bought a fridge, a Dometic 75DZW. Yup, the big one. Now we need a way to power it!

Our wants and needs that lead us to this particular unit is as follows:
• We wanted a brand that’s known for its reliability, durability, and has an excellent reputation for standing behind their products.
• A unit that was big enough to hold enough food for two people for up to seven days.
• It needed to be as energy efficient as possible, compared to other brands its size.
• It had to have a drain in the bottom to facilitate easy clean-ups, in case of an accidental spill and routine cleaning.
• Both AC and DC capabilities. For times when we want to use it in our camping trailer.
Additional features it has that are a bonus:
• Split in to two compartments. One side can be used as a freezer. Just in case we need to make ice for someone we have along that has a cooler. 
• Bluetooth controls and monitoring device. We’ll easily be able to keep an eye on it and make adjustments while we’re driving.
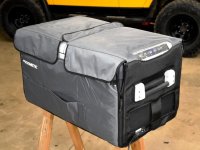
• Although it came with an additional cost, an insulated cover. This will add to its efficiency but still provide easy access.
 

Attachments

  • DSC_0008.jpg
    DSC_0008.jpg
    43.7 KB · Views: 2,111
  • DSC_0007.jpg
    DSC_0007.jpg
    53.3 KB · Views: 2,117
  • DSC_0006.jpg
    DSC_0006.jpg
    53.3 KB · Views: 2,106
Subscribed. I just bought the CFX 50W and went with an arkpak with a quality deep cycle battery and solar panel. It will be nice to see your battery install in case I go that route.
 
subscribed.
Also trying to figure all this out before i buy the fridge. Hopefully you guys answer all my questions, lol
 
I’ll be doing. Very similar install in the new year with REDARC gear. The BCDC works with out alternators, allows charging options for different battery options and can easily incorporate solar with MPPT. By adding the Smart Start SBI, it gives boosting ability from the second battery with the push of a button!


Sent from my iPhone using Tapatalk
 
This needs to happen to my truck before we head off to Colorado in September. I will be paying close attention to this thread. I also love your videos.
 
One of the first mods I did was I installed a National Luna Dual Battery Controller along with an Optima Yellow Top Battery. Had to relocate the secondary air injection pump and move the power steering res a little but if you get the Shrockworks relocation kit it comes with everything you need and a super good write up on exactly how to do the relocation.

Definitely took an entire day to run all the wiring but worth it knowing how its all put together and saving a little cash by doing it myself.
 
Battery, Battery Mount, and Position of Mount

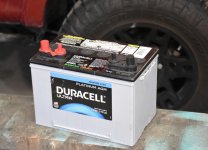
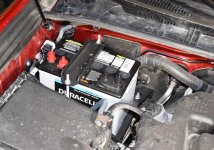
It's possible to pay a boat load of money for a battery if we wanted to. We didn't want to. After a lot of research we decided on a Duracell Ultra Platinum, AGM, BCI Group 34M, Deep Cycle, Dual Purpose battery from our local Batteries+ store. Just shy of $200 and It came with a four year free replacement warranty. We went with a dual-purpose or hybrid battery for the ability to use it for an emergency jump-start.

For our 4Runner there's three likely positions for a second battery.
1. Side by side with the starter battery.
Pros-
• Mounting them both there would leave plenty of room under the hood for other things, like a compressor. (We have ours mounted in the rear)
• The cables connecting the two would be extremely short; less power drop, a tidy install.
Cons-
• To fit two batteries in that space it looks like we'd have to downsize them. We want to keep the starter battery the stock size and, since it's only a year old, we want to keep it.
• That area next to the engine would be very cramped.

2. Passenger side, up front near the radiator.
Pros-
• This spot provides a nice flat, sturdy spot for mounting a universal tray.
• Cables would be short, just a radiator's width apart.
Cons-
• We would need a kit to relocate the air pump that's already in this position, adding to the overall cost.

3. Passenger side, near firewall.
Pros-
• More than enough room for a large battery.
• No modifications needed to existing components.
Cons-
• Takes a special, somewhat elaborate battery tray to securely hold
battery.
• Connecting cables would be at their longest of the three choices.

For us choice #3 was the best choice. Now how to mount it there.
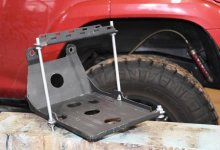
Choice of well made battery trays for this location is limited. We went with one from C4 Fab. primarily for the lower cost but after receiving it we were impressed by its ruggedness. There's no worries about it failing or bending! It does come only in bare steel but that's easily handled with some good surface prep and a rattle can of flat black. Bolting it in is a quick and easy job, two bolts at the bottom, bolt a bracket to the firewall, then two bolts sideways into the fenderwell.
 

Attachments

  • battery2.jpg
    battery2.jpg
    81.5 KB · Views: 1,901
  • battery_tray.jpg
    battery_tray.jpg
    51 KB · Views: 1,848
  • battery.jpg
    battery.jpg
    99.5 KB · Views: 1,974
For us choice #3 was the best choice. Now how to mount it there.
Choice of well made battery trays for this location is limited. We went with one from C4 Fab. primarily for the lower cost but after receiving it we were impressed by its ruggedness. There's no worries about it failing or bending! It does come only in bare steel but that's easily handled with some good surface prep and a rattle can of flat black. Bolting it in is a quick and easy job, two bolts at the bottom, bolt a bracket to the firewall, then two bolts sideways into the fenderwell.

Can you explain why choice #3 was the "best choice" for your application?

Also can we end the whole mystery thing and get a complete parts list that you ordered?

An finally can you show a pic of the battery tray with out the battery? Does this tray address the weakness of the fender in that area?

Thanks.
 
Last edited:
Can you explain why choice #3 was the "best choice" for your application?

Sure, since that space is virtually wide open choice #3 takes the least amount of modifying to fit in a large battery. Some people use this space for their compressor but since ours is mounted in the rear, it's the most logical space for our second battery. The cables we use to tie the two batteries together will be sized properly to avoid any power drop due to their longer length.

Also can we end the whole mystery thing and get a complete parts list that you ordered?

Patience my good man, patience.

An finally can you show a pic of the battery tray with out the battery? Does this tray address the weakness of the fender in that area?

I'm guessing a pic of the tray mounted under the hood without the battery? I'll do my best to get one posted later this morning. Because the tray is bolted on in such a way that it doesn't solely rely on the strength of the inner fender at the bottom, I believe it's more than adequate.
 
Sure, since that space is virtually wide open choice #3 takes the least amount of modifying to fit in a large battery. Some people use this space for their compressor but since ours is mounted in the rear, it's the most logical space for our second battery. The cables we use to tie the two batteries together will be sized properly to avoid any power drop due to their longer length.


Patience my good man, patience.


I'm guessing a pic of the tray mounted under the hood without the battery? I'll do my best to get one posted later this morning. Because the tray is bolted on in such a way that it doesn't solely rely on the strength of the inner fender at the bottom, I believe it's more than adequate.

Thank you for answering those questions. Mark, don't worry about the pic, I went to the C4Fab web site. I look forward to the rest of your writeup. Hurry up!:becky::tea:
 
Last edited:
Well, this project has taken longer than we expected but as they say, good things come to those who wait.
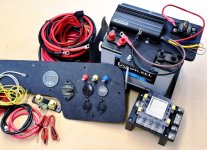
Most all the parts are sitting on the bench. There's a little wiring to do on the outlet panel. Should be up and running soon!
 

Attachments

  • DSC_0976.JPGsm.jpg
    DSC_0976.JPGsm.jpg
    122.7 KB · Views: 1,754
Can't wait for the video. It's been a while since you and your wife have posted. I know creating and editing them are a lot of work and I appreciate the amount of time you both spend!
 
Can't wait for the video. It's been a while since you and your wife have posted. I know creating and editing them are a lot of work and I appreciate the amount of time you both spend!


Thanks for watching!

We've been busy lately with a few unrelated projects and the holidays. But know were getting back into the swing of things. :)
 
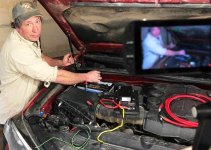
We're making progress! In fact we have the system installed and tested. Now to run the wires back to our outlet panel. The video will be slightly delayed due to me being off on the measurement of the cables going to the rear. So, we need to splice in another 18" using an Anderson plug. That should be on our doorstep tomorrow.
 

Attachments

  • dual_battery.jpg
    dual_battery.jpg
    92.3 KB · Views: 837

Members online

Forum statistics

Threads
278,307
Messages
3,554,056
Members
248,016
Latest member
Advally Service

Trending content

Back
Top