
Dusty's Custom Cargo Drawers: Version 2.0

Dusty Driftwood

New member
Well guys, some of you are familiar with my first cargo drawer setup. Which was/is functional, but I always knew I could do a much better job than I did. But, I kind of rushed through the first build.
This time, I took my time and paid closer attention to the small details that really makes this look like a finished product. For the most part, the system functions the same as the original, but there are some pretty significant upgrades that I'll outline below.
The outer dimensions of the new box are slightly bigger than the original at 41-3/8" wide by 33-1/4" deep and 8-7/8" tall. This fills the rear cargo area only leaving a couple inches between the box and tailgate. And, obviously, the area behind the wheel wells on the side of the box. The new design still allows the box to fit under the double decker cargo shelf.
Ok, on to the pictures - probably my favorite part of the original build was the flip up lid, so I kept that design element in this build as well
Full Box
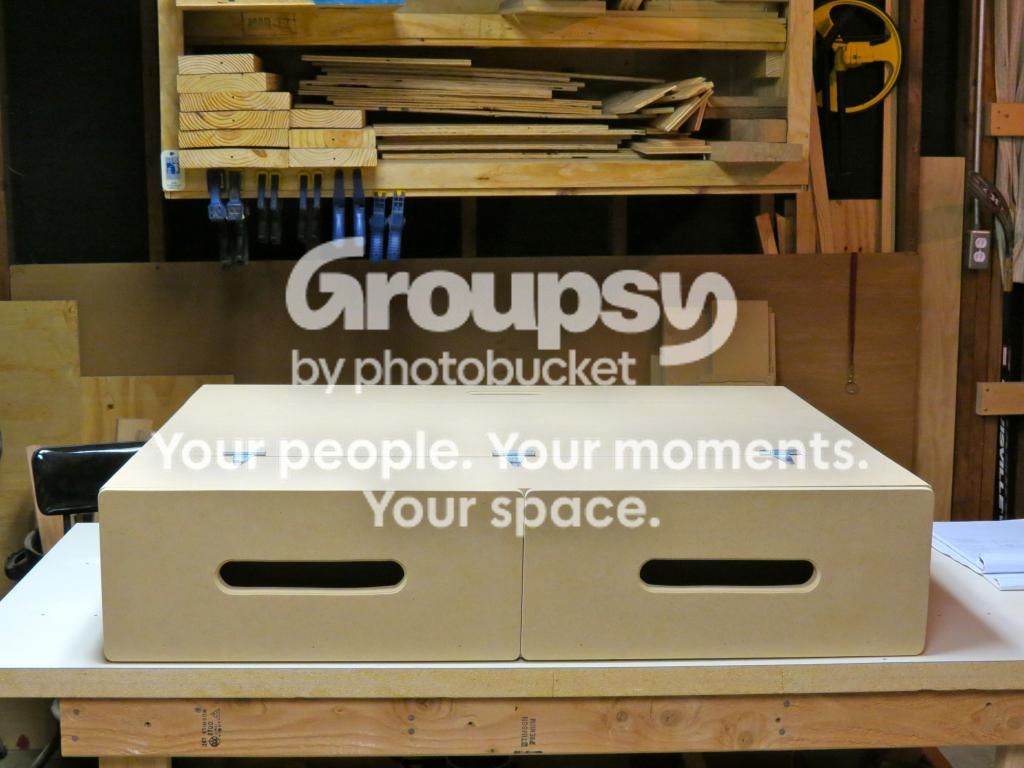
Flip Up Lid
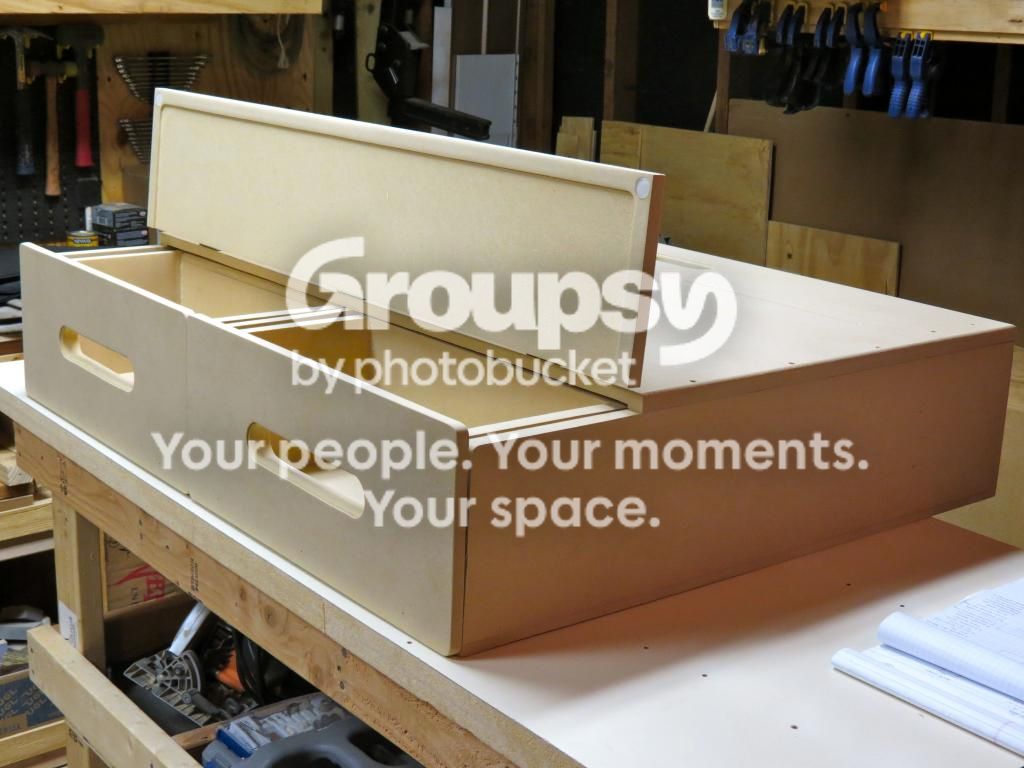
Drawers Open - I always kicked myself for not using drawer slides the first time around.:brick: I didn't make that mistake this time.
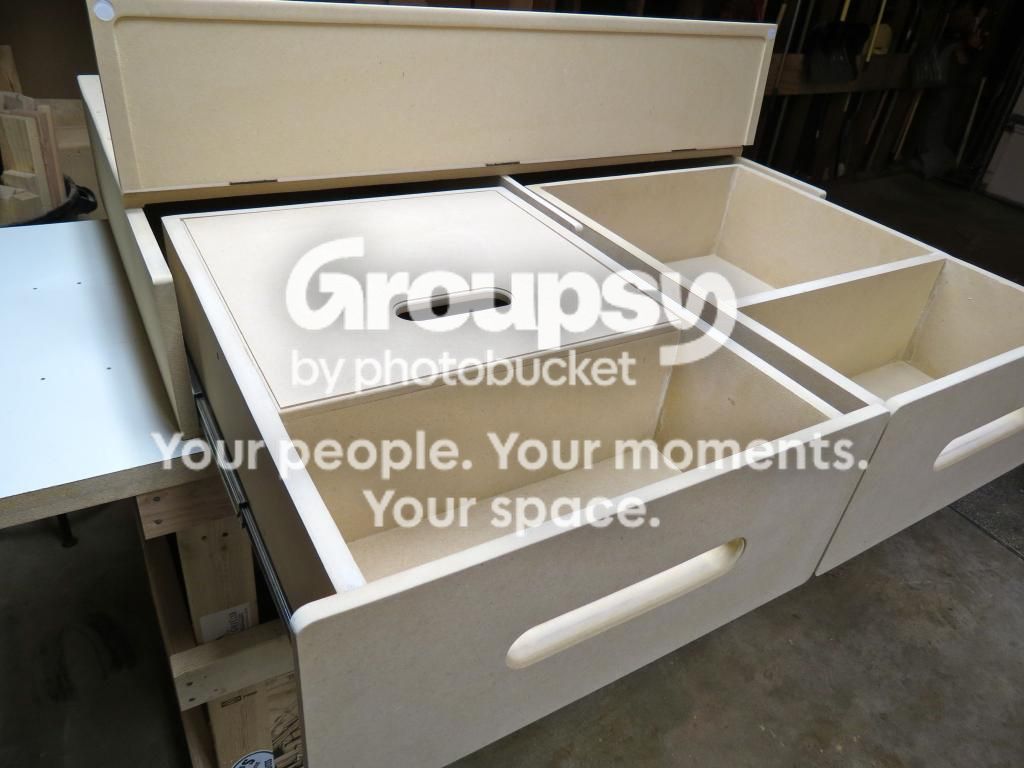
I also added a sliding lid in the left drawer, which acts as a place to set stuff you're removing from the other side. Or, in our case a portable changing table:moon:. In this next picture, you can see it slid into the forward position.
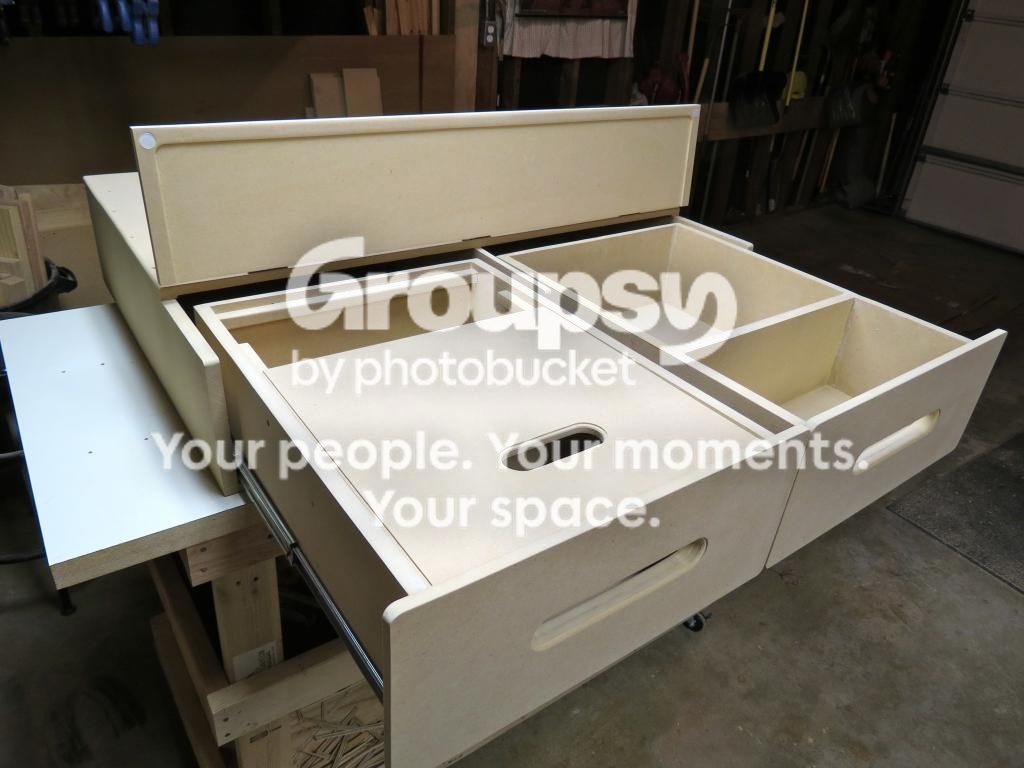
This time around, I also chose to add a rear cubby that spans the width of the box. This is great for longer items, like my umbrella. Or, items like my jumper cables that I always have but rarely use.
Here is the Cubby Lid in Place
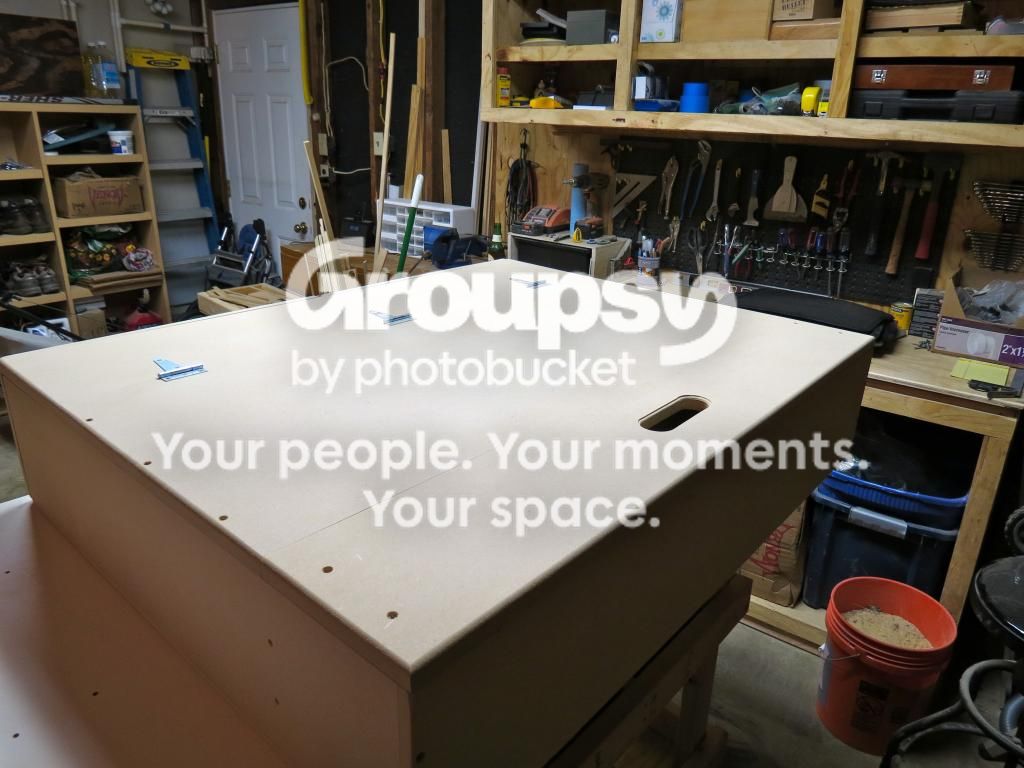
Popped Open
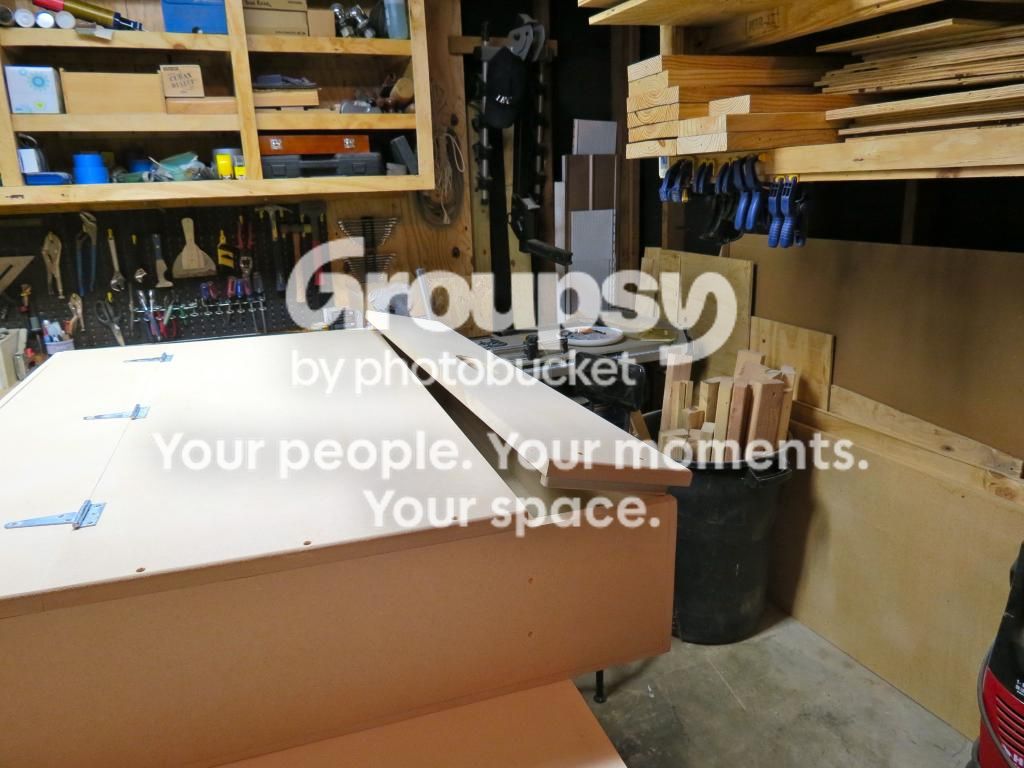
And, Fully Open
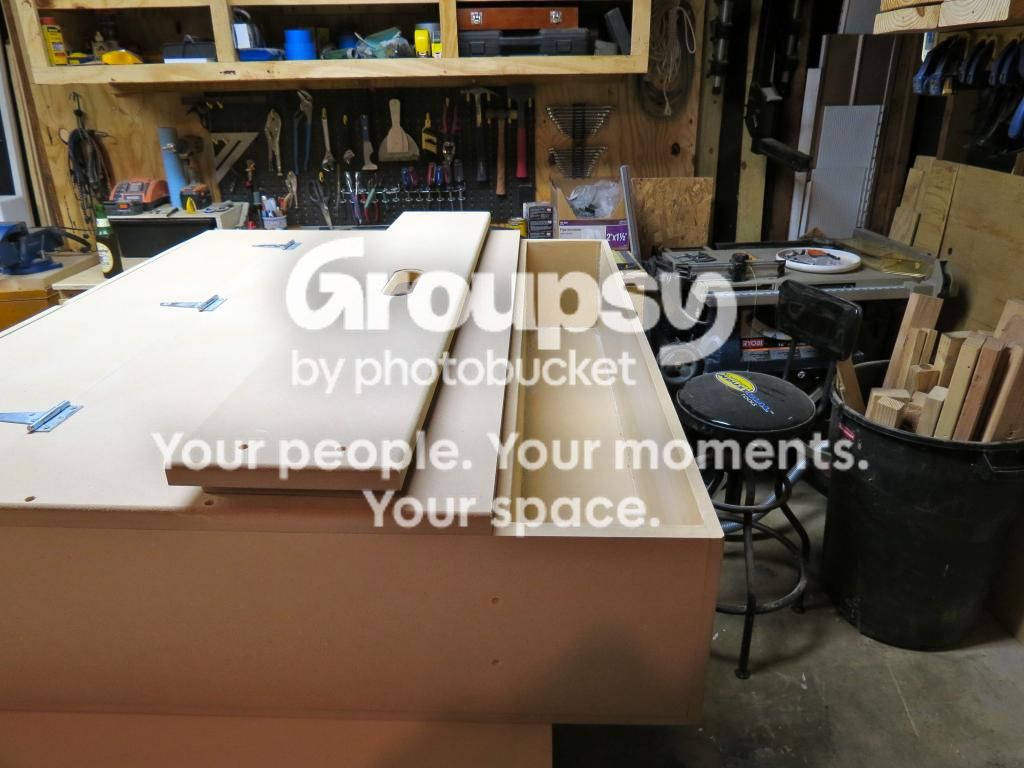
Consequently, when the double decker shelf is in place, this cubby is completely hidden, so the rear cubby also acts as a great hiding place for valuables if you're at a trailhead, disc golf course or camping etc.
Disassembled & Ready to install in the 4Runner
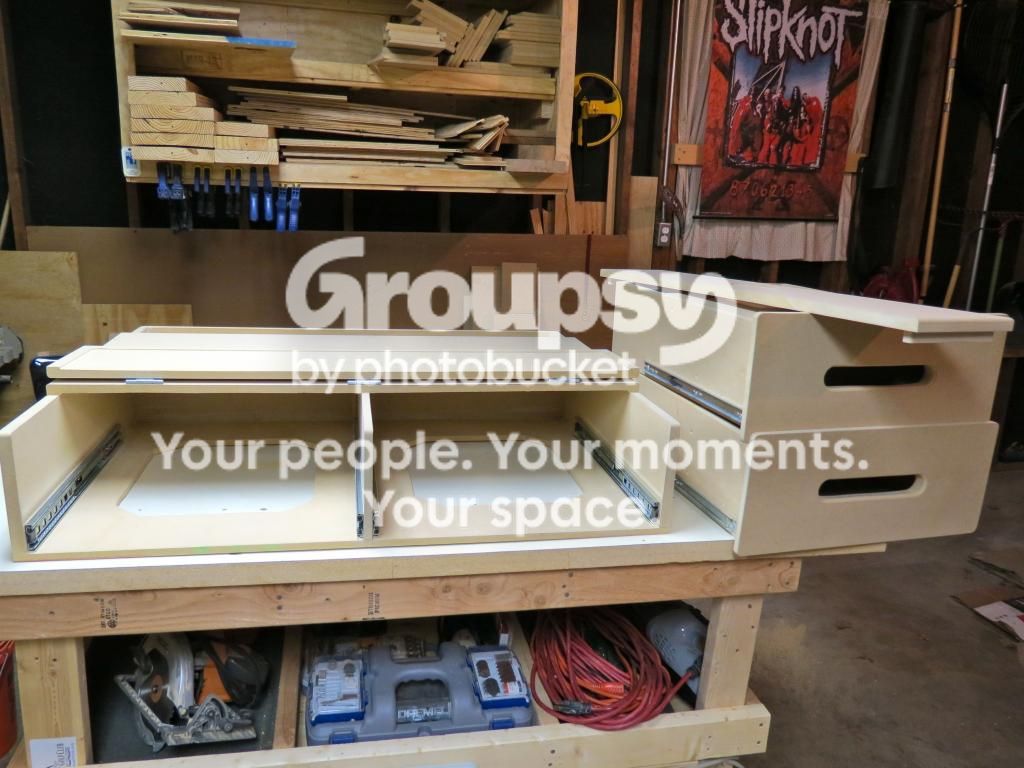
You'll also notice in the picture above that I've cut out large areas of the floor board. I originally did this to cut down on weight, which honestly didn't help. But, these came in really handy as the only way to grab this thing when installing it in the 4Runner.
Finally, Installed in the 4Runner
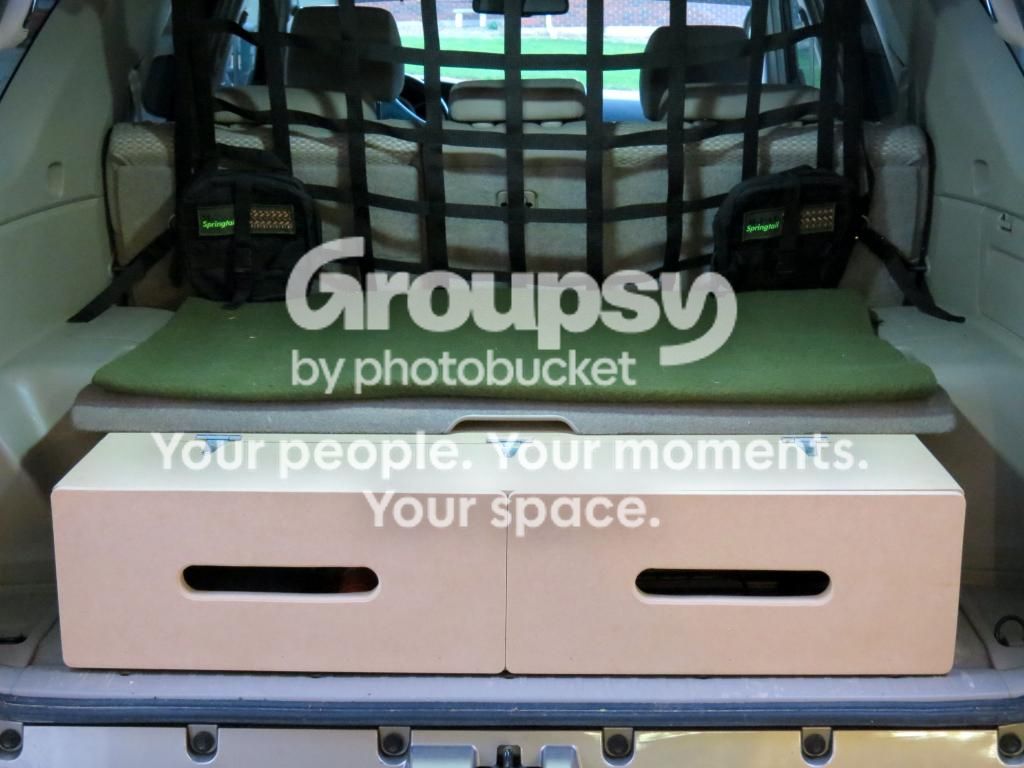
View From Outside
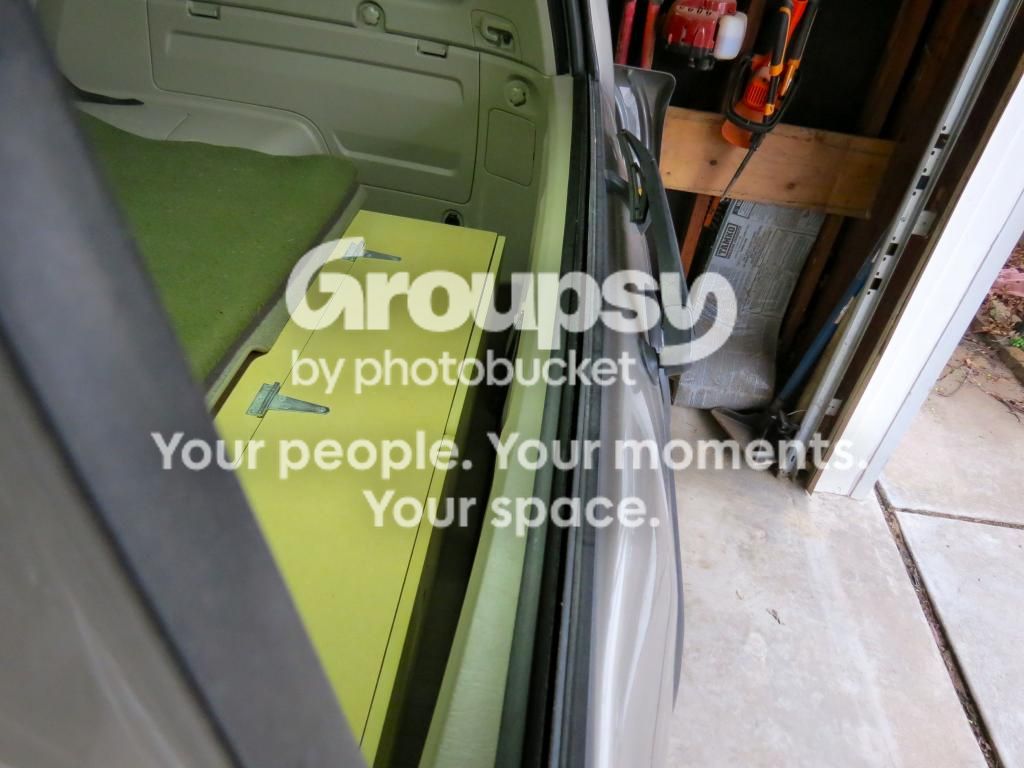
Flip Up Lid Access
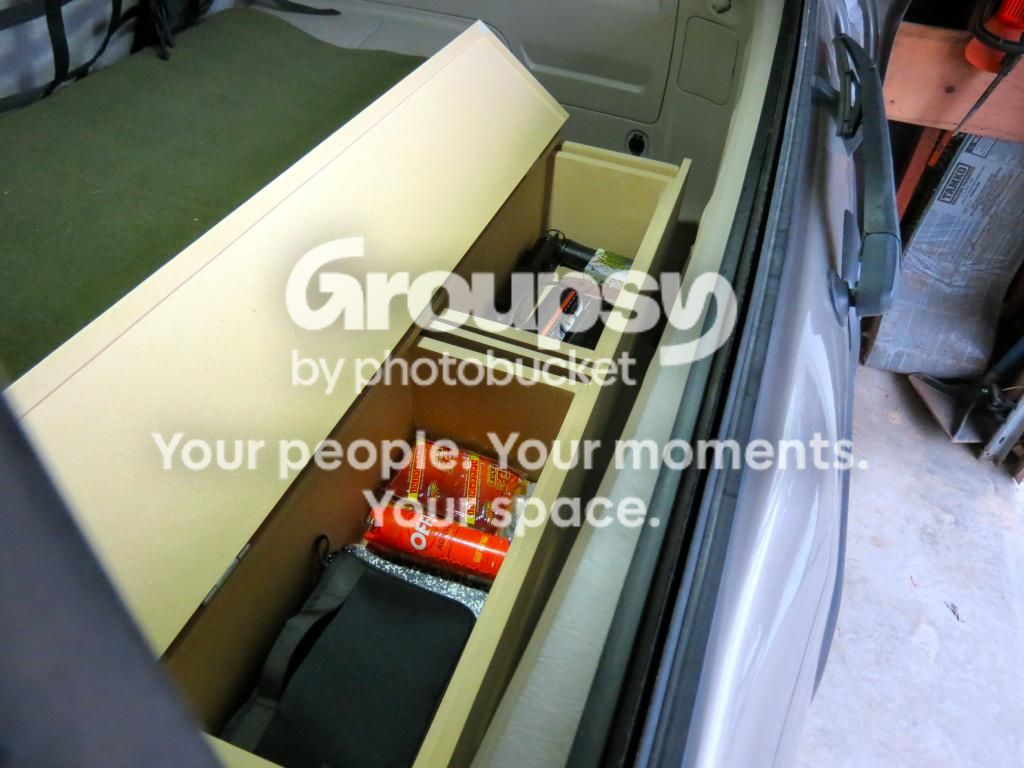
And, last but not least, a reward for a hard day's work - it actually took a couple days, but you get the idea
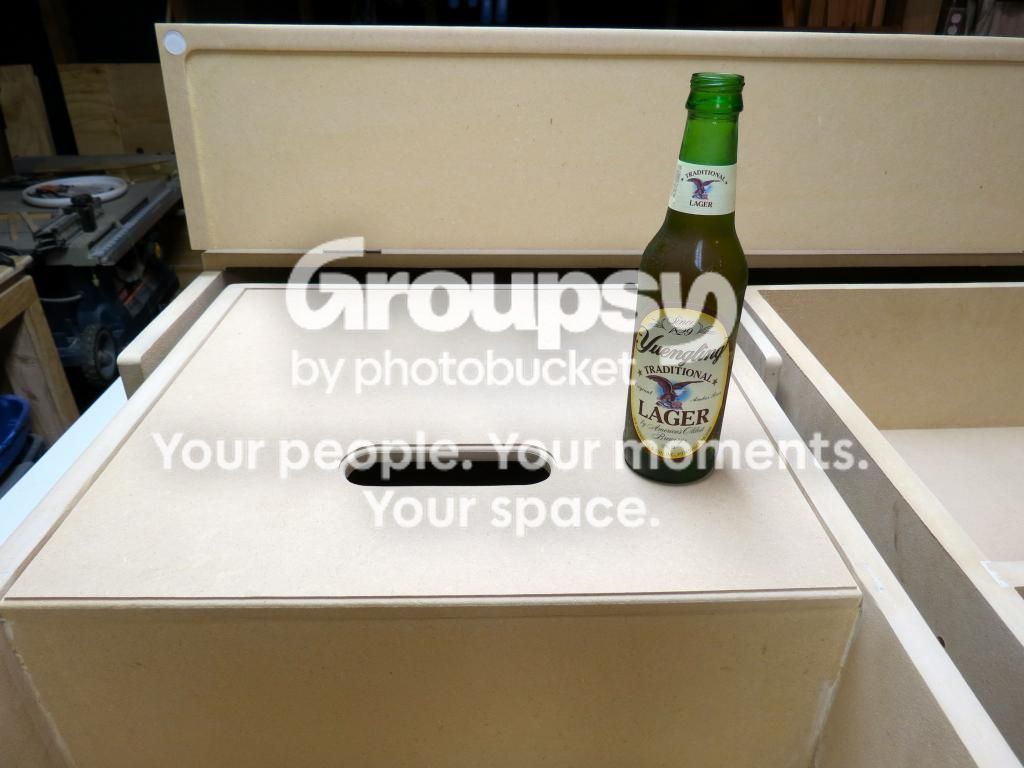
We (unfortunately) can't get Yuengling here in MO. But, I figured this was a special enough occasion to break into the reserve:beer:
 
Register to hide this ad
Dimensions & Specifications
Width: 41-3/8"
Depth: 33-1/4"
Height: 8-7/8"
Front Cubby: 7-3/4"
Flip Up Lid: 8"
Main Drawer: 15-3/4"
Rear Cubby: 6-1/8"
Rear Cubby Lid: 7-1/32"
Sliding Lid: 17" Wide x 16-1/4" long
Drawer Slides: 20"
Materials
1/2" & 3/4" MDF Boards
Craftsmanship
Counter-sunk bump stops

Rounded Edges

Rebbited Corners/Dividers

Router Work

S4S - Square 4 Sides - This thing is completely square and level


I still need to install the lid edges, drawer pins, tie downs, maglight holder, power inverter as well as wrap up some finish sanding and decide weather I want to paint or stain this thing. But, the construction of it is done (for now). If anyone has any experience staining MDF, please chime in.

Disappointments
There are really only a couple things I wish I would have done differently. As you can see is some of the pics, I got a little overzealous with the sander, and I should have done more hand sanding. Also, although MDF is really easy to shape, I wish I would have used Pine. This thing weights a ton anyway, so it wouldn't have saved any weight and it would have been much more durable. I guess there could always be a version 3.0...
 
Last edited:
That box looks great! Yeah, MDF gets heavy in large quantities surprised no one makes them out of aluminum or fiberglass or something...

A little unrelated, but could we get some detail pics of your cargo net set-up? I remember a while ago someone said they were working on something like that for the 4Runner, but they never updated.. :(
 
That's a sweet customer cargo drawer setup. Great craftsmanship!

I wish I had the patience do such a nice job.
 
Beautiful work Dusty! Really nice attention to detail on the drawer openings and bumpers.

In terms of staining the box, I'd just use a brush and an even coat unless you're trying to simulate wood grain. You can simulate grain by overlapping coats and making some areas heavier than others. It really all depends on which look you're going for.

Only other issue would be if the MDF absorbs a lot of the stain. It might take a long while to dry. Because of this, I would consider top coating with an oil poly.
 
This is an awesome setup. Very nicely done. Something like this will be my next project now that my lift is done. How is it anchored? In your original build thread, didn't you say that you had sold the double decker system? My plan is to cut a piece of plywood to fit my cargo area and use that to bolt my future box to
 
Wow, nice job!!

I've had my 4Runner for a few weeks and I'm constantly getting annoyed with the lack of storage in the rear. But it's probably my only complaint so far. Mine has the JBL audio, so I don't even have the compartment on the right that I can see in your pics. I was already planning to build something similar this summer, so thanks for sharing this. It gave me a few fresh ideas.

I like the idea of the hidden cubby, but I'm concerned that my wife may not be able to slide the unit out to access it while full. She will be driving it by herself occasionally, so it has to be more accessible for her. I may try to figure out a way to access mine from the rear seat area. Maybe I can modify the flap on the deck so that you can flip it out of the way temporarily.

I can't wait to get started on this now.
 
Thank you guys for all the kind words, I really appreciate it. This was a fun project and I enjoyed working on it again.

This is an awesome setup. Very nicely done. Something like this will be my next project now that my lift is done. How is it anchored? In your original build thread, didn't you say that you had sold the double decker system? My plan is to cut a piece of plywood to fit my cargo area and use that to bolt my future box to

The box isn't anchored with any hardware. I basically measured the height of the space created by the double decker system and made the box about 1/16th taller than that gap.
So, the double decker shelf keeps the box in place. The drawer slides to help with ease of opening, but this also means that they have to be locked in place so they don't slide open while in transit. I have a solution for that, but I haven't had time to install yet.
I actually sold the sliding cargo cover, not the double decker shelf system. There wasn't really enough space for anything I carry with the shelf in place and the cover pulled

Wow you have some serious skills.

I love the "hidden" compartment.

Thanks, I really wanted a hidden area on this build and that seemed like the most practical place to put it. I toyed with the idea of another, smaller hidden compartment, but I felt it would have been too obvious, which defeated the purpose.

Wow, nice job!! I was already planning to build something similar this summer, so thanks for sharing this. It gave me a few fresh ideas.

I like the idea of the hidden cubby, but I'm concerned that my wife may not be able to slide the unit out to access it while full. She will be driving it by herself occasionally, so it has to be more accessible for her. I may try to figure out a way to access mine from the rear seat area. Maybe I can modify the flap on the deck so that you can flip it out of the way temporarily.

I can't wait to get started on this now.

Depending on how tall your wife is, it may be a non-issue. With the tail gate up, I can unlock the double decker shelf and prop it up - I made some props that fit on the ledge where the double decker shelf rests. This gets the shelf out of the way and gives enough clearance to get into the rear cubby. That said, I only keep my gold umbrella, jumper cables, disc golf stool and ice scrapper back there. So, I really don't have to access those items with any frequency that makes their location impractical.
I went through a couple different design ideas and this seemed to be the best solution for my needs.
 
Last edited:
Awesome router skillzz man! I'm a cheap router bit buyer and always obliterate a good bit of what im trying to make look good lol. quick question, had you thought of using some stainless piano hinge instead of the three separate hinges? this box looks super functional and i dig the build quality!
 
In terms of staining the box, I'd just use a brush and an even coat unless you're trying to simulate wood grain. You can simulate grain by overlapping coats and making some areas heavier than others. It really all depends on which look you're going for.

Thanks, I'm not really trying to simulate wood grain. I know its just MDF, but with the quality of the build, I'd like to do something nicer than just rattle can black, ya know. That said, I'm thinking that is the most convenient and easiest. I think for now, I'll just leave it bare and see what I decide on in the next few weeks.

That box looks great! Yeah, MDF gets heavy in large quantities surprised no one makes them out of aluminum or fiberglass or something...

A little unrelated, but could we get some detail pics of your cargo net set-up? I remember a while ago someone said they were working on something like that for the 4Runner, but they never updated.. :(

You're right, it got pretty heavy pretty quickly, I would have used other materials for this project but I'm all thumbs when it comes to anything but wood.
I'm happy to take extra pics of the cargo net, just let me know what you're looking for. I already have a couple rear view pics in my build thread cause someone else was asking if it created blind spots. I can get a couple attachment pics over the next few days if that helps. Just let me know what you're looking for.

I like the idea of the hidden cubby, but I'm concerned that my wife may not be able to slide the unit out to access it while full. She will be driving it by herself occasionally, so it has to be more accessible for her. I may try to figure out a way to access mine from the rear seat area. Maybe I can modify the flap on the deck so that you can flip it out of the way temporarily.

Take a look at the pics I posted below for the detail on the double decker supports I mentioned earlier.

Awesome router skillzz man! I'm a cheap router bit buyer and always obliterate a good bit of what im trying to make look good lol. quick question, had you thought of using some stainless piano hinge instead of the three separate hinges? this box looks super functional and i dig the build quality!

Thanks, I considered a piano hinge, but I was really trying to be a minimalist when it came to hardware on this build. I had the same type of hinges on my last box and they served me well. I think the piano hinge would have been a little overkill in this situation since the flip up lid is only 8" deep

That is awesome, and definitely an upgrade from your first setup which I also loved, nice work man

Thanks, I really took a lot more time to make sure I was doing it right. I still made a couple mistakes, but no one will notice them but me. In fact, the front pull holes are twice as wide as they were supposed to be. You've heard of measuring twice and cutting once, right? This is true, but you should always make sure you erase your first measurement mark, otherwise you might cut in the wrong place, like I did. Now that it's all done, I kind of like the bigger openings, but that doesn't keep me from shaking my head at myself when I see them.
 
I had a little time this afternoon to clean up some of the details I mentioned on the last page. Below are some pictures.
Supports for access to the back cubby

These are also handy to use when installing the box so the shelf stays out of the way

Drawer Locks & Tie Downs


Tie Downs Secured with T-Nuts

Inside (the drawer) View

The pin is an even 1/2" so it stays in place nicely, but I could always use the pin if I really wanted to

Another shot from outside the box

And, my wife was doing some Spring cleaning and ran across a bunch of black fleece that she was going to use for another project. So, I cut that down to size and lined the drawers.

 
Can i offer to buy and ship a large shipment of yeungling in exchange for a similar box? Plenty around here in NJ outside of Philly!!!
 
That looks awesome Jeff! Lots of thoughtful details and great craftmanship. Congratulations!

One thought about the final finish- My box is MDF as well and I sprayed it with Rustoleum Truck Bed Liner (can get it at Home Depot). It has held up VERY WELL. Despite dragging stuff across it over and over it still looks new and it actually seems to make the MDF stronger- kind of like a thin plastic shell coating type thingy...:confused:

Anyway, keep it up. Look forward to the finished product. You have me re-thinking my box now. Dammit!
 

Members online

Forum statistics

Threads
278,309
Messages
3,554,071
Members
248,016
Latest member
Advally Service

Trending content

Back
Top