

Reina
New member
I been wanting have a E-locker for a while and the search in the junk yard have not been successful. So I turn to another method TRANSPLANT. I set off to find another used 4Runner with a diff lock to become the donor for my 4Runner. At long last I found this 1996 4Runner Limited with a Savage title. The donor 4runner is in good mechanical shape. The only bad think would be the cosmetic condition of the exterior paint and a dent here and there.

Anyways after a short research looking through the service information from ALL DATA of the factory E-locker I draw up plans to install the E-locker so that it looks like it is straight from the factory.
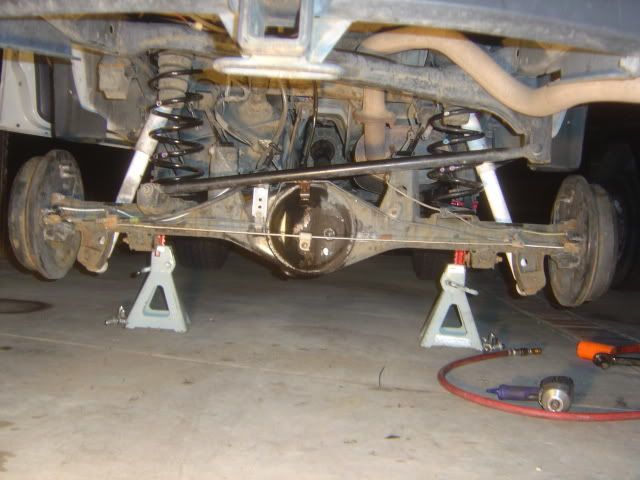
I started with removing the rear axle which is pretty straight forward just unbolt everything that connects to the rear axle it falls off. lolz But do keep a jack under it when you are disconnecting everything. One important tip.. I found that using a tire valve cap I was able to plug up the brake line while I do my work preventing a major lost of brake fluid.


At this time since I have everything off the back of my 4runner I installed a slightly shorter 8.25 wraps LC springs just to try how it compares to the 9.25 wraps springs I have on it before and longer LC shocks. Also upgraded to a longer brake line from toytec.

Here is a OME shock next to the LC rear Shock

The wiring was the worst possible. I have read online where others have written about the E-locker swap and they say how their 4runner was semi pre-wired for a E-locker. After removal of some panels I found out that my 4Runner HAS NON OF ANY WIRING THAT IS ANY PART OF THE E-LOCKER WIRING 0_0 well Sh*t…… at least I have a background in automotive wiring and mechanics and a donor car so no problem, I would just create my own wiring harness.
First I needed the rear axle harness from the donor car and boy that was not an easy task. I was about to drop the fuel tank because I could not get the rear axle harness clips off top of the fuel tank. Even tho I was perfectly capable of removing the fuel tank I was lazy. So I stuck a torch through the access panel on top of the fuel tank and melted the clips off.


With the wires off I striped all the wire protection to separate the E-locker wiring from the ABS wiring. Cut the E-locker wiring off the connector that goes in the interior and put everything back into the donor car.
Bolting everything back on to the 4runners was also pretty straight forward. Now came the test to see if the gear ratio was the same between my 4runners. I drove it to the street and put it into 4WD and &^$^%@%$@^%# dammm it.
Back to work in transplanting the front axle. Start with removing the front wheels, then the front axle 35mm bolt, then the lower ball join 4 bolts, then move the hub assembly out of the way, take a big A$$ pry bar and remove the CV axle. Now comes the pain in the A$$ part, the front diff does not have that much clearance. It takes a little bit of work before you will be able to free it, also don’t forget to remove the vacuum lines and connectors and the breather tube off the Front diff.


The install is also equally painful if not more since now you have gravity fighting you this time. And as all service manual say “install in reverse order of removal”
Here comes the wiring. It could be confusing at first not bad at all after I study it and compare it to the wires I have. Here is the wiring diagram I draw up on paint of my wiring plan below. The hard part is that I didn’t have the luxury of pre-wiring. I have to create most of my wiring even add a pin to my gauge wiring harness. But all in all it paid off and now I have a nice red light next to the green 4wd light ^_^
Also I have the bench test of the e-locker here 4Runner E-locker 3rd gen Retro fitting OEM look - YouTube


Anyways after a short research looking through the service information from ALL DATA of the factory E-locker I draw up plans to install the E-locker so that it looks like it is straight from the factory.
I started with removing the rear axle which is pretty straight forward just unbolt everything that connects to the rear axle it falls off. lolz But do keep a jack under it when you are disconnecting everything. One important tip.. I found that using a tire valve cap I was able to plug up the brake line while I do my work preventing a major lost of brake fluid.
At this time since I have everything off the back of my 4runner I installed a slightly shorter 8.25 wraps LC springs just to try how it compares to the 9.25 wraps springs I have on it before and longer LC shocks. Also upgraded to a longer brake line from toytec.
Here is a OME shock next to the LC rear Shock
The wiring was the worst possible. I have read online where others have written about the E-locker swap and they say how their 4runner was semi pre-wired for a E-locker. After removal of some panels I found out that my 4Runner HAS NON OF ANY WIRING THAT IS ANY PART OF THE E-LOCKER WIRING 0_0 well Sh*t…… at least I have a background in automotive wiring and mechanics and a donor car so no problem, I would just create my own wiring harness.
First I needed the rear axle harness from the donor car and boy that was not an easy task. I was about to drop the fuel tank because I could not get the rear axle harness clips off top of the fuel tank. Even tho I was perfectly capable of removing the fuel tank I was lazy. So I stuck a torch through the access panel on top of the fuel tank and melted the clips off.
With the wires off I striped all the wire protection to separate the E-locker wiring from the ABS wiring. Cut the E-locker wiring off the connector that goes in the interior and put everything back into the donor car.
Bolting everything back on to the 4runners was also pretty straight forward. Now came the test to see if the gear ratio was the same between my 4runners. I drove it to the street and put it into 4WD and &^$^%@%$@^%# dammm it.
Back to work in transplanting the front axle. Start with removing the front wheels, then the front axle 35mm bolt, then the lower ball join 4 bolts, then move the hub assembly out of the way, take a big A$$ pry bar and remove the CV axle. Now comes the pain in the A$$ part, the front diff does not have that much clearance. It takes a little bit of work before you will be able to free it, also don’t forget to remove the vacuum lines and connectors and the breather tube off the Front diff.
The install is also equally painful if not more since now you have gravity fighting you this time. And as all service manual say “install in reverse order of removal”
Here comes the wiring. It could be confusing at first not bad at all after I study it and compare it to the wires I have. Here is the wiring diagram I draw up on paint of my wiring plan below. The hard part is that I didn’t have the luxury of pre-wiring. I have to create most of my wiring even add a pin to my gauge wiring harness. But all in all it paid off and now I have a nice red light next to the green 4wd light ^_^
Also I have the bench test of the e-locker here 4Runner E-locker 3rd gen Retro fitting OEM look - YouTube
Last edited:


