f250ben’s Intensive Maintenance/Upgrade/Build Thread

I like the way you are approaching this build. Subbed for the dash replacement.



That’s the project I’m dreading the most. Suspension and mechanical upgrades are easy. Maintenance stuff I can do in my sleep almost. I hate interior and wiring though. It’s fiddly and troublesome. And something I don’t know a lot about. For that one I’ll probably set aside an entire weekend, pull everything out over Friday night and Saturday, then hopefully get it installed again on Sunday.

I’m going to try to document it pretty well too with some good pics, links to the other threads I reference, and a rough total cost and labor hours I put into it.

Once the dash is done I can start doing the fun stuff and stop hating the 4runner every time I get in it because of how nasty the old dash is lol.


Sent from my iPhone using Tapatalk
 
That’s the project I’m dreading the most. Suspension and mechanical upgrades are easy. Maintenance stuff I can do in my sleep almost. I hate interior and wiring though. It’s fiddly and troublesome. And something I don’t know a lot about. For that one I’ll probably set aside an entire weekend, pull everything out over Friday night and Saturday, then hopefully get it installed again on Sunday.

I’m going to try to document it pretty well too with some good pics, links to the other threads I reference, and a rough total cost and labor hours I put into it.

Once the dash is done I can start doing the fun stuff and stop hating the 4runner every time I get in it because of how nasty the old dash is lol.


Sent from my iPhone using Tapatalk

O for sure, I think im gunna go the coverlay route.
 
Soooo I haven’t done much lately. Work, baby, and volunteering at church has been my life.

Almost closed in my shop, and decided to take a break from construction to get some stuff done on the 4runner that’s been BUGGING me. Today I’m mainly pulling everything out, then I’ll work on this list on and off for the next week or so. Then I’ll button it back up and get back to the work I’m supposed to be doing (finishing the shop so I can move all my tools out of my buddy’s garage).

-remove all seats and center console
-remove all dash parts for dash swap
-deep clean carpet, seats, and all removed trim pieces while they’re out
-figure out my weird issue with my drivers seat
-route new microphone for Sony headunit I installed a month ago or so. This time I’m Routing it to the correct place at the top of the A pillar, drivers side.
-install backup camera, and attempt to route ALL wiring to follow original wire harnesses. (I hate random wires tucked under trim. Super messy and easily damaged anytime trim gets removed)
-install ram mount onto center dash piece
-possibly repaint gray/silver dash pieces cause they’re worn out and don’t look good
-install new dash
-reinstall everything.


Shop progress. Gonna be awesome one day when I finish it.
8c42564a64a509df3f1fa2ed408632b4.jpg


Project for the day on the 4runner:
701e5a52e17bf1d7992647eb5f6af429.jpg


3197f6201438b44d4636f23111e6f449.jpg


Also pulled out that useless luggage platform thing. Anybody in central Texas wants it, it’s free to whoever feels like picking it up in San Antonio.
3acee0b8fe3674ea20f6521410e4cf7b.jpg


Sent from my iPhone using Tapatalk
 
I got a bit carried away. Was only going to do a bit of work today.
a6d56924edeba633665250551c594e2e.jpg
ab7e7df4806beb332337ee441a520142.jpg
df2578e77928dec1f2173b317679b7ba.jpg


Everything out. I have NO IDEA why people say a dash replacement is so difficult. But I haven’t tried putting the new one in yet, so we’ll see.
Going ahead and replacing my AC blower motor since I’ve got everything else pulled out.


Sent from my iPhone using Tapatalk
 
WOW, did you have to remove the entire dash framework to just replace the dash pad itself??

You're almost to the point that you could replace the AC evaporator and heater core!!
 
Last edited:
Soooo I haven’t done much lately. Work, baby, and volunteering at church has been my life.

Almost closed in my shop, and decided to take a break from construction to get some stuff done on the 4runner that’s been BUGGING me. Today I’m mainly pulling everything out, then I’ll work on this list on and off for the next week or so. Then I’ll button it back up and get back to the work I’m supposed to be doing (finishing the shop so I can move all my tools out of my buddy’s garage).

-remove all seats and center console
-remove all dash parts for dash swap
-deep clean carpet, seats, and all removed trim pieces while they’re out
-figure out my weird issue with my drivers seat
-route new microphone for Sony headunit I installed a month ago or so. This time I’m Routing it to the correct place at the top of the A pillar, drivers side.
-install backup camera, and attempt to route ALL wiring to follow original wire harnesses. (I hate random wires tucked under trim. Super messy and easily damaged anytime trim gets removed)
-install ram mount onto center dash piece
-possibly repaint gray/silver dash pieces cause they’re worn out and don’t look good
-install new dash
-reinstall everything.


Shop progress. Gonna be awesome one day when I finish it.
8c42564a64a509df3f1fa2ed408632b4.jpg


Project for the day on the 4runner:
701e5a52e17bf1d7992647eb5f6af429.jpg


3197f6201438b44d4636f23111e6f449.jpg


Also pulled out that useless luggage platform thing. Anybody in central Texas wants it, it’s free to whoever feels like picking it up in San Antonio.
3acee0b8fe3674ea20f6521410e4cf7b.jpg


Sent from my iPhone using Tapatalk


Hey Ben, if anyone hasn’t claimed the luggage separator yet, I’ll take it. I’m in San Antonio
 
WOW, did you have to remove the entire dash framework to just replace the dash pad itself??


You're almost to the point that you could replace the AC evaporator and heater core!!

The dash framework IS the dash pad. All the same thing. Also way less work than it looks like. That took me an hour and a half. And I’ve already got the new dash mostly back in. That’s with multiple beer, bathroom, and hanging out with the wife and baby breaks.


Sent from my iPhone using Tapatalk
 
Hey Ben, if anyone hasn’t claimed the luggage separator yet, I’ll take it. I’m in San Antonio


Yeah man! Nobody’s claimed it. It’s yours. Prob won’t be available to meet later next week, I’ll pm you my number and we can work it out tho.


Sent from my iPhone using Tapatalk
 
The dash framework IS the dash pad. All the same thing. Also way less work than it looks like. That took me an hour and a half. And I’ve already got the new dash mostly back in. That’s with multiple beer, bathroom, and hanging out with the wife and baby breaks.


Sent from my iPhone using Tapatalk

Ok, didn't know that it was all one piece, that helps explain why one of my vents it sorta not correct after the dealer replace mine.

One of my vent is not the same as it was when I took it to them, maybe you can give me some insight to the issue, the little wheel that closes off the air flow at the bottom of the vents is pushed in on one of them and doesn't work now, so far in I can't rotate it to close the vent, can you tell if it was broken by the installer/Tech or if it's just slipped out of place?
 
Ok, didn't know that it was all one piece, that helps explain why one of my vents it sorta not correct after the dealer replace mine.

One of my vent is not the same as it was when I took it to them, maybe you can give me some insight to the issue, the little wheel that closes off the air flow at the bottom of the vents is pushed in on one of them and doesn't work now, so far in I can't rotate it to close the vent, can you tell if it was broken by the installer/Tech or if it's just slipped out of place?


Pm sent.


Sent from my iPhone using Tapatalk
 
Dash swap done.
806f66de7a6c8ddd3c5900ced873f46c.jpg


Also went ahead and ran the wire for the backup camera.
31f9882739cad6f3a5a759a38a99ab1b.jpg

Haven’t run it through the hatch yet, that’s for another day. The wiring that came with this camera is weird, I’m going to buy some weather proof plugs, wire it up with a couple of quick disconnects, then confirm it’s working properly BEFORE I run all the remaining wire through the door. Wiring is not my strong suite.


Didn’t button everything back up, I’m painting some of the scratched silver trim pieces satin black, and going to finish detailing the entire interior before reinstalling seats etc.


Sent from my iPhone using Tapatalk
 
HVAC blower swapped out (no pics)

Trim around headunit painted black, probably the worst paint job I’ve ever seen, but it’s staying like that for a while. Used semi gloss by mistake. And had some spiderwebbing.

All trim around dash and center console reinstalled
b9dd12ccc4ff296f6a398e6fadc5674a.jpg


Backup camera finished! This took the most time. I’ve probably put 15 plus hours into that backup camera. Wiring isn’t my strong suit, I learned how to solder while installing the backup camera, had multiple issues I had to contact crutchfield tech support for, and I’m a little anal-retentive about making actual wiring harnesses with loom, then zip tying to OEM harnesses, rather than just running wire around and forgetting it.
0161a7fe26478c47a2e96bd53dff3fbe.jpg

40d6d3414af0147a172af6998debb615.jpg


I’m wrapping up vacuuming and detailing the interior tomorrow, getting the drivers seat frame welded at a single height adjustment, so it stops bending and rattling around. Then. I’m getting back to the shop construction project for a bit.


Sent from my iPhone using Tapatalk
 
My project took an unexpected turn.

d380c25a54952d72394a173aba4f81ad.jpg


Randomly found this on craigslist yesterday for a killer deal. $820. I would consider it almost brand new condition with some wear marks. So I drove eight hours round-trip to pick it up last night.

I also have a full length prinsu roof rack coming first week of June.


Sent from my iPhone using Tapatalk
 
im enjoying this thread. Great Build! keep it up!

your easily breathing another 250k into this truck, and if maintained the way your resurrecting it, maybe more.
 
im enjoying this thread. Great Build! keep it up!

your easily breathing another 250k into this truck, and if maintained the way your resurrecting it, maybe more.

Thanks! Definitely the goal. I haven't even begun to tear into the mechanical replacements yet, which is really where the increased reliability and life will be gained. But just taking it one step at a time, and trying to do it right so that none of this work needs to be redone down the road.


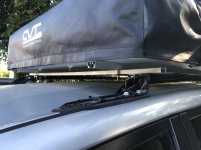
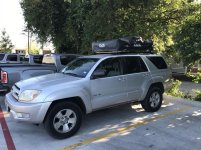
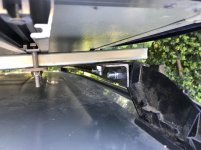
Spent $30 on some unistrut, angle, and some bolts for a temporary RTT mount. Mounted the RTT last night, because I'm excited, and impatient, and that's WAY more fun than framing on my shop (which is probably what I should have been doing).

I also broke all 4 plastic covers on my stock rails. Doesn't really matter because the entire thing is coming off in a few weeks anyways.

Also, as an aside, if anybody is hurting for a cheap rack setup, I'd be happy to let my entire stock roof rack, stock crossbars, and my new "HD" unistrut crossbars go for $100 bucks or so. Just something to help cover the cost of my new bars plus a bit. Its all coming off as soon as my prinsu rack comes in.


ALSO, mounting a RTT sucks. My knuckles hurt a lot this morning.
 

Attachments

  • IMG_1057.jpg
    IMG_1057.jpg
    124.5 KB · Views: 113
  • IMG_1055.jpg
    IMG_1055.jpg
    139.8 KB · Views: 114
  • IMG_1058.jpg
    IMG_1058.jpg
    125.9 KB · Views: 110
Quick maintenance day before our shakedown camp out. Took a half day as the beginning of a 5 day “staycation” with our 1 night camp out in the middle of it. Testing out the new rtt, as well as our 5 month old daughter on her first campout.

Completely set the tent up to vacuum, wipe down and air out. Tried out the annex too.
2b85553e23e3758e1cf10f4d7e5e6758.jpg
9cd406fa121007452f748dbb27ee5551.jpg
5c470edff3c7cd0a2c24b1452362847f.jpg


Ordering some stuff from CVT. Turns out I’m missing one of the spring poles. So I ordered a new set of them plus the extra channel so I can keep the annex attached along with the cover.

Then went ahead and did spark plugs, cleaned the maf, changed oil, oil filter, and air filter. And took my first oil sample to send to Blackstone for analysis. And installed the fumoto valve.

Then I reinstalled my headunit. I’m done messing with it. Steering wheel controls don’t work, everything else does, I’m sick of playing around with it.

No pics, all of that was pretty boring. Only odd thing was the oil I found leaking around the oil pan.
7d61a64be09ab1b11518eea3bbecb699.jpg
9ef9d9804d022f3e435fae2548577dd7.jpg


It’s not dripping on the ground but obviously oozing out somewhere. I cleaned everything up and will monitor to see if I can figure out where it’s coming from.


Sent from my iPhone using Tapatalk
 
Went camping in Guadalupe State Park outside of San Antonio Sunday and Monday. Had a great time, RTT did AWESOME. Rained pretty hard Sunday afternoon/evening and we stayed dry and comfortable.
1c27caa6076f12f61973c37da1a5fe2e.jpg

If it’s not obvious, our daughter was very into the whole new camping experience.

Today, my prinsu rack came in. Played with building a rtt hoist for several hours in preparation for having to move the RTT off and back on in 1 day, and gave up. Did not work well. I’ll come back to that another day.
Picture of my attempt at a RTT hoist:
b19f18e495f688d56791690d87391bba.jpg


I did remove the RTT and stock rack, cleaned up the roof and around the mounting points, then washed and waxed the roof since I’m sure it wont get much love from this point forward.

Then I mounted the rack, and remounted the RTT.
f7d889bd9a5ecebb4e878cdc4694645e.jpg

1aef3bf5ff4575da0be4ac63bfefee26.jpg


Shuffled the crossbars around so that the RTT covered portion of the rack is usable when the RTT and it’s 2 crossbars are removed, but there’s a good number of crossbars out in front of the RTT where I’ll actually be mounting stuff. I’m probably going to shuffle the bars around again, slide the RTT slightly father back, and put more bars up front, but this works for now.

Note about the rack, I freaking love it. Officiallly got on top of it and stood there. Slight deflection but nothing I’d be concerned about, and I do weigh a good 210 or so. It’s rock solid, super well built, perfectly square and they included extra of all the hardware I ordered. I used the bolts and screws they include, even though I’ve heard of rust issues. These are Torx heads now, and I used anti-seize on every one of them, so I think it will be fine.

Also found an oil spot under the 4runner. So while I’ve been pouring money into it, it’s been quietly laughing at me. I’m probably being dramatic. I guess I’ll tear into that next week sometime.

I’ve made progress on my shop too, framed for my door.
b48211afd65461b2528619ccae21be2b.jpg


Sent from my iPhone using Tapatalk
 
Long time since my last update. I opened up a new store for work mid June, which pretty much consumed me until this past weekend. That said, I’ve done a few things.
I added several additional crossbars to my prinsu rack, added the prinsu tie downs, and added security torx heads on the crossbars for the RTT to discourage theft.

This past weekend I got a wild hair and decided to install the dobinsons suspension, instead of working on my shop. Shop has taken a long time. I’m sort of discouraged with that. 4runner is more fun. So I’m just doing that instead right now.

List of what’s being installed:
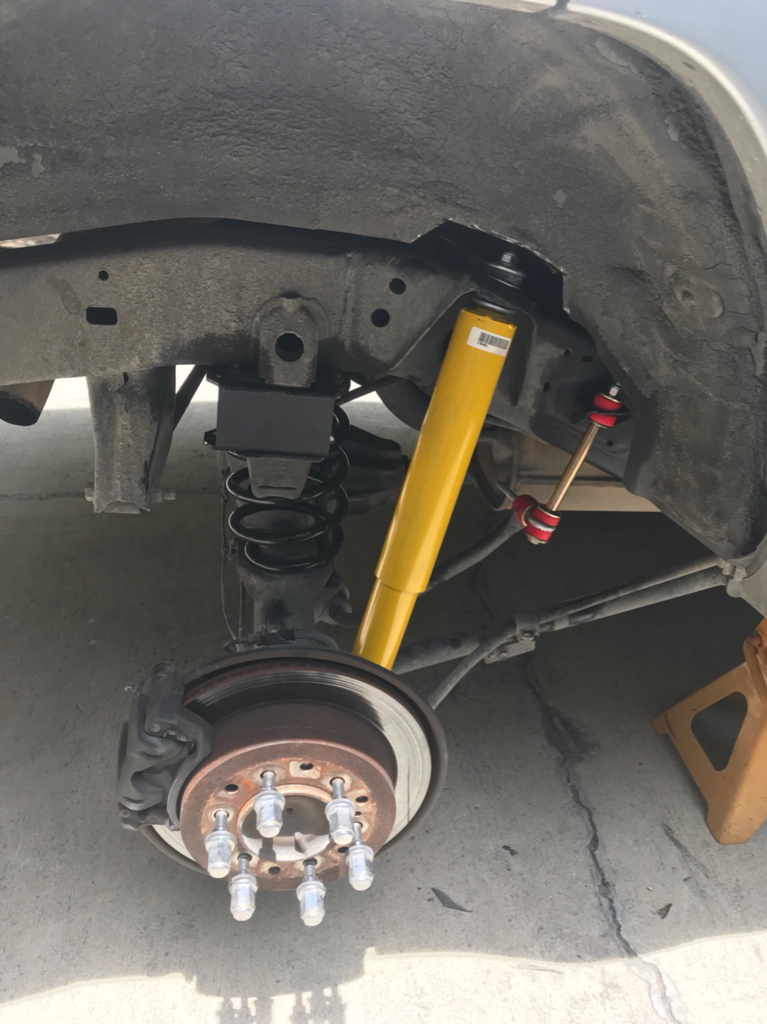
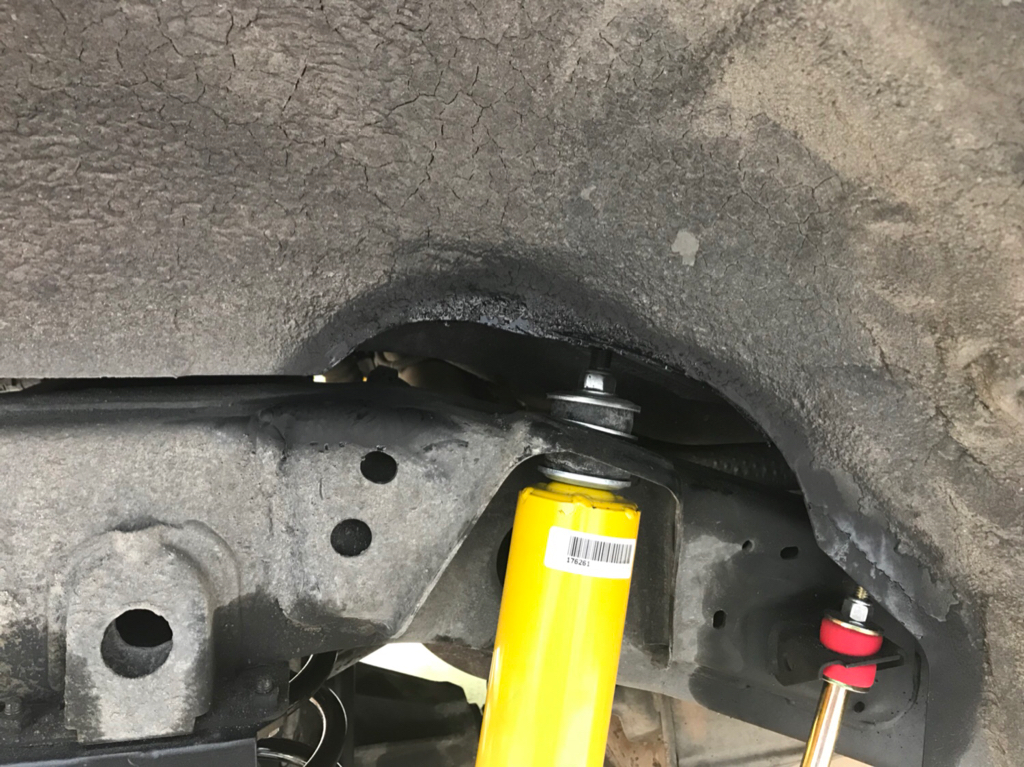
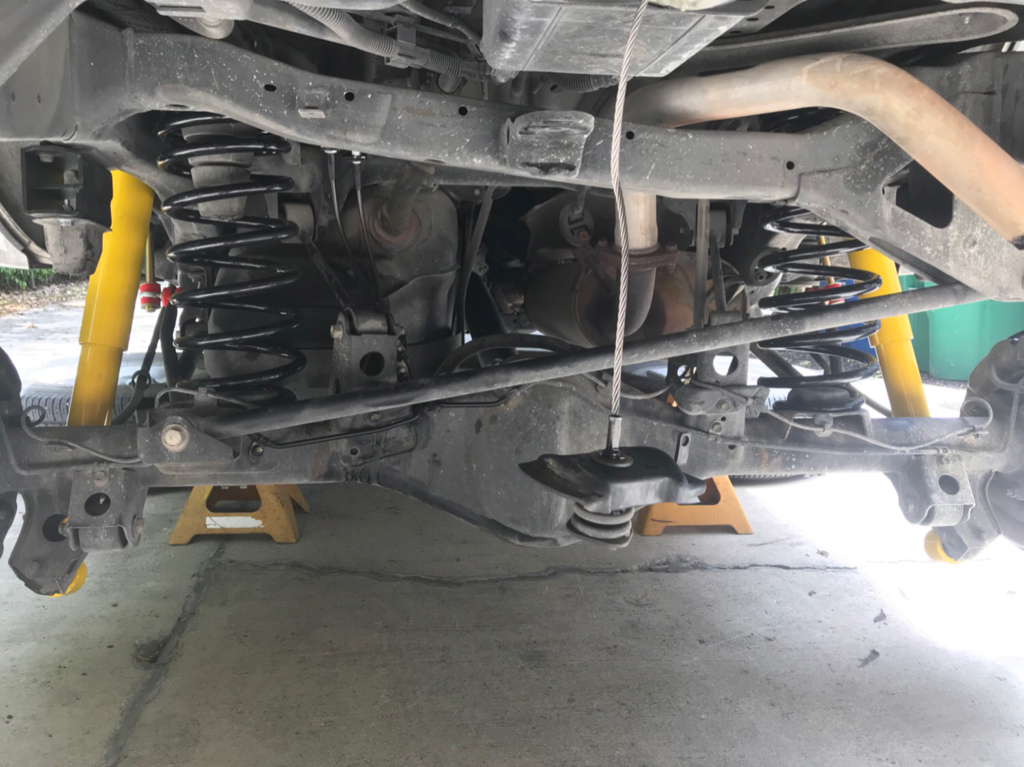
Dobinsons 677 rear lt coils with 701 lt shocks
Dobinsons 300 front coils with 220 shocks
Dobinsons UCA’s with their 555 ball joints
Wheelers rear extended brake lines
Metal tech 3” bump stop extensions
Energy bushings extended rear sway bar links (that semi-DIY approach with an eye bolt and the sway bar link kit)
No-name amazon front sway bar relocator brackets
Dobinsons front diff drop
OME trim packer in the drivers side rear (for lean)
Toytec 1/4” spacer in drivers front (also for lean)

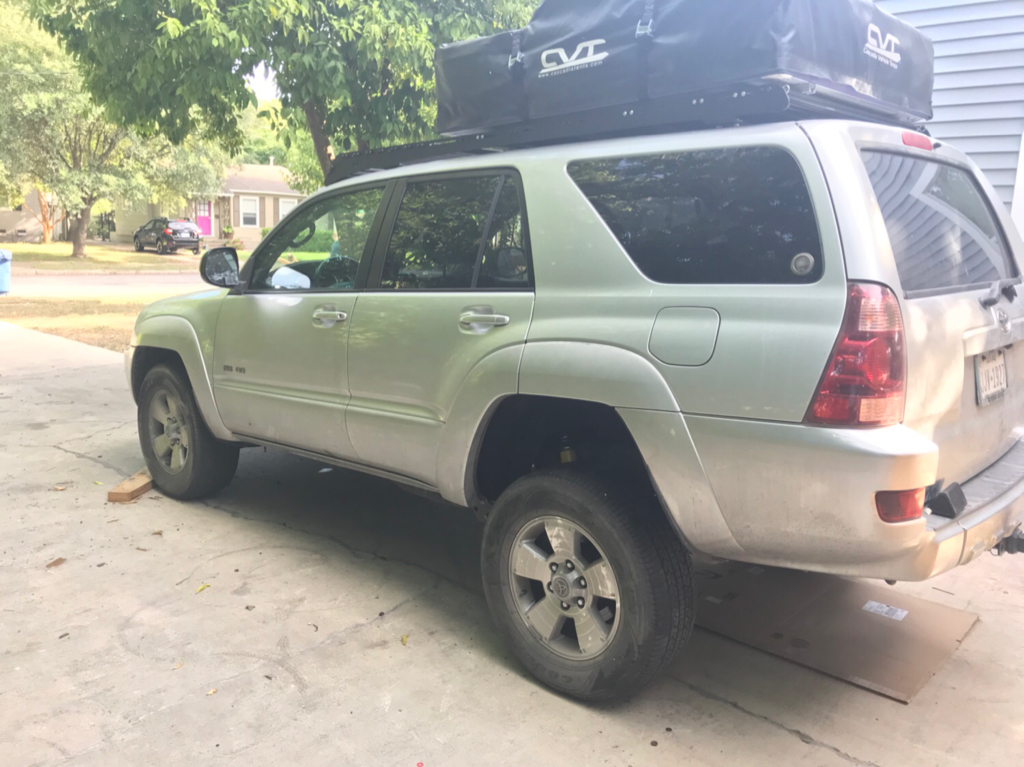
I took before measurements from the ground and hub to fender. I’ll post before and after once lift is completed. It was obvious my springs had sagged a lot, I’m pretty sure I’ll be getting more than 3” front and rear compared to my current saggy state.

And on to the pics:


984ff96fc161fed65d39bc79077f66ea.heic

Best thing about working on a truck with 200k on it? Doesn’t matter if you take a grinder to it. One of the pics above show an earlier rendition of this cut I made to improve access to the shock nut. After everything was done, I went back and cleaned everything up, smoothed out the cut, and painted to avoid corrosion. I didn’t cut into the pinch weld at all, just trimmed the inner fender sheet metal a bit. Helped SO MUCH. just used my angle grinder.
0bf3bbd018fcaea1450fb2b35c76cc2b.heic
f0fe0d754f9a2a982ae564fdbdf162ea.heic


Rear is done. I might or might not have used ratchet straps as spring compressors to get those bad boys up in there. Do NOT try this at home.
I also had to use the stock bottle jack between the bump stop and axle to push the axle down on one side, while pushing it up on the other side with my big jack. It was fun. Getting stiff, tall coils in there is a chore.
27745ca8a2779dd7ae7b12187dc36e70.heic


No pics, but I also installed extended rear brake lines, also you can see the metal tech bump stop extensions and DIY sway bar link extensions too. Supposedly 2nd gen sway bar links also work. I’m happy with this approach. The one additional thing I did was double nut the inside of the eyebolt where it attaches to the sway bar. I also used red loctite on the outer nut.

As she sat Saturday night:
09dd8390b70ca7ca2f3dad95831f1270.heic
aa72dcb059e425fdb7d9b84db707cfaa.heic


Started on the front coils, shocks etc last night and almost finished one side. Just have to re-install the new UCA on the passenger side then that side is done.

UCAs are having ball joints pressed in today, picking them up on the way home. Should have everything done by end of day tomorrow give or take. Will post pics and measurements before alignment and after.


Sent from my iPhone using Tapatalk
 
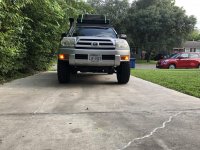
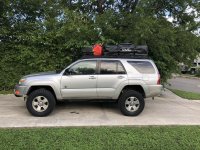
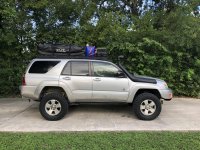
Again, lots of changes since my last post here. Been doing a lot of working, lots of playing with the rig, and not so much posting.

Things that have happened since my last post:

-Dobinsons installation completed, including UCA's and diff drop
-alignment
-$1600 worth of AC repairs, spread over about 6 different visits to my mechanic, but the AC is now working. Evaporator and condenser ended up getting replaced.
-New drivers hub, couldn't get alignment done without it, so I had the mechanic do it for me
-new inner tie rod end-still need to go and replace the other inner and both outers, but they're fine for now.
-new oil pan, old one was leaking, it had been driving me crazy, and mechanic gave me a good deal on replacing it while it was getting the AC work done.
-LC80 snorkel installed, intake completely sealed going into snorkel
-Cali-raised sideshooter ditch lights on Rago fabrication brackets installed
-amber Lamin-X installed on fogs and DRL's
-rear diff breather extended up to gas tank lid
-front bumper cover trimmed, and front mudflaps completely removed, because the new tires were rubbing a bit on them.
-the "40" part of the 60/40 rear seat completely removed, in preparation for a some cargo compartments/platforms we'll be making and installing this winter. Now our cooler lives in that spot for trips. Super convenient.
-1.25" spidertrax spacers installed
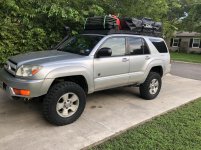
-255/80/17 Cooper ST MAXX tires installed-still need to play with the truck with the suspension flexed, I have a feeling I'll end up doing the BMC to avoid any rubbing while stuffed. Also got a 5th one installed on the spare, and barely got it stuffed back into the stock spare location.
-Plano all weather case mounted to front of roof rack, now holds all recovery gear
-Got some X-bull traction boards-not really a mod, but directly effects our ability to go offroading and exploring by ourselves, so there you go.
-We've gone on several trips, played a lot with gear organization, and I've succeeded in getting most of my emergency gear and tools that live in the truck stored in small compartments, so that they're readily accessible and not floating around in the back.

Maintenance completed:
-seafoam treatment
-sparkplugs again
-a couple of oil changes
-front and rear diff fluid, and transfer case fluid change
-
 

Attachments

  • IMG_2261.jpg
    IMG_2261.jpg
    139 KB · Views: 35
  • IMG_2258x2.jpg
    IMG_2258x2.jpg
    138 KB · Views: 35
  • IMG_2257x2.jpg
    IMG_2257x2.jpg
    140.5 KB · Views: 33
  • IMG_2256x2.jpg
    IMG_2256x2.jpg
    140.1 KB · Views: 34
Last edited:

Members online

No members online now.

Forum statistics

Threads
278,310
Messages
3,554,080
Members
248,016
Latest member
Advally Service

Trending content

Back
Top