Fiore's Build Thread

fiore

New member
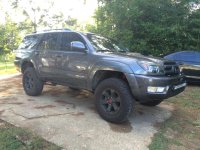
Okay so I decided to start a build thread. My passion for building an offroad vehicle started when I was in 10th grade. All my friends had jeeps and trucks and we would all see who could make theirs look the best. I had a 2001 Jeep Grand Cherokee Limited All-Time 4x4. I lifted it, added rims and tires, put a few lights on it, and added a brush guard. My gas mileage was awful though and my friends with stock 4runner's were getting over double what I was getting. So, I decided to give up my 4x4 Jeep for a stock 2wd v6 4runner. I told everyone I was going to keep it stock, including my parents, but that lasted maybe a month.

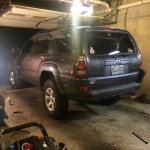
The first picture is from the day I bought it. 2005 Toyota 4runner Galactic Grey Sport Edition 2wd v6 with 152k miles.
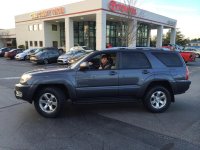
4runner build 1.jpg


The first mod I did was add Led Lights all around including: Dome lights, Door lights, Reverse Lights, and License Plate Lights
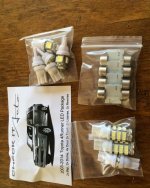
4runner build 2.jpg
The difference in Stock vs Led:
4runner build 3.jpg

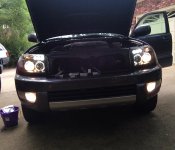
Next up was the Spec-D Tuning Headlights. They came with HIDs and ballasts.
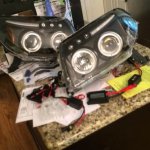
4runner build 4.jpg
Without the HIDs installed yet:
4runner build 5.jpg

Next up came the Daystar 1" Thick Budget Boost (2" Lift)
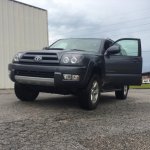
4runner build 6.jpg

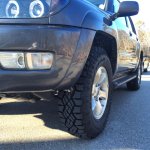
A few months after the leveling kit I figured I should fill the empty space in the front so I added 255/75/17 Duratracs. Got them online for under $700 and Walmart mounted them for $20.
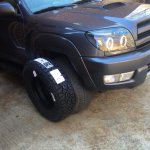
4runner build 7.jpg
4runner build 8.jpg
 

Attachments

  • 4runner build 1.jpg
    4runner build 1.jpg
    137.1 KB · Views: 686
  • 4runner build 2.jpg
    4runner build 2.jpg
    133.8 KB · Views: 626
  • 4runner build 3.jpg
    4runner build 3.jpg
    119.7 KB · Views: 620
  • 4runner build 4.jpg
    4runner build 4.jpg
    112.8 KB · Views: 611
  • 4runner build 5.jpg
    4runner build 5.jpg
    116.7 KB · Views: 629
  • 4runner build 6.jpg
    4runner build 6.jpg
    127.9 KB · Views: 624
  • 4runner build 7.jpg
    4runner build 7.jpg
    125.5 KB · Views: 637
  • 4runner build 8.jpg
    4runner build 8.jpg
    131.1 KB · Views: 607
Register to hide this ad
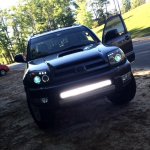
Finally hooked up the HID's that came with the headlights after forcing the stock bulbs out. Many people had this problem with the stock low beam bulbs on Spec-D Headlights. Also bought a 32" light bar to put in the lower grill. Couldn't find an easy place to mount onto the frame so I rigged up something with the stock mounts facing out. Added a LED LIGHT BAR rocker switch inside which looks pretty neat and factory. Also had my front windows tinted 20% with a 5% windshield strip.
4runner build 9.jpg

Tested out the light bar a few nights after I got it. Ended up hitting a few mud holes and blew a few fuses for my light bar.
4runner build 10.jpg

Decided I wanted to go bigger with my 4Runner on a tight budget so I bought a buddy's old 1.5" rear Daystar spacers with his OEM springs which had 100k miles less than mine.
4runner build 12.jpg
With it installed:
4runner build 13.jpg

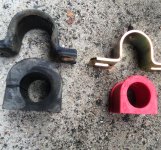
I've had swaying problems for awhile now and have been taking everything into account. One thing I was told to do by a member was to change out my Sway Bar Bushings with Polyurethane bushings because OEM rubber ones wear out. I replaced front and rear including sway bar end-links. Heres a comparison on stock and Prothane Bushings:
4runner build 14.jpg

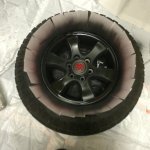
After Plasti-dipping the roof rails and bedlining the silver parts on the front and rear bumpers, I decided to see how I liked black rims. I did multiple searches for Sport Edition rims but found few that I liked. I went ahead and did it anyways and painted the Toyota emblem red. Couldn't be more happy. Now to either get wheel spacers or wider tires.
4runner build 15.jpg

Gave her a fresh wax after the plastidipped rims and debadging:
4runner build 16.jpg
 

Attachments

  • 4runner build 9.jpg
    4runner build 9.jpg
    134 KB · Views: 602
  • 4runner build 10.jpg
    4runner build 10.jpg
    135.9 KB · Views: 628
  • 4runner build 12.jpg
    4runner build 12.jpg
    129.8 KB · Views: 604
  • 4runner build 13.jpg
    4runner build 13.jpg
    123.9 KB · Views: 621
  • 4runner build 14.jpg
    4runner build 14.jpg
    142.1 KB · Views: 594
  • 4runner build 15.jpg
    4runner build 15.jpg
    116.6 KB · Views: 615
  • 4runner build 16.jpg
    4runner build 16.jpg
    137.4 KB · Views: 597
Last edited:
As you can see in the previous picture, I debadged my Runner. One reason being that others could tell it was RWD by the missing of the 4WD emblem. To fix that and add a few hundred horsepower, I added TRD emblems on the front doors.
4runner build 18.jpg

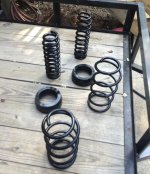
I bought Moog 81088 Coils which apparently lift a V6 RWD 4runner just shy of 2". Painted them red for looks and paired them with Bilstein 5100's. Solid looking combo in my opinion. Set the bilsteins at 1.75" and added Moog top plates.
attachment.php

attachment.php


Finally got around to installing them. Assembled the struts the night before the install and got a buddy to help with the install. Disconnected the sway bar and let it freely sit without removing the skid plate. Dropped the LCA off of the hub by the 2 bolts holding them together. Stock struts came right out and disconnecting XREAS was a breeze (oil went everywhere!). New struts went in easily but they were so stiff that cranking up the LCA to get the tires back on was nearly impossible. Took about 5 hours with a buddy including assembling the struts the night before. I have spent hundred of hours on the forum researching how to do everything but actually doing it was a different story. Drivers side took about 2 hours and passenger was probably 40 minutes just because I knew what I was doing then.
attachment.php


Rear Bilstein 5100s went in easy. Took about an hour and gave my rear end a lot more travel than before.

Heres the final product from last night.
attachment.php

I will try and get better pictures today.
 

Attachments

  • 4runner build 18.jpg
    4runner build 18.jpg
    138.1 KB · Views: 600
Last edited:
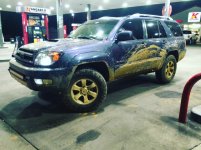
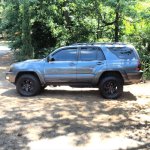
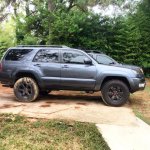
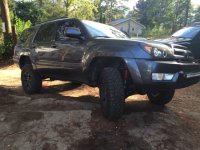
Just had my alignment done. They obviously couldn't get it into spec but thats ok. Here's a few daytime pics of after the lift installed.
4runner build 22.jpg4runner build 23.jpg4runner build 24.jpg
 

Attachments

  • 4runner build 22.jpg
    4runner build 22.jpg
    137.2 KB · Views: 577
  • 4runner build 23.jpg
    4runner build 23.jpg
    141.2 KB · Views: 573
  • 4runner build 24.jpg
    4runner build 24.jpg
    138 KB · Views: 595
Nice, clean, and simple. Jealous of the tire deal you found online!

Welcome to the Toyota world! :whoo:
 
Thanks [MENTION=84680]wadle5[/MENTION]! You've got a nice 4R yourself. Keep up the nice work
 
Look'n good! I'm liking the red springs! Thought about doing it then went with black. Oh well. Nice looking truck!
 
Last edited:
Thanks [MENTION=109424]robaroni[/MENTION]! My goal was to look like yours! I just wanted to see how the springs would look and loved them! The spring compressors didn't however, but nothing some touchup paint couldn't fix. Thanks for the help along the way
 
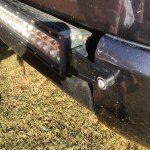
Lower Grill Light Bar Mount

image.jpg
For anyone wondering how I mounted my light bar in the lower grill: this is what I did. I used the stock mounting brackets and turned them sideways. The part of the bracket that usually mounts to the bumper or vehicle is actually attached to the side of the light bar and where it usually attaches to the side of the light bar is attached to the bumper. I like how the light bar sits also because the beam is outside of the bumper and doesn't lose light output from the top of the bumper where if the light bar was inside the grill. Also the install of this method is super easy and only takes the time to drill holes into the bumper. The longest part was taking out the plastic inside the grill. I love how it looks and performs. Never had a problem with a rock hitting it or coming lose. The bolts in the bumper have held up pretty good also and the light bar doesn't bounce around or shake when driving down the road or offroad.
 

Attachments

  • image.jpg
    image.jpg
    141.4 KB · Views: 437
Thank you [MENTION=75287]Wavesport[/MENTION]! They didn't like mud too much and left some dried mud on them after I cleaned my car. I'll probably peel the plastidip off and paint and clear coat them to last longer because I like the look of them.
 
New 4runner build!!

I'm sorry I have been on here in awhile! I sold the 4Runner and now I am back in a newer one thats very similar! Check it out in my new photo album!! Didnt want to have to make another build thread. Or follow me on instagram @project_charlene2.0
 

Members online

Forum statistics

Threads
278,309
Messages
3,554,065
Members
248,016
Latest member
Advally Service

Trending content

Back
Top