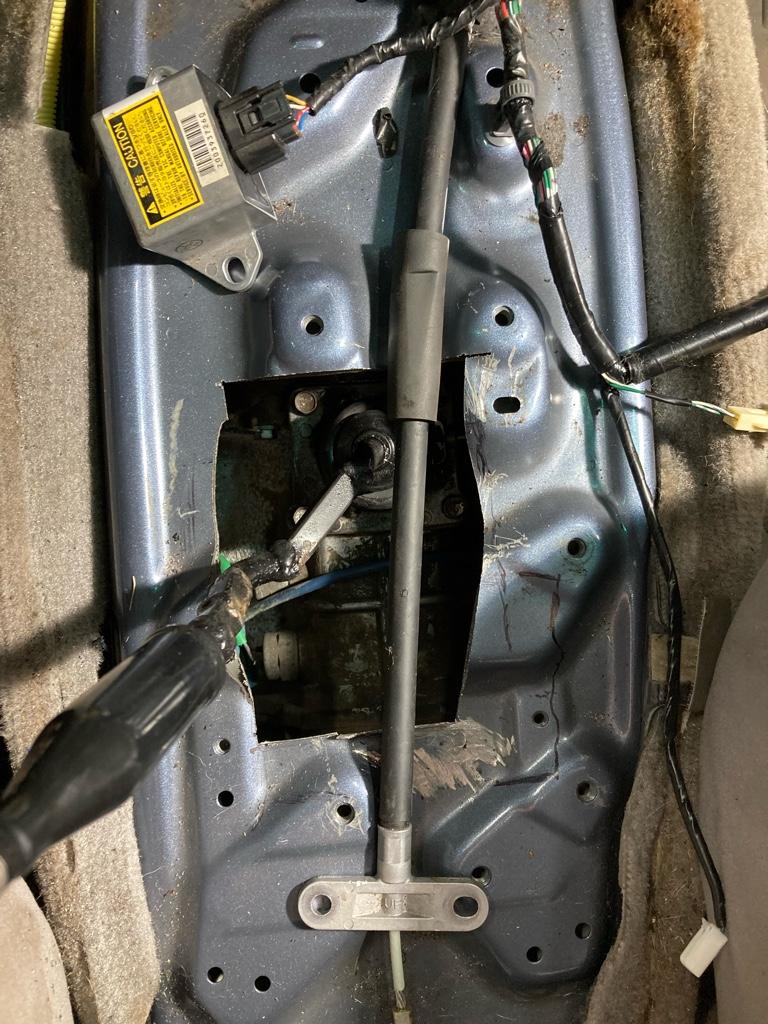
FJ Transfer Case Swap into a V6 4th Gen

Wiring Part 1: Dash Lights

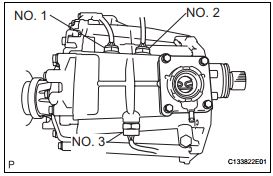
Finally had time to finish everything up for the swap and get it posted here! First part I'll discuss is wiring up the FJ case position sensors to get the dash lights to work when the case is shifted. The picture below shows the 3 position sensors on the case.

Sensor 1 indicates neutral
Sensor 2 indicates 4Lo
Sensor 3 indicates 4WD


https://flic.kr/p/2kL2GD9


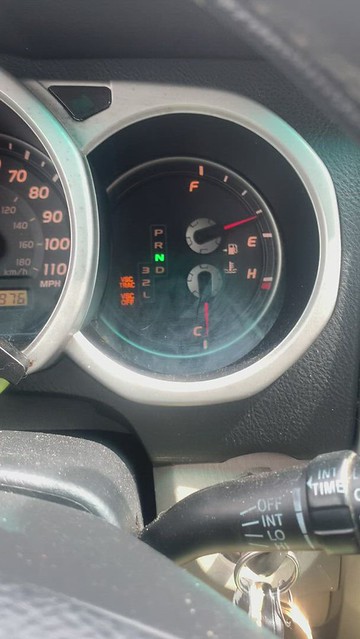
I decided to wire up Sensor 3 and Sensor 2, leaving Sensor 1 unconnected. For my dash lights, the center diff lock light turns on when I go from 2WD to 4WD, and 4Lo turns on for 4Lo.

To do this, I used my Chilton manual to get the wire colors on the 4WD computer plugs that correspond to the dash lights I want to wire up. The 4WD computer is located behind a black trim piece underneath the glovebox. One screw and 2 retaining tabs hold the trim on.

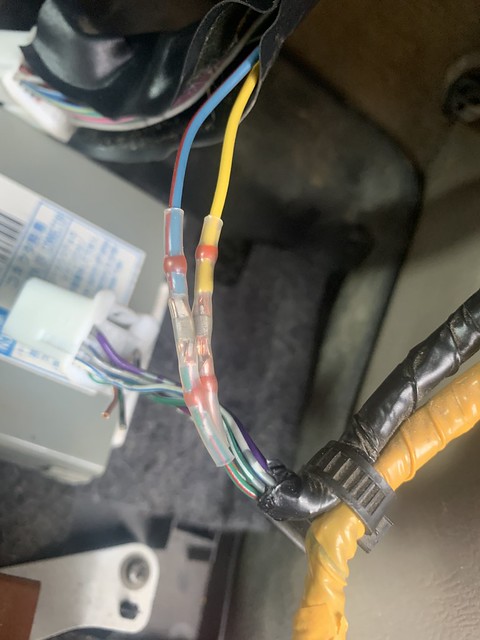
You need to remove the tape/sheathing covering both plugs that connect to the 4WD computer. You're gonna connect two wires from each plug to one another, then leave the 4WD computer unplugged as you no longer need it. Connect the red/blue wire on one plug to the green/red wire on the other plug. Similarly, connect the yellow wire to the brown/white wire for the 4Lo dash light. Follow the wiring diagram in your manual to be certain that the correct dash lights are connected.

Austin's build thread has some better pictures of the wires than what I could take, it's a good reference for this swap as well as the twin stick mod: A-Ha's Build Thread


The yellow and red/blue wires connect to the large plug that used to connect to the old transfer case actuator. So that's where you can connect power for each sensor on the FJ case to those same yellow and red/blue wires to finish up the dash lights. Then just ground the sensors; I grounded them to one of the shifter bolts.

That's it for dash lights! Next up is getting the ADD to actuate and wiring up an ABS killswitch.
 
Wiring Part 2: ADD Actuator and ABS Killswitch

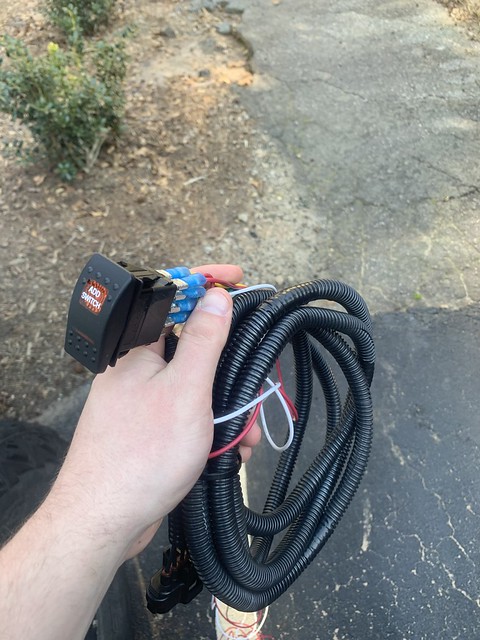
With the FJ case, you no longer have control over the ADD actuator on the front diff to allow power to be delivered to the passenger CV axle. To fix this, you can wire up the actuator to a manual switch. I bought a complete ADD harness from a fellow 4Runner driver on Instagram (@spudrunner_t4r) that includes the correct plug to connect it to the ADD actuator and a switch. Harness also includes enough wire length to get the switch into the cab and place it to the left of the steering wheel.

Here's the harness:


Just hook up the harness to power and ground (I wired mine to an aftermarket fuse box I have) and you're all set! To actuate the ADD, hold the switch downward until the backlight comes on. Disengage ADD by holding the switch upward until the light turns off.

Now, the FJ case will require an ABS killswitch to disengage the ABS when you're in 4Lo as suggested by [MENTION=66389]BlackWorksInc[/MENTION] since the ABS and traction control systems may be unhappy on certain terrain (see post #17 on this thread).

I followed the steps in this YouTube video to wire up the killswitch: ABS Killswitch Install

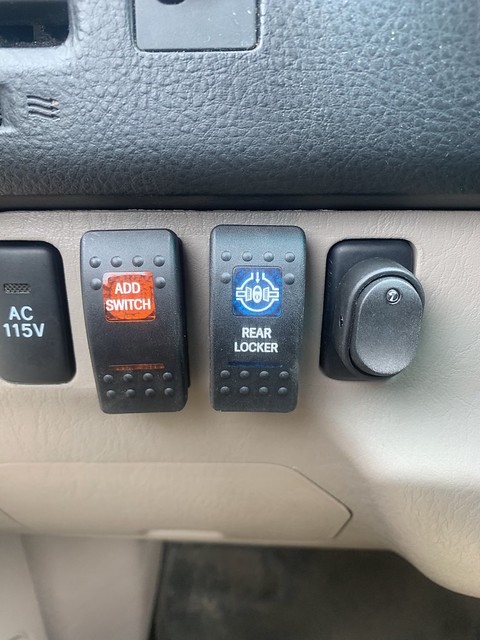
All wiring for the FJ transfer case swap should now be complete! Here's the switches installed:


Here's a video showing everything working as intended (click on the image to view the video):


Interior Part 1: Closing Up the Hole in the Floor

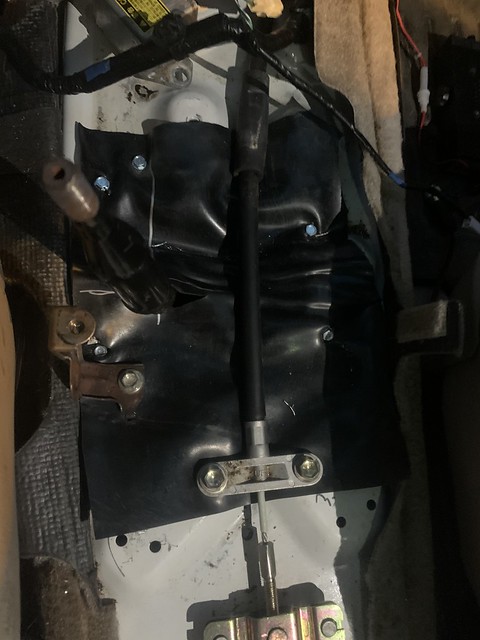
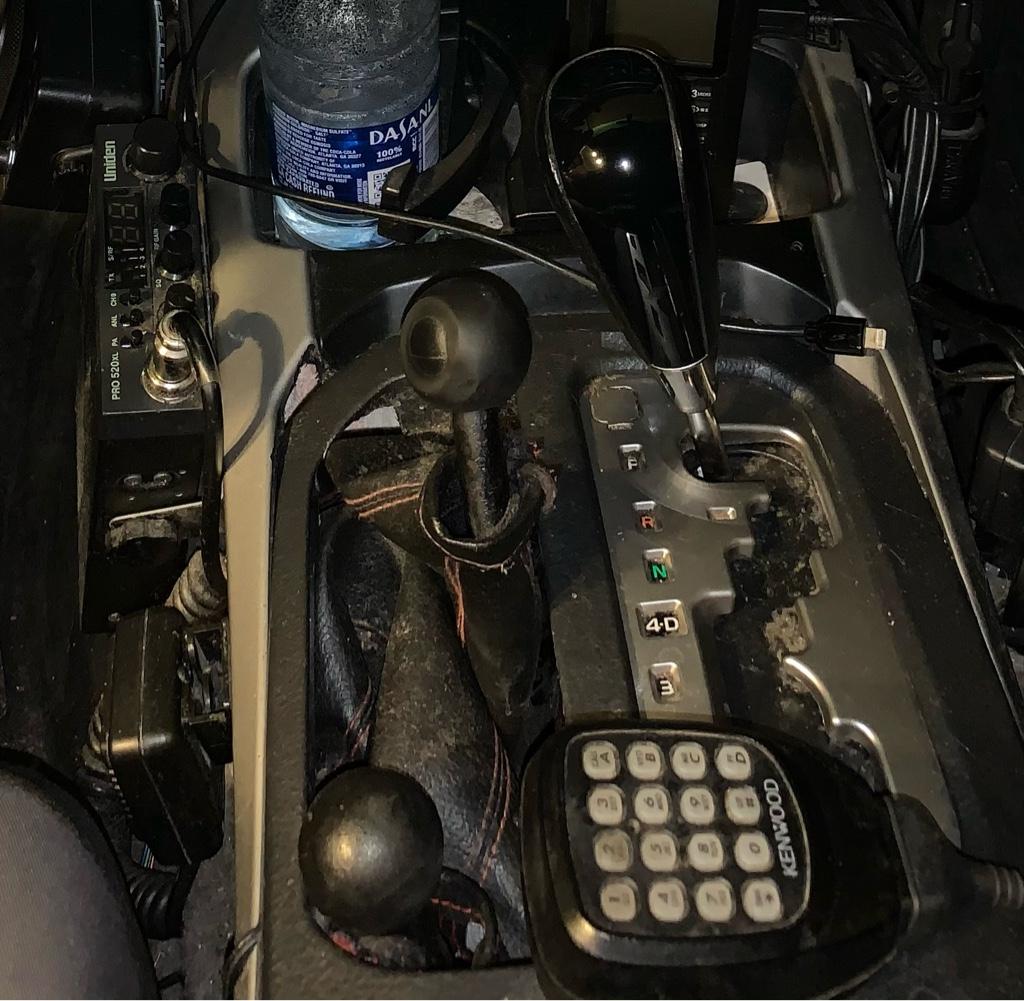
To cover the floor hole as best as I could, I used some self-tapping screws to secure some 1/8" rubber down to the floor. I cut slits in the rubber for the shifter to move around in without tearing the rubber too much.


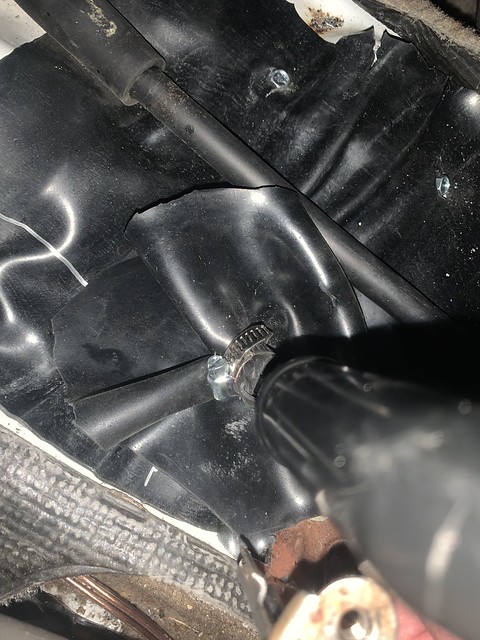
Then, I added a second, smaller piece of rubber that is attached to the shifter and travels with it to help cover the slits in the bottom piece of rubber. I attached the small rubber piece to the shifter using a small hose clamp:


That does it for covering the floor!
 
Interior Part 2: Rear AC

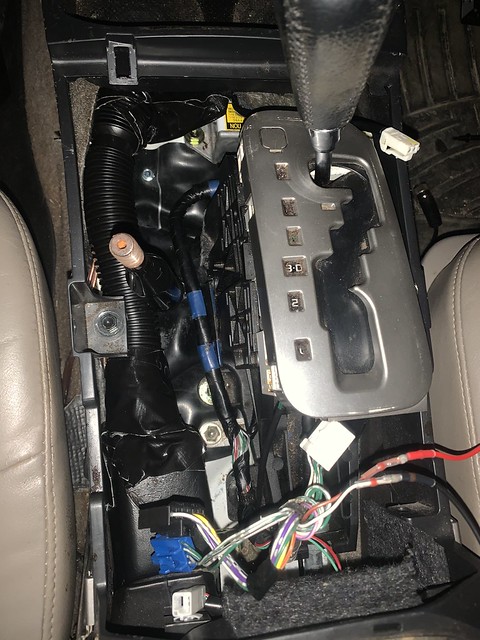
To somewhat retain rear AC function, I followed Austin's (@A-Ha) method of cutting the plastic AC duct and using hose to connect the ends. I used a 1.25" corrugated hose intended for a dishwasher drain to connect the ends of the AC duct while routing the hose in between the center console bracket and the shifter.


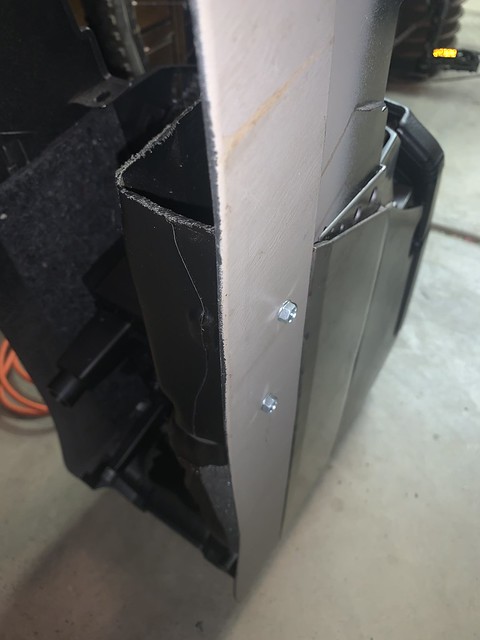
The duct end that goes into the dash stays in place rather well, but the connection to the rear of the center console would move around. To fix this, I just added 2 self-tapping screws through the side of the center console and into the remaining AC duct piece:


There's barely enough room for the hose, and the hose does put some pressure on the shifter. But, this helps prevent the shifter from rattling around too much. Not much air comes out of the rear vents, but it's better than absolutely nothing.
 
Interior Part 3: Shift Boot and Finishing Touches

The last thing I needed to do to completely finish up this swap is add a shift boot and a USB outlet since this swap removes the cigarette outlet.

I bought a generic dual-port USB outlet from Amazon, about $10.

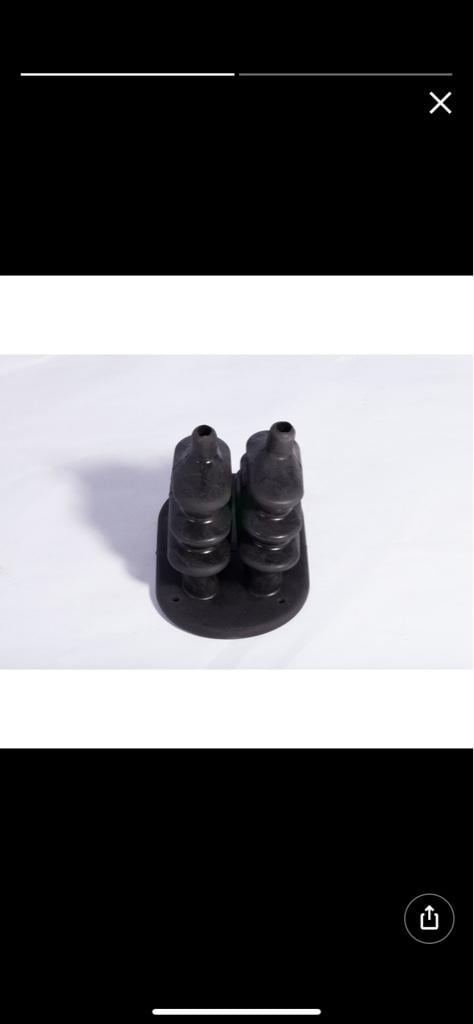
For the shift boot, I used a generic shift boot from Autozone that is $10, similar to [MENTION=459231]xtremewlr[/MENTION] (see post #33).

I cut holes in the shift boot and drilled holes into the center console trim all around the pocket where the shifter goes and attached the boot to the console trim using zip ties:
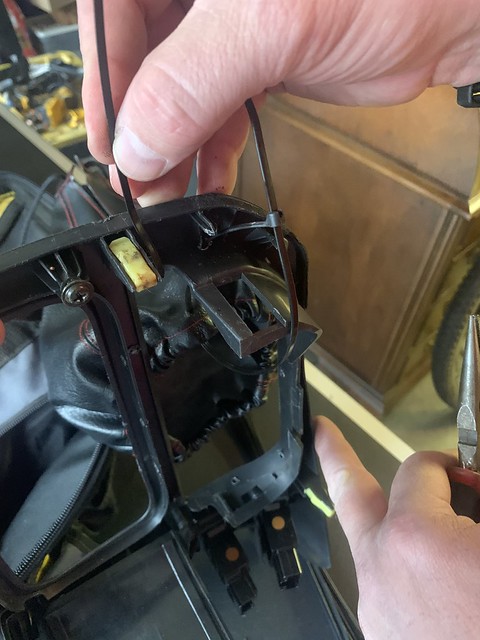


And installed:


That concludes the FJ transfer case swap! I'm sure I've left out details throughout so please ask questions in this thread or PM me so I can add more info to this thread for others to benefit from. Hopefully I'll be able to get out and wheel soon to test it all out. Until then, happy wheeling everyone!
 
The last thing I needed to do to completely finish up this swap is add a shift boot and a USB outlet since this swap removes the cigarette outlet.

I bought a generic dual-port USB outlet from Amazon, about $10.

For the shift boot, I used a generic shift boot from Autozone that is $10, similar to [MENTION=459231]xtremewlr[/MENTION] (see post #33).

I cut holes in the shift boot and drilled holes into the center console trim all around the pocket where the shifter goes and attached the boot to the console trim using zip ties:


And installed:


That concludes the FJ transfer case swap! I'm sure I've left out details throughout so please ask questions in this thread or PM me so I can add more info to this thread for others to benefit from. Hopefully I'll be able to get out and wheel soon to test it all out. Until then, happy wheeling everyone!

That boot works pretty well, doesn't it? Nice work man, came out really good! :rockon:
 
The last thing I needed to do to completely finish up this swap is add a shift boot and a USB outlet since this swap removes the cigarette outlet.

I bought a generic dual-port USB outlet from Amazon, about $10.

For the shift boot, I used a generic shift boot from Autozone that is $10, similar to [MENTION=459231]xtremewlr[/MENTION] (see post #33).

I cut holes in the shift boot and drilled holes into the center console trim all around the pocket where the shifter goes and attached the boot to the console trim using zip ties:

And installed:
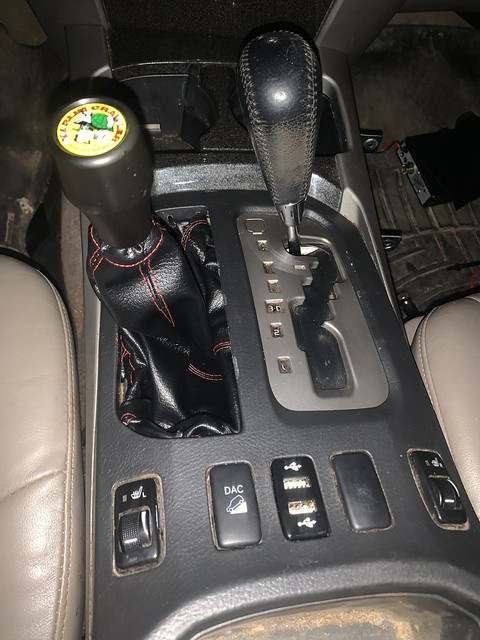


That concludes the FJ transfer case swap! I'm sure I've left out details throughout so please ask questions in this thread or PM me so I can add more info to this thread for others to benefit from. Hopefully I'll be able to get out and wheel soon to test it all out. Until then, happy wheeling everyone!


Nice job doing this swap.

Funny we all use similar shift boots.

ac57610a1809fa3237313b8acee5db47.jpg


Also consider adding the single stick version of this to seal the heat coming up the hole area. I added sound damping and the rubber shift boot to help with noise on mine.

645dfebcb59ab6b724218bc9e3f691fe.jpg


Sent from my iPhone using Tapatalk
 
Last edited:
Nice job doing this swap.

Funny we all use similar shift boots.

ac57610a1809fa3237313b8acee5db47.jpg


Also consider adding the single stick version of this to seal the heat coming up the hole area. I added sound damping and the rubber shift boot to help with noise on mine.

645dfebcb59ab6b724218bc9e3f691fe.jpg


Sent from my iPhone using Tapatalk

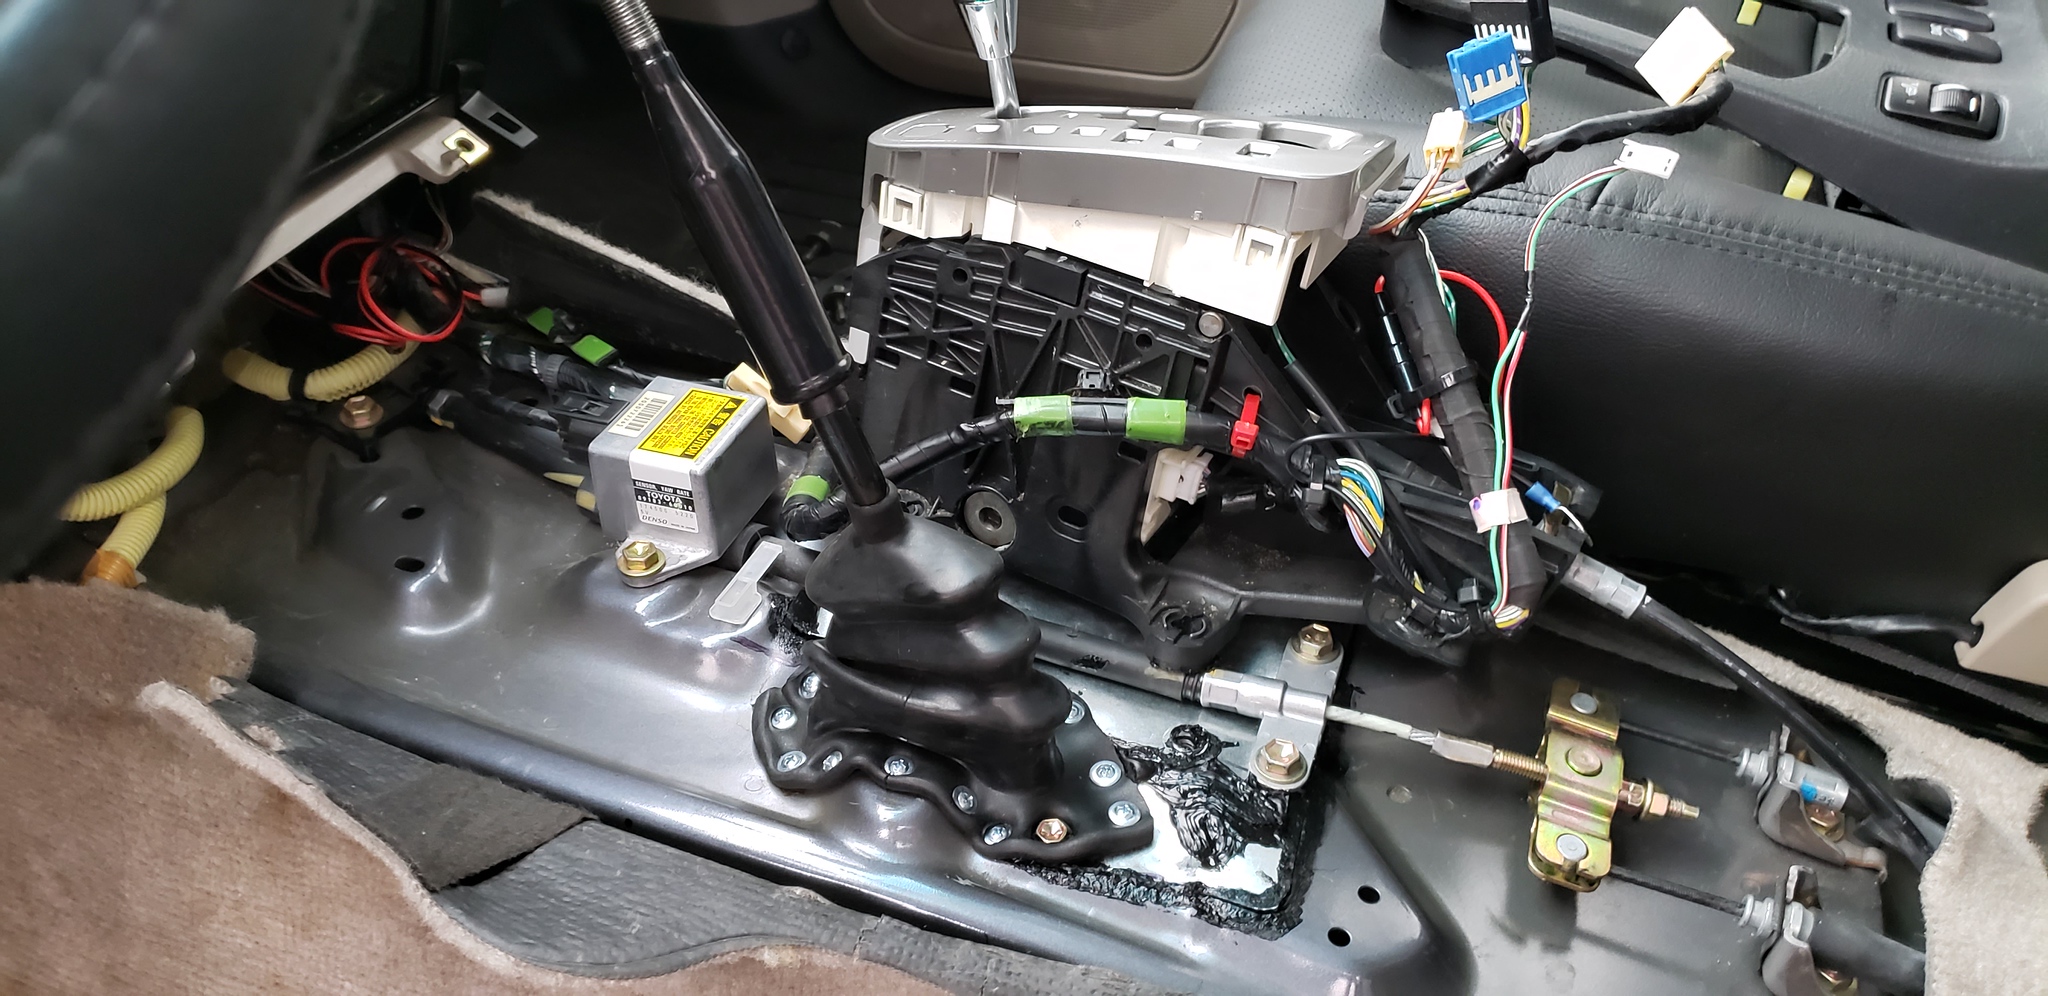
I had bought a twin stick for the swap but haven't used it yet. I took the twin boot and cut it in half and sealed up the FJ stick with that.

20200926_114640-X4.jpg
 
I had bought a twin stick for the swap but haven't used it yet. I took the twin boot and cut it in half and sealed up the FJ stick with that.

20200926_114640-X4.jpg

Nice pretty much like mine except I added sound damping material aka dynamat around the entire bare floor to cut down on noise, the noise even with sheeting sealed still kind of loud alone.
 
Nice pretty much like mine except I added sound damping material aka dynamat around the entire bare floor to cut down on noise, the noise even with sheeting sealed still kind of loud alone.

Yeah, I'll be doing that at some point. Probably when I get around to replacing the carpet. I'll also remake the cover plate for the hole that I cut into the trans tunnel since it's 2 pieces right now.
 
I probably should do some more to reduce noise coming through the floor but tbh, it seems about as quiet as it was before and I usually have my music cranked up loud anyways.
 
Did the swap a couple weeks ago. Really not hard at all and worth the time and money invested to do it. Lots of time saved thanks to Ryan documenting his swap.
Couple things I found:
1. I did the 1.5”bl because it was said that it might be required, I don’t think that was the case. It made it easier in some ways but makes it harder to get the shifter fitting correct because the farther the body is from the t-case the more room the shifter needs to clear stuff.
2. To make the shifter fabrication easier take the shifter apart and spin it 180deg and reassemble. You’ll know that I’m talking about once you’ve seen it.
3. Here is a pic of my floor cut which was just enough room.
c90ccd88b7e60c8e430318bb1626d30f.jpg


Sent from my iPhone using Tapatalk
 
Last edited:
I'm considering buying an '03 V6 (4spd), and a little concerned about sticking actuators in these. It works for now, but being a Texas truck, chances are I was the first to engage 4WD in a decade+ (as would just about any 4th gen from here)... so I'm doing a little pre-planning.

From the looks of this thread, should I hold out for a V8? I hate to let this one go, the price is right...

Also, is it possible that OP's conversion could have have been done without a body lift?

Did the swap a couple weeks ago. Really not hard at all and worth the time and money invested to do it. Lots of time saved thanks to Ryan documenting his swap.
Couple things I found:
1. I did the 1.5”bl because it was said that it might be required, I don’t think that was the case. It made it easier in some ways but makes it harder to get the shifter fitting correct because the farther the body is from the t-case the more room the shifter needs to clear stuff.
2. To make the shifter fabrication easier take the shifter apart and spin it 180deg and reassemble. You’ll know that I’m talking about once you’ve seen it.
3. Here is a pic of my floor cut which was just enough room.

What year/engine is yours?
 
Last edited:
So after my last long trip out west I started having problems with 4 lo out there.

I hunted down an FJ case locally. I saw the thread on how to delete the ADD up front. Also going to do a twin stick for 2lo, which would be really nice when dry and running mountain passes.

I’ll eventually be adding ARB’s front and rear. So I’m not too worried about the ADD stuff.

Any good YouTube videos on rebuilding one of these FJ cases? I’d like to put in new bearings and seals.
 
So after my last long trip out west I started having problems with 4 lo out there.

I hunted down an FJ case locally. I saw the thread on how to delete the ADD up front. Also going to do a twin stick for 2lo, which would be really nice when dry and running mountain passes.

I’ll eventually be adding ARB’s front and rear. So I’m not too worried about the ADD stuff.

Any good YouTube videos on rebuilding one of these FJ cases? I’d like to put in new bearings and seals.

have you already sourced the twin sticks? My suggestion, keep it simple and forego that mod and just keep the j-pattern shifter. I swapped over to the twin-stick mod in mine (primarily because the junkyard elected NOT to include the factory shifter and I couldn't find anything cheaper than $600 for a replacement) and can tell you I have used 2lo LITERALLY 2 times: one was to make sure it works after I swapped it in, and the second on a trail before quickly realizing that 4hi was significantly better than 2lo. I just haven't found the need or application for 2lo. Especially if you haven't/arent planning to upgrade the rear axle..

it is significantly easier to package and seal the single shifter vs the twin sticks. I also found that when I'm in 2Hi and try to accelerate from a dead stop with heavy throttle, my t-case wants to "pop" into 4hi and clunks as the synchro slips and tries to engage. I'm not 100% certain if this is a result of modifying the case to accept the twin sticks or not, but I can eliminate the sound by holding the 2hi/4hi stick selector forward under heavy acceleration.

As far as seals and bearings.. there's really nothing much to these cases and you have access to everything once you crack it open.. just be mindful of the synchronizer hub/springs when you take it apart.. they'll shoot out and you'll never find them again. I have personally yet to hear anyone having to replace bearings on a t-case so you may be overthinking that.. the seals are like any other seal when it comes to replacing. I elected to not change anything on my junkyard t-case that has god knows how many miles and it has 0 issues for the past year of use.
 

Members online

Forum statistics

Threads
278,316
Messages
3,554,112
Members
248,016
Latest member
Advally Service

Trending content

Back
Top