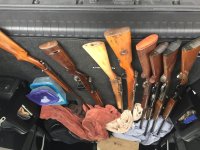
So I have been lurking on here for long enough and its time I start posting about my build.
Background:
I'm a former Jeep guy.....was really into it, but got tired of spending $$$ every other month just to go back out an break something else...I was also a lot younger then. I caught the overland bug several years ago. I'm also a big hunter and have been fortunate enough to take some killer trips and meet some awesome people following my passion to be outside. Long story short after filming for friends in my spare time, I along with 3 friends decided to combine our passion for hunting and overland travel together. This build will be for my vehicle that will take part in a great deal of our travels over the next few years, some of which will potentially be featured on a network. The Trans America trail and the original route 66 route are two main objectives for the project. This vehicle has received some sponsorships so I want to be up front about that...but my opinion on any and all gear used will be honest. While I am still new to a Yota, I'm by no means new to going offroad. I say this as I have a great respect for quality gear and manufactures that stand by the products they sell.
Vehicle:
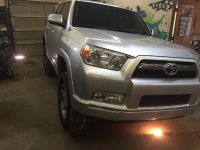
2012 SR5 4Runner.
Millage at build start: 30,000.
No previous modification.
Goals for Build:
Sleeper/Grey Man- My former jeep (95 YJ) was heavily decked out and honestly caused me to get more attention than I would like. I didn't like coming out of REI to find some wacko underneath my ride "admiring my rocks lights and skid plates" (Not Kidding) Another time I found a kid sitting in my driver seat (Doors were removed...I know I know) and looking around the inside of my jeep. All this said I don't want to attract a bunch of attention rolling down the street. Some of you might remember me asking about bumpers in an earlier thread I started. I was looking at the Schrockworks front bumper and wasn't into a hidden winch mount...that changed. So long story short I'm going for a sleeper. I want most people to not give my rig a second thought when I drive to work everyday.
Low Weight -Honestly I'm trying to make sure anything that is placed on the vehicle has a purpose. Unnecessary items cause unnecessary weight. The more weight on the vehicle the less efficient it becomes and the harder it has to work. I am trying to keep this simple. Skids and protection will occur, but you won't see a fridge installed in my rig. Why? Its not that I have a problem with them...but I need that space for other gear. (Guns, Bows, Rods, etc.) Not to mention I am very happy running an MSR pocket rocket with mountain house...thats how I pack for hunts and thats what will transfer to this rig. For my purposes less is more.
To Learn- Like I said, I am new to this platform. While I'm excited I have a bunch to learn. So going through the vehicle little by little will allow me to learn about my new platform. Also posting in this thread and keeping it up to date will allow me to pull from the knowledge that so many of you have. I'm very excited to say the least.
I'm starting this late at night and will add notes/pics of whats been completed thus far over the next few days. I just touched down from a long trip and I am jet lagged like crazy. I'm a full time recruiter for my day job so my schedule is always changing. This will keep my progress slow due to random interruptions that are bound to happen.
Mods List:
*=Sponsor
Windows Tinted-11/18/14
AirRaid MXP Snorkel Ready CAI- 11/19/14
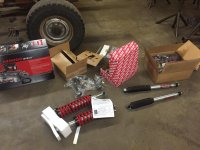
Toytec Boss Suspension System-11/23/14
Light Racing UCAs- 11/23/14
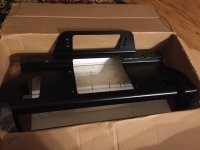
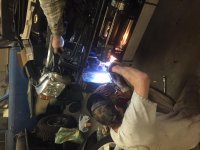
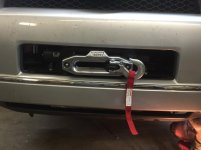
Bud Built Hidden Winch Mount- 11/23/14
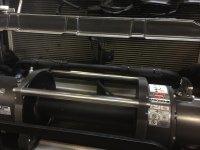
*WARN M8000S- 11/23/14
*5 BFG All Terrain T/A 285/70/17- 11/25/14
Escort Passport 8500- 11/25/14
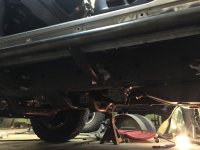
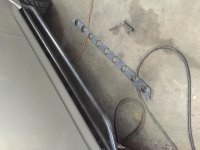
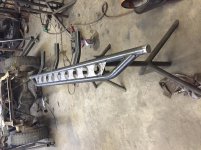
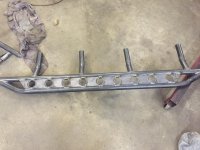
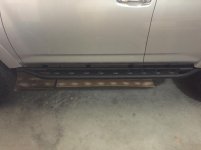
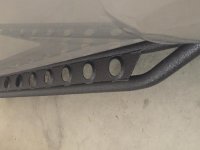
Custom Rock Sliders- 1/18/15
*Gibson Performance Stainless Exhaust- 1/21/15
Weathertech Floor Liners- 1/24/15
To Come:
Remove 3rd Row
Custom Locking Storage Box/Sleeping Platform
Electronic Gun Lock (Shotgun and maybe AR)=Bear Medicine
HAM Radio
Aluminum Skid Plates
Gobi Rack
ARB Mini Compressor
ARB Air Lockers
Rigid Lights- Front Light Bars, Camp Lights, and Duallys for Reverse Lights.
Tailgater Switch
Rigid Strobe KIT and IR Strobes for Emergencies. (This is strictly for rescue purposes if we were to ever need it. I can give you plenty of reasons for these)
Interior Tie Down Brackets
Quick Detach Mount for spare fuel.
Interior Rear Hatch Button
I honestly think thats it for now. I will add pics for what I have up to now over the next few days. Glad to be here. Sleep is needed.
Background:
I'm a former Jeep guy.....was really into it, but got tired of spending $$$ every other month just to go back out an break something else...I was also a lot younger then. I caught the overland bug several years ago. I'm also a big hunter and have been fortunate enough to take some killer trips and meet some awesome people following my passion to be outside. Long story short after filming for friends in my spare time, I along with 3 friends decided to combine our passion for hunting and overland travel together. This build will be for my vehicle that will take part in a great deal of our travels over the next few years, some of which will potentially be featured on a network. The Trans America trail and the original route 66 route are two main objectives for the project. This vehicle has received some sponsorships so I want to be up front about that...but my opinion on any and all gear used will be honest. While I am still new to a Yota, I'm by no means new to going offroad. I say this as I have a great respect for quality gear and manufactures that stand by the products they sell.
Vehicle:
2012 SR5 4Runner.
Millage at build start: 30,000.
No previous modification.
Goals for Build:
Sleeper/Grey Man- My former jeep (95 YJ) was heavily decked out and honestly caused me to get more attention than I would like. I didn't like coming out of REI to find some wacko underneath my ride "admiring my rocks lights and skid plates" (Not Kidding) Another time I found a kid sitting in my driver seat (Doors were removed...I know I know) and looking around the inside of my jeep. All this said I don't want to attract a bunch of attention rolling down the street. Some of you might remember me asking about bumpers in an earlier thread I started. I was looking at the Schrockworks front bumper and wasn't into a hidden winch mount...that changed. So long story short I'm going for a sleeper. I want most people to not give my rig a second thought when I drive to work everyday.
Low Weight -Honestly I'm trying to make sure anything that is placed on the vehicle has a purpose. Unnecessary items cause unnecessary weight. The more weight on the vehicle the less efficient it becomes and the harder it has to work. I am trying to keep this simple. Skids and protection will occur, but you won't see a fridge installed in my rig. Why? Its not that I have a problem with them...but I need that space for other gear. (Guns, Bows, Rods, etc.) Not to mention I am very happy running an MSR pocket rocket with mountain house...thats how I pack for hunts and thats what will transfer to this rig. For my purposes less is more.
To Learn- Like I said, I am new to this platform. While I'm excited I have a bunch to learn. So going through the vehicle little by little will allow me to learn about my new platform. Also posting in this thread and keeping it up to date will allow me to pull from the knowledge that so many of you have. I'm very excited to say the least.
I'm starting this late at night and will add notes/pics of whats been completed thus far over the next few days. I just touched down from a long trip and I am jet lagged like crazy. I'm a full time recruiter for my day job so my schedule is always changing. This will keep my progress slow due to random interruptions that are bound to happen.
Mods List:
*=Sponsor
Windows Tinted-11/18/14
AirRaid MXP Snorkel Ready CAI- 11/19/14
Toytec Boss Suspension System-11/23/14
Light Racing UCAs- 11/23/14
Bud Built Hidden Winch Mount- 11/23/14
*WARN M8000S- 11/23/14
*5 BFG All Terrain T/A 285/70/17- 11/25/14
Escort Passport 8500- 11/25/14
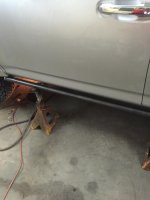
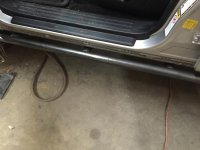
Custom Rock Sliders- 1/18/15
*Gibson Performance Stainless Exhaust- 1/21/15
Weathertech Floor Liners- 1/24/15
To Come:
Remove 3rd Row
Custom Locking Storage Box/Sleeping Platform
Electronic Gun Lock (Shotgun and maybe AR)=Bear Medicine
HAM Radio
Aluminum Skid Plates
Gobi Rack
ARB Mini Compressor
ARB Air Lockers
Rigid Lights- Front Light Bars, Camp Lights, and Duallys for Reverse Lights.
Tailgater Switch
Rigid Strobe KIT and IR Strobes for Emergencies. (This is strictly for rescue purposes if we were to ever need it. I can give you plenty of reasons for these)
Interior Tie Down Brackets
Quick Detach Mount for spare fuel.
Interior Rear Hatch Button
I honestly think thats it for now. I will add pics for what I have up to now over the next few days. Glad to be here. Sleep is needed.
Last edited: