

G.I.G.
New member
Shrockworks Rock Sliders
I installed my Shrockworks sliders with the help of a friend today. This is definitely a 2-man job, so I'm glad I waited until I could enlist the help of a friend.
As you probably already know, the stock step tubes are very flimsy and will buckle under even a little pressure on a trail. Below are a couple of pics of the stock step tubes, illustrating how much abuse they took while they were on there.


Installing the sliders were a PITA. I followed the directions, had the appropriate tools, and had an extra set of hands. Still, this ended up being an 8 hour job that easily could have take less than 2. Let me explain....
The front U-brackets on both sliders do not line up well on either side. Towards the front of the vehicle, the frame gets wider and curves in slightly before it curves up. Shrockworks designed the slider so that the front cross member is angled back slightly. It would have been much more efficient if they just moved that cross member back about an inch/inch and a half and kept it straight, as there is nothing on either side that would get in the way and would make for a much more efficient design.
We tried moving the sliders further forward, further back, but still came up with the same problem with the front U-bracket: we could not get the bolt through to the other side. Plus, since the frame widens, when you jack the sliders into place, the frame pushes the U-bracket outwards so instead of looking like |__| it ends up looking like \__/ so you cannot get the bolt through to the other side. Shrockworks does make the front U-bracket wider and supplies a longer bolt for the front, but it was not wide enough. I don't know if it was the frame on my particular 4Runner or the sliders Shrockworks sent me or a combination of the two, but from searching this forum and others (including Toyota120), I am not the first person who has encountered this issue.
We ended up making a trip to Ace Hardware to pick up a thinner bolt (1/4 inch) and bent it slightly so it could make it through to the other side. This is a bit of a shortcut, but the middle and rear bolts are so rock solid, I don't feel like this will compromise the integrity of the sliders. The bolts basically hold the sliders in place. Most impacts are going to be pushing the sliders towards the frame, and not pulling on the bolts themselves.
Regardless, we got them on and I am pleased with the end result. I drove my 4Runner around after the install and everything seems to be very tight and I did not hear anything wiggle around. I will get under it again here in the next week or two to re-torque everything once I've put some miles on it, but I don't think these sliders are going anywhere.
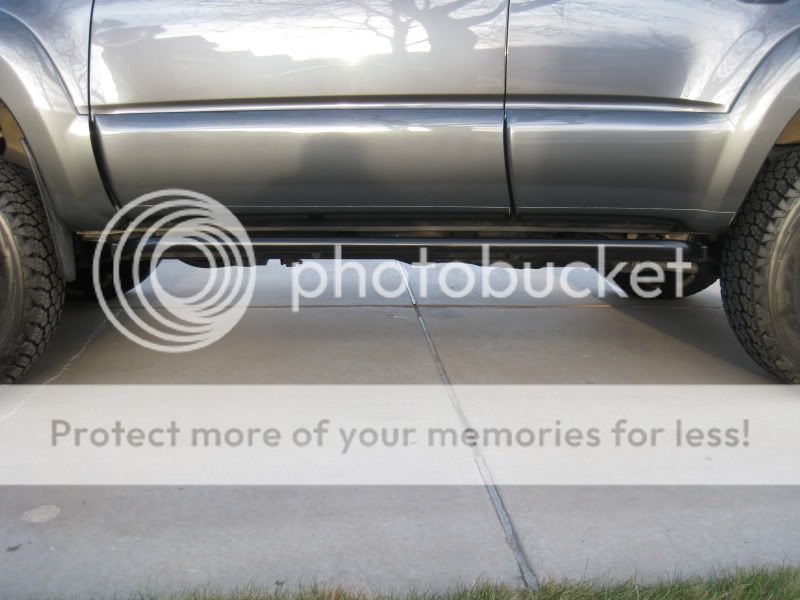
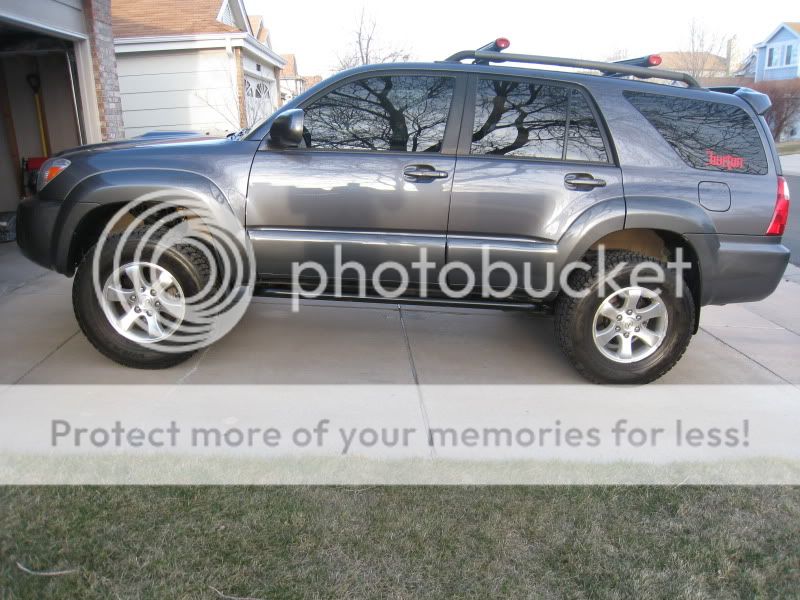
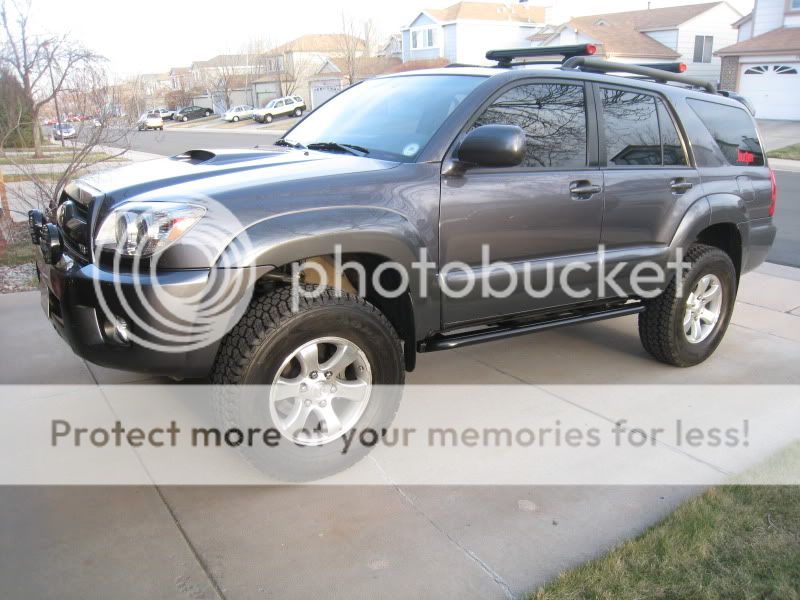
I'm happy with the final result, but the true test will be on the trails. From everything I've read, these should hold up great.
I installed my Shrockworks sliders with the help of a friend today. This is definitely a 2-man job, so I'm glad I waited until I could enlist the help of a friend.
As you probably already know, the stock step tubes are very flimsy and will buckle under even a little pressure on a trail. Below are a couple of pics of the stock step tubes, illustrating how much abuse they took while they were on there.
Installing the sliders were a PITA. I followed the directions, had the appropriate tools, and had an extra set of hands. Still, this ended up being an 8 hour job that easily could have take less than 2. Let me explain....
The front U-brackets on both sliders do not line up well on either side. Towards the front of the vehicle, the frame gets wider and curves in slightly before it curves up. Shrockworks designed the slider so that the front cross member is angled back slightly. It would have been much more efficient if they just moved that cross member back about an inch/inch and a half and kept it straight, as there is nothing on either side that would get in the way and would make for a much more efficient design.
We tried moving the sliders further forward, further back, but still came up with the same problem with the front U-bracket: we could not get the bolt through to the other side. Plus, since the frame widens, when you jack the sliders into place, the frame pushes the U-bracket outwards so instead of looking like |__| it ends up looking like \__/ so you cannot get the bolt through to the other side. Shrockworks does make the front U-bracket wider and supplies a longer bolt for the front, but it was not wide enough. I don't know if it was the frame on my particular 4Runner or the sliders Shrockworks sent me or a combination of the two, but from searching this forum and others (including Toyota120), I am not the first person who has encountered this issue.
We ended up making a trip to Ace Hardware to pick up a thinner bolt (1/4 inch) and bent it slightly so it could make it through to the other side. This is a bit of a shortcut, but the middle and rear bolts are so rock solid, I don't feel like this will compromise the integrity of the sliders. The bolts basically hold the sliders in place. Most impacts are going to be pushing the sliders towards the frame, and not pulling on the bolts themselves.
Regardless, we got them on and I am pleased with the end result. I drove my 4Runner around after the install and everything seems to be very tight and I did not hear anything wiggle around. I will get under it again here in the next week or two to re-torque everything once I've put some miles on it, but I don't think these sliders are going anywhere.
I'm happy with the final result, but the true test will be on the trails. From everything I've read, these should hold up great.


 I actually like a little bit of rake on my 4Runner and the OME lift sits perfect IMO. So when I've got it loaded up with gear or if I'm towing, it will sit level rather than sag in the rear.


